Introduction
Secure Block Storage (SBS) volumes are easy to use, highly redundant, scalable, and secure block storage you can attach to Atlantic.Net Cloud Servers.
You can use Secure Block Storage volumes for your file, database, application, and backup storage needs. Designed for 99.999% availability, SBS volumes are automatically replicated multiple times to protect your data from component failure. You can increase storage on-the-fly and move your SBS volumes between your Cloud Servers within the same region.
This guide will cover how to create, configure, format, and manage your SBS volumes on Windows Servers and assumes you are already connected to your Server via a Remote Desktop Connection.
What you will learn in this guide:
Creating a Block Storage Volume
Configuring a Block Storage Volume for Initial Use
Detaching a Block Storage Volume
Attaching a Previously Configured Block Storage Volume
Resizing a Block Storage Volume
Deleting a Block Storage Volume
Creating a Volume
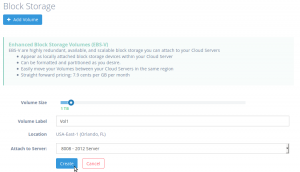
Step 1: Create the Volume in the Atlantic.Net Cloud Control Panel
In the Atlantic.Net Control Panel, click on "Block Storage", then click the "Add Volume" button. Next select the volume size, name, location, and server you wish to attach the Volume to.
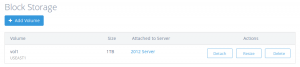
After the Volume is done creating, you should see that the Volume is attached to the server you chose.
Configuring a Volume for Initial Use
After creating a volume in the Atlantic.Net Cloud Control Panel, follow the steps below to configure your volume in your Windows Server for the first time.
Step 1: Open Disk Management
Windows 2008 Server:
Click on the Start Button, Administrative Tools, Computer Management, Disk Management.
Windows 2012 Server and above:
Right-click on the Windows Button and select "Disk Management"
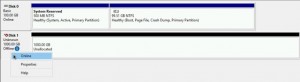
Step 2: Bring the Volume online
In the lower pane, right-click all the way to the left under the disk name and select "Online".
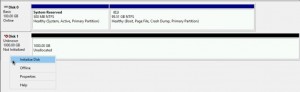
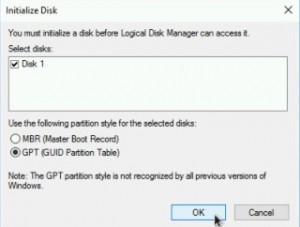
Step 3: Initialize the Volume (Warning: this will delete all data on your volume. Skip this step if you already have data on the volume you wish to keep)
In the lower pane, right-click all the way to the left under the disk name and select "Initialize Disk", partition style "GPT", then press "Ok"
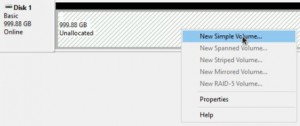
Step 4: Configure the volume (Skip this step if you have already configured the volume to your desired settings)
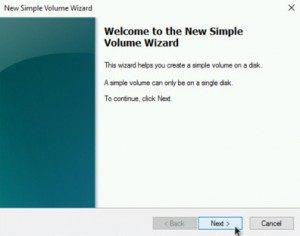
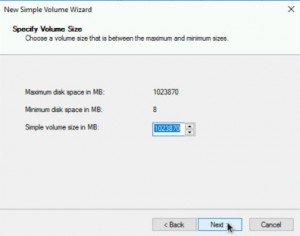
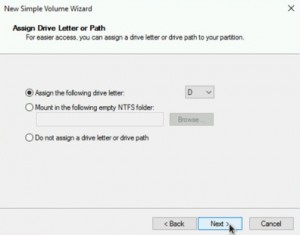
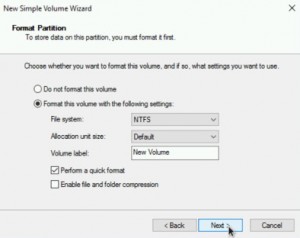
In the lower pane, right-click in the right pane of the disk, select "New Simple Volume", Complete the wizard with your desired settings.
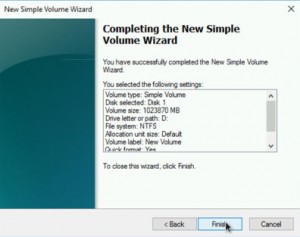
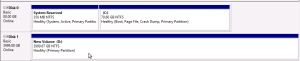
Once you have completed the “Wizard”, you should see that the volume is formating and then finally, in a healthy state:
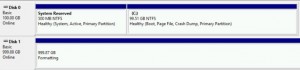
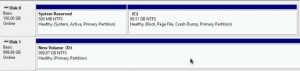
Your volume is now ready to use.
Detaching a Volume from a Cloud Server
When you no longer wish to use the volume on your Cloud Server, you should always offline the volume before issuing a detach request in the Atlantic.Net Cloud Control Panel.
Step 1: Open Disk Management
Windows 2008 Server:
Click on the Start Button, Administrative Tools, Computer Management, Disk Management.
Windows 2012 Server and above:
Right-click on the Windows Button and select "Disk Management"
Step 2: Bring the Volume offline
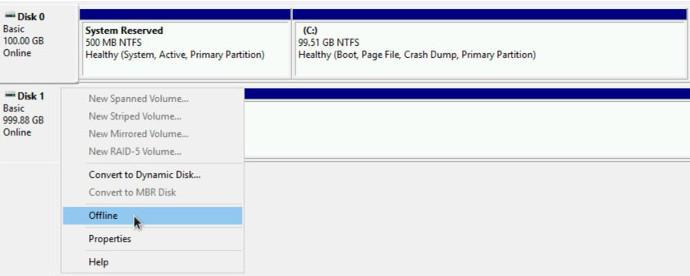
In the lower pane, right-click all the way to the left under the disk name and select "Offline".

You can now issue a detach command from the Atlantic.Net Control Panel
Step 3: Detach the Volume from the Cloud Server
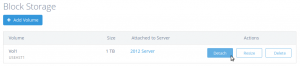
In the Atlantic.Net Control Panel, click on "Block Storage", then click the "Detach" button next to the Volume you wish to detach.
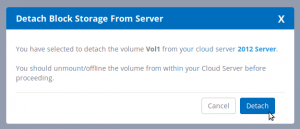
In the pop-up window, confirm you wish to detach the Volume from the Cloud Server by clicking the "Detach" button.
Attaching a Previously Configured Volume to a Cloud Server
If you previously configured a Volume in a Cloud Server and detached it from the Cloud Server and wish to attach it to the same or other Cloud Server, follow the directions below:
Step 1: Attach the Volume to the desired Cloud Server
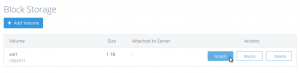
In the Atlantic.Net Control Panel, click on "Block Storage", then click the "Attach" button next to the Volume you wish to attach.
In the pop-up window, select the server you wish to attach the volume to.

After the Volume is done attaching, you should see that the Volume is attached to the server you chose.
Step 2: Open Disk Management
Windows 2008 Server:
While logged into your Cloud Server, Click on the Start Button, Administrative Tools, Computer Management, Disk Management.
Windows 2012 Server and above:
While logged into your Cloud Server, Right-click on the Windows Button and select "Disk Management"
Step 3: Bring the Volume online
In the lower pane, right-click all the way to the left under the disk name and select "Online".
Your Volume should now display in a healthy state and be ready for your use
Resizing a Volume
Running low on space? If you want to expand the storage size of a Volume, follow the steps below.
Step 1: Resize the Volume in the Atlantic.Net Cloud Control Panel
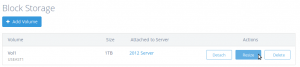
In the Atlantic.Net Control Panel, click on "Block Storage", then click the "Resize" button next to the Volume you wish to resize to a larger size.
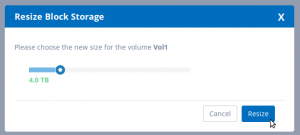
In the pop-up window, select the size you wish to resize the Volume to and then press the "Resize" button.
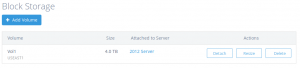
You should now see that the Volume has been resized in the Control Panel
Step 2: Open Disk Management
Windows 2008 Server:
While logged into your Cloud Server, Click on the Start Button, Administrative Tools, Computer Management, Disk Management.
Windows 2012 Server and above:
While logged into your Cloud Server, Right-click on the Windows Button and select "Disk Management"
Step 3: Rescan Disks
In order for Windows Server to detect the additional space that has been added to your Volume, you will need to do the following:
Windows 2008 and 2012 Server:
From the Disk Management menu, select "Actions" and then "Rescan Disks"
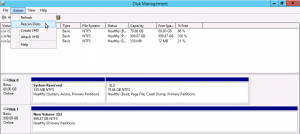
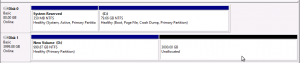
You should now see your additional space as “Unallocated”
Windows Server 2016 and above:
Since Windows 2016 Server doesn’t support online disk rescanning for new additional space, you will need to detach and reattach your volume to your server or reboot your Cloud Server.
Once you have done that you should now see your additional space as “Unallocated”

Step 3: Expand your Volume to make use of your additional space
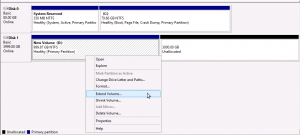
Right-click on the already configured "Healthy" portion of your Volume and select "Extend Volume"
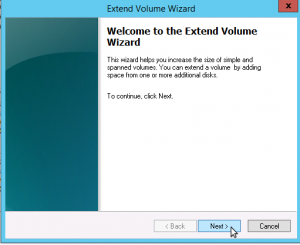
Press "Next" to begin configuring your additional space.
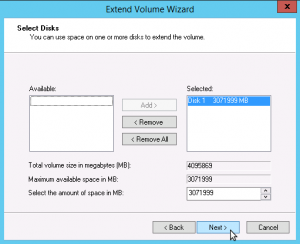
Choose the amount of additional space to allocate to your volume (defaults to all available space) and press "Next"
Press "Finish" to complete setting up your additional space.
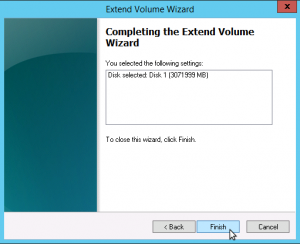
You should now see that your Volume has been resized to the desired amount and is ready to use.
Deleting a Volume
When you no longer want a Volume, follow the steps below
Step 1: Open Disk Management
Note: You can skip this step if the Volume is not currently attached to a Cloud Server
Windows 2008 Server:
Click on the Start Button, Administrative Tools, Computer Management, Disk Management.
Windows 2012 Server and above:
Right-click on the Windows Button and select "Disk Management"
Step 2: Bring the Volume offline
Note: You can skip this step if the Volume is not currently attached to a Cloud Server
In the lower pane, right-click all the way to the left under the disk name and select "Offline".
Step 3: Delete the Volume in the Atlantic.Net Control Panel
In the Atlantic.Net Control Panel, click on "Block Storage", then click the "Delete" button next to the Volume you wish to delete.
![]()
In the pop-up window, carefully read the entire message, and click the "Delete" button to remove the Volume.
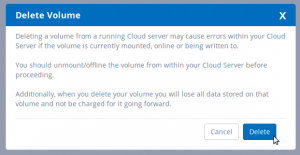
The Volume has now been deleted and you will no longer be charged for it going forward.
* This post is for informational purposes only and does not constitute professional, legal, financial, or technical advice. Each situation is unique and may require guidance from a qualified professional.
Readers should conduct their own due diligence before making any decisions.