A mail server is handy when you own a website or web application and want to send transactional emails to users. Postfix is a free and open-source Mail Transfer Agent used to send and receive emails. Postfix is free, so you don’t need to rely on third-party service providers like Sendgrid or Pepipost. You can easily install and configure Postfix to send emails through your local application.
This post will show you how to install and configure Postfix as a Send-Only SMTP server on Ubuntu. This procedure is compatible with Ubuntu 22.04 and Ubuntu 24.04.
Step 1 – Setup Hostname
Before starting, you must set up a fully qualified hostname on your server. You can set it up with the following command:
hostnamectl set-hostname email.linuxbuz.com
Next, edit the/etc/hosts file and add the following line:
nano /etc/hosts
Add the following line:
your-server-ip email.linuxbuz.com
Save and close the file when you are finished.
Step 2 – Install Postfix
The simplest and easiest way to install Postfix is to install a mailutils package to your system.
You can install the mailutils package using the following command:
apt-get install mailutils -y
After the installation, run the following command to configure Postfix:
dpkg-reconfigure postfix
You will be asked to select the type of mail configuration as shown below:
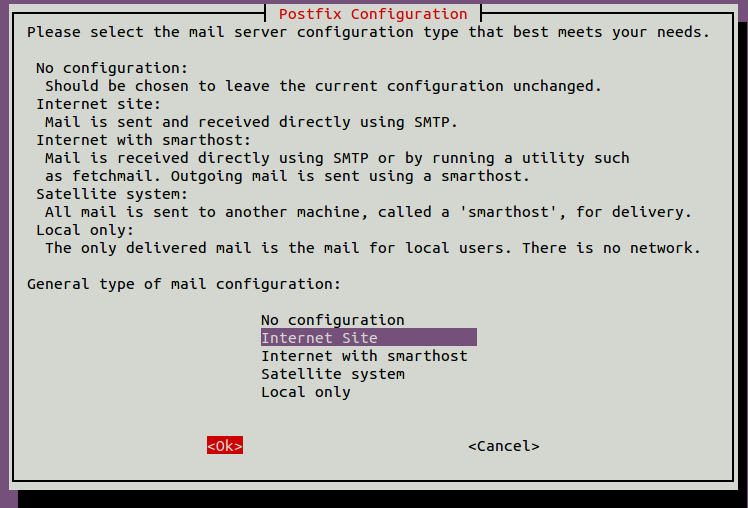
Select Internet Site and hit Enter. You will be asked to provide your mail name as shown below:
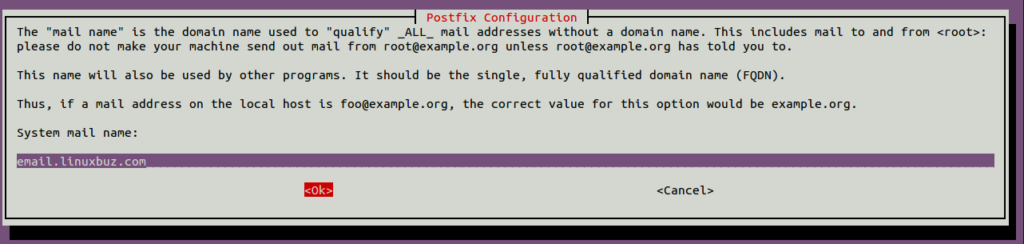
Provide your domain name and hit Enter to finish the installation.
Next, check the status of Postfix using the following command:
systemctl status postfix
Step 3 – Configure Postfix as a Send-Only SMTP Server
Next, you must configure Postfix to send an email from the local host. You can configure it by editing the Postfix main configuration file:
nano /etc/postfix/main.cf
Change the following line:
inet_interfaces = loopback-only
Save and close the file, then set the hostname directly in the Postfix configuration file using the following command:
postconf -e "myhostname = email.linuxbuz.com"
Next, verify your configured domain name using the following command:
postconf mydomain
You should get the following output:
mydomain = email.linuxbuz.com
You must verify the default domain name appended to sender and recipient addresses.
postconf myorigin
Sample output:
myorigin = /etc/mailname
Next, display the content of the above file using the following command:
cat /etc/mailname
You should see your domain in the following output:
email.linuxbuz.com
Finally, restart the Postfix service to apply the changes:
systemctl restart postfix
You can also check the status of Postfix with the following command:
systemctl status postfix
Sample output:
● postfix.service - Postfix Mail Transport Agent
     Loaded: loaded (/lib/systemd/system/postfix.service; enabled; vendor preset: enabled)
     Active: active (exited) since Sun 2021-08-15 12:52:44 UTC; 9s ago
    Process: 4230 ExecStart=/bin/true (code=exited, status=0/SUCCESS)
   Main PID: 4230 (code=exited, status=0/SUCCESS)

Aug 15 12:52:44 ubuntu2004 systemd[1]: Starting Postfix Mail Transport Agent...
Aug 15 12:52:44 ubuntu2004 systemd[1]: Finished Postfix Mail Transport Agent.
Step 4 – Verify Postfix Server
At this point, Postfix is installed and configured as a send-only SMTP server. Now, it’s time to send emails to an external email account.
You can use the following command to send a simple email to the external email address:
echo "This is the body of the email" | mail -s "This is the subject line" user@yourdomain.com
You should now see the message in your Inbox or Spam folder.
Step 5 – Forward System Mail
Forwarding all system mail to your external email address is a good idea. This section will set up email forwarding for the root user.
Edit the /etc/aliases file:
nano /etc/aliases
Find the following line:
postmaster: root
And replace it with the next line:
root: user@yourdomain.com
Save and close the file, then run the following command to apply the changes:
newaliases
Now, verify email forwarding by sending an email to the root user:
echo "This new email" | mail -s "This is new email" root
If everything is fine, you should receive an email at your external email address.
Conclusion
Congratulations! You have successfully set up a Postfix as a send-only SMTP server. You can now use this setup with your application to notify your users via email. Give it a try on your VPS from Atlantic.Net!
* This post is for informational purposes only and does not constitute professional, legal, financial, or technical advice. Each situation is unique and may require guidance from a qualified professional.
Readers should conduct their own due diligence before making any decisions.