In Linux, Supervisor offers an efficient way to manage processes on UNIX systems, automating the restart of crashed processes and providing precise up/down status information.
In this tutorial, we will learn how to install Supervisor and configure it to manage the Nginx process on Ubuntu. This procedure is compatible with Ubuntu 22.04 and Ubuntu 24.04.
Step 1 – Install Supervisor
By default, the Supervisor package is available in the Ubuntu default repository. You can install it with the following commands:
apt-get update -y
apt-get install supervisor -y
After installing Supervisor, you can verify the installed version of the Supervisor with the following command:
supervisord -v
You should get the following output:
4.2.5
Next, verify the status of the Supervisor service with the following command:
systemctl status supervisor
You should get the following output:
● supervisor.service - Supervisor process control system for UNIX
     Loaded: loaded (/usr/lib/systemd/system/supervisor.service; enabled; preset: enabled)
     Active: active (running) since Sun 2025-05-25 09:30:18 UTC; 22s ago
       Docs: http://supervisord.org
   Main PID: 109733 (supervisord)
      Tasks: 1 (limit: 4609)
     Memory: 22.1M (peak: 24.1M)
        CPU: 217ms
     CGroup: /system.slice/supervisor.service
             └─109733 /usr/bin/python3 /usr/bin/supervisord -n -c /etc/supervisor/supervisord.conf

May 25 09:30:18 ubuntu24 systemd[1]: Started supervisor.service - Supervisor process control system for UNIX.
May 25 09:30:18 ubuntu24 supervisord[109733]: 2025-05-25 09:30:18,405 CRIT Supervisor is running as root.  Privileges were not dropped because no user is specified in May 25 09:30:18 ubuntu24 supervisord[109733]: 2025-05-25 09:30:18,405 WARN No file matches via include "/etc/supervisor/conf.d/*.conf"
May 25 09:30:18 ubuntu24 supervisord[109733]: 2025-05-25 09:30:18,409 INFO RPC interface 'supervisor' initialized
May 25 09:30:18 ubuntu24 supervisord[109733]: 2025-05-25 09:30:18,409 CRIT Server 'unix_http_server' running without any HTTP authentication checking
May 25 09:30:18 ubuntu24 supervisord[109733]: 2025-05-25 09:30:18,410 INFO supervisord started with pid 109733
Step 2 – Enable Supervisor Web Interface
Supervisor provides a web-based interface to manage all processes, but it is disabled by default. You can enable it by editing the file /etc/supervisor/supervisord.conf.
nano /etc/supervisor/supervisord.conf
Add the following lines:
[inet_http_server]
port=*:9001
username=admin
password=admin
Save and close the file, then restart the Supervisor service to apply the changes:
systemctl restart supervisor
Step 3 – Manage the Nginx Process with Supervisor
In this section, we will learn how to control the Nginx process with Supervisor.
First, install the Nginx server with the following command:
apt-get install nginx -y
After installing Nginx, you will need to stop and disable the Nginx service as we will use Supervisor to manage the Nginx process.
You can stop and disable the Nginx service with the following command:
systemctl stop nginx
systemctl disable nginx
Next, you will need to create a standalone configuration file for each service that you want to manage. You can create an Nginx configuration file with the following command:
nano /etc/supervisor/conf.d/nginx.conf
Add the following lines:
[program:nginx]
command=/usr/sbin/nginx -g "daemon off;"
autostart=true
autorestart=true
startretries=5
numprocs=1
startsecs=0
process_name=%(program_name)s_%(process_num)02d
stderr_logfile=/var/log/supervisor/%(program_name)s_stderr.log
stderr_logfile_maxbytes=10MB
stdout_logfile=/var/log/supervisor/%(program_name)s_stdout.log
stdout_logfile_maxbytes=10MB
Save and close the file when you are finished. Next, tell the Supervisor to know about the new config:
supervisorctl reread
You should get the following output:
nginx: available
Next, tell Supervisor to start the Nginx service:
supervisorctl update
You should get the following output:
nginx: added process group
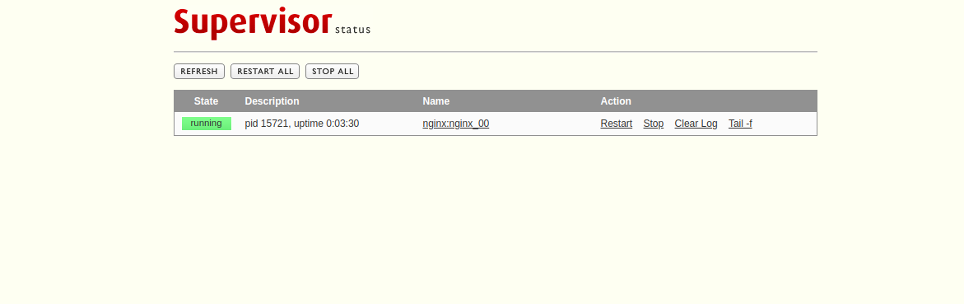
Next, verify whether Supervisor started the Nginx service with the following command:
supervisorctl
You should get the following output:
nginx:nginx_00 RUNNING pid 15717, uptime 0:00:13
If you want to stop the Nginx service, run the following command:
stop nginx:nginx_00
Output:
nginx:nginx_00: stopped
To start the Nginx service again, run the following command:
start nginx:nginx_00
Output:
nginx:nginx_00: started
Now, exit from the Supervisor shell with the following command:
exit
You can also verify the Nginx process with the following command:
ps aux | grep nginx
You should get the following output:
root       15721  0.0  0.4  57176 10064 ?        S    14:14   0:00 nginx: master process /usr/sbin/nginx -
g daemon off;
www-data   15722  0.0  0.2  57828  5340 ?        S    14:14   0:00 nginx: worker process
www-data   15723  0.0  0.2  57828  5340 ?        S    14:14   0:00 nginx: worker process
Step 4 – Access Supervisor Web Interface
You can now access the Supervisor web interface using the URL http://your-server-ip:9001. You will be asked to provide a username and password as shown below:
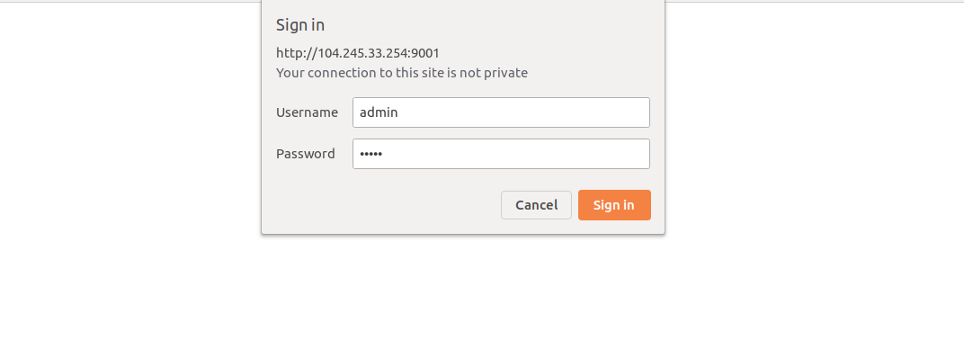
Provide your admin username and password that you have defined in the configuration file, then click on the Sign-in button. You should see the Supervisor web interface in the following page:
Conclusion
In this guide, you learned how to install Supervisor and enable the web interface on Ubuntu. You also learned how to control the Nginx process with Supervisor. Try controlling processes on your Linux VPS hosting account with Atlantic.Net!
* This post is for informational purposes only and does not constitute professional, legal, financial, or technical advice. Each situation is unique and may require guidance from a qualified professional.
Readers should conduct their own due diligence before making any decisions.