Introduction
A LAMP stack is one of the most widely used open-source platforms for building and deploying dynamic websites and web applications. The term LAMP stands for:
- Linux – the operating system
- Apache – the web server
- MySQL – the database server
- PHP – the scripting language
Together, these components create a powerful environment for running popular applications such as WordPress, Joomla, Drupal, phpMyAdmin, and many custom-built PHP applications.
In this guide, you will learn how to install and configure the LAMP stack on Debian 12 (Bookworm).
Step 1 – Install Apache Webserver
Apache is the most popular open-source web server and is available in the default Debian 12 repositories. We’ll install Apache, start the service, and verify that it is running.
1. Install the Apache web server package.
apt install apache2 -y
2. After the installation, check the installed version of Apache.
apachectl -v
Output.
Server version: Apache/2.4.57 (Debian)
3. Now, start the Apache service and enable it to launch automatically at boot.
systemctl start apache2
systemctl enable apache2
4. Confirm that Apache is running properly by checking its status.
systemctl status apache2
Output.
● apache2.service - The Apache HTTP Server
     Loaded: loaded (/lib/systemd/system/apache2.service; enabled; preset: enabled)
     Active: active (running) since Fri 2025-09-05 13:00:39 UTC; 1s ago
       Docs: https://httpd.apache.org/docs/2.4/
    Process: 11875 ExecStart=/usr/sbin/apachectl start (code=exited, status=0/SUCCESS)
   Main PID: 11879 (apache2)
      Tasks: 6 (limit: 4642)
     Memory: 12.5M
        CPU: 85ms
     CGroup: /system.slice/apache2.service
             ├─11879 /usr/sbin/apache2 -k start
             ├─11880 /usr/sbin/apache2 -k start
             ├─11881 /usr/sbin/apache2 -k start
             ├─11882 /usr/sbin/apache2 -k start
             ├─11883 /usr/sbin/apache2 -k start
             └─11884 /usr/sbin/apache2 -k start
Step 2- Install MySQL
MySQL is a popular open-source relational database management system (RDBMS) used to store and manage data for web applications. Since MySQL is not included in the default Debian 12 repositories, we need to add the MySQL APT repository first, then install the server.
1. Download the MySQL APT repository configuration package.
wget https://dev.mysql.com/get/mysql-apt-config_0.8.34-1_all.deb
2. Install the downloaded package.
apt install ./mysql-apt-config_0.8.34-1_all.deb
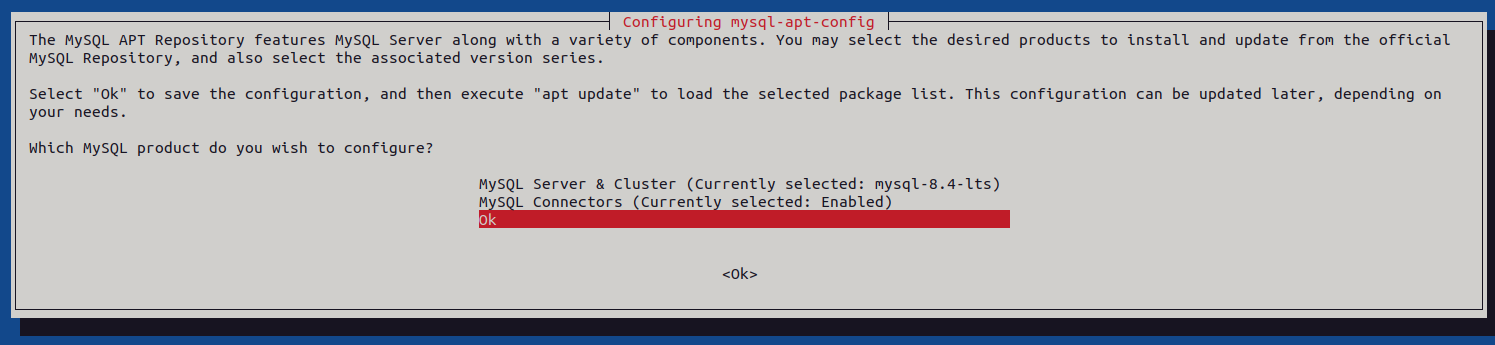
During installation, you will see a configuration screen.
Select MySQL Server & Cluster option.
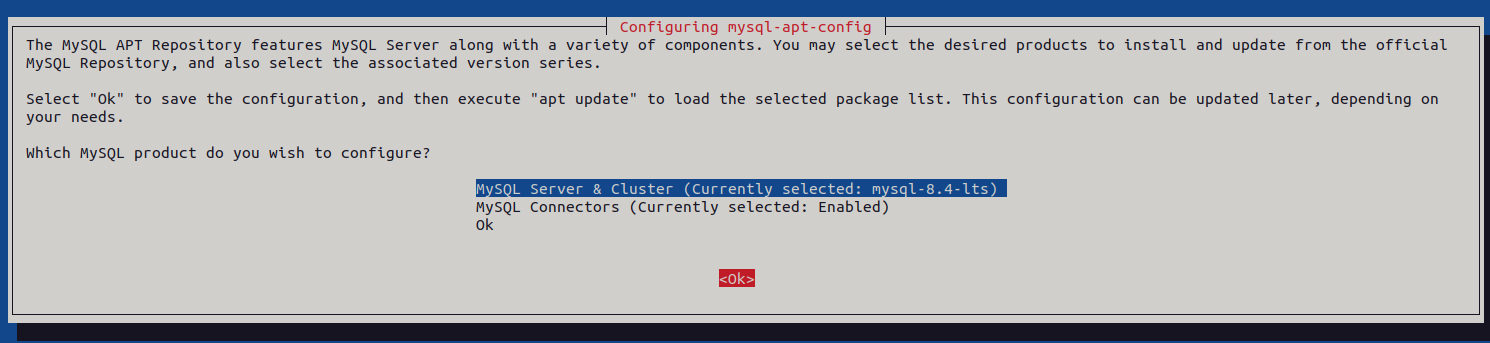
Use the arrow keys to select your preferred MySQL version (for example, mysql-8.4-lts).
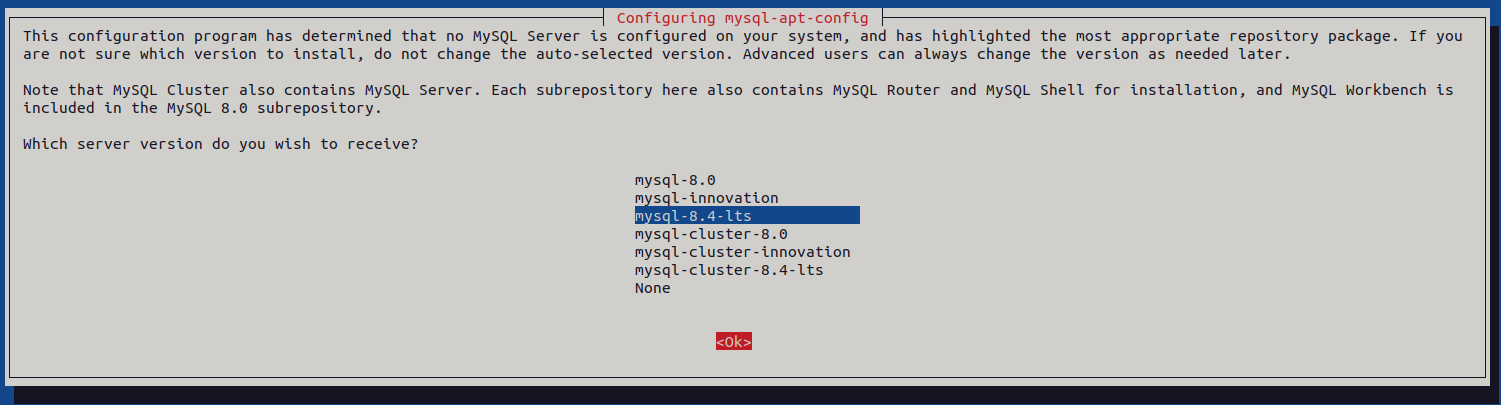
Press Enter, then select Ok to save changes.
3. After adding the repository, update your package list.
apt update -y
4. Now install MySQL server.
apt install mysql-server -y
During installation, you will be prompted to set a password for the root database user. Enter a strong password and press Enter.
5. Check the installed version.
mysql --version
Output.
mysql Ver 8.4.6 for Linux on x86_64 (MySQL Community Server - GPL)
6. Start MySQL and enable it to run automatically on system boot.
systemctl enable mysql
systemctl start mysql
7. Verify the MySQL service status.
systemctl status mysql
output.
● mysql.service - MySQL Community Server
     Loaded: loaded (/lib/systemd/system/mysql.service; enabled; preset: enabled)
     Active: active (running) since Fri 2025-09-05 12:44:43 UTC; 19s ago
       Docs: man:mysqld(8)
             http://dev.mysql.com/doc/refman/en/using-systemd.html
   Main PID: 2175 (mysqld)
     Status: "Server is operational"
      Tasks: 35 (limit: 4642)
     Memory: 427.5M
        CPU: 852ms
     CGroup: /system.slice/mysql.service
             └─2175 /usr/sbin/mysqld
8. Secure the MySQL installation.
mysql_secure_installation
Enter the root database user password you set earlier.
Enter password for user root:
Enter Y when prompted to setup the VALIDATE PASSWORD component.
VALIDATE PASSWORD COMPONENT can be used to test passwords
and improve security. It checks the strength of password
and allows the users to set only those passwords which are
secure enough. Would you like to setup VALIDATE PASSWORD component?

Press y|Y for Yes, any other key for No: Y
Set the preferred password strength policy for your MySQL database server. For example, enter 2 to enable the use of strong passwords on your server.
There are three levels of password validation policy:

LOW    Length >= 8
MEDIUM Length >= 8, numeric, mixed case, and special characters
STRONG Length >= 8, numeric, mixed case, special characters and dictionary                  file

Please enter 0 = LOW, 1 = MEDIUM and 2 = STRONG: 2
Enter N when prompted to change the root database user password, or enter Y to change the password.
Using existing password for root.

Estimated strength of the password: 50
Change the password for root ? ((Press y|Y for Yes, any other key for No) : N
Enter Y when prompted to remove anonymous users on your MySQL database server.
Enter Y when prompted to disallow remote login for the root user.
Enter Y when prompted to remove the test database from your MySQL database server.
Enter Y to reload the MySQL privileges table and apply all configuration changes.
Step 3 – Install PHP
PHP (Hypertext Preprocessor) is a widely used scripting language designed for creating dynamic web pages and applications. In the LAMP stack, PHP works with Apache to serve dynamic content and connects with MySQL to manage data.
1. Install PHP and the PHP FastCGI Process Manager (PHP-FPM).
apt install php php-fpm -y
2. Install additional PHP modules.
apt install php-mysql php-cli libapache2-mod-php -y
3. Check the installed version of PHP.
php -v
Output.
PHP 8.2.29 (cli) (built: Jul  3 2025 16:16:05) (NTS)
Copyright (c) The PHP Group
Zend Engine v4.2.29, Copyright (c) Zend Technologies
    with Zend OPcache v8.2.29, Copyright (c), by Zend Technologies
4. Now, start the PHP-FPM service and enable it to run automatically on system boot.
systemctl start php8.2-fpm
systemctl enable php8.2-fpm
5. Verify that PHP-FPM is running.
systemctl status php8.2-fpm
Output.
● php8.2-fpm.service - The PHP 8.2 FastCGI Process Manager
     Loaded: loaded (/lib/systemd/system/php8.2-fpm.service; enabled; preset: enabled)
     Active: active (running) since Fri 2025-09-05 12:49:24 UTC; 12min ago
       Docs: man:php-fpm8.2(8)
    Process: 11836 ExecStartPost=/usr/lib/php/php-fpm-socket-helper install /run/php/php-fpm.sock /etc/php/8.2/fpm/pool.d/www.conf 82 (code=exited, status=0/SUCCESS)
   Main PID: 11833 (php-fpm8.2)
     Status: "Processes active: 0, idle: 2, Requests: 1, slow: 0, Traffic: 0.00req/sec"
      Tasks: 3 (limit: 4642)
     Memory: 10.1M
        CPU: 118ms
     CGroup: /system.slice/php8.2-fpm.service
             ├─11833 "php-fpm: master process (/etc/php/8.2/fpm/php-fpm.conf)"
             ├─11834 "php-fpm: pool www"
             └─11835 "php-fpm: pool www"
Step 4 – Configure PHP-FPM
PHP-FPM (FastCGI Process Manager) is designed to handle PHP processes more efficiently than the traditional mod_php module. It allows Apache to process dynamic PHP files via the proxy_fcgi module. In this step, we’ll configure PHP-FPM and integrate it with Apache.
1. Enable the Apache proxy_fcgi module.
a2enmod proxy_fcgi
2. Check if PHP-FPM is listening on its Unix socket.
ss -pl | grep php
Output.
u_str LISTEN 0 4096 /run/php/php8.2-fpm.sock 30695 * 0 users:(("php-fpm8.2",pid=11835,fd=10),("php-fpm8.2",pid=11834,fd=10),("php-fpm8.2",pid=11833,fd=8))
This confirms that PHP-FPM is active and ready to process PHP requests.
3. Enable the PHP-FPM configuration for Apache.
a2enconf php8.2-fpm
This links Apache with the PHP-FPM socket.
4. To apply the changes, restart both Apache and PHP-FPM.
systemctl restart apache2
systemctl restart php8.2-fpm
Step 5 – Configure Apache With PHP-FPM
Now that PHP-FPM is running and connected with Apache, we need to configure Apache to serve PHP files correctly. This is done by creating a Virtual Host configuration and linking it with PHP-FPM.
1. Create a new Apache virtual host.
nano /etc/apache2/sites-available/lamp.conf
Add the following content.
<VirtualHost *:80>
    ServerAdmin [email protected]
    ServerName lamp.example.com

    DocumentRoot /var/www/html
    DirectoryIndex index.html index.php

    <Directory /var/www/html>
        Options Indexes FollowSymLinks
        AllowOverride All
        Require all granted
    </Directory>

    <FilesMatch \.php$>
        SetHandler "proxy:unix:/run/php/php8.2-fpm.sock|fcgi://localhost/"
    </FilesMatch>

    ErrorLog ${APACHE_LOG_DIR}/error.log
    CustomLog ${APACHE_LOG_DIR}/access.log combined
</VirtualHost>
Explanation:
- ServerName – Replace lamp.example.com with your server’s domain name or IP.
- DocumentRoot – Points to the web root directory /var/www/html.
- FilesMatch – Ensures all .php files are processed by PHP-FPM.
2. Disable Apache’s default site and enable the new configuration.
a2dissite 000-default
a2ensite lamp
3. Check for syntax errors before restarting Apache.
apachectl configtest
Output.
Syntax OK
4. Apply the changes by restarting Apache.
systemctl restart apache2
5. Create a PHP configuration file inside the web root.
echo "<?php phpinfo(); ?>" | tee /var/www/html/index.php
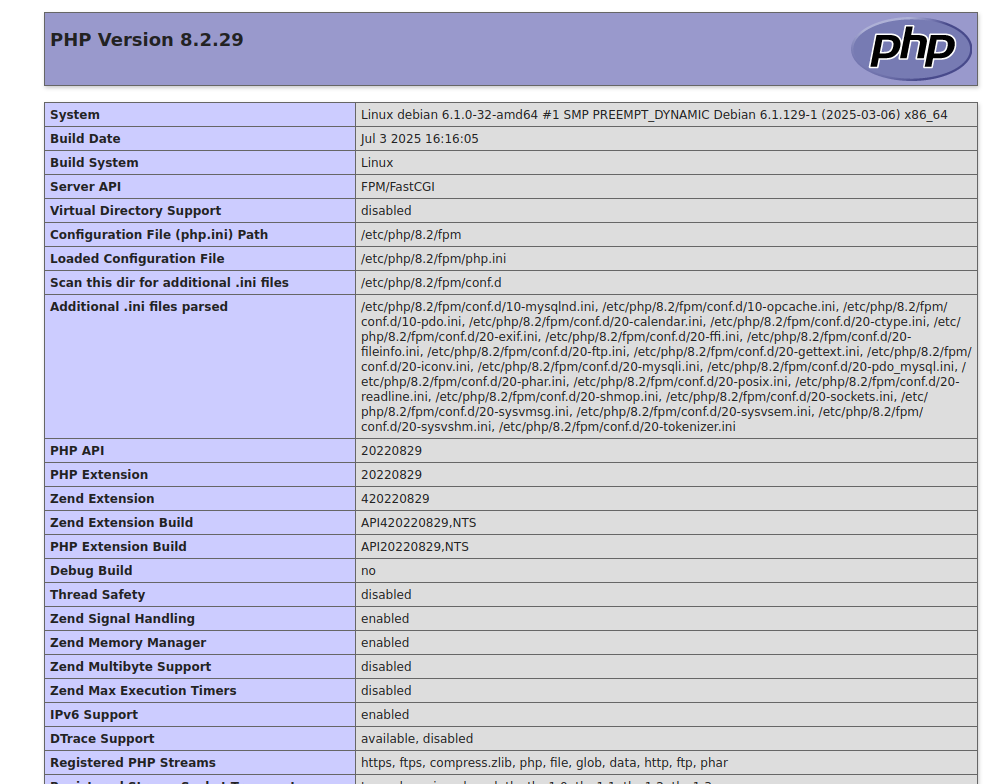
6. Now open a web browser and visit the below URL.
http://lamp.example.com/index.php
You should see the PHP information page showing PHP version, configuration, and enabled modules. This confirms that Apache is working with PHP-FPM.
Conclusion
In this tutorial, you learned how to set up the complete LAMP stack on Debian 12. You installed Apache to serve web content, configured MySQL as the database engine, and set up PHP with PHP-FPM to handle dynamic requests efficiently. You then integrated Apache with PHP-FPM and confirmed the configuration by creating a simple phpinfo() test page.
With this setup, your Debian 12 server is now capable of hosting dynamic web applications powered by PHP and MySQL. You can start deploying projects such as WordPress, Joomla, or even custom-built PHP applications by placing them in your web root or creating additional Virtual Hosts.
* This post is for informational purposes only and does not constitute professional, legal, financial, or technical advice. Each situation is unique and may require guidance from a qualified professional.
Readers should conduct their own due diligence before making any decisions.