Transferring files over the FTP protocol is one of the most popular methods of uploading files to a server. ProFTPD is a reliable, free, open-source FTP server that allows you to create an FTP connection between your local system and a web server. ProFTP comes with a options that are not available in many other FTP software options. It provides a rich set of features including tls/ssl support, anonymous FTP, multiple virtual FTPs, shadow password suite support, the ability to run as a configurable non-privileged user, support for IPv6, and many more.
In this tutorial, we will explain how to install a ProFTP server on Ubuntu. This procedure is compatible with Ubuntu 18.04, Ubuntu 22.04, and Ubuntu 24.04. We will also show you how to encrypt the entire transmission with SSL/TLS.
Step 1 – Install ProFTP
By default, the ProFTP package is available in the Ubuntu 18.04 default repository. You can install it by just running the following command:
apt-get update -y
apt-get install proftpd proftpd-mod-crypto -y
Once the installation is finished, start the ProFTP service and enable it to start after system reboot using the following command:
systemctl start proftpd
systemctl enable proftpd
You can also verify the status of the ProFTP service with the following command:
systemctl status proftpd
You should get the following output:
● proftpd.service - ProFTPD FTP Server
     Loaded: loaded (/usr/lib/systemd/system/proftpd.service; enabled; preset: enabled)
     Active: active (running) since Thu 2025-05-15 05:27:40 UTC; 9s ago
       Docs: man:proftpd(8)
    Process: 28055 ExecStartPre=/usr/sbin/proftpd --configtest -c $CONFIG_FILE $OPTIONS (code=exited, status=0/SUCCESS)
    Process: 28057 ExecStart=/usr/sbin/proftpd -c $CONFIG_FILE $OPTIONS (code=exited, status=0/SUCCESS)
   Main PID: 28058 (proftpd)
      Tasks: 1 (limit: 629145)
     Memory: 1.9M (peak: 3.0M)
        CPU: 31ms
     CGroup: /system.slice/proftpd.service
             └─28058 "proftpd: (accepting connections)"
Step 2 – Create a Self-signed SSL/TLS Certificate
By default, FTP is not secured because passwords and data are transferred in clear text, so it is recommended to secure your FTP with SSL/TLS.
To do so, run the following command to generate a self-signed SSL/TLS certificate for the server.
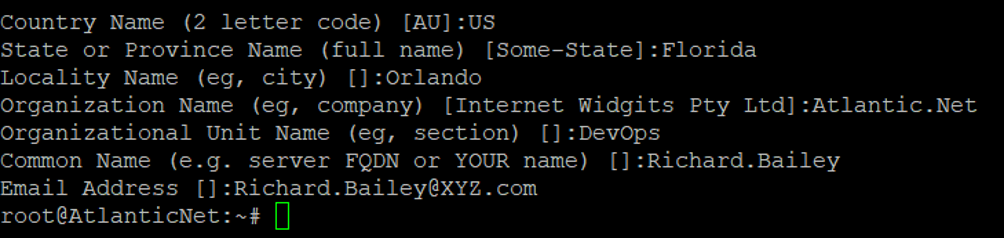
openssl req -x509 -nodes -newkey rsa:2048 -keyout /etc/ssl/private/serverkey.pem -out
/etc/ssl/certs/servercertificate.pem -days 365
Answer all the questions as shown below:
During the installation, you will be asked a number of questions. These questions will be specific to you.
Step 3 – Configure ProFTPD to use SSL/TLS
Next, you will need to configure ProFTP to use the SSL/TLS certificate created above. You can do it by editing the file /etc/proftpd/tls.conf:
nano /etc/proftpd/tls.conf
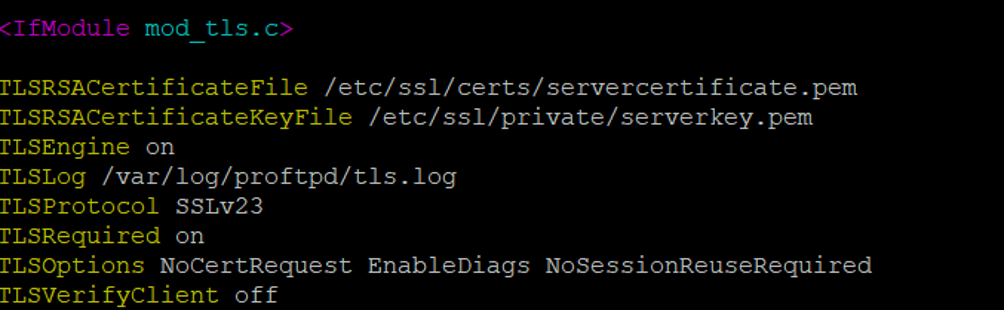
Add the following lines below <IfModule mod_tls.c>:
TLSRSACertificateFile /etc/ssl/certs/servercertificate.pem
TLSRSACertificateKeyFile /etc/ssl/private/serverkey.pem
TLSEngine                  on
TLSRequired               on
TLSProtocol               TLSv1.2 TLSv1.3
TLSOptions                NoSessionReuseRequired
TLSVerifyClient           off
TLSLog                                  /var/log/proftpd/tls.log
Save and close the file when you are finished.
Next, edit the /etc/proftpd/modules.conf file and enable the TLS module.
nano /etc/proftpd/modules.conf
Uncomment the following line:
LoadModule mod_tls.c
Step 4 – Configure ProFTP
ProFTP’s default configuration file is located at /etc/proftpd/proftpd.conf. You will need to edit this file and make some changes:
nano /etc/proftpd/proftpd.conf
Change the following lines per your requirements:
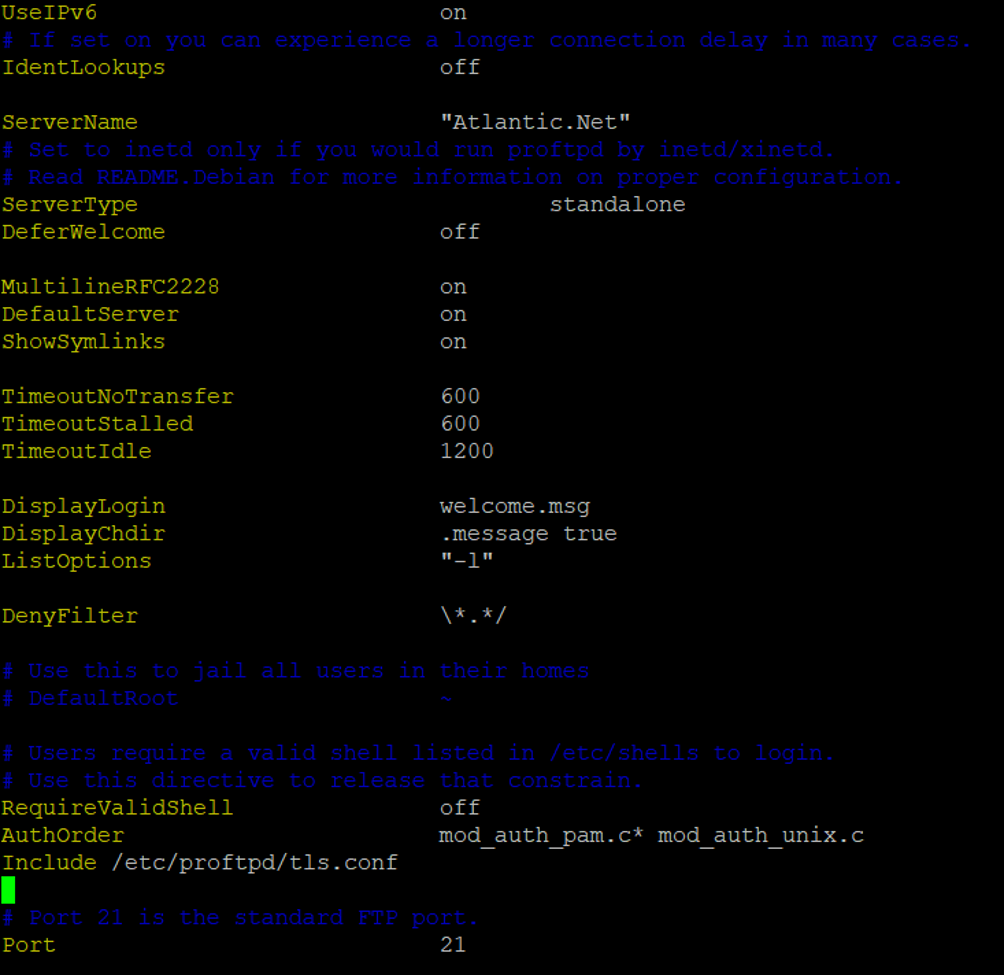
UseIPv6 on
ServerName "FTP Server"
Port 21
RequireValidShell on
AuthOrder mod_auth_pam.c* mod_auth_unix.c
Include /etc/proftpd/tls.conf
Save and close the file when you are finished.
The config file should look similar to this:
Then, restart the ProFTP service to apply the changes:
systemctl restart proftpd
A brief explanation of each option is shown below:
- UseIPV6 : Enables or disables the IPv6 support.
- ServerName : Specifies your FTP Server name.
- Port : Specifies the port of your FTP server.
- RequireValidShell : Enables logging in for users, even for those who don’t have a valid shell in /etc/shells to log in.
- AuthOrder : Enables the use of local passwords.
- Include /etc/proftpd/tls.conf : Enables TLS/SSL support.
Step 5 – Create a ProFTP User
At this point, ProFTP is installed and configured with TLS/SSL support. Next, you will need to create a user for ProFTP.
You can create a new user named user1 with the following command:
adduser user1
You should get the following output, and you will also be prompted to enter a password and some user information.
Adding user `user1' ...
Adding new group `user1' (1000) ...
Adding new user `user1' (1000) with group `user1' ...
Creating home directory `/home/user1' ...
Copying files from `/etc/skel' ...
Enter new UNIX password:
Retype new UNIX password:
passwd: password updated successfully
Changing the user information for user1
Enter the new value, or press ENTER for the default
Full Name []: FTP User
Room Number []:
Work Phone []:
Home Phone []:
Other []:
Is the information correct? [Y/n] Y
Next, change the home directory of user1 to /var/www/ using the following command:
usermod -m -d /var/www user1
Next, change the ownership of the /var/www/ directory:
chown -R user1:user1 /var/www
Next, log in with user1 by running the following command:
su - user1
Next, create a sample file and directories with the following command:
touch file1.txt fil2.txt
mkdir dir1 dir2
Step 6 – Access ProFTP with FTP Client
Now, download and install the FileZilla FTP client in your local system. Read the installation to ensure no additional bloatware is installed, as FileZilla is supported by bundled applications.
Next, open the FileZilla client and create a new site from the site manager. You should see the following screen:
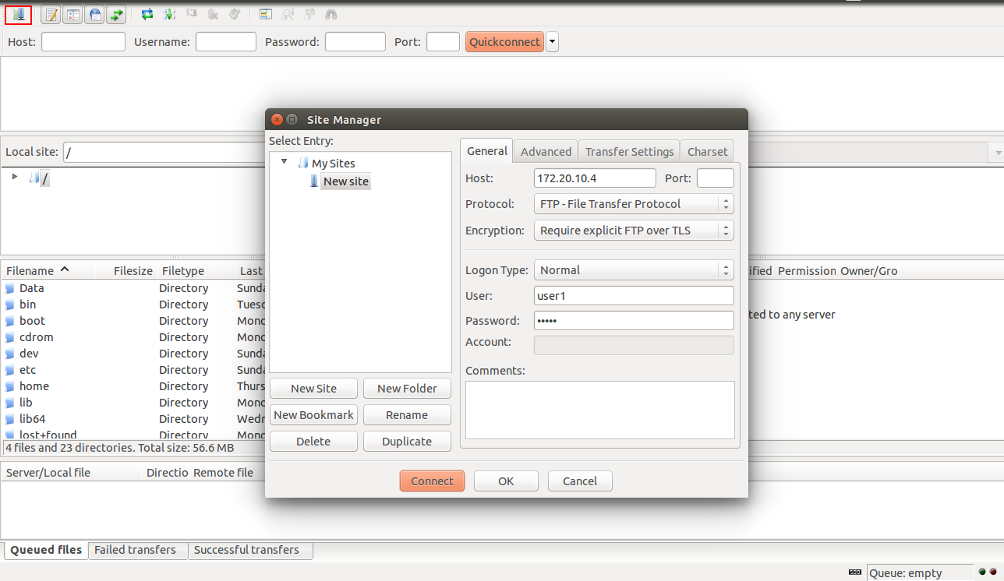
Next, provide the IP address of your FTP server, select Require explicit FTP over TLS, select Normal in Logon Type, provide your FTP username and password, and click on the Connect button. You will be prompted with a certificate as shown below:
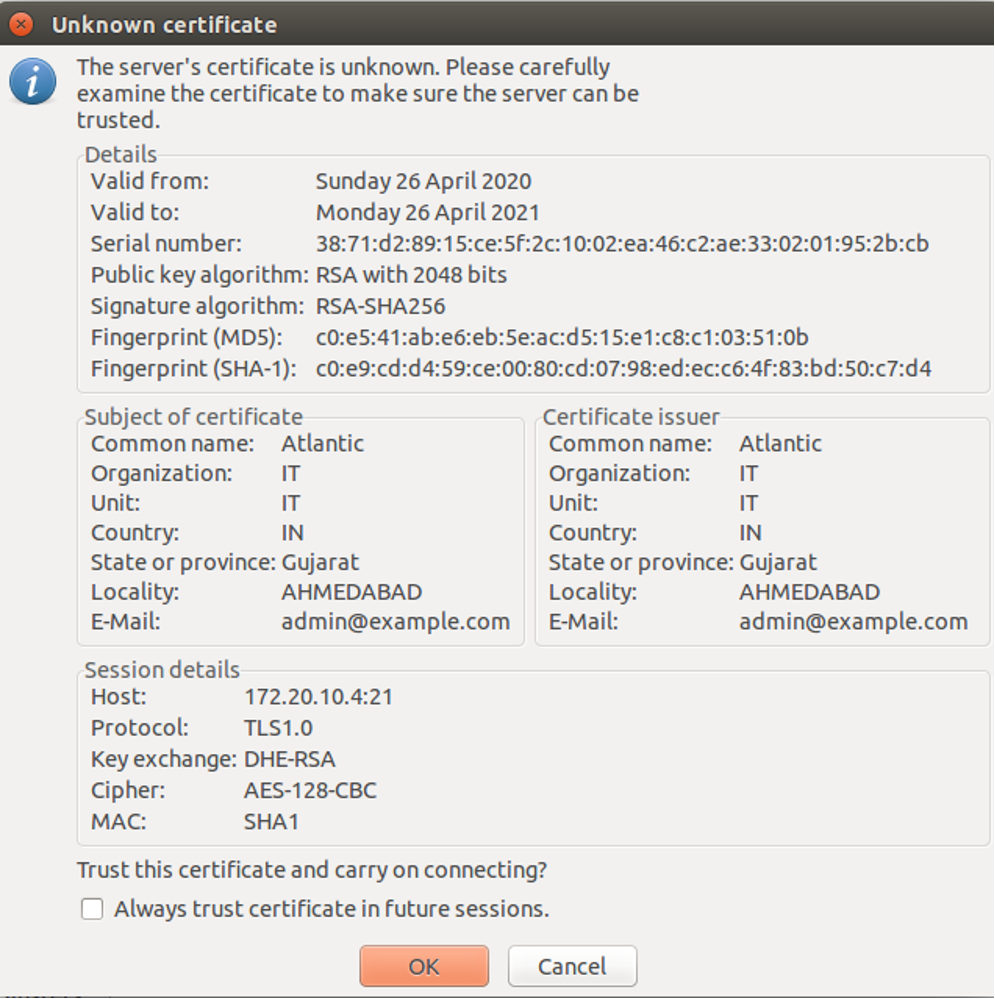
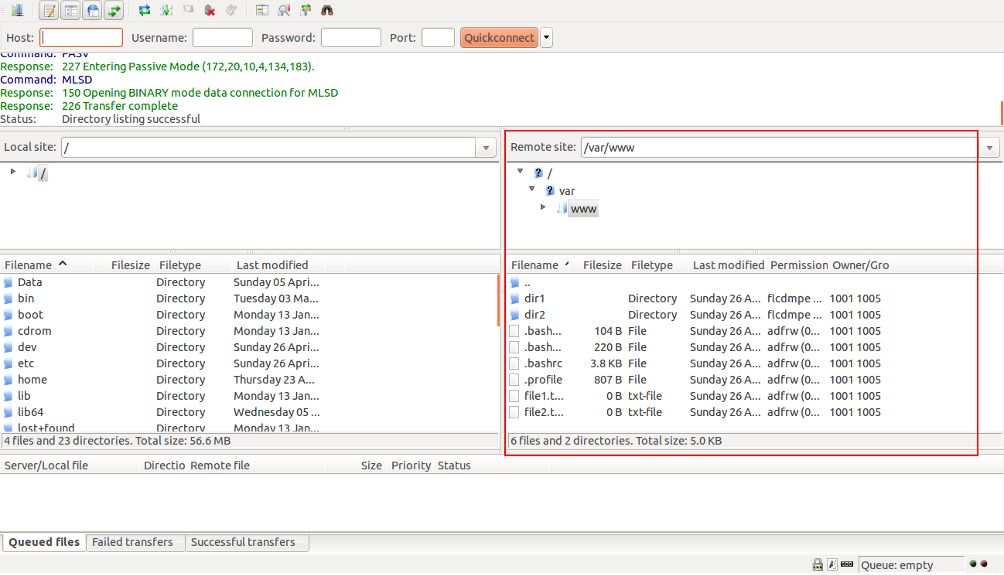
Accept the certificate and click on the OK button. Once the connection has been established successfully, you should see the following screen:
Conclusion
In the above guide, we learned how to install ProFTP on Ubuntu. We also learned how to secure an FTP connection with TLS/SSL. If your installation is not working you can check the ProFTP log file at /var/log/proftpd/proftpd.log. Get started with ProFTP on VPS hosting from Atlantic.Net today!