Verified and Tested 06/13/21
Introduction
Ever wanted to run your own private chat service, either for business or personal use? Openfire is a fantastic open-source XMPP instant messaging server that will allow you to do just that.
Prerequisites
– You will need a server with root privileges. If you do not have a server already, you can spin up one of our industry-leading Cloud servers in under 30 seconds.
Install Java
Openfire is a Java-based application so you will need to install Java in your server. You can install Java with the following command:
apt-get install default-jdk -y
Once the Java is installed, verify the Java version using the following command:
java --version
You should see the following output:
openjdk 11.0.11 2021-04-20
OpenJDK Runtime Environment (build 11.0.11+9-Ubuntu-0ubuntu2.20.04)
OpenJDK 64-Bit Server VM (build 11.0.11+9-Ubuntu-0ubuntu2.20.04, mixed mode, sharing)
Install Openfire
By default, Openfire is not included in the Ubuntu default repository. So you will need to install it from the DEB package file.
You can download the Openfire .deb file with the following command:
wget https://www.igniterealtime.org/downloadServlet?filename=openfire/openfire_4.5.2_all.deb -O openfire.deb
Once the download is completed, install the downloaded file with the following command:
dpkg -i openfire.deb
Once the Openfire is installed, start the Openfire service and enable it to start at system reboot:
systemctl start openfire
systemctl enable openfire
You can also verify the status of Openfire with the following command:
systemctl status openfire
Output:
● openfire.service - LSB: Start/stop openfire jabber server
     Loaded: loaded (/etc/init.d/openfire; generated)
     Active: active (running) since Mon 2021-06-14 04:56:50 UTC; 31s ago
       Docs: man:systemd-sysv-generator(8)
      Tasks: 33 (limit: 4691)
     Memory: 187.8M
     CGroup: /system.slice/openfire.service
             └─4562 /bin/java -server -DopenfireHome=/usr/share/openfire -Dlog4j.configurationFile=/usr/share/openfire/lib/log4j2.xml -Dopenfi>

Jun 14 04:56:50 ubuntu2004 systemd[1]: Starting LSB: Start/stop openfire jabber server...
Jun 14 04:56:50 ubuntu2004 openfire[4554]: best java alternative in:
Jun 14 04:56:50 ubuntu2004 openfire[4554]: Starting openfire: openfire.
Jun 14 04:56:50 ubuntu2004 systemd[1]: Started LSB: Start/stop openfire jabber server.
By default, Openfire listens on port 9090. You can check it with the following command:
ss -antpl | grep 9090
Output:
LISTEN 0 50 *:9090 *:* users:(("java",pid=4562,fd=113))
Install and Configure MariaDB Database
Next, you will need to install the MariaDB database server to your system. You can install it with the following command:
apt-get install mariadb-server -y
After installing the MariaDB, log in to MySQL with the following command:
mysql
Once log in, create a database and user for Openfire with the following command:
CREATE DATABASE openfire;
GRANT ALL PRIVILEGES ON openfire.* TO openfire@localhost IDENTIFIED BY 'password';
Next, flush the privileges and exit from the MariaDB with the following command:
FLUSH PRIVILEGES;
EXIT;
Next, log in to MariaDB with Openfire user with the following command:
mysql -u openfire -p'password'
Next, import the Openfire database schema with the following command:
USE openfire;
source /usr/share/openfire/resources/database/openfire_mysql.sql;
Next, exit from the MariaDB with the following command:
EXIT;
Access Openfire Web UI
Now, open your web browser and access the Openfire web interface using the URL http://your-server-ip:9090. You should see the following screen:
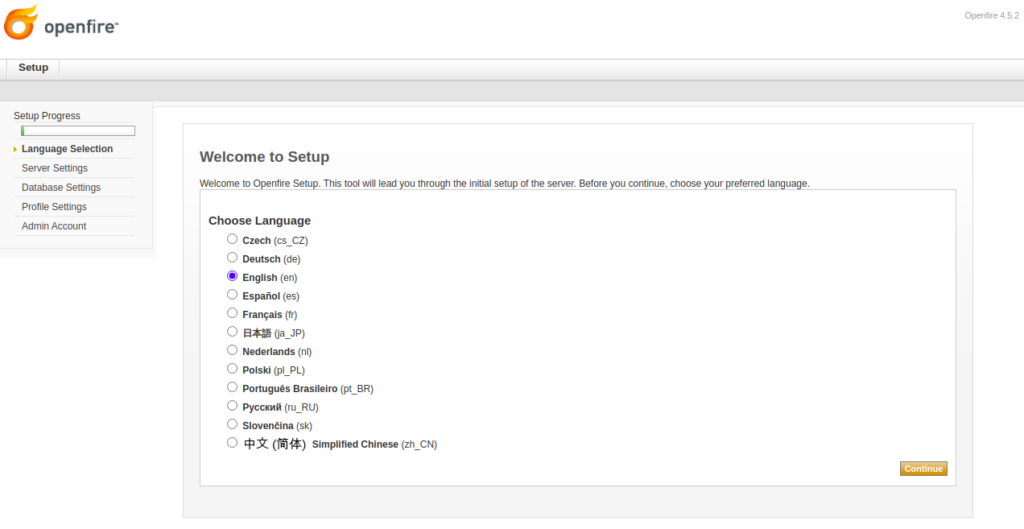
Select your language and click on the Continue button. You should see the following page:
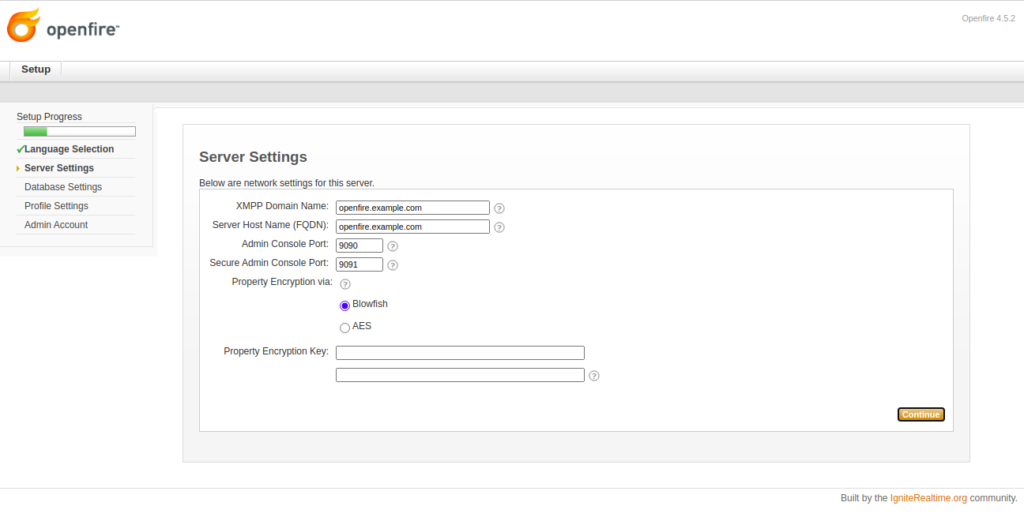
Provide your domain name, hostname and click on the Continue button. You should see the following page:
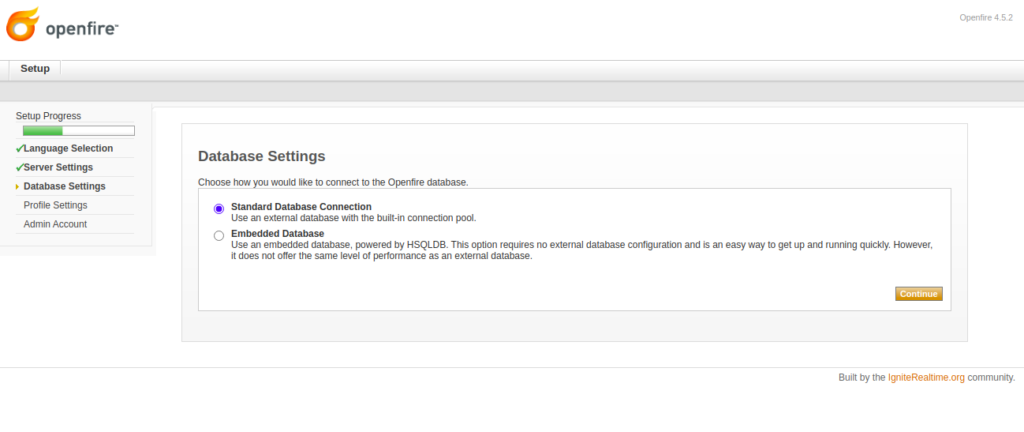
Select Standard Database Connection and click on the Continue button. You should see the following page:
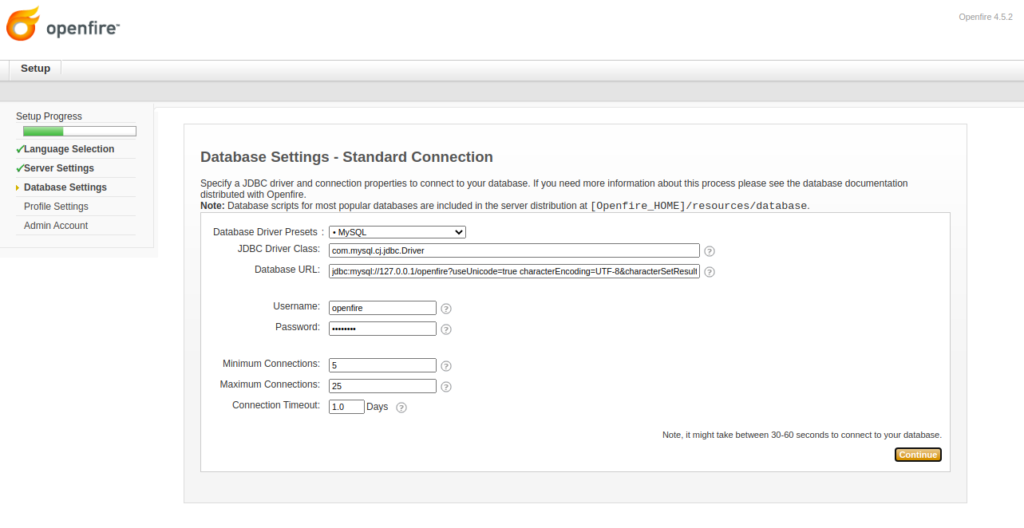
Select your database driver, database URL, username, password, and click on the Continue button. You should see the following page:
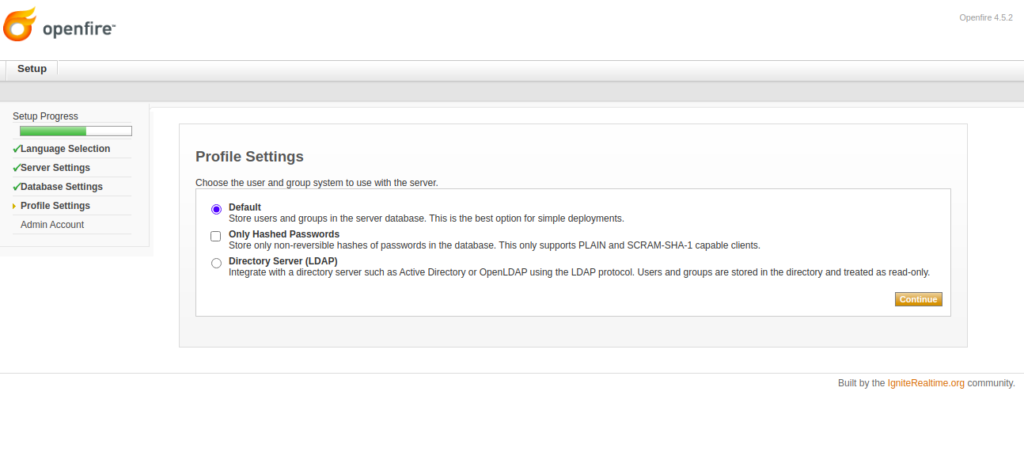
Select the default option and click on the Continue button. You should see the following page:
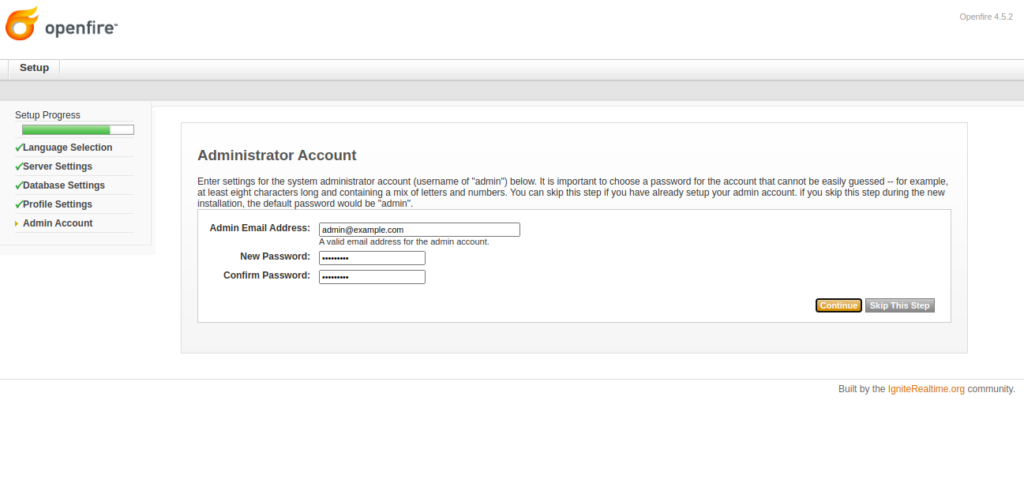
Set your admin username, password and click on the Continue button. You should see the following page:

Provide your admin username, password and click on the Login button. You should see the Openfire dashboard on the following page:
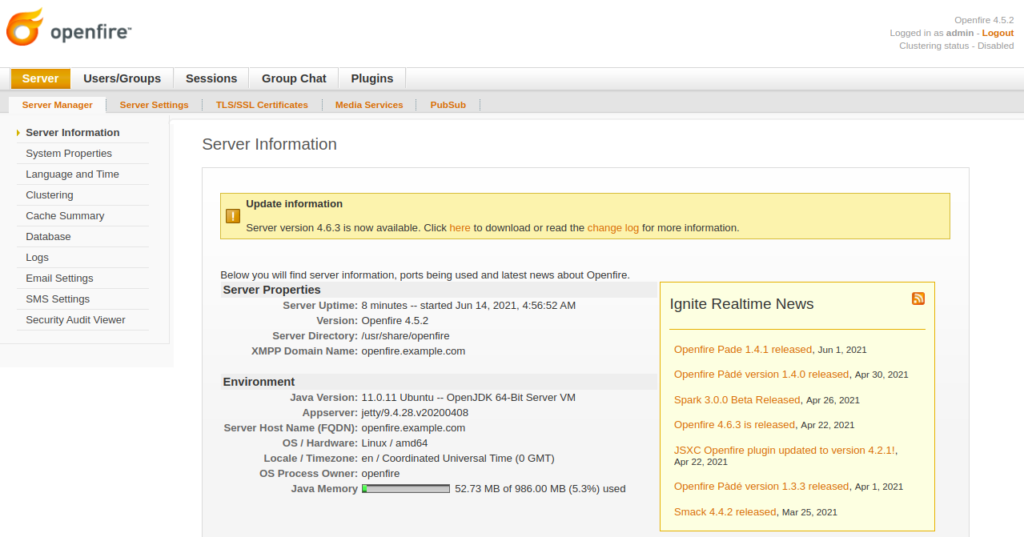
Now you can create a chat room and connect to it with your favorite XMPP chat client. Enjoy! Please check back here for more updates, and learn more about our reliable HIPAA-compliant cloud hosting solutions.