Table of Contents
Verified and Tested 05/06/15
Introduction
We will walk you through installing LEMP on your Ubuntu 15.04 cloud server in this How-To. LEMP is simply a software bundle that consists of 4 components. Linux (L) is the core of the platform, which will sustain the other components. Nginx (E) is used for the web hosting service. MySQL (M) is used for database management. PHP (P) is the application programming language.
Prerequisites
A server with Ubuntu 15.04 already installed. You can spin up a dependable server from Atlantic.Net in under 30 seconds.
Installing Nginx
Install Nginx with the following command to begin the install:
apt-get -y install nginx
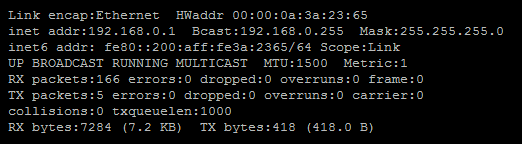
Verify if all is working by opening your browser and going to http:// <ipaddress>
If you are unsure what your IP address is, run the following:
ifconfig
 ifconfig command
In this example, we would do http:// 192.168.0.1, which should open a page looking like this.
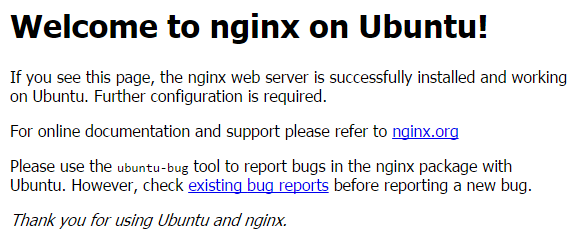 Default Nginx site
Configure Nginx
The Nginx configuration file is located in /etc/nginx/nginx.conf, so we will use our text editor (In this article, it would be nano) and open the file by running the following command:
nano /etc/nginx/nginx.conf
You will need to change the worker_processes to the amount of CPUs your server is running. The default is set to 4.
 Nginx configuration file
If you are unsure of the amount of CPUs your server is running, you can use the command “lscpu” to see the amount.
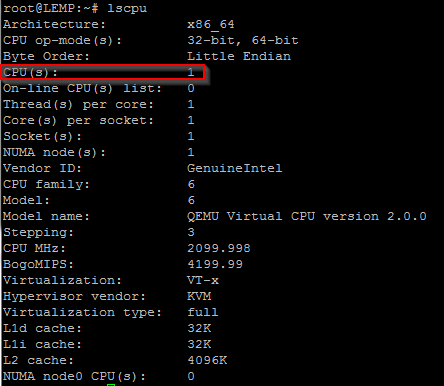 Lscpu command
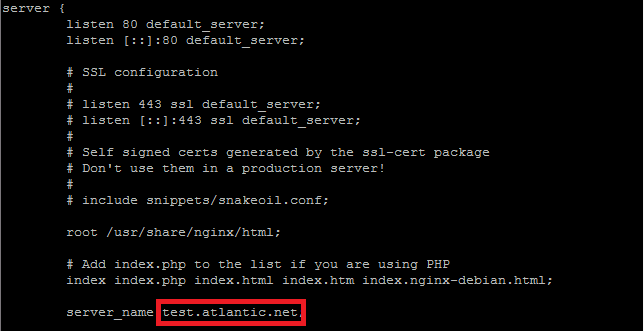
Next, we will need to edit the default vhost (server block) located in /etc/nginx/sites-available/default. Use your text editor to go into the file. This article uses nano for text editing, but you may use whichever program you’re most comfortable with.
nano /etc/nginx/sites-available/default
Under the server section, you will need to change the FQDN or IP address beside “server_name” as shown below.
 Configuration file for default vhost
Scroll down a little farther to the section that starts with “location ~ \.php$ {“. Here you will need to uncomment the section and change the following lines to look like below.
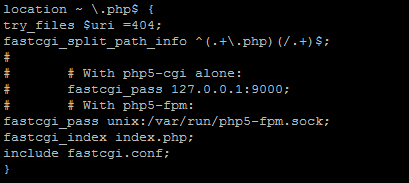 Nginx default vhost configuration file
Once done, save and exit the file.
We will now test the Nginx configuration by running the following command.
nginx -t
You should see something like this if it is ok.
 Testing Nginx Configuration
Installing MySQL
Next, we will install MySQL by running the following command:
apt-get install mysql-server mysql-client
You will be prompted to enter a new password for MySQL “root” user, enter what you would like.
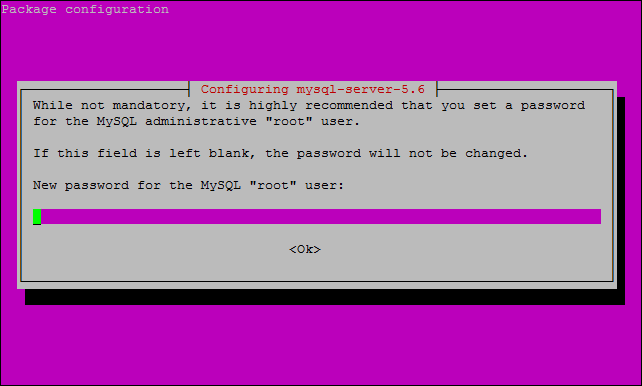 MySQL root database password
You are then asked to enter the password again.
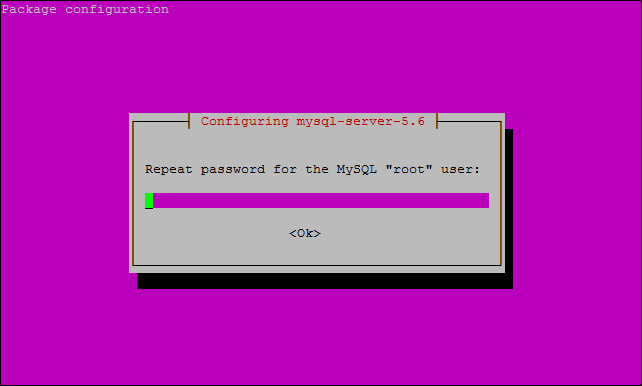 Re-enter MySQL root database password
Once complete, you can verify MySQL is installed by running the below command.
systemctl status mysql
It will show active(running)
 MySQL status command
Next, you will want to secure MySQL by running the following command:
mysql_secure_installation
This command will first ask you for your current MySQL “root” user password, which we created earlier when installing MySQL. Enter the password and continue. If you would like to change the root password, type “n” and press enter unless you want to change it. You will say yes to the next couple of questions as it will secure your MySQL. The command will remove anonymous user access, disallow root login remotely, remove the test database, and access it. The last question is to reload the privilege tables, say yes, and press Enter.
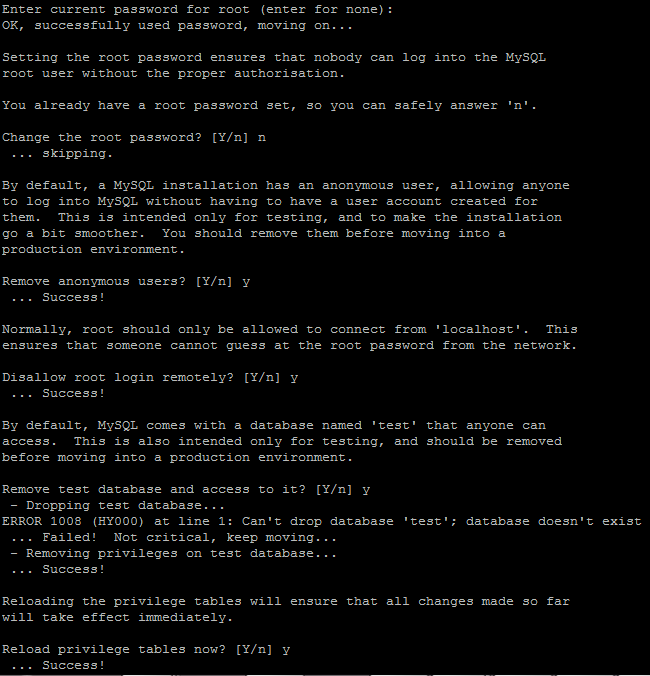 MySQL secure installation questions
Installing PHP
To install PHP, run the following command:
apt-get -y install php5 php5-fpm php5-mysql
Before testing the install, we will need to configure PHP by opening the php.ini file. This is located in /etc/php5/fpm. Open this php.ini file with your text editor.
nano /etc/php5/fpm/php.ini
We need to change cgi.fix_pathinfo to equal 0 instead of 1. Below is how it would look.
 CGI.fix_pathinfo
Save and exit the file.
We will have to restart PHP5-FPM using the following command.
systemctl restart php5-fpm
After a restart, check the status of php5-fpm by running,
systemctl status php5-fpm
You will see an output similar to this,
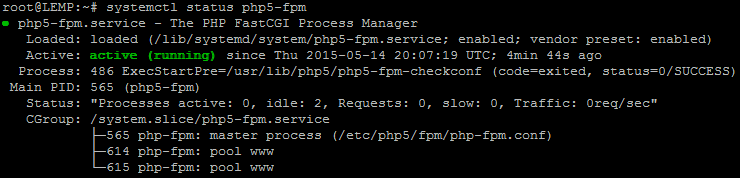 PHP5-FPM status
We will save a basic PHP script under the web root directory to test PHP. For Ubuntu 15.04 with Nginx, this is located in /usr/share/nginx/html, so we would want to open a test file called something like test.php by running the following command:
nano /usr/share/nginx/html/test.php
This will open an empty file. We will add the following text:
<?php
phpinfo();
?>
Save and close the file.
You will now need to restart Nginx for the changes to take effect. To restart Nginx, run the following command:
systemctl restart nginx
In this article, our server IP address from earlier is 192.168.0.1, and the PHP script is saved under the web root directory named test.php. We can now test php by opening up an internet browser and the PHP script we saved. We will now enter the URL http:// 192.168.0.1/test.php and press Enter. You will see the following screen if installed and working correctly.
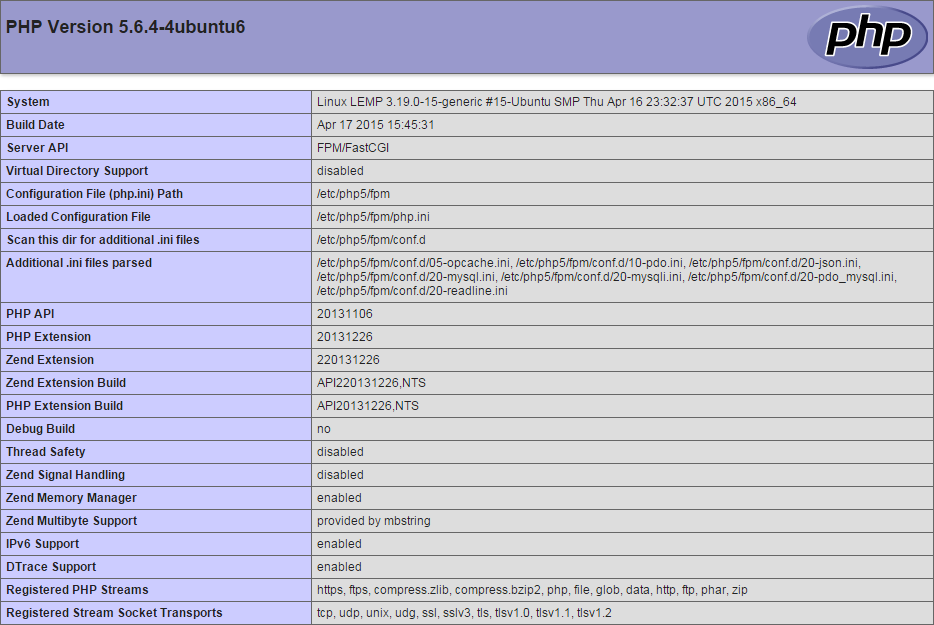 PHP Information page
You have now wholly installed LEMP on your Ubuntu 15.04 server.
Learn more about our VPS hosting services and VPS hosting price.