Anaconda is a free and open-source distribution of the Python and R programming languages. It is used for scientific computing, machine learning, and data science that involves heavy calculations and predictive analysis. Anaconda Python offers over 1400 data packages, both free and paid.
In this tutorial, we will explain how to install the Anaconda Python Distribution on Ubuntu 18.04.
Step 1 – Install Anaconda
Before starting, visit the Anaconda downloads page as shown below:
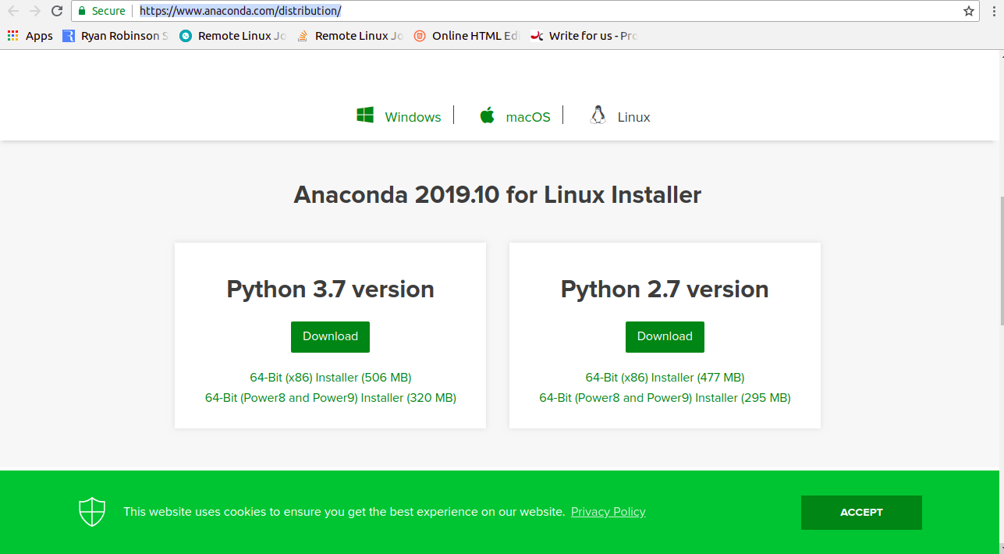
At the time of writing this article, the latest stable version for Anaconda is 2019.10. You can download the Anaconda installation script with wget command as shown below:
wget https://repo.anaconda.com/archive/Anaconda3-2019.10-Linux-x86_64.sh
Once the download is completed, check the data integrity of the script by running sha256sum command:
sha256sum Anaconda3-2019.10-Linux-x86_64.sh
You should see the following output:
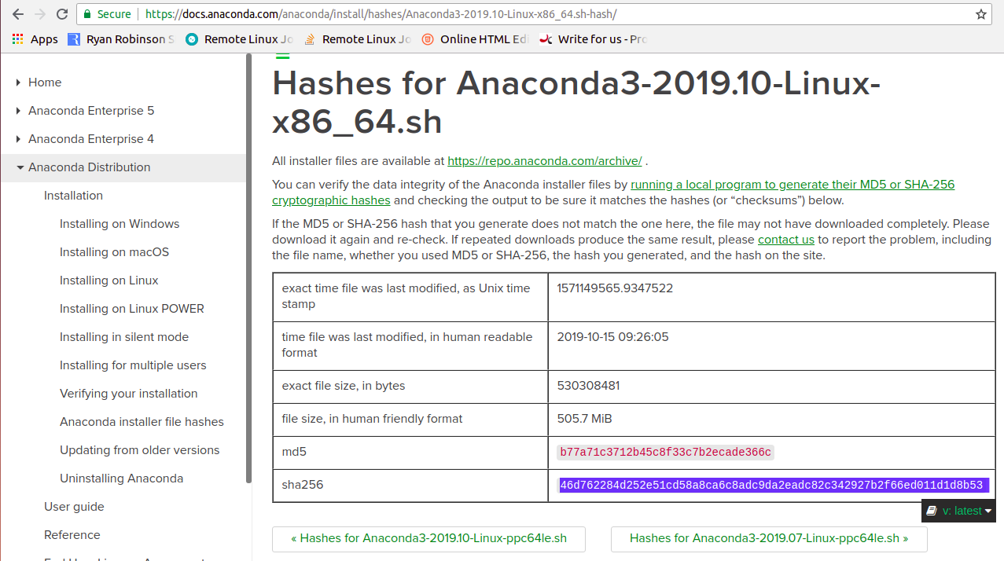
46d762284d252e51cd58a8ca6c8adc9da2eadc82c342927b2f66ed011d1d8b53 Anaconda3-2019.10-Linux-x86_64.sh
Next, visit the Anaconda Linux page and check that the above hash matches with the one available in the following page:
If everything is correct, run the Anaconda installation script with the following command:
bash Anaconda3-2019.10-Linux-x86_64.sh
You should see the “Welcome” message in the following output:
Welcome to Anaconda3 2019.10

In order to continue the installation process, please review the license
Please, press ENTER to continue
>>>
Now, press ENTER to continue. You should see the following output:
Please answer 'yes' or 'no':'
>>> yes
Type yes to continue. You should see the following output:
Anaconda3 will now be installed into this location:
/root/anaconda3

- Press ENTER to confirm the location
- Press CTRL-C to abort the installation
- Or specify a different location below

[/root/anaconda3] >>>
By default, Anaconda Python will be installed on the ~/anaconda3 directory in your user’s HOME directory. You can also choose your desired installation directory. Press the Enter button to install the Anaconda in the default location. You should see the following output:
Preparing transaction: done
Executing transaction: done
installation finished.
Do you wish the installer to initialize Anaconda3
by running conda init? [yes|no]
[no] >>> yes
Now, type yes to initialize Anaconda3. Once the installation has been completed, you should see the following output:
==> For changes to take effect, close and re-open your current shell. <==

If you'd prefer that conda's base environment not be activated on startup,
set the auto_activate_base parameter to false:

conda config --set auto_activate_base false

Thank you for installing Anaconda3!

===========================================================================

Anaconda and JetBrains are working together to bring you Anaconda-powered
environments tightly integrated in the PyCharm IDE.

PyCharm for Anaconda is available at:
https://www.anaconda.com/pycharm
Next, activate Anaconda with the following command:
source ~/.bashrc
You should see the following output:
(base) root@ubuntu1804:~#
Step 2 – Verify Anaconda Python Installation
Now that Anaconda Python is installed, you can run the following command to verify the installation.
conda info
You should get the following output:
     active environment : base
    active env location : /root/anaconda3
            shell level : 1
       user config file : /root/.condarc
 populated config files :
          conda version : 4.7.12
    conda-build version : 3.18.9
         python version : 3.7.4.final.0
       virtual packages :
       base environment : /root/anaconda3  (writable)
           channel URLs : https://repo.anaconda.com/pkgs/main/linux-64
                          https://repo.anaconda.com/pkgs/main/noarch
                          https://repo.anaconda.com/pkgs/r/linux-64
                          https://repo.anaconda.com/pkgs/r/noarch
          package cache : /root/anaconda3/pkgs
                          /root/.conda/pkgs
       envs directories : /root/anaconda3/envs
                          /root/.conda/envs
               platform : linux-64
             user-agent : conda/4.7.12 requests/2.22.0 CPython/3.7.4 Linux/4.15.0-66-generic ubuntu/18.04.3 glibc/2.27
                UID:GID : 0:0
             netrc file : None
           offline mode : False
You can also check the Anaconda version with the following command:
conda --version
You should see the following output:
conda 4.7.12
You can list all the installed Anaconda Python packages by running the following command:
conda list
You should get the following output:
# packages in environment at /root/anaconda3:
#
# Name                    Version                   Build  Channel
_ipyw_jlab_nb_ext_conf    0.1.0                    py37_0
_libgcc_mutex             0.1                        main
alabaster                 0.7.12                   py37_0
anaconda                  2019.10                  py37_0
anaconda-client           1.7.2                    py37_0
anaconda-navigator        1.9.7                    py37_0
anaconda-project          0.8.3                      py_0
asn1crypto                1.0.1                    py37_0
astroid                   2.3.1                    py37_0
astropy                   3.2.2            py37h7b6447c_0
atomicwrites              1.3.0                    py37_1
attrs                     19.2.0                     py_0
babel                     2.7.0                      py_0
backcall                  0.1.0                    py37_0
backports                 1.0                        py_2
backports.functools_lru_cache 1.5                        py_2
backports.os              0.1.1                    py37_0
backports.shutil_get_terminal_size 1.0.0                    py37_2
backports.tempfile        1.0                        py_1
:
:
Step 3 – Configure Anaconda Environments
To keep all your projects organized, it is recommended to create an Anaconda virtual environment for each project. You can easily select the required version of Python for your Anaconda Python environment.
Check the available versions of Python by running the following command:
conda search "^python$"
You can see multiple versions of Python, including Python 2 and Python 3.
Next, let’s create a new environment with name test_env using Python 3 as shown below:
conda create --name test_env python=3
Type [Y] to proceed. Next, activate the newly created environment with the following command:
conda activate test_env
You should see the following output:
(test_env) root@ubuntu1804:~#
Now, check the version of Python with the following command:
python --version
The output will look like this:
Python 3.8.0
Now, deactivate from your Anaconda environment with the following command:
conda deactivate
You can also list all your environments with the following command:
conda info --envs
You should get the following output:
# conda environments:
#
base * /root/anaconda3
test_env /root/anaconda3/envs/test_env
Step 4 – Update Anaconda
You can update the Anaconda easily with a conda tool. First, you will need to update the conda tool using the following command:
conda update conda
Type y and press Enter to confirm the update.
Next, update Anaconda by running the following command:
conda update anaconda
Type y and press Enter to update Anaconda.
Step 5 – Uninstall Anaconda
In this section, we will show you how to remove Anaconda from your system.
First, remove the test_env with the following command:
conda env remove -n test_env
You should get the following output:
Remove all packages in environment /root/anaconda3/envs/test_env:
Next, install anaconda-clean module to uninstall Anaconda with all the configuration files.
conda install anaconda-clean
Type yes and hit Enter to complete the installation.
Next, run the following command to remove the Anaconda from your system:
source .bashrc
anaconda-clean
Type y and hit Enter to remove Anaconda:
Delete .conda? (y/n): y
Backup directory: /root/.anaconda_backup/2019-11-28T094615
Next, remove the Anaconda root directory with the following command:
rm -rf ~/anaconda3
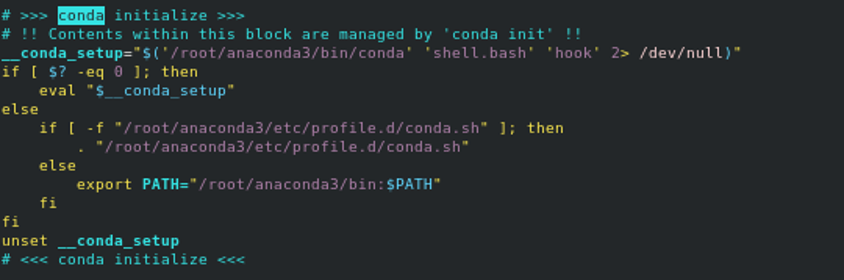
Next, open the ~/.bashrc file and remove the Anaconda environment variable:
nano ~/.bashrc
Remove the following lines:
__conda_setup="$('/root/anaconda3/bin/conda' 'shell.bash' 'hook' 2> /dev/null)"
if [ $? -eq 0 ]; then
    eval "$__conda_setup"
else
    if [ -f "/root/anaconda3/etc/profile.d/conda.sh" ]; then
        . "/root/anaconda3/etc/profile.d/conda.sh"
    else
        export PATH="/root/anaconda3/bin:$PATH"
    fi
fi
unset __conda_setup
[Before]
[After]

Save and close the file when you are finished.
At this point, Anaconda is completely removed from your server.
Conclusion
Congratulations! You have successfully installed Anaconda Python on Ubuntu 18.04 server. You now have enough knowledge to create environments, perform updates, and manage large-scale data with Anaconda Python. Get started today with Anaconda on VPS Hosting from Atlantic.Net!