Bpytop is a free and open-source resource monitoring tool written in Python. It provides a command-line interface to monitor system resources including disk, network, process, and CPU in real-time. Bpytop can be installed on several operating systems including Linux, macOS, and FreeBSD.
It provides many useful features including a responsive UI, keyboard and mouse support, support for multiple filters, and much more.
In this post, we will show you how to install and use the Bpytop resource monitoring tool on Ubuntu 20.04.
Step 1 – Install Required dependencies
Before starting, you will need to install some dependencies in your system. You can install all of them with the following command:
apt-get install python3 python3-pip git make gcc build-essential -y
Once all the dependencies are installed, you can proceed to the next step.
Step 2 – Install Bpytop Using PIP
There are several ways to install Bpytop in your Ubuntu system. You can use PIP to install Bpytop to your system.
First, install the required dependencies using the following command:
pip3 install psutil
Next, install the Bpytop with the following command:
pip3 install bpytop
Step 3 – Compile Bpytop from Source
You can also install Bpytop by downloading it from the Git Hub, then compiling it to your system.
First, download the latest version of Bpytop with the following command:
git clone https://github.com/aristocratos/bpytop.git
Once the download is completed, change the directory to bpytop and compile it with the following command:
cd bpytop
make install
Step 4 – Install Bpytop Using SNAP
You can also use SNAP package manager to install Bpytop to your system. First, install the SNAP package manager with the following command:
apt-get install snapd -y
Once installed, run the following command to install Bpytop:
snap install bpytop
Step 5 – Install Bpytop Using Ubuntu Repository
You can also add the Bpytop repository to APT and install it from the Ubuntu repository.
First, add the Bpytop repository with the following command:
echo "deb http://packages.azlux.fr/debian/ buster main" | tee /etc/apt/sources.list.d/bpytop.list
Next, add the GPG key with the following command:
wget -qO - https://azlux.fr/repo.gpg.key | apt-key add -
Next, update the repository and install Bpytop with the following command:
apt-get update -y
apt-get install bpytop -y
Once the installation is complete, verify the installed version of Bpytop with the following command:
bpytop --version
Output:
bpytop version: 1.0.64
psutil version: 5.8.0
Step 6 – Working with Bpytop
You can launch the Bpytop command-line interface using the following command:
bpytop
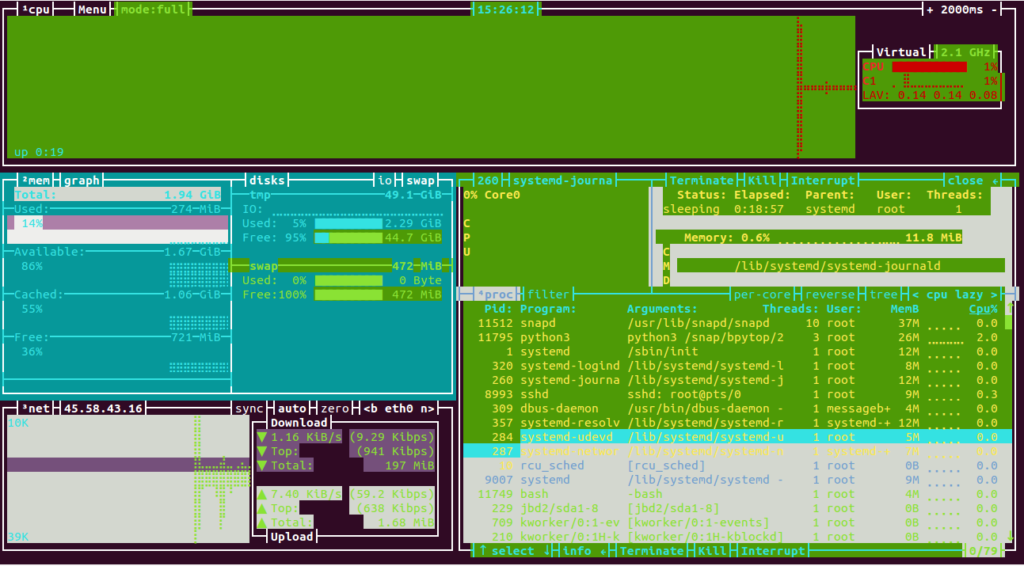
You should see the following screen:
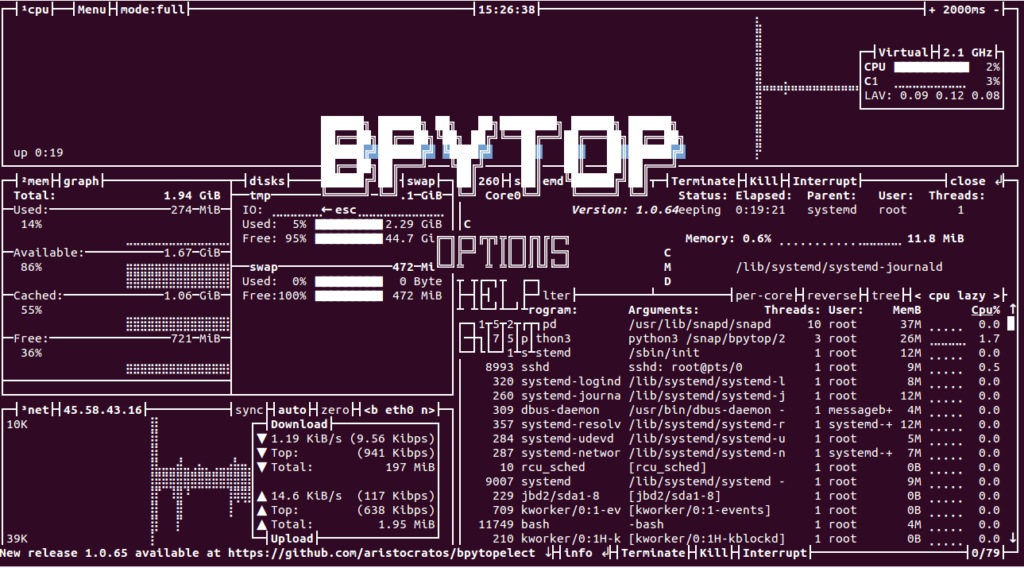
To get the list of all commands and keyboard shortcuts, press the ESC key. You should see the following screen:
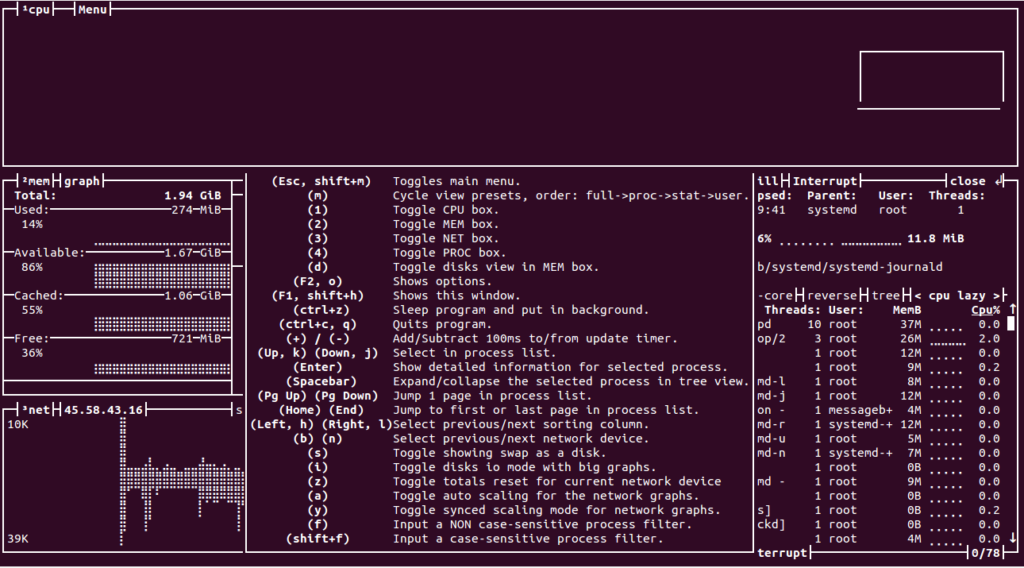
Now, scroll down and select the HELP option. You will get a list of keyboard shortcuts on the following screen:
If you want to exit from the Bpytop resource monitor, press q on the keyboard.
Conclusion
In the above guide, you learned how to install and use the Bpytop resource monitoring tool on Ubuntu. You can now play around with different options and check the results on your virtual private server from Atlantic.Net!
* This post is for informational purposes only and does not constitute professional, legal, financial, or technical advice. Each situation is unique and may require guidance from a qualified professional.
Readers should conduct their own due diligence before making any decisions.