Pritunl is a free, open-source, web-based VPN server that virtualizes your private networks across datacenters and provides simple remote access in minutes. It supports all OpenVPN clients and has official clients for several devices and platforms. Pritunl allows you to choose between connecting with OpenVPN and WireGuard. All networking features are available with the WireGuard protocol. Pritunl provides a customizable plugin system that allows you to extend your VPN’s functionality.
In this post, we will show you how to install Pritunl VPN Server on Rocky Linux 8.
Step 1 – Increase Open File Limit
Before starting, you will need to increase the open file limit on the server to prevent any connection issues in case of a high load.
You can do it by editing limits.conf file:
nano /etc/security/limits.conf
Add the following lines:
* hard nofile 64000
* soft nofile 64000
root hard nofile 64000
root soft nofile 64000
Save and close the file when you are finished.
Also Read
How to Install and Configure OpenVPN Server on Ubuntu 20.04
Step 2 – Install MongoDB Server
Pritunl uses MongoDB as a database backend, so you will need to install MongoDB on your server.
First, create a MongoDB repo using the following command:
nano /etc/yum.repos.d/mongodb-org-4.4.repo
Add the following lines:
[mongodb-org-4.4]
name=MongoDB Repository
baseurl=https://repo.mongodb.org/yum/redhat/$releasever/mongodb-org/4.4/x86_64/
gpgcheck=1
enabled=1
gpgkey=https://www.mongodb.org/static/pgp/server-4.4.asc
Save and close the file, then install MongoDB using the following command:
dnf install mongodb-org -y
Once MongoDB is installed, start and enable the MongoDB service using the command given below:
systemctl enable mongod --now
Also Read
How to Install and Secure MongoDB on Oracle Linux 8
Step 3 – Install Pritunl Server on Rocky Linux 8
By default, the Pritunl server package is not included in the Rocky Linux 8, so you will need to create a Pritunl repo to your system.
nano /etc/yum.repos.d/pritunl.repo
Add the following lines:
[pritunl]
name=Pritunl Repository
baseurl=https://repo.pritunl.com/stable/yum/centos/8/
gpgcheck=1
enabled=1
Save and close the file, then install the EPEL repo with the following command:
dnf install epel-release
Next, add and import the GPG keys with the following command:
gpg --keyserver hkp://keyserver.ubuntu.com --recv-keys 7568D9BB55FF9E5287D586017AE645C0CF8E292A
gpg --armor --export 7568D9BB55FF9E5287D586017AE645C0CF8E292A > key.tmp
rpm --import key.tmp
Finally, install the Pritunl server using the following command:
dnf install pritunl -y
Once the Pritunl server is installed, verify the Pritunl version using the following command:
pritunl version
You will get the following output:
pritunl v1.30.3023.56
Step 4 – Manage Pritunl Service
You can now start and enable the Pritunl service by running the following command:
systemctl enable pritunl --now
You can also check the status of the Pritunl service using the following command:
systemctl status pritunl
You will get the following output:
● pritunl.service - Pritunl Daemon
   Loaded: loaded (/etc/systemd/system/pritunl.service; enabled; vendor preset: disabled)
   Active: active (running) since Wed 2021-12-29 11:50:28 UTC; 8s ago
 Main PID: 5546 (pritunl)
    Tasks: 1 (limit: 11411)
   Memory: 227.3M
   CGroup: /system.slice/pritunl.service
           └─5546 /usr/lib/pritunl/bin/python /usr/lib/pritunl/bin/pritunl start

Dec 29 11:50:28 rockylinux systemd[1]: Started Pritunl Daemon.
Step 5 – Access Pritunl Web Interface
At this point, Pritunl is started and running. You can now access it using the URL https://your-server-ip. You will get the Pritunl database setup page:
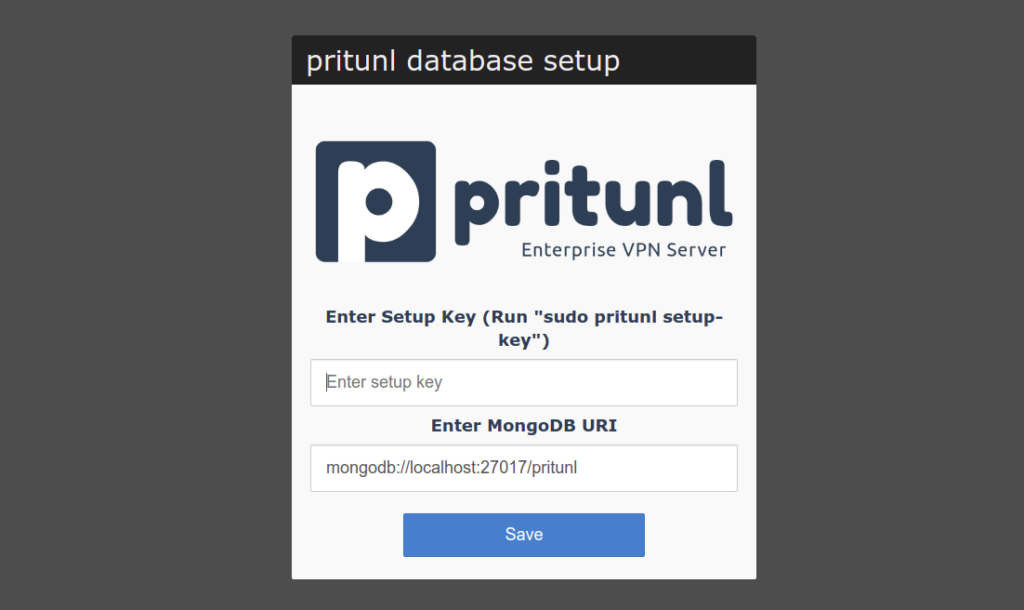
Now, go back to the terminal and generate the database setup key using the following command:
pritunl setup-key
Sample output:
2d9c4f65ebba4479a5147d1a18feccf4
Go back to the Pritunl web interface, paste the setup key, and click on the Save button. You should see the Pritunl login page:
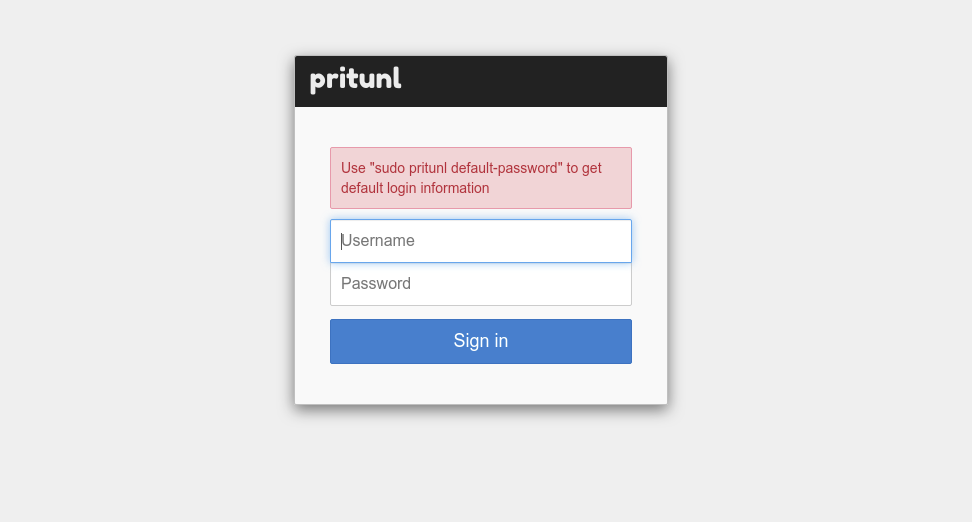
Go back to the terminal and generate login credentials with the following command:
pritunl default-password
You will get the following output:
[undefined][2021-12-29 11:55:53,139][INFO] Getting default administrator password
Administrator default password:
  username: "pritunl"
  password: "UUgJaZt3ice6"
Go back to the Pritunl web interface, paste the username and password, and click on the Sign in button. You should see the Pritunl initial setup page:
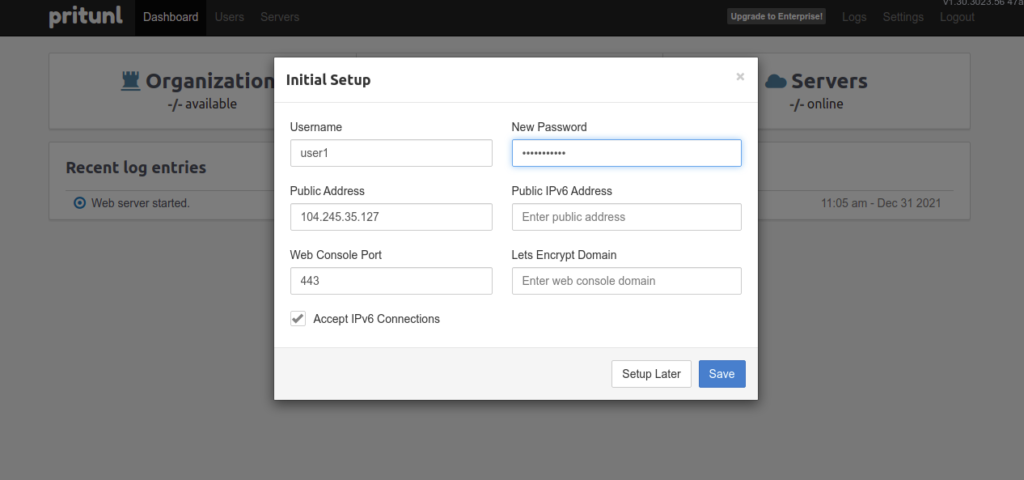
Provide your user name, password, IP address, and port, and click on the Save button. You should see the Pritunl dashboard on the following page:

Step 6 – Add Users in Pritunl
Next, you will need to add a user to the Pritunl server.
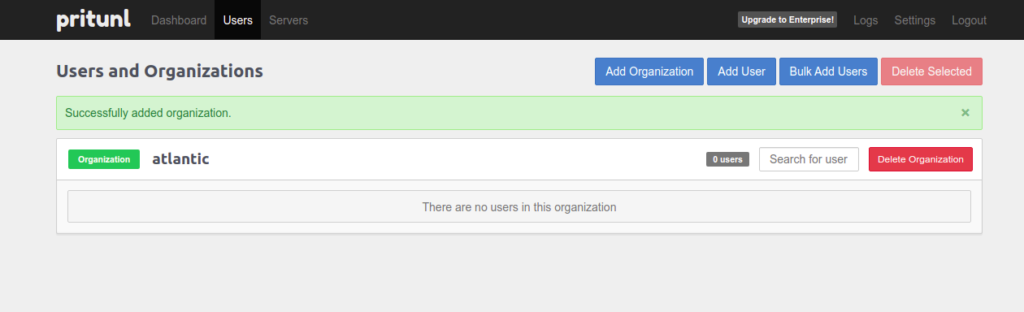
First, click on the Add Organization button to add the organization. You should see the following page:
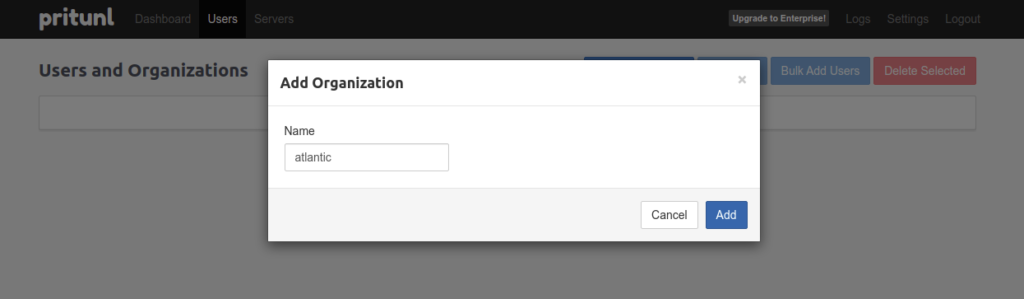
Provide your organization name and click on the Add button. You should see the following page:
Now, click on the Add User button to add a user. You should see the following page:
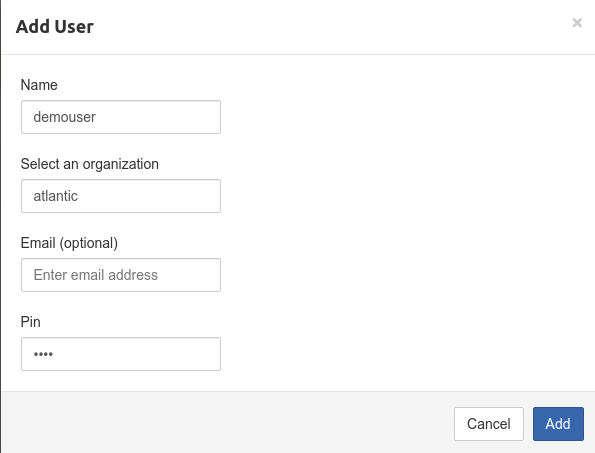
Provide your username, organization, and pin, and click on the Add button. Next, click on the Add Server in the server tab. You should see the following page:
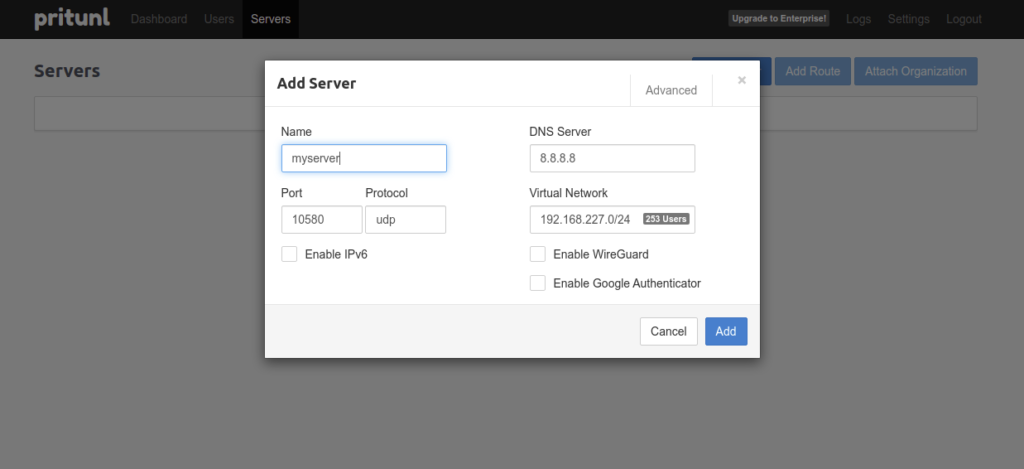
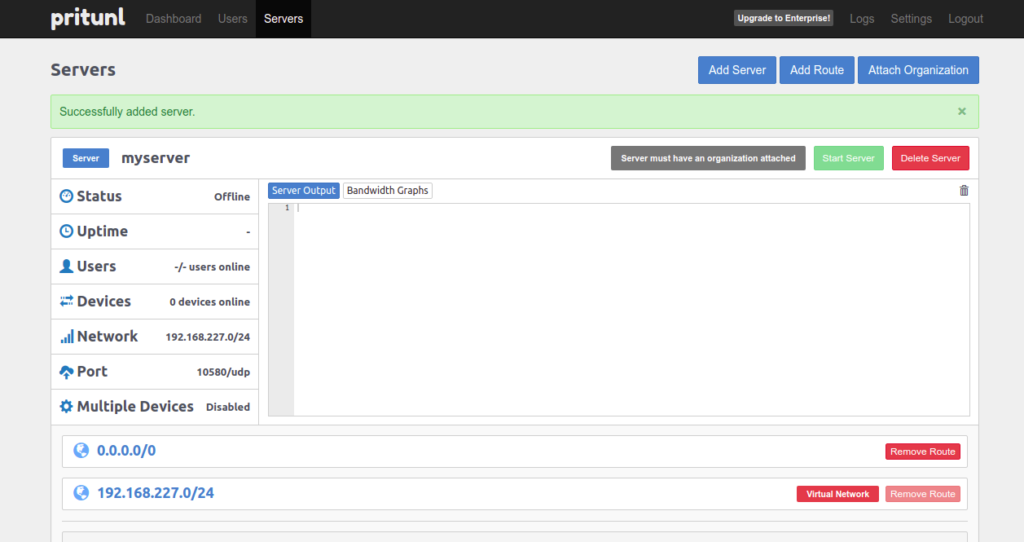
Provide your server name, port, protocol, DNS server, and Virtual Network, then click on the Add button. You should see the following page:
Click on Attach Organization. You should see the following page:
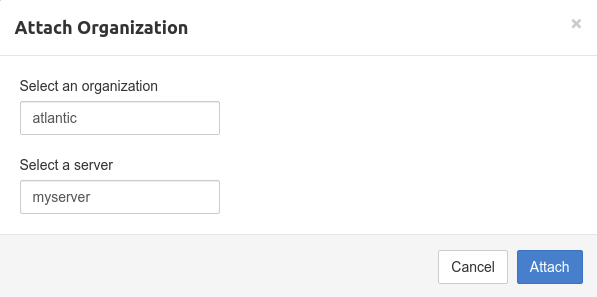
Select your organization and server and click on the Attach button. You should see the following page:
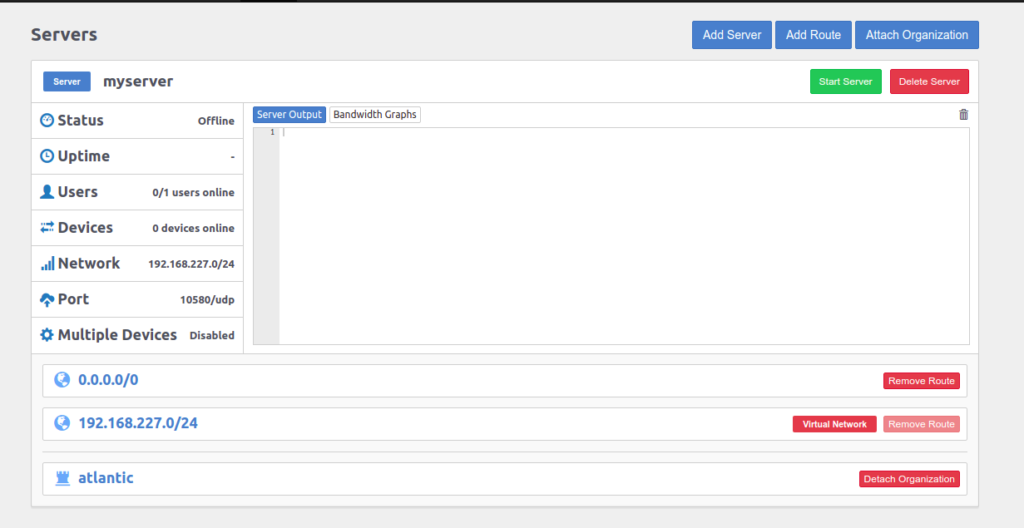
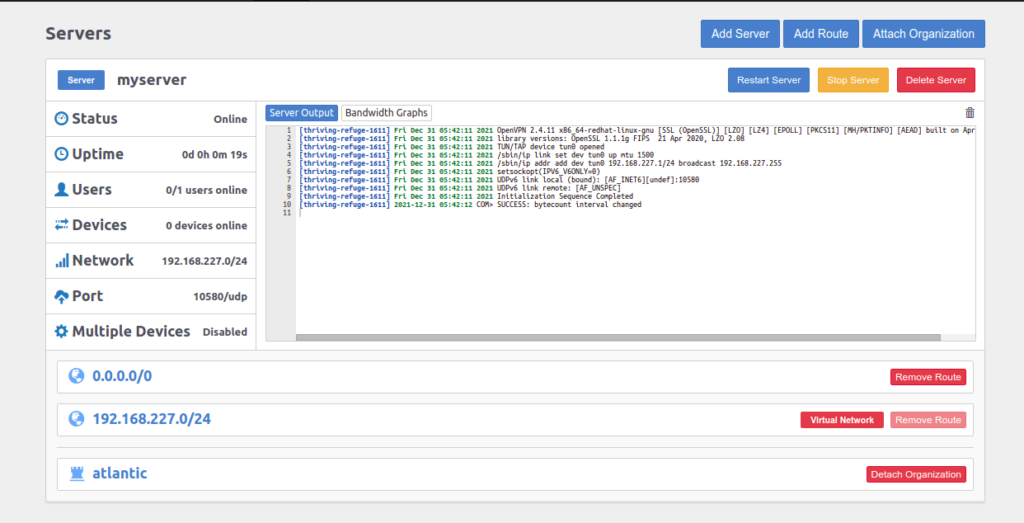
Finally, click on the Start Server button to start the server. Once the server is started successfully, you should see the following screen:
Conclusion
Congratulations! You have successfully installed and configured the Pritunl VPN server on Rocky Linux 8. You can now install the Pritunl client on the remote client machine and connect to the Pritunl VPN server. Try it on dedicated server hosting from Atlantic.Net!