Table of Contents
Verified and Tested 04/27/15
Introduction
This article will go over how to set up a Mount & Blade: Warband dedicated server in a freshly provisioned CentOS 6.5 virtual private server.

Install Mount & Blade: Warband Dedicated Server on CentOS
First, we will need to install the EPEL repository:
yum install epel-release -y
Now update system packages and EPEL database:
yum update -y
And finally, all the required packages:
yum install tmux nano wine unzip wget -y
Note: Wine will take several minutes to install, so be patient.
Now to open up the required ports in the firewall. The default ports needed for steam and non-steam users are 7240 and 7241. Let us open these up in IPtables:
nano /etc/sysconfig/iptables
Add the following lines before the REJECT rules:
-A INPUT -p tcp --match multiport --dports 7240,7241 -j ACCEPT
-A INPUT -p udp --match multiport --dports 7240,7241 -j ACCEPT
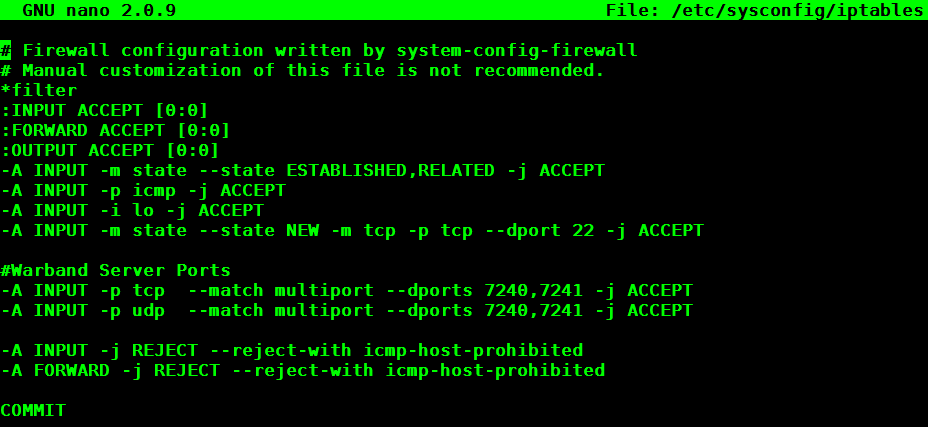
An example of the iptables file after adding the additional rules.
Once you are done, save your changes and exit from nano with CTRL O + Enter and CTRL X.
Then restart IPtables:
service iptables restart
Verify that the rules are in place:
iptables -L

An example of iptables -L
That’s it for the firewall configuration.
Time to create a separate user for the dedicated server. Call this user whatever you wish, but for the sake of this how-to, I will be using “Warband”:
useradd Warband
passwd Warband
Now let’s change to the home folder of the user we just created and make a directory for our server files:
su Warband
cd
mkdir Warband_Server
cd Warband_Server
Download the Warband dedicated server files to the Warband_Server directory we just created. The most recent dedicated server can be found HERE under the “Other Downloads” section.
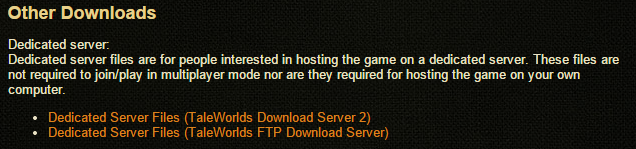
An example of what the “Other Downloads” looks like
We can “wget” the zipped file by right-clicking on the link and selecting “Copy Link Address” (For Chrome) or “Copy Shortcut” (For Internet Explorer):
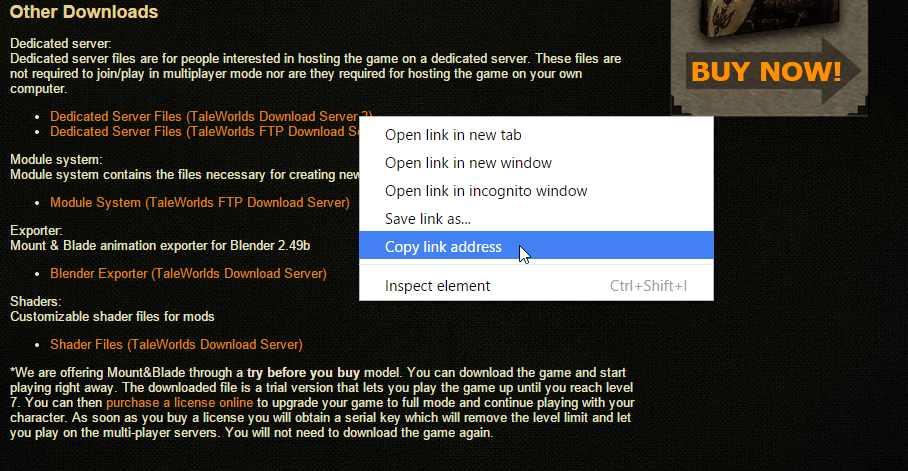
Getting the link to download to wget it on the server
An example when you wget the download link.
Now that we have the dedicated server files, we will need to unzip them:
unzip mb_warband_dedicated_1158.zip
Change into the Warband directory you just unzipped. You may need to use TAB to fill out the actual directory name:
cd Mount\&Blade\ Wardband\ Dedicated/
Inside you will find many sample server configuration templates to use. The easiest thing to do is edit one of the pre-existing templates. After deciding what kind of game mode you want to host, open it with nano:
nano Sample_Team_Deathmatch.txt
Review this file for applicable settings. The first changes you will want to make are:
#set_pass_admin ADMINPASS
#set_server_name SERVERNAME
#set_welcome_message WELCOME MESSAGE
Remove the “#” and add the appropriate modifications to the admin password, server name, and welcome message. Also, keep in mind that the server name cannot have spaces or special characters. If you need to create a space, then use an underscore.
NOTE: You can find additional commands to add to this file from the readme.txt. For instance, I highly recommend adding the following line:
set_control_block_direction 1
If set to 1, blocking will have to be done manually by a mouse. Otherwise, directional blocking will be automatic…, and that’s no fun.
Once you are done, save your changes and exit from nano with CTRL O + Enter and CTRL X.
Now let’s take a minute to discuss the TMUX package we installed earlier.
We are ready to run the dedicated server, but once we start it from the current terminal session, it will stop once we disconnect/exit from the session. This is where TMUX comes in. TMUX allows us to create a “Window” to run other applications. This will enable us to quit our current terminal session while leaving the window open to run whatever service we choose.
Note: TMUX is what is referred to as a Terminal Multiplexer. Both of which have very loyal user bases. It is a matter of preference on which one you decide to use. The most popular alternative to TMUX is SCREEN.
Open a new window:
tmux
Now start the dedicated server with Wine. Make sure you are still in the dedicated server files directory when you run this:
wineconsole --backend=curses Sample_Team_Deathmatch_start.bat
Note: Each game mode template has an associated “.bat” file. Run the one that corresponds to the template you edited.
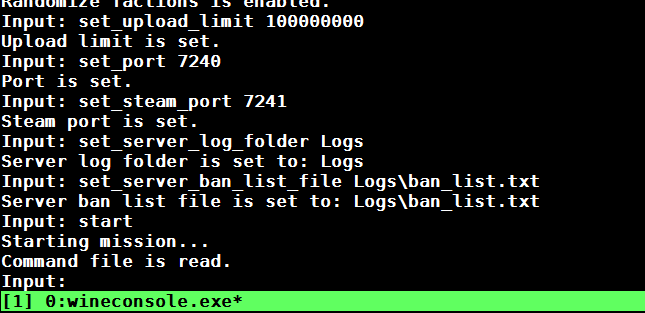
An example of the wineconsole.exe
Once the dedicated server is finished loading, you can close the CTRL B + D window.
Note: You can re-open any active TMUX sessions with the “tmux attach” command.
Now check to make sure that the server is still running with the “top” command:
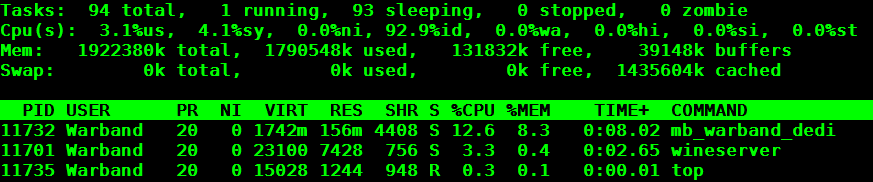
An example of top
Now go join your server!

An example of the Game server that was created
Learn more about our VPS hosting services and VPS hosting price.