Table of Contents
Verified and Tested 02/27/2015
Introduction
This how-to will guide you through enabling audio in your Windows Server 2012 R2. This is a quick and easy process and should take less than five minutes.
Enabling Audio on Windows Server 2012 R2
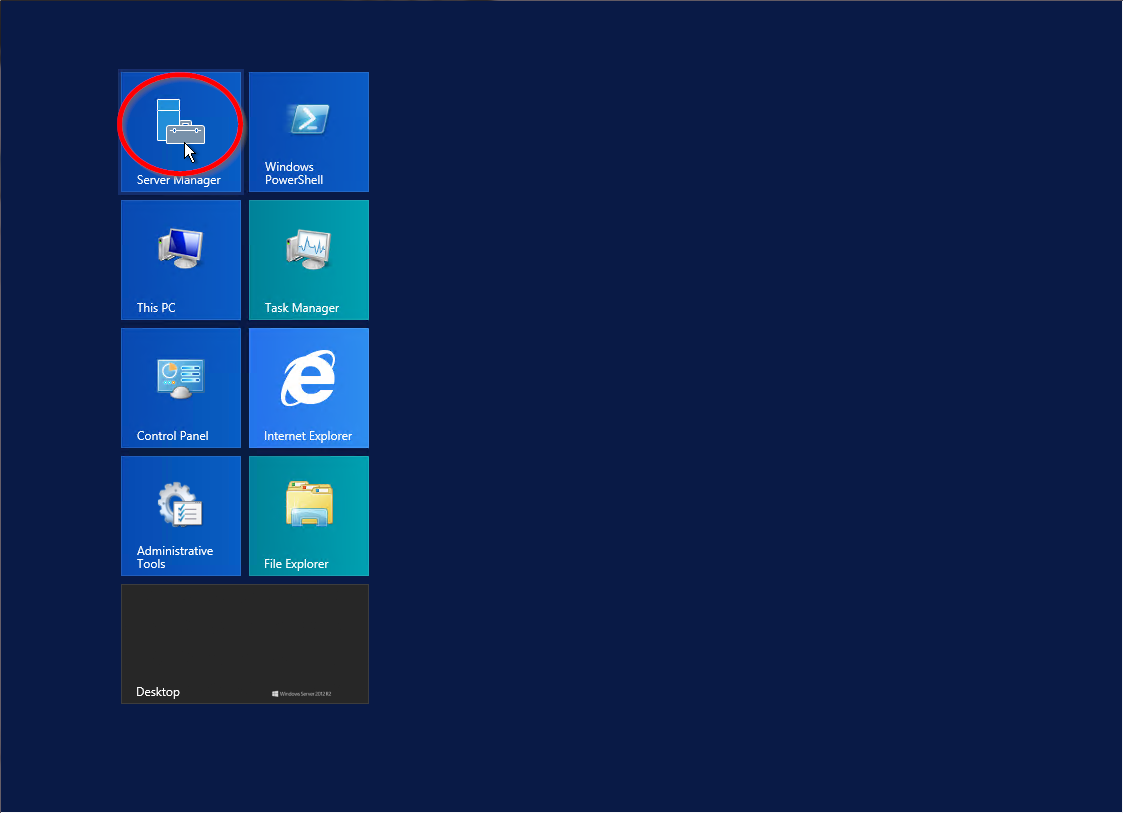
First, open Server Manager by going to Start>Server Manager.
Once Server Manager opens, click on Tools in the top right of the window and select Services.

Server Manager Dashboard
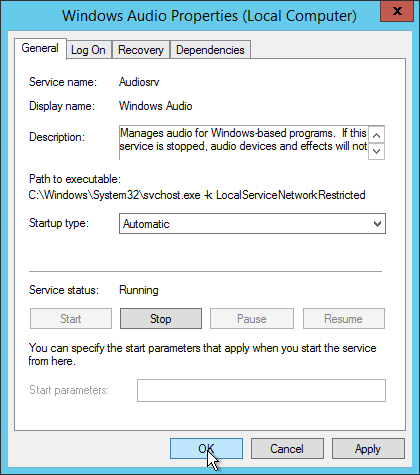
In the right pane of Services, scroll down to Windows Audio and double click on it. In Windows Audio Properties, change Startup Type to Automatic and click on Start under Service Status. Once done, click OK.
Now you have audio enabled! Come back and check for new updates.
Atlantic.Net offers dedicated server hosting backed by World-class VPS hosting infrastructure gives you the freedom to choose the plans that best fit your needs. Contact us today for more information.
* This post is for informational purposes only and does not constitute professional, legal, financial, or technical advice. Each situation is unique and may require guidance from a qualified professional.
Readers should conduct their own due diligence before making any decisions.