Crater is a free and open-source invoicing application based on the Laravel PHP framework. It is designed for individual users or small and medium-sized businesses to help track payments and expenses as well as create professional invoices. It comes with a suite of tools that are used to manage invoices. Crater allows users to create and send professional invoices to their clients.
In this post, we will show you how to install Crater Invoicing Solution on Debian 11.
Step 1 – Install Apache, MariaDB, and PHP
Before starting, you will need to install the Apache web server, MariaDB database server, PHP, and other required PHP extensions to your server. You can install all of them with the following commands:
apt-get update -y

apt-get install apache2 mariadb-server libapache2-mod-php php-common php-bcmath php-mbstring php-mysql php-tokenizer php-zip php-curl php-xml openssl curl unzip -y
After installing all the packages, start and enable both the Apache and MariaDB services:
systemctl start apache2 mariadb
systemctl enable apache2 mariadb
Also Read
How to Install Apache on Ubuntu 20.04
Step 2 – Create a Database for Crater
Crater uses a MariaDB as a database backend, so you will need to create a database and user for Crater. First, log in to MySQL with the following command:
mysql
Next, create a database and user using the following command:
create database crater;
create user 'crater'@'localhost' identified by 'password';
Next, grant all the privileges to the Crater database with the following command:
grant all privileges on crater.* to 'crater'@'localhost';
Next, flush the privileges and exit from the MariaDB shell using the following command:
flush privileges;
exit;
Step 3 – Download Crater
Next, you will need to download the latest version of Crater from their official website. You can download it using the wget command:
wget https://craterapp.com/downloads/file/6.0.6 -O crater.zip
Once Crater is downloaded, extract the downloaded file using the following command:
unzip crater.zip
Next, move the extracted directory to the Apache web root directory:
mv crater /var/www/html/crater
Next, set proper ownership and permissions to the Crater directory:
chown -R www-data:www-data /var/www/html/crater
chmod -R 775 /var/www/html/crater/storage/framework
chmod -R 775 /var/www/html/crater/storage/logs
chmod -R 775 /var/www/html/crater/bootstrap/cache
Step 4 – Create an Apache Virtual Host for Crater
Next, you will need to create an Apache virtual host configuration file to host Crater on the internet. You can create it with the following command:
nano /etc/apache2/sites-available/crater.conf
Add the following lines:
<VirtualHost *:80>
    ServerName crater.example.com
    DocumentRoot /var/www/html/crater/public

    <Directory /var/www/html/crater/public>
        Options Indexes FollowSymLinks MultiViews
        AllowOverride All
        Require all granted
    </Directory>

    ErrorLog /var/log/apache2/crater_error.log
    CustomLog /var/log/apache2/crater_access.log combined
</VirtualHost>
Save and close the file, then activate the Crater virtual host and Apache rewrite module using the following command:
a2enmod rewrite
a2ensite crater.conf
Next, restart the Apache service to apply the configuration changes:
systemctl restart apache2
To check the status of the Apache service, use the following command:
systemctl status apache2
You should see the following output:
● apache2.service - The Apache HTTP Server
     Loaded: loaded (/lib/systemd/system/apache2.service; enabled; vendor preset: enabled)
     Active: active (running) since Tue 2022-03-01 08:03:05 UTC; 4s ago
       Docs: https://httpd.apache.org/docs/2.4/
    Process: 14762 ExecStart=/usr/sbin/apachectl start (code=exited, status=0/SUCCESS)
   Main PID: 14767 (apache2)
      Tasks: 6 (limit: 2341)
     Memory: 13.6M
        CPU: 72ms
     CGroup: /system.slice/apache2.service
             ├─14767 /usr/sbin/apache2 -k start
             ├─14768 /usr/sbin/apache2 -k start
             ├─14769 /usr/sbin/apache2 -k start
             ├─14770 /usr/sbin/apache2 -k start
             ├─14771 /usr/sbin/apache2 -k start
             └─14772 /usr/sbin/apache2 -k start
Step 5 – Access Crater Web UI
At this point, Crater is installed and configured. You can now access the Crater web UI using the URL http://crater.example.com. You should see the following page:
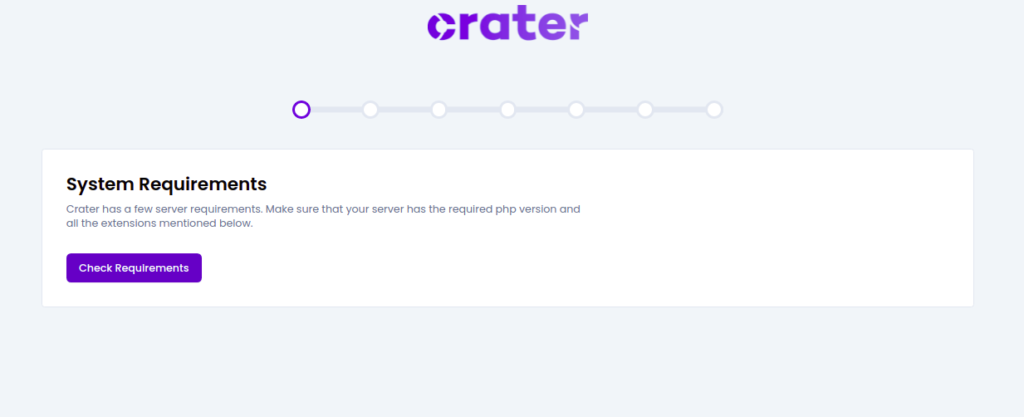
Click on Check Requirements. You should see the following page:
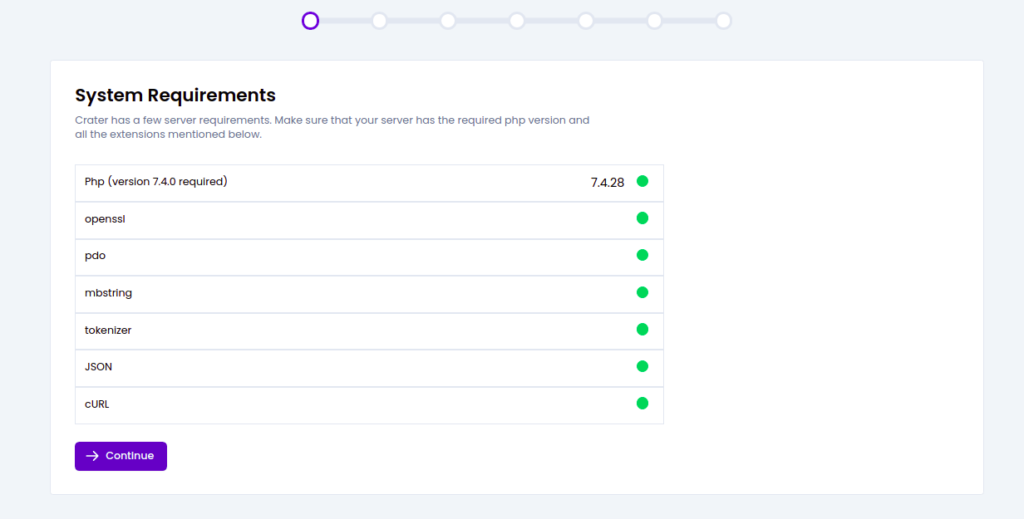
If all required PHP extensions are installed then click on the Continue button. You should see the following page:
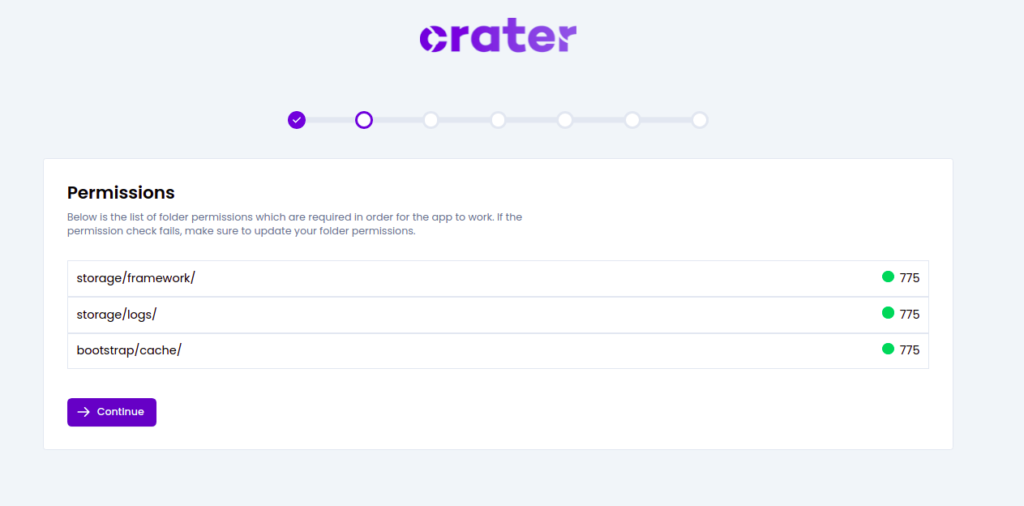
Make sure all permissions are correct then click on the Continue button. You should see the following page:
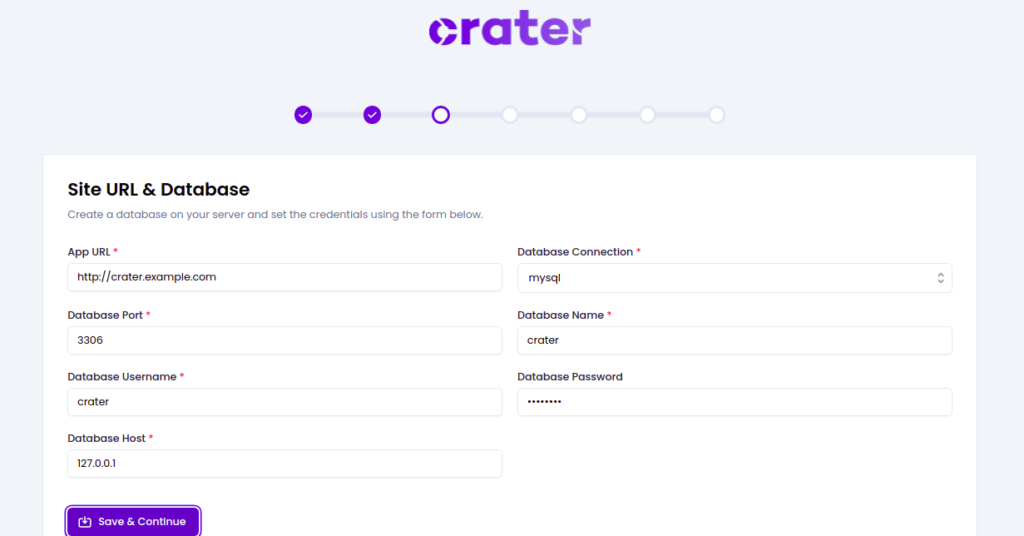
Provide the website URL and database configuration details and click on the Save & Continue button. You should see the following page:
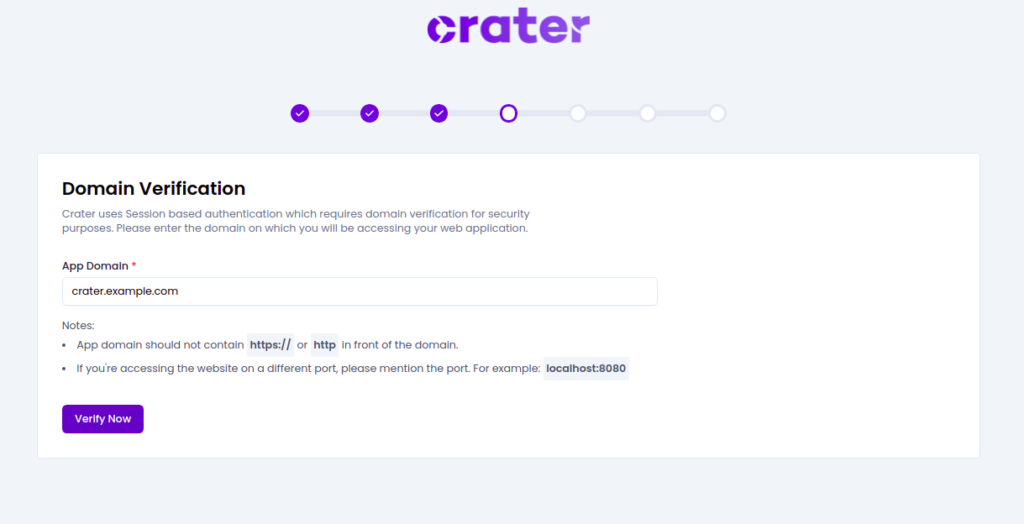
Provide your website Domain and click on the Verify Now button. You should see the following page:
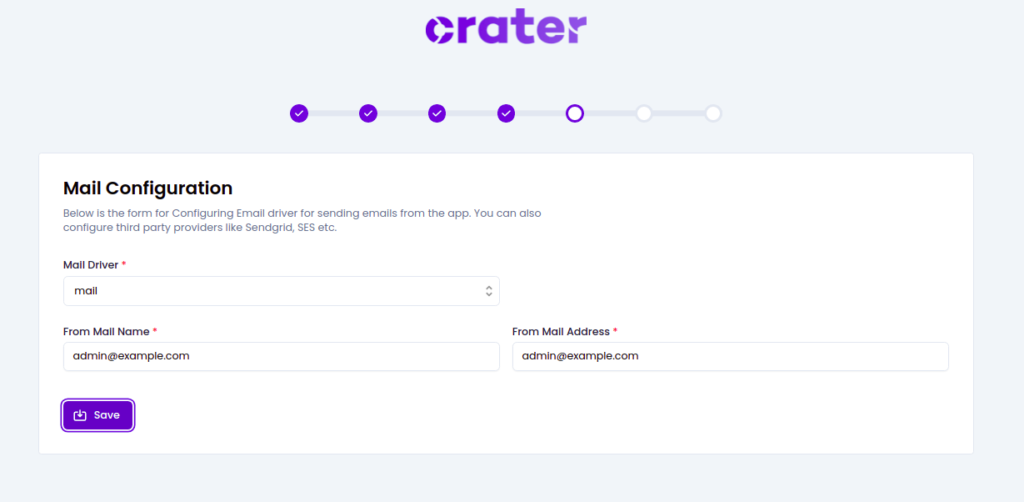
Provide your Mail configuration and click on the Save button. You should see the following page:

Provide your account information and click on the Save & Continue button. You should see the following page:
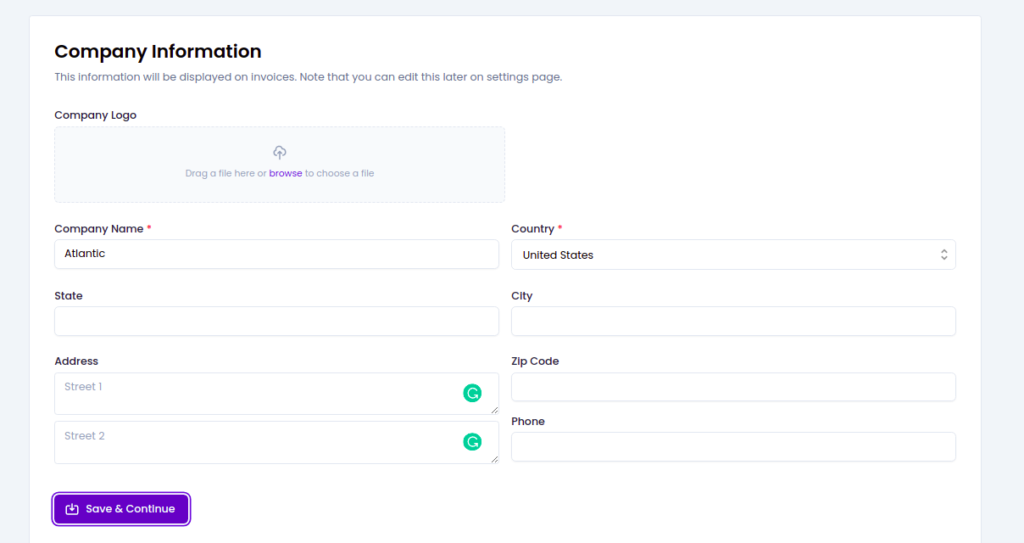
Provide your company information and click on the Save & Continue button. You should see the following page:
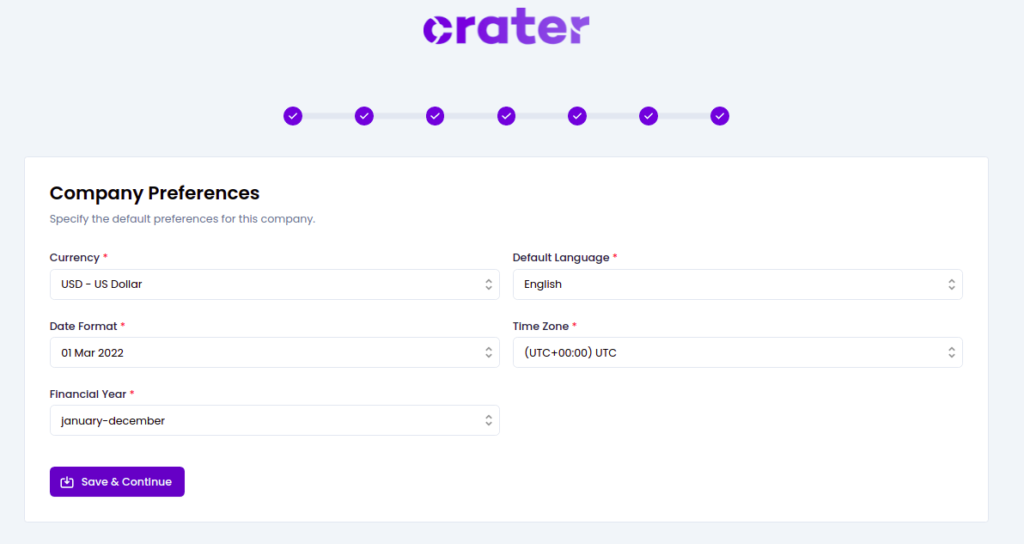
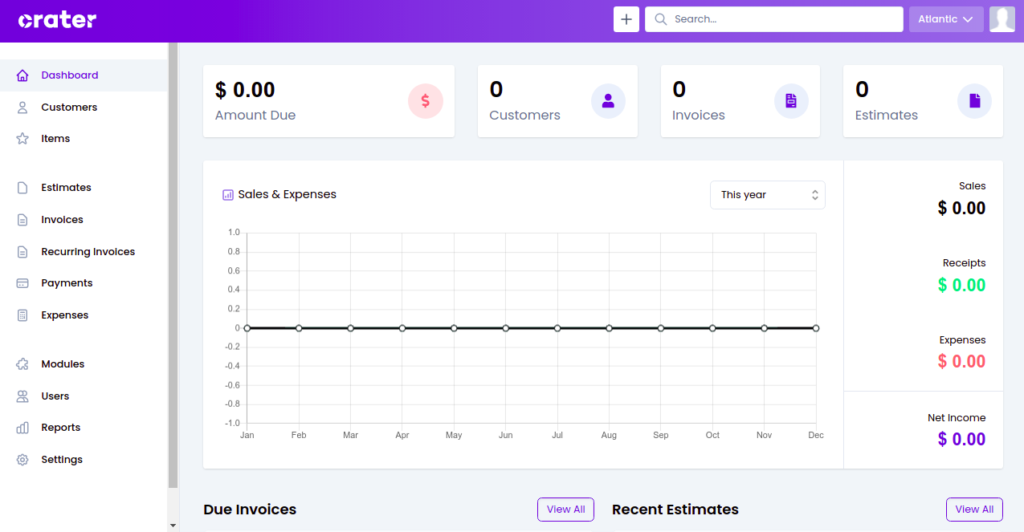
Select your company preferences and click on the Save & Continue button. You should see the Crater dashboard on the following page:
Conclusion
In this guide, we explained how to install Crater Invoicing Solution on Debian 11. You can now implement Crater in your organization and start managing taxes, invoices, and payments from the central location. Try it on dedicated hosting from Atlantic.Net!