GlassFish is an open-source platform used to host Java applications. It allows web developers to easily build scalable and portable Java applications. GlassFish also enables high availability clustering and load balancing and supports different user authentication methods such as file-based, LDAP, certificate, JDBC, digest, PAM, Solaris, and custom realms.
In this post, we will show you how to install GlassFish 7 on Fedora.
Step 1 – Install Java JDK
GlassFish is a Java-based application, so you will need to install Java JDK on your server. You can install it using the following command.
dnf install java-11-openjdk
After the Java installation, you can verify the Java version using the following command.
java -version
Output.
openjdk version "11.0.15" 2022-04-19
OpenJDK Runtime Environment 18.9 (build 11.0.15+10)
OpenJDK 64-Bit Server VM 18.9 (build 11.0.15+10, mixed mode, sharing)
Step 2 – Install GlassFish
First, create a dedicated user to run GlassFish.
useradd -m -d /opt/glassfish6 -U -s /bin/false glassfish
Next, download the latest version of GlassFish using the following command.
wget https://www.eclipse.org/downloads/download.php?file=/ee4j/glassfish/glassfish-7.0.5.zip -O glassfish-7.0.5.zip
Next, unzip the downloaded file with the following command.
unzip glassfish-7.0.5.zip
Next, move the extracted directory to the /opt directory.
mv glassfish7 /opt/glassfish
Next, change the ownership of the glassfish directory.
chown -R glassfish:glassfish /opt/glassfish
Step 3 – Create a Systemd Service File
Next, you will need to create a systemd service file to manage the GlassFish service via systemctl command.
nano /lib/systemd/system/glassfish.service
Add the following configurations.
[Unit]
Description = GlassFish Server v7
After = syslog.target network.target

[Service]
User=glassfish
ExecStart=/opt/glassfish/bin/asadmin start-domain
ExecReload=/opt/glassfish/bin/asadmin restart-domain
ExecStop=/opt/glassfish/bin/asadmin stop-domain
Type = forking

[Install]
WantedBy = multi-user.target
Save and close the file, then reload the systemd daemon to apply the changes.
systemctl daemon-reload
Now, start and enable the GlassFish service.
systemctl start glassfish
systemctl enable glassfish
You can also check the GlassFish status with the following command.
systemctl status glassfish
You will see the following output.
● glassfish.service - GlassFish Server v7
     Loaded: loaded (/usr/lib/systemd/system/glassfish.service; disabled; vendor preset: disabled)
     Active: active (running) since Sat 2023-06-24 06:58:42 EDT; 7s ago
    Process: 48226 ExecStart=/opt/glassfish/bin/asadmin start-domain (code=exited, status=0/SUCCESS)
   Main PID: 48246 (java)
      Tasks: 95 (limit: 4666)
     Memory: 334.8M
        CPU: 35.922s
     CGroup: /system.slice/glassfish.service
             └─48246 /usr/lib/jvm/java-11-openjdk-11.0.15.0.10-1.fc34.x86_64/bin/java -cp /opt/glassfish/glassfish/modules/glassfish.jar -DWALL_CLOCK_START=2023-06-24T>

Jun 24 06:58:24 fedora systemd[1]: Starting GlassFish Server v7...
Step 4 – Set GlassFish Admin Password
By default, the GlassFish default admin password is not set, so you will need to set it before login GlassFish via web browser. You can set the admin password using the following command.
sudo -u glassfish /opt/glassfish/bin/asadmin --port 4848 change-admin-password
You will be asked to provide the username.
Enter admin user name [default: admin]>admin
Provide the admin user and hit the Enter key. You will be asked to provide the admin password.
Enter the admin password>
Just press the Enter key. You will be asked to set a new password.
Enter the new admin password>
Enter the new admin password again>
Command change-admin-password executed successfully.
By default, GlassFish web-based login is disabled, so you will also need to enable it via command line.
sudo -u glassfish /opt/glassfish/bin/asadmin --port 4848 enable-secure-admin
Provide your admin password to enable the secure login.
Enter admin user name>  admin
Enter admin password for user "admin">
You must restart all running servers for the change in secure admin to take effect.
Command enable-secure-admin executed successfully.
Finally, restart the GlassFish service to apply the changes.
systemctl restart glassfish
Step 5 – Access GlassFish Web UI
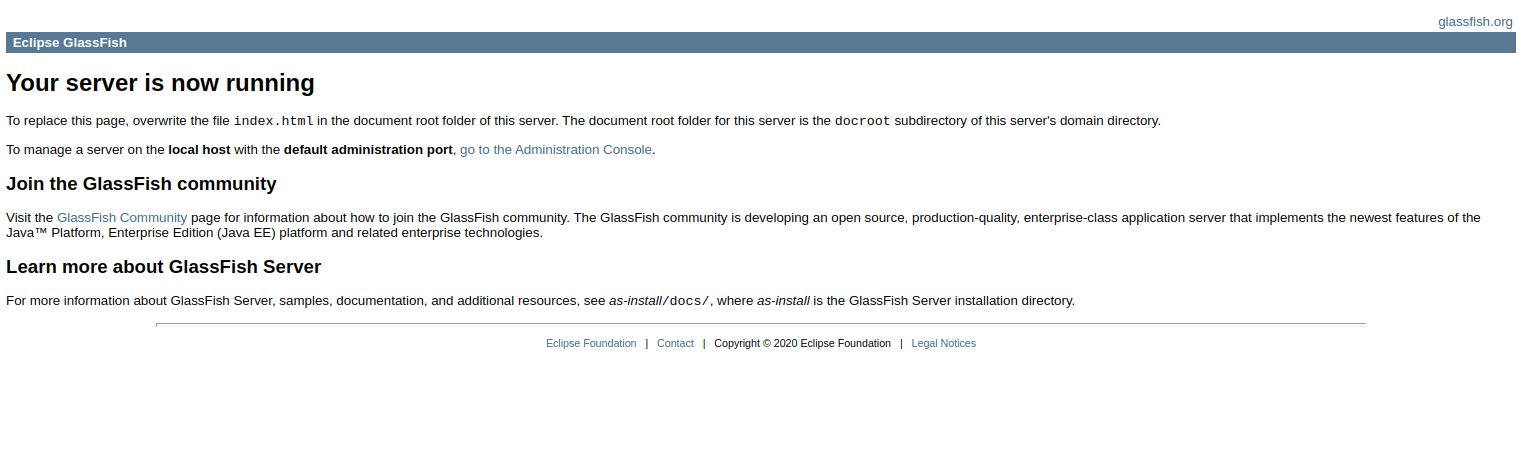
At this point, GlassFish is installed and configured. Now, open your web browser and access the GlassFish test page using the URL http://your-server-ip:8080.
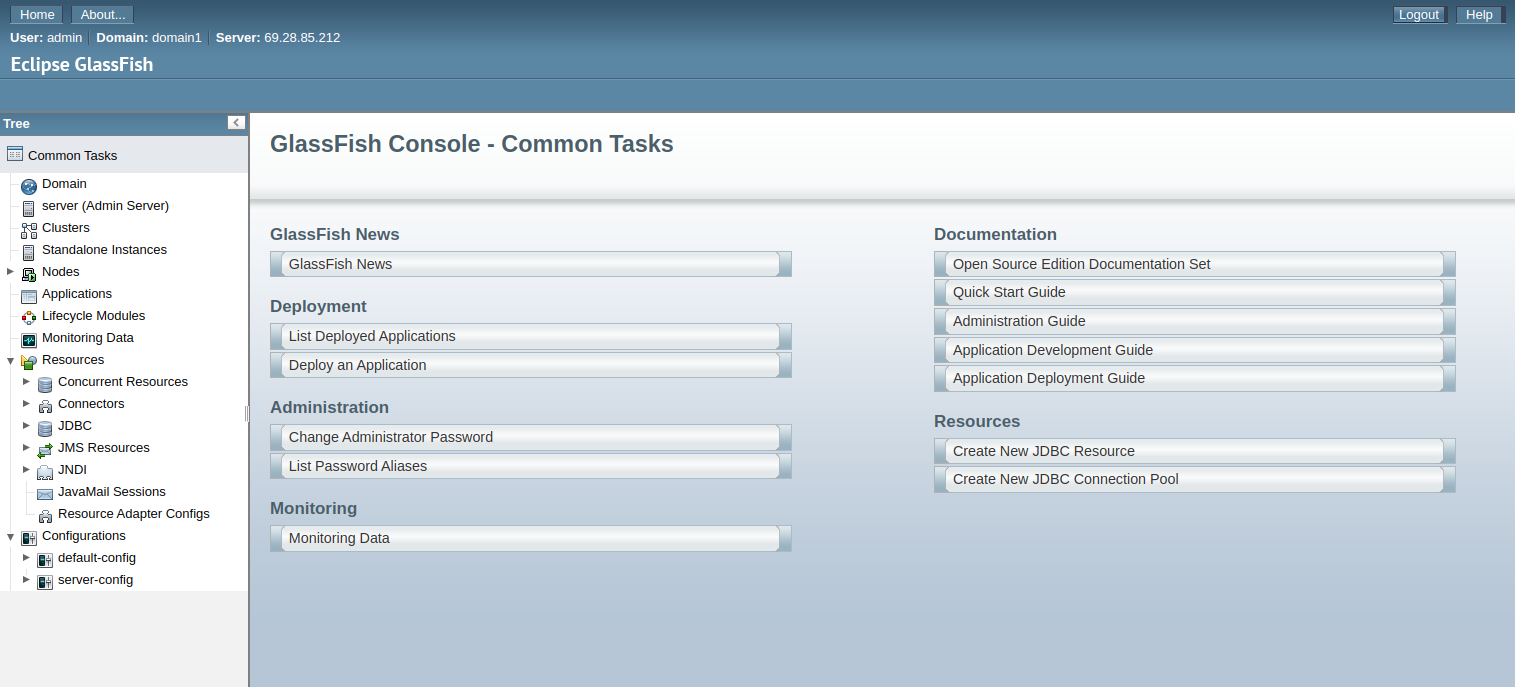
You can also access the GlassFish admin panel using the URL http://your-server-ip:4848. You should see the GlassFish login screen.
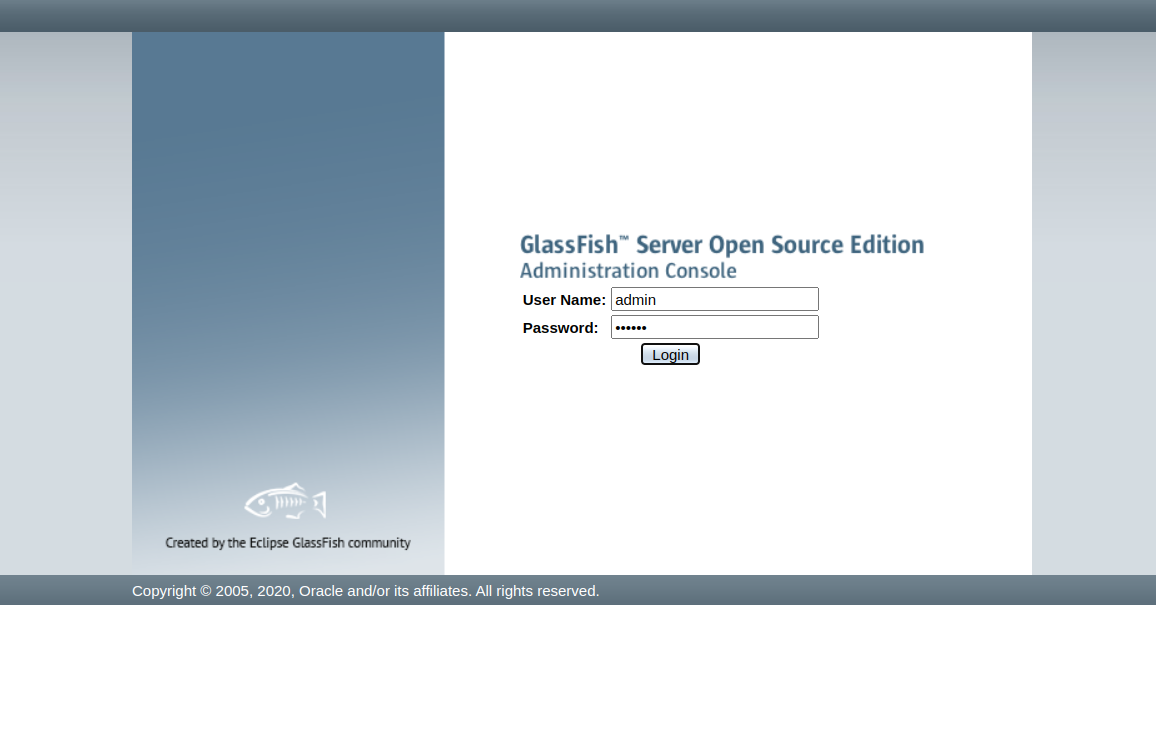
Provide your admin username and password and click on Login. You should see the GlassFish dashboard on the following screen.
Conclusion
In this post, we showed you how to install GlassFish on Fedora. We also set the GlassFish admin password and enable the secure login. You can now start deploying your Java application using the GlassFish platform. You can now deploy GlassFish on dedicated server hosting from Atlantic.Net!
* This post is for informational purposes only and does not constitute professional, legal, financial, or technical advice. Each situation is unique and may require guidance from a qualified professional.
Readers should conduct their own due diligence before making any decisions.