NextCloud is an open-source, self-hosted cloud storage solution used for creating and using file hosting services. It offers on-premise access and sync service that allows you to sync and share files in a secure way. NextCloud is very similar to other cloud storage solutions such as Dropbox, Google Drive, and One Drive. It provides a client for all major operating systems including Linux, macOS, Windows, iOS, and Android. If you are looking for a free cloud storage solution, then NextCloud is the best option for you.
In this post, we will show you how to install NextCloud on Oracle Linux 10.
Also Read
Real-World Case Study for HIPAA Storage and Sharing: Nextcloud & HIPAA Compliance
Step 1 – Install LAMP Stack
Before starting, you will need to install Apache, MariaDB, and PHP on your server. First, install the Apache and MariaDB server using the following command:
dnf install httpd mariadb-server -y
Next, install PHP 8 with other extensions using the following command:
dnf install php php-fpm php-curl php-gd php-intl php-json php-ldap php-mbstring php-mysqlnd php-xml php-zip php-opcache unzip curl -y
After the successful installation, start the Apache, php-fpm, and MariaDB services and enable them to start after the system reboot:
systemctl start httpd
systemctl enable httpd
systemctl start mariadb
systemctl enable mariadb
systemctl start php-fpm
systemctl enable php-fpm
Also Read
How to Install LAMP Server on Oracle Linux 8
Step 2 – Configure MariaDB Database for NextCloud
NextCloud uses MariaDB or MySQL to store its data, so you will need to create a database and user for NextCloud. First, log in to MariaDB with the following command:
mysql -u root -p
Once you are logged in, create a database and user with the following command:
CREATE DATABASE nextclouddb;
CREATE USER 'nextclouduser'@'localhost' IDENTIFIED BY 'securepassword';
Next, grant all the privileges to the NextCloud database using the following command:
GRANT ALL PRIVILEGES ON nextclouddb.* TO 'nextclouduser'@'localhost';
Next, flush the privileges and exit from the MariaDB shell using the command below:
FLUSH PRIVILEGES;
EXIT;
Step 3 – Install NextCloud
At the time of writing this tutorial, the latest version of NextCloud is 24. You can download it from their official download page using the following command:
wget https://download.nextcloud.com/server/releases/nextcloud-32.0.3.zip
Once the download is completed, extract the downloaded file to the Apache web root directory with the following command:
unzip nextcloud-32.0.3.zip -d /var/www/html/
Next, create a data directory for NextCloud with the following command:
mkdir -p /var/www/html/nextcloud/data
Next, change the ownership of NextCloud directory to Apache:
chown -R apache:apache /var/www/html/nextcloud/
Step 4 – Configure Apache for NextCloud
Next, you will need to create an Apache virtual host configuration file to host NextCloud using the Apache webserver.
nano /etc/httpd/conf.d/nextcloud.conf
Add the following code:
<VirtualHost *:80>
    ServerName nextcloud.example.com
    DocumentRoot /var/www/html/nextcloud
    ErrorLog /var/log/httpd/nextcloud_error.log
    CustomLog /var/log/httpd/nextcloud_access.log combined
</VirtualHost>
Save the file when you are finished, then restart the Apache service to apply the changes:
systemctl restart httpd
You can check the status of Apache using the following command;
systemctl status httpd
You should get the following output:
● httpd.service - The Apache HTTP Server
   Loaded: loaded (/usr/lib/systemd/system/httpd.service; disabled; vendor preset: disabled)
   Active: active (running) since Wed 2025-31-18 12:23:29 EDT; 6s ago
     Docs: man:httpd.service(8)
 Main PID: 4189 (httpd)
   Status: "Started, listening on: port 80"
    Tasks: 213 (limit: 23694)
   Memory: 26.4M
   CGroup: /system.slice/httpd.service
           ├─4189 /usr/sbin/httpd -DFOREGROUND
           ├─4190 /usr/sbin/httpd -DFOREGROUND
           ├─4191 /usr/sbin/httpd -DFOREGROUND
           ├─4192 /usr/sbin/httpd -DFOREGROUND
           └─4193 /usr/sbin/httpd -DFOREGROUND
Step 5 – Configure Firewall
If firewalld is installed and running on your server, then you will need to allow port 80 through firewall. You can allow it using the following command:
firewall-cmd --add-port=80/tcp --zone=public --permanent
Next, reload the firewall to apply the changes:
firewall-cmd --reload
Step 6 – Access NextCloud Dashboard
To access NextCloud, open your web browser and type the URL http://nextcloud.example.com. You should see the following screen:
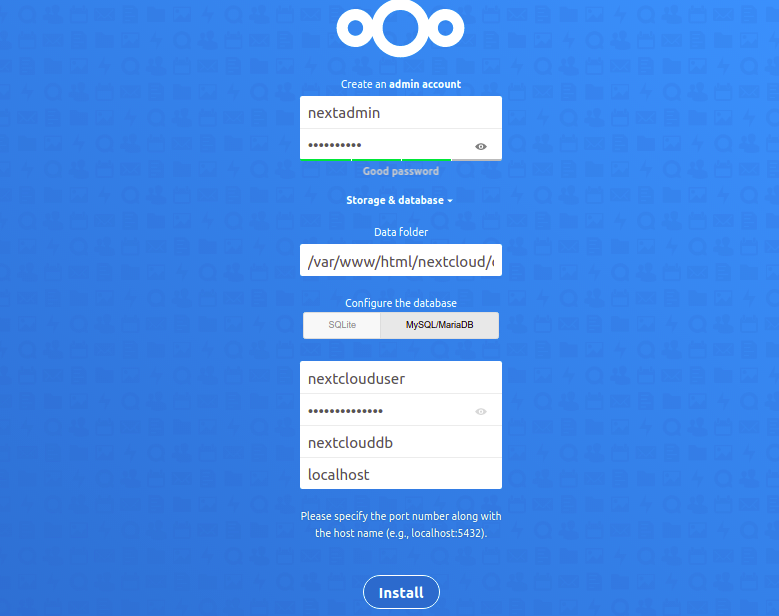
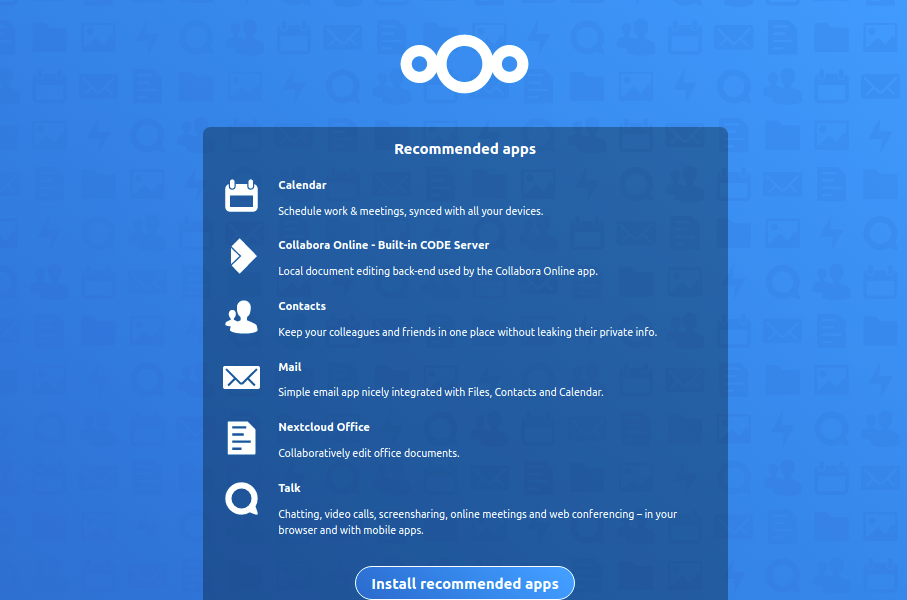
Provide your administrator account name and password, define your data directory and database credentials, and click on the Install button. You will be redirected to the Recommended apps installation login page:
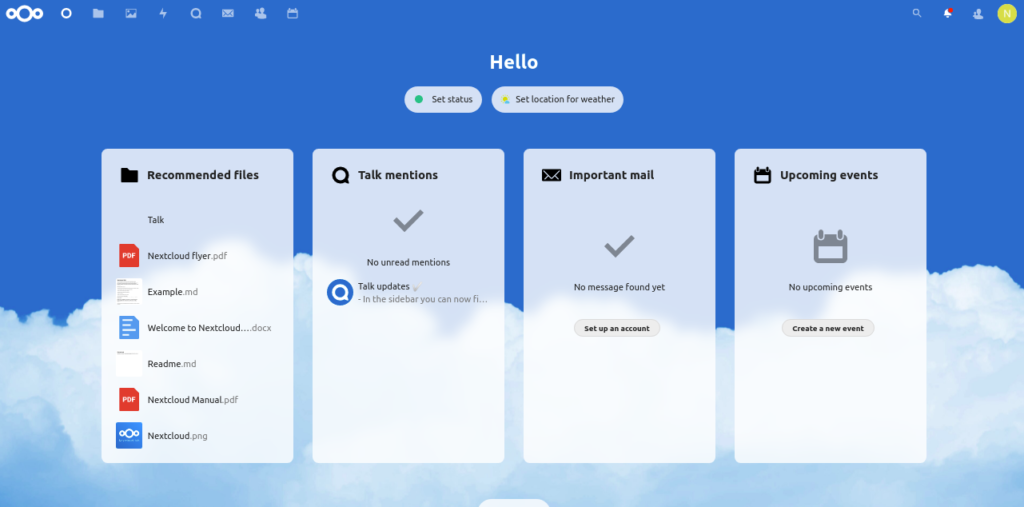
Click on the Install recommended apps. You should see the NextCloud dashboard:
Conclusion
In this post, you learned how to install NextCloud on Oracle Linux 10. You can now easily create and share documents, calendars, etc with your friends and family. Get started on dedicated hosting from Atlantic.Net.
* This post is for informational purposes only and does not constitute professional, legal, financial, or technical advice. Each situation is unique and may require guidance from a qualified professional.
Readers should conduct their own due diligence before making any decisions.