osTicket is an open-source and web-based customer support ticketing system used to scale and streamline customer service operations. It is written in PHP programming and developed by Enhancesoft. osTicket is simple and lightweight and allows you to organize, manage and archive support requests. It helps to define routing rules for tickets to send the tickets to the correct department.
Features
- Ticket Filters
- Customer Support Portal
- Ticket Filters
- Custom Fields, Columns, and Queues
- Agent Collision Avoidance
- Assign, Transfer, & Referral
In this post, we will show you how to install osTicket on Rocky Linux 8.
Step 1 – Install Apache, PHP, and MariaDB
First, install the Apache and MariaDB server package using the following command:
dnf install httpd mariadb mariadb-server -y
Next, install the EPEL and PHP Remi repositories with the following command:
dnf install https://dl.fedoraproject.org/pub/epel/epel-release-latest-8.noarch.rpm -y
dnf install https://rpms.remirepo.net/enterprise/remi-release-8.rpm -y
Next, disable the default PHP repository and enable the PHP Remi repository using the following command:
dnf module reset php
dnf module install php:remi-7.4 -y
Next, install PHP with other required extensions using the following command:
dnf install php php-pear php-cgi php-common php-curl php-gettext php-zip php-opcache php-apcu php-imap php-intl php-gd php-mysqli wget unzip -y
Once all the packages are installed, start and enable the Apache and MariaDB services:
systemctl enable --now httpd
systemctl enable --now mariadb
Step 2 – Configure MariaDB Database
First, secure the MariaDB installation and set the MariaDB root password using the following command:
mysql_secure_installation
Answer all the questions as shown below:
Enter current password for root (enter for none):
Set root password? [Y/n] y
New password:
Re-enter new password:
Remove anonymous users? [Y/n] y
Disallow root login remotely? [Y/n] y
Remove test database and access to it? [Y/n] y
Reload privilege tables now? [Y/n] y
Next, log in to the MariaDB server with the following command:
mysql -u root -p
Once you are logged in, create a database and user for osTicket:
CREATE DATABASE osticketdb;
GRANT ALL PRIVILEGES ON osticketdb.* TO osticketuser@localhost IDENTIFIED BY "securepassword";
Next, flush the privileges and exit from the MariaDB shell:
FLUSH PRIVILEGES;
EXIT;
Step 3 – Install osTicket
First, download the latest version of osTicket using the following command:
wget https://github.com/osTicket/osTicket/releases/download/v1.15.4/osTicket-v1.15.4.zip
Once the download is completed, unzip the downloaded file to the Apache web root directory:
unzip osTicket-v1.15.4.zip -d /var/www/html/osTicket
Next, copy the osTicket sample configuration file:
cp /var/www/html/osTicket/upload/include/ost-sampleconfig.php /var/www/html/osTicket/upload/include/ost-config.php
Next, change the ownership of the osTicket directory to apache:
chown -R apache:apache /var/www/html/osTicket
Step 4 – Configure Apache for osTicket
Next, you will need to create an Apache virtual host configuration file for osTicket. You can create it using the following command:
nano /etc/httpd/conf.d/osticket.conf
Add the following lines:
<VirtualHost *:80>
     ServerAdmin [email protected]
     DocumentRoot /var/www/html/osTicket/upload
     ServerName osticket.example.com
     <Directory /var/www/html/osTicket/>
          Options FollowSymlinks
          AllowOverride All
          Require all granted
     </Directory>

     ErrorLog /var/log/httpd/osticket_error.log
     CustomLog /var/log/httpd/osticket_access.log combined
</VirtualHost>
Save and close the file, then restart the Apache service to apply the changes:
systemctl restart httpd
You can now check the status of Apache using the command below:
systemctl status httpd
You should see the following output:
● httpd.service - The Apache HTTP Server
   Loaded: loaded (/usr/lib/systemd/system/httpd.service; enabled; vendor preset: disabled)
  Drop-In: /usr/lib/systemd/system/httpd.service.d
           └─php-fpm.conf
   Active: active (running) since Thu 2021-12-16 15:46:17 UTC; 9s ago
     Docs: man:httpd.service(8)
 Main PID: 12203 (httpd)
   Status: "Running, listening on: port 80"
    Tasks: 213 (limit: 23695)
   Memory: 26.4M
   CGroup: /system.slice/httpd.service
           ├─12203 /usr/sbin/httpd -DFOREGROUND
           ├─12204 /usr/sbin/httpd -DFOREGROUND
           ├─12205 /usr/sbin/httpd -DFOREGROUND
           ├─12206 /usr/sbin/httpd -DFOREGROUND
           └─12207 /usr/sbin/httpd -DFOREGROUND

Dec 16 15:46:17 rockylinux systemd[1]: httpd.service: Succeeded.
Dec 16 15:46:17 rockylinux systemd[1]: Stopped The Apache HTTP Server.
Dec 16 15:46:17 rockylinux systemd[1]: Starting The Apache HTTP Server...
Step 5 – Access osTicket Web Installation Wizard
Now, open your web browser and access the osTicket web installation wizard using the URL http://osticket.example.com. You should see the following page:
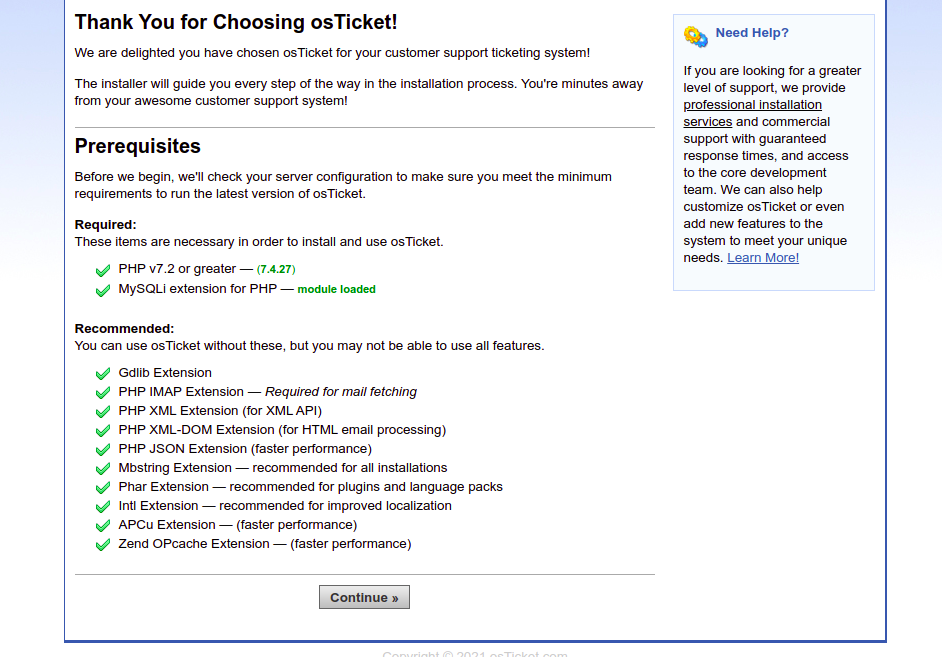
Make sure all the PHP extensions are installed, then click on the Continue button. You should see the following page:
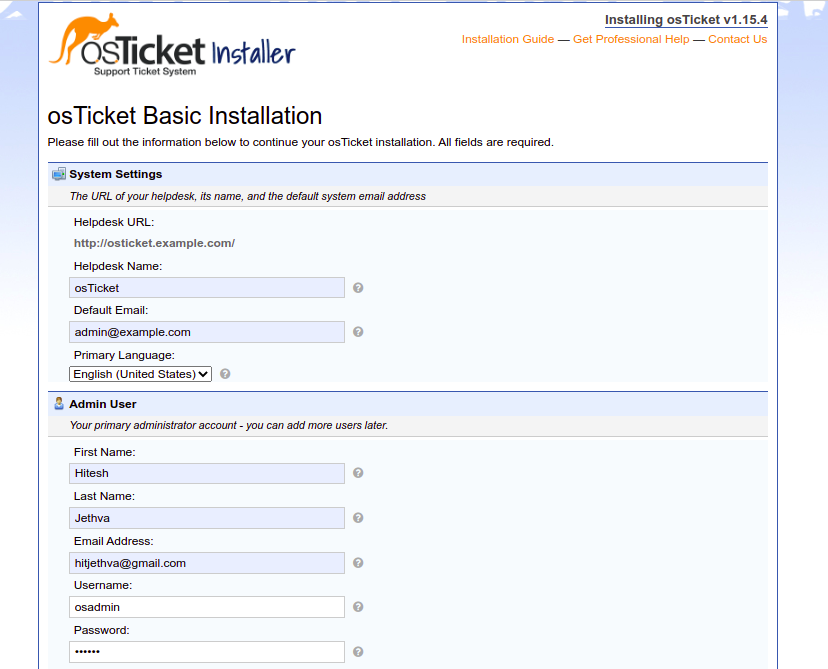
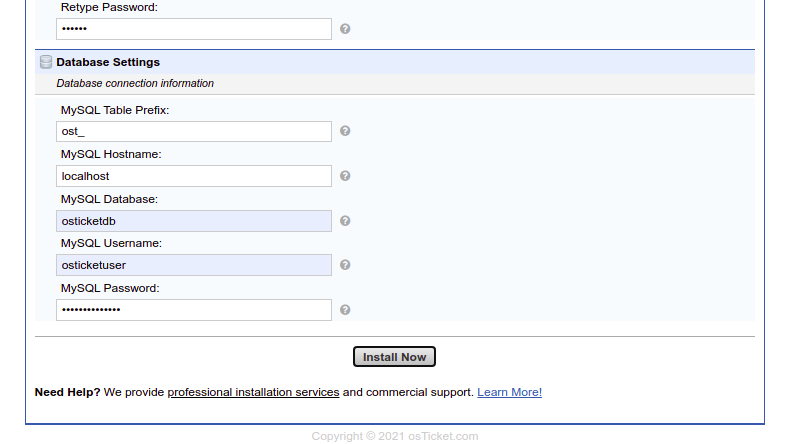
Provide your system settings, admin username, password, and database credentials, then click on the Install button. Once the installation is completed, you should see the following page:
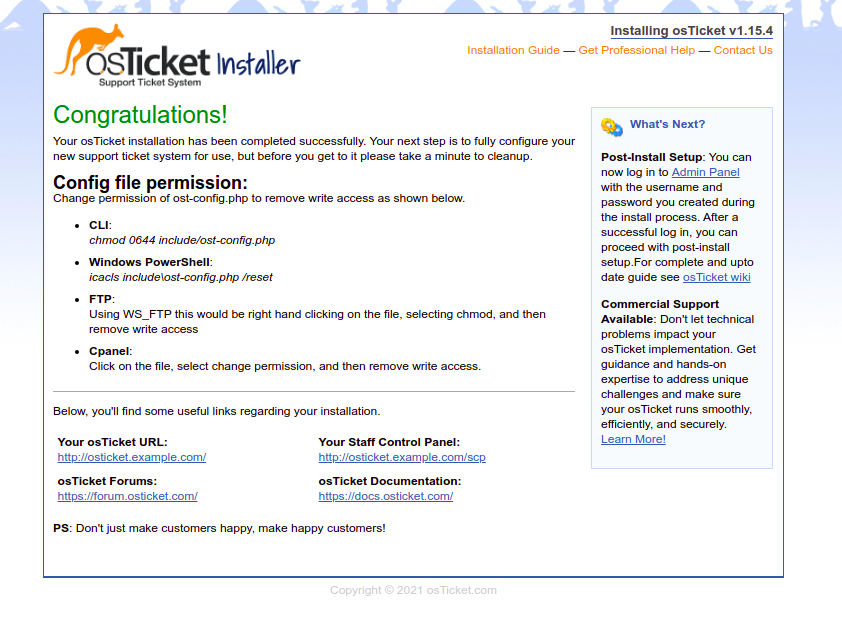
Now, open your terminal, change the permissions of the osTicket configuration file, and remove the setup directory:
chmod 0644 /var/www/html/osTicket/upload/include/ost-config.php
rm -rf /var/www/html/osTicket/upload/setup/
Next, go back to your web browser and click on the Your Staff Control Panel. You should see the following page:
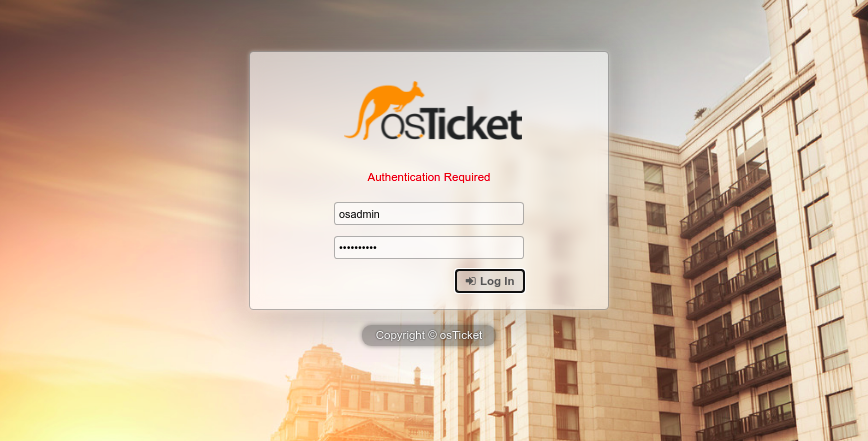
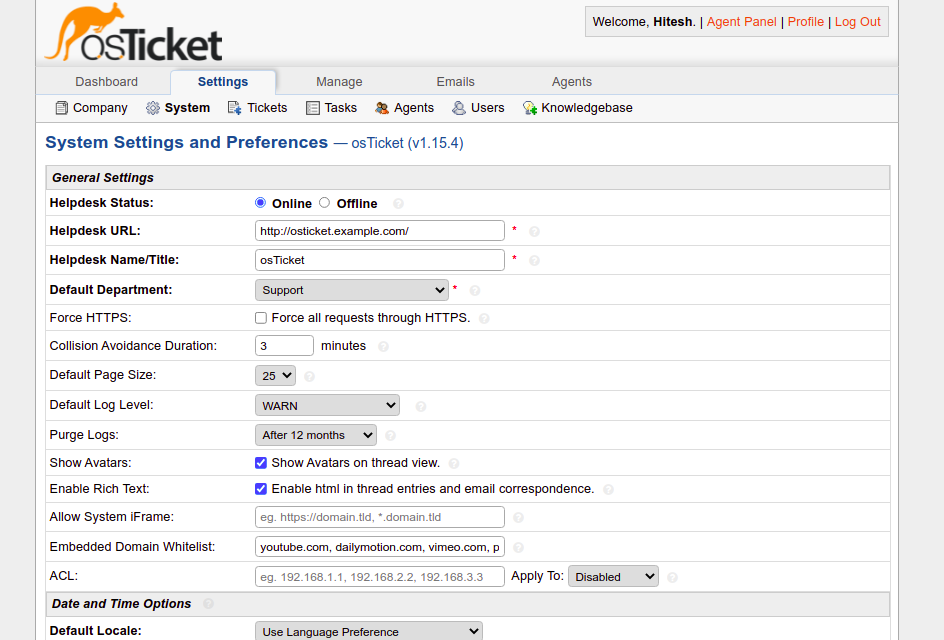
Provide your admin username and password and click on the Login button. You should see the osTicket dashboard on the following page:
Conclusion
Congratulations! You have successfully installed osTicket with Apache on Rocky Linux 8. You can now use osTicket in your organization to provide customer support. Try it on dedicated hosting from Atlantic.Net!