Table of Contents
- Prerequisites
- Step 1: Install Required Packages
- Step 2: Configure the Database
- Step 3: Install RVM and Ruby
- Step 4: Download and Configure Redmine
- Step 5: Install Ruby Gems and Initialize Redmine
- Step 6: Install and Configure Passenger with Apache
- Step 7: Configure Apache Virtual Host for Redmine
- Step 8: Access Redmine Web Interface
- Conclusion
Redmine is an open-source and cross-platform project management system. It is written in Ruby on Rails. Redmine allows you to manage multiple projects and sub-projects. It offers a web-based interface and other useful features including support for multiple languages, time tracking, role-based access control, and more. It supports various SCM integration including, SVN, CVS, Git, Mercurial, and more.
In this tutorial, we will show you how to install Redmine 6 on a Debian 12 server.
Prerequisites
Before installing Redmine 6 on Debian 12, make sure your server meets the following requirements:
- A Debian 12 server with sudo or root privileges.
- A valid domain name (e.g., redmine.example.com) pointing to your server’s IP address.
- At least 2 GB of RAM (4 GB recommended for smoother performance).
Step 1: Install Required Packages
Redmine requires a web server, database server, Ruby, and several development libraries to function properly. You can install all necessary dependencies with the following command:
apt install apache2 mariadb-server ruby gnupg2 curl ruby-dev build-essential libssl-dev libreadline-dev zlib1g-dev libcurl4-openssl-dev libmariadb-dev libpq-dev libaprutil1-dev libapr1-dev apache2-devOnce the installation is completed, start the Apache and MariaDB services.
systemctl start apache2
systemctl start mariadb
Step 2: Configure the Database
Redmine needs a database to store its data. We’ll use MariaDB, which is already installed.
Run the following command to open the MariaDB shell.
mariadbCreate a Redmine database and user.
CREATE DATABASE redminedb CHARACTER SET utf8mb4 COLLATE utf8mb4_general_ci;
CREATE USER redminedbuser@localhost IDENTIFIED BY 'password';
GRANT ALL ON redminedb.* TO redminedbuser@localhost WITH GRANT OPTION;
FLUSH PRIVILEGES;
Once done, exit the MariaDB shell:
EXIT;Your Redmine database and user are now ready.
Step 3: Install RVM and Ruby
Redmine is a Ruby on Rails application, so we need Ruby installed. We’ll use RVM (Ruby Version Manager) to install and manage Ruby versions.
1. Run the following command to import the RVM keys.
gpg2 --keyserver hkp://keyserver.ubuntu.com --recv-keys 409B6B1796C275462A1703113804BB82D39DC0E3 7D2BAF1CF37B13E2069D6956105BD0E739499BDBIf the above command fails, manually import the key with.
curl -sSL https://rvm.io/pkuczynski.asc | gpg2 --import -2. Download and install RVM.
curl -sSL https://get.rvm.io | bash -s stable
source /etc/profile.d/rvm.sh
3. Update RVM and install Ruby 3.3.
rvm pkg install openssl
rvm get head
rvm install ruby 3.3
rvm use ruby 3.3 --default
This sets Ruby 3.3 as the default version on your server.
Step 4: Download and Configure Redmine
With Ruby installed, we can now download and set up Redmine 6.0.3.
1. Create a directory where Redmine will be stored.
mkdir /var/lib/redmine2. Download the Redmine 6.0.3 tarball and extract it.
wget https://www.redmine.org/releases/redmine-6.0.3.tar.gz
tar -xvzf redmine-6.0.3.tar.gz
3. Copy the extracted files into the Redmine directory.
cp -r redmine-6.0.3/* /var/lib/redmine4. Copy the sample database configuration file.
cp /var/lib/redmine/config/database.yml.example /var/lib/redmine/config/database.yml5. Make www-data (Apache user) the owner of the Redmine directory.
chown -R www-data:www-data /var/lib/redmine6. Edit the file to match the database credentials you created earlier.
nano /var/lib/redmine/config/database.ymlUpdate the production section:
production:
  adapter: mysql2
  database: redminedb
  host: localhost
  username: redminedbuser
  password: "password"
  # Use "utf8" instead of "utfmb4" for MySQL prior to 5.7.7
  encoding: utf8mb4
  variables:
    # Recommended `transaction_isolation` for MySQL to avoid concurrency issues is
    # `READ-COMMITTED`.
    # In case of MySQL lower than 8, the variable name is `tx_isolation`.
    # See https://www.redmine.org/projects/redmine/wiki/MySQL_configuration
    tx_isolation: "READ-COMMITTED"
At this point, Redmine is downloaded and linked to your database. Next, you’ll install required Ruby gems and initialize the application.
Step 5: Install Ruby Gems and Initialize Redmine
Now that Redmine is configured, we need to install the required Ruby gems and set up the application.
1. Bundler is a Ruby tool used to manage application dependencies. Install it with the below command.
gem install bundler2. Move into the Redmine directory and install the required gems.
cd /var/lib/redmine
bundle config set --local without 'development test'
bundle install
This will download and install all necessary Ruby gems for Redmine, excluding development and test dependencies.
3. Redmine requires a secret token for session management. Generate it with:
bin/rake generate_secret_token4. Set up the database schema and load default data.
bin/rake db:migrate RAILS_ENV="production"
RAILS_ENV=production bundle exec rake redmine:load_default_data
During this step, you may be asked to choose a default language for Redmine’s interface. Once complete, your Redmine database is ready, and the application is fully initialized.
Step 6: Install and Configure Passenger with Apache
Redmine runs on Ruby, so we’ll use Passenger as the application server to integrate it with Apache.
1. Run the following command to install Passenger.
gem install passenger2. Then, install the Passenger Apache module automatically.
passenger-install-apache2-module --auto --languages ruby3. Run the below command to see a configuration snippet for Apache.
passenger-install-apache2-module --snippetOutput.
LoadModule passenger_module /usr/local/rvm/gems/ruby-3.3.9/gems/passenger-6.0.27/buildout/apache2/mod_passenger.so

<IfModule mod_passenger.c>
  PassengerRoot /usr/local/rvm/gems/ruby-3.3.9/gems/passenger-6.0.27
  PassengerDefaultRuby /usr/local/rvm/gems/ruby-3.3.9/wrappers/ruby
</IfModule>
Copy this snippet because you’ll need to add it to your Apache configuration in the next step.
Step 7: Configure Apache Virtual Host for Redmine
Now that Passenger is installed, let’s configure Apache to serve Redmine.
1. Create a new Apache configuration file for Redmine.
nano /etc/apache2/sites-available/redmine.confPaste the following configuration, replacing the Passenger paths with the ones you noted from the previous step.
<VirtualHost *:80>
  ServerName redmine.example.com
  ServerAdmin admin@example.com
  DocumentRoot /var/lib/redmine/public

<Directory "/var/lib/redmine/public">
  Require all granted
</Directory>

# Basic configuration for Passenger. Use the info gathered from running #the passenger command and update the lines below.

LoadModule passenger_module /usr/local/rvm/gems/ruby-3.3.9/gems/passenger-6.0.27/buildout/apache2/mod_passenger.so

<IfModule mod_passenger.c>
  PassengerRoot /usr/local/rvm/gems/ruby-3.3.9/gems/passenger-6.0.27
  PassengerDefaultRuby /usr/local/rvm/gems/ruby-3.3.9/wrappers/ruby
</IfModule>

# Allow access to Redmine's installation directory
<Directory /var/lib/redmine/public>
    Allow from all
    Options -MultiViews
    Require all granted
</Directory>
</VirtualHost>
2. Enable the Apache virtual host and restart the Apache.
a2ensite redmine.conf
systemctl restart apache2
Step 8: Access Redmine Web Interface
With Apache and Passenger configured, you can now access Redmine through your browser.
1. Go to your server’s domain or IP address. If everything is configured correctly, you’ll see the Redmine page.
http://redmine.example.com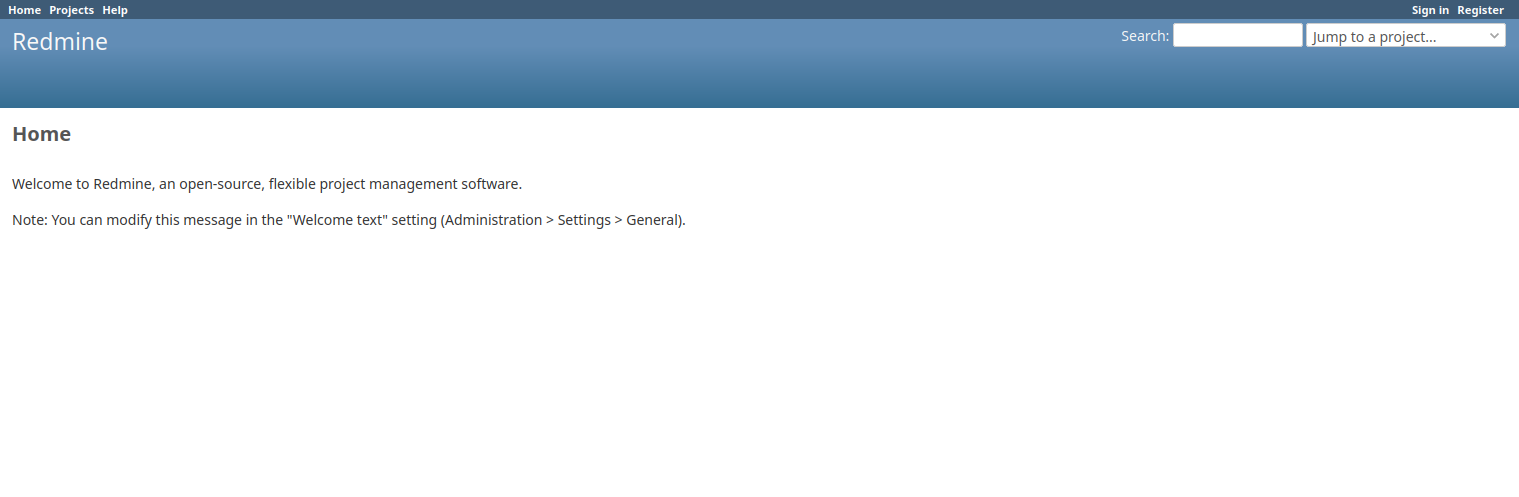
2. Click Sign in, and you will see the Redmine login page.
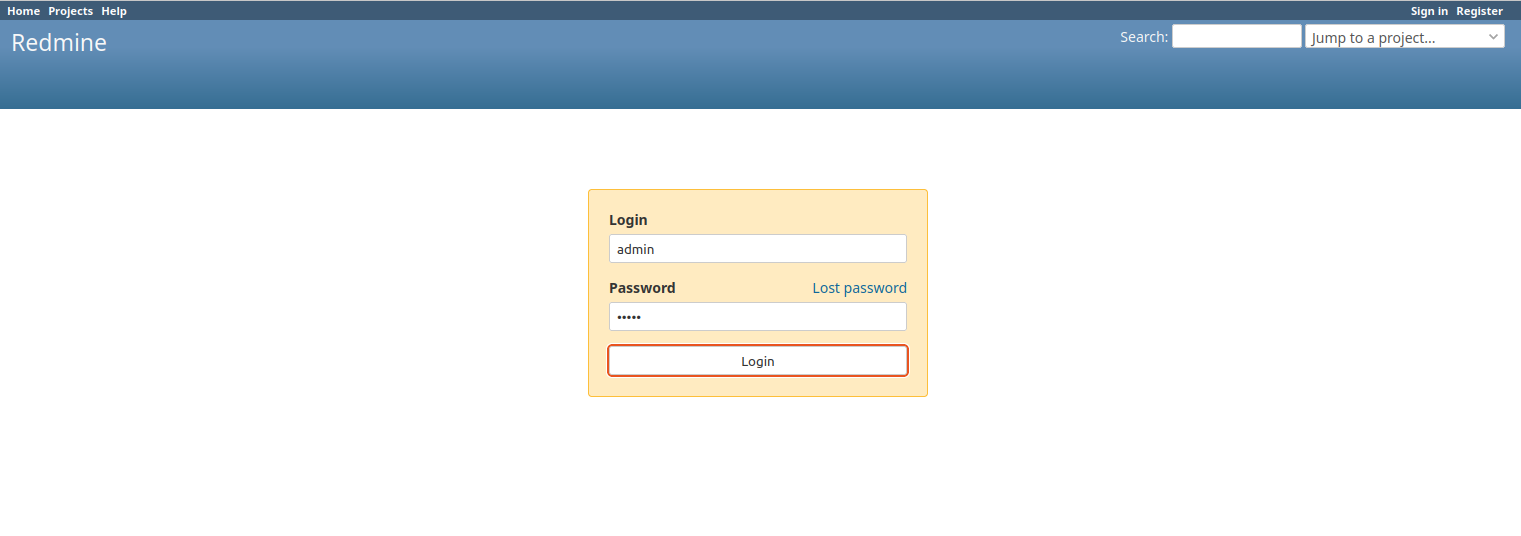
3. Enter the default administrator username admin, the password as admin and click Login. On first login, Redmine will prompt you to change the password.
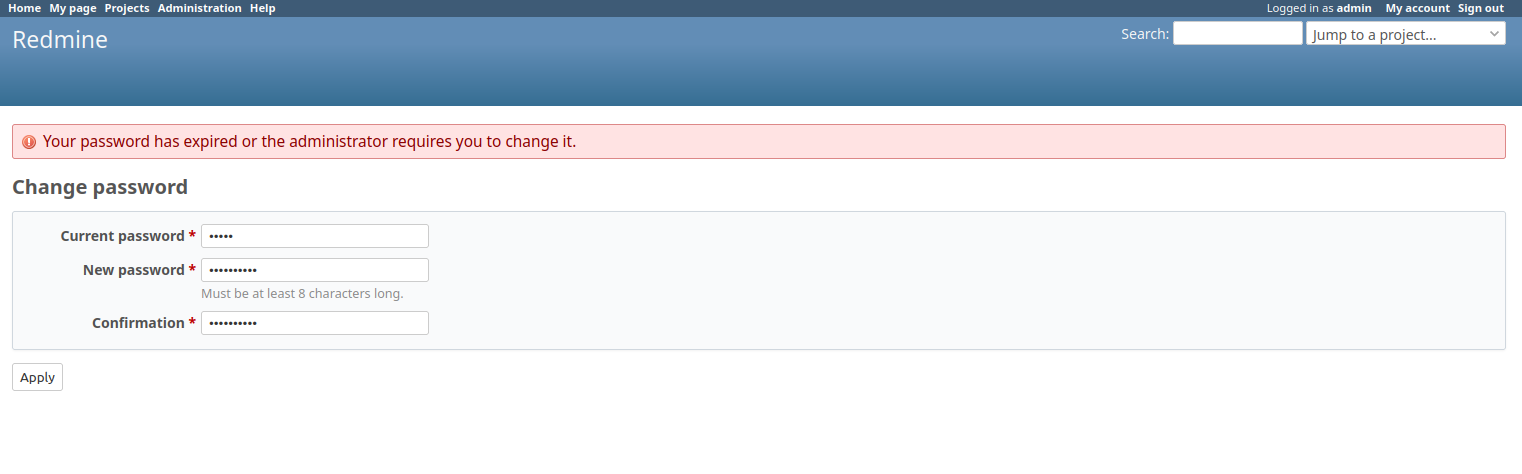
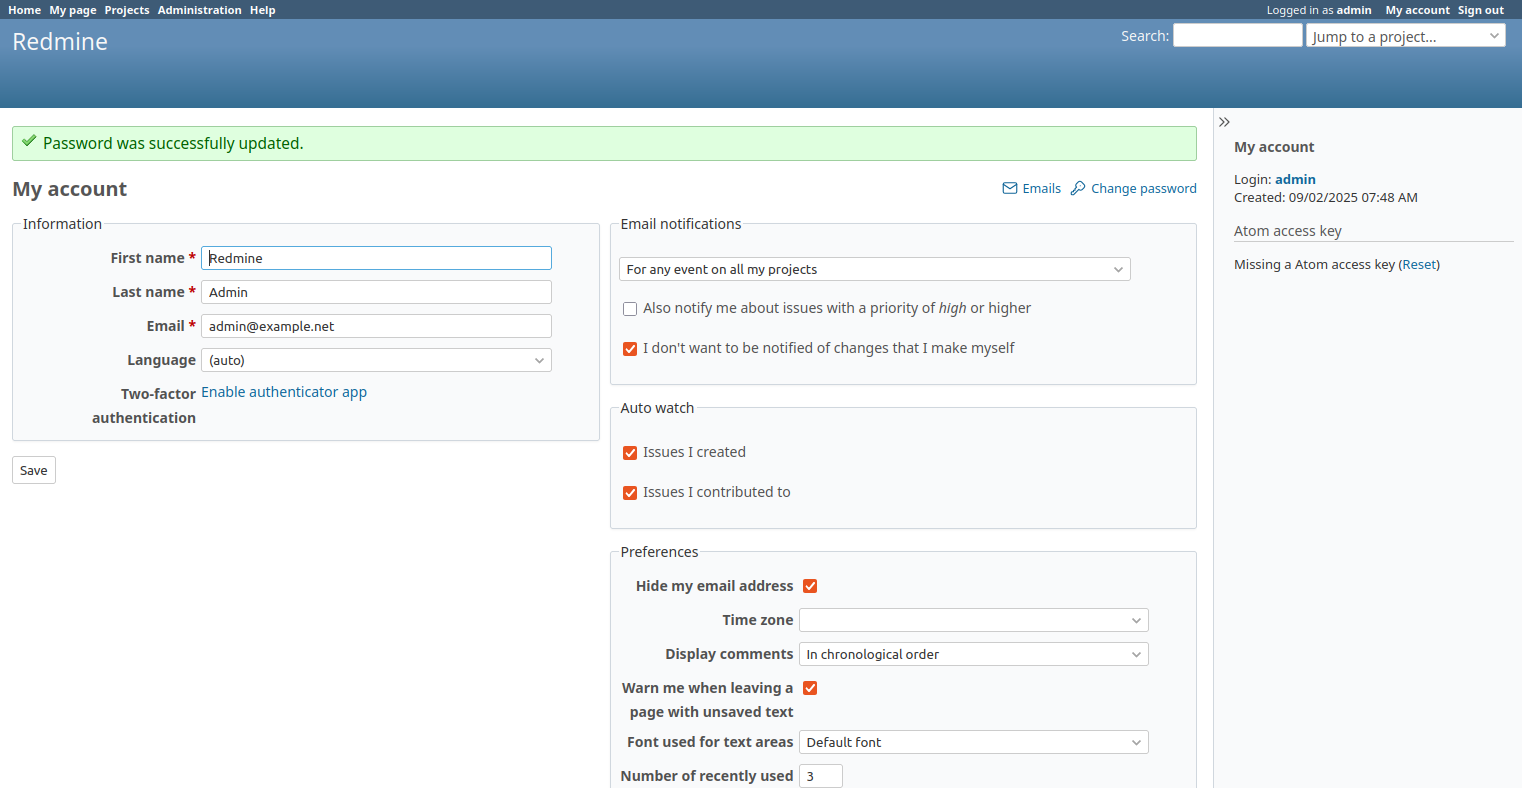
4. Enter the current password (admin) and set a new secure password. After applying the changes, you’ll be redirected to the Redmine dashboard, ready to start creating projects, users, and issues.
Conclusion
In this tutorial, you installed and configured Redmine 6 on Debian 12 with Apache, MariaDB, and Passenger. You created a database, set up Ruby using RVM, downloaded and configured Redmine, installed required gems, and integrated it with Apache to serve the application.
At this point, your Redmine instance is up and running. You can log in from your browser, create projects, add users, assign roles, and start tracking tasks.
* This post is for informational purposes only and does not constitute professional, legal, financial, or technical advice. Each situation is unique and may require guidance from a qualified professional.
Readers should conduct their own due diligence before making any decisions.