Introduction
This how-to will guide you on installing OpenVAS (Open Vulnerability Assessment System) on CentOS 7. The OpenVAS application is free and open source vulnerability scanner and vulnerability management solution. With the significant Vulnerabilities that have come out recently it is a good idea to have a scanner that can detect vulnerabilities on the systems that you manage.
Prerequisites
A server with CentOS 7 installed. If you do not have a server, why not fire up an extremely fast SSD cloud server from Atlantic.Net
Install OpenVAS Vulnerability Scanner on CentOS 7
We first need to install the Atomic repo with the following command:
wget -q -O - http://www.atomicorp.com/installers/atomic | sh
NOTE: If wget is not installed, install it with the following command:
yum install wget
Next we need to install bzip2, which is a high-quality data compressor that the OpenVAS setup uses. Install it with the following command:
yum install bzip2
Now we can install the OpenVAS application with the following command:
yum install openvas
Next we need to make some changes to the Redis configurations. You can use your favorite editor to change /etc/redis.conf In this example, we are using NANO.
nano /etc/redis.conf
Uncomment unixsocket /tmp/redis.sock and unixsocketperm 700. It should look similar to the following:
# Specify the path for the Unix socket that will be used to listen for
# incoming connections. There is no default, so Redis will not listen
# on a unix socket when not specified.
#
 unixsocket /tmp/redis.sock
 unixsocketperm 700
Once you have made the changes, you can save and exit.
Now we need to restart and enable redis with the following commands:
systemctl enable redis
systemctl restart redis
We can now run the openvas setup with the following command:
openvas-setup
At the start of the install, it will prompt you with the following question.
Once completed, this will be updated automatically every 24 hours

Select download method
* wget (NVT download only)
* curl (NVT download only)
* rsync

  Note: If rsync requires a proxy, you should define that before this step.
Downloader [Default: rsync]
Click enter for rsync or choose wget or curl, rsync is the recommended choice.
Note: Dependng on the time of day the install may fail due to rysnc not being able to connect to certain NVT’s, if this happens just run openvas-setup again
At the end of the install, it will prompt you with the following:
Step 3: Choose the GSAD admin users password.
The admin user is used to configure accounts,
Update NVT's manually, and manage roles.

Enter administrator username [Default: admin] :
Enter Administrator Password:
Verify Administrator Password:
You can use admin as the default user or set your own, and then provide a secure password and verify it again.
Now that OpenVAS is complete you can now test it by opening your browser and entering the URL https://your-server's-address:9392 You should get a page similar to the image below.
Note: If you do not know your IP address, run the following command:
ip addr show eth0
An example of running the command: ip addr show eth0 and getting 192.168.100.10 for the IP address.In our example, we would put
https://192.168.100.10:9392into our browser’s address bar.
 An example of running the command: ip addr show eth0 and getting 192.168.100.10 for the IP address.In our example, we would put
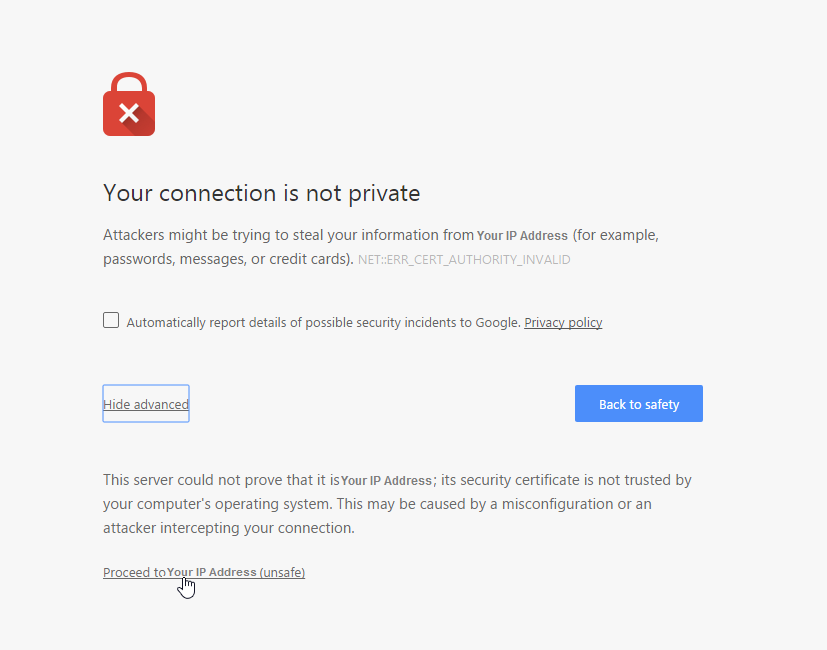 An example of the connection is not private page, click Advanced and click proceed to yoursite (unsafe)
Since there is no SSL installed on the server, we are going to get a warning that the connection is not private. Proceed to the website and we should get a page similar to the one below.
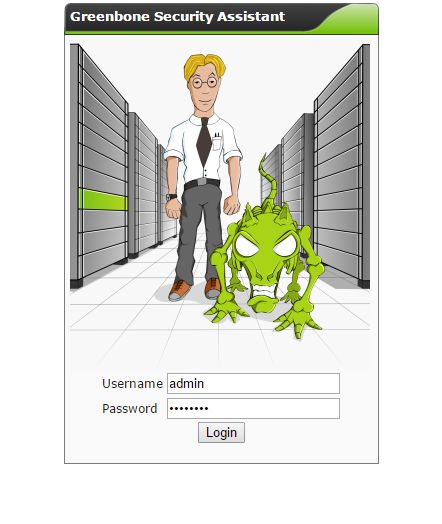 An example of the OpenVAS login page.
Login with the credentials you set up during the openvas-setup and you should get a page similar to the one below.
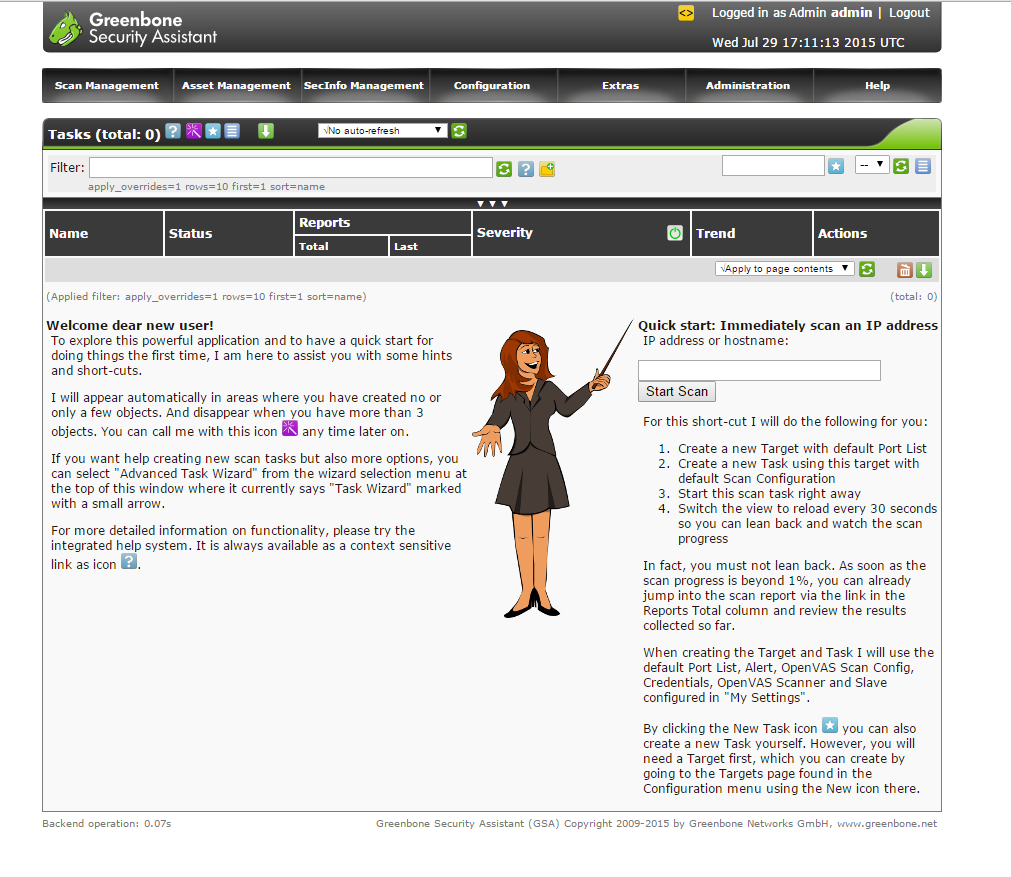 Follow the quick start guide to get started.
Congratulations you now have OpenVAS vulnerability scanner installed on CentOS 7. Use the quick start guide on the dashboard to get yourself started. Be sure to check out the OpenVAS site and join their mailing list.
 An example of running the command: ip addr show eth0 and getting 192.168.100.10 for the IP address.
Thank you for reading this how-to! Be sure to check back for more updates, and to learn more about our cloud hosting solutions, including HIPAA compliant disaster recovery services.
* This post is for informational purposes only and does not constitute professional, legal, financial, or technical advice. Each situation is unique and may require guidance from a qualified professional.
Readers should conduct their own due diligence before making any decisions.