Verified and Tested 10/2/15
Introduction
In this How-To, we will walk you through the install and configuration of Drupal on Fedora 23 with Apache. Drupal is a free content management system that will facilitate the way your content is organized and managed. It has a user-friendly interface that makes customizing your content easy and simple with little effort.
Prerequisites
– You need a Fedora 23 server that is configured with a static IP address.
– You will also need to have a LAMP(Linux, Apache, MySQL, PHP) stack platform that can be installed by clicking here if you don’t already have it.
Installing Drupal on Fedora 23 with Apache
To get started, log in to your Fedora 23 server via SSH or Console. If you are using the Atlantic.Net cloud service, note that they are setup with minimal installations to avoid having unnecessary packages from being installed and never used. If some software packages that you’re used to using aren’t installed by default, feel free to install them as needed.
You may need to install tar and wget for this tutorial; you can do so with the following command:
dnf install tar wget
Let’s make sure that your server is fully up-to-date so we can complete the preparation.
dnf update
Creating a Database and User for Drupal on Fedora 23
For Drupal to function, we must create a Database in MySQL. Let us begin access MySQL with the following command:
mysql -u root -p
Now, we must first begin creating the Database that Drupal will use. This can be accomplished with the following command replacing yourdbname with your database name:
CREATE DATABASE yourdbname;
With the Database created we must now create a user so it can access the Database.This can be accomplished with the following command replacing yourdrupaluser with your desired username and replace yourdrupalpassword with your desired password.
CREATE USER yourdrupaluser@localhost IDENTIFIED BY 'yourdrupalpassword';
Furthermore, we must grant Database access to your recently created user with the following command:
GRANT ALL PRIVILEGES ON yourdbname.* TO yourdrupaluser@localhost;
Additionally, we must refresh MySQL so the system can flush the newly added privileges and for the changes to take effect, then exit your session. This can be accomplished with the following commands:
FLUSH PRIVILEGES;
exit
Installing Drupal on Fedora 23
Now, we must install the following PHP dependencies so that Drupal can function properly when we install it. This can be accomplished with the following command:
dnf install php-gd php-xml php-pear php-fpm php-mbstring
We need to edit the php.ini file and set mbstring.http_input and mbstring.http_output to pass.
nano /etc/php.ini
Look for mbstring.http_input and mbstring.http_output, remove the semicolon in the front and add “= pass” It should look similar to the below example.
; Use of this INI entry is deprecated, use global input_encoding instead.
; http input encoding.
; mbstring.encoding_traslation = On is needed to use this setting.
; If empty, default_charset or input_encoding or mbstring.input is used.
; The precedence is: default_charset < intput_encoding < mbsting.http_input
; http://php.net/mbstring.http-input
mbstring.http_input = pass

; Use of this INI entry is deprecated, use global output_encoding instead.
; http output encoding.
; mb_output_handler must be registered as output buffer to function.
; If empty, default_charset or output_encoding or mbstring.http_output is used.
; The precedence is: default_charset < output_encoding < mbstring.http_output
; To use an output encoding conversion, mbstring's output handler must be set
; otherwise output encoding conversion cannot be performed.
; http://php.net/mbstring.http-output
mbstring.http_output = pass
Since we installed new packages we need to restart apache:
sudo systemctl restart httpd.service
Since we installed the unzip tool in the beginning of this how-to, we can safely run the following command safely:
wget http://ftp.drupal.org/files/projects/drupal-7.41.tar.gz
After we have installed the requires dependencies, we can continue with the installation of Drupal. Run the following command to unzip the Drupal package that we downloaded.
tar -zxvf drupal-7.41.tar.gz
Since, Drupal is currently in the root directory, let us move the folder and rename the location to drupal with the following command:
cp -r ~/drupal-7.41/* /var/www/html
Furthermore, with the following command we can apply the appropriate permissions for the Drupal directory that was just created.
chown -R apache:apache /var/www/html/
Now to finalize the configurations on the servers side, we must change the create a settings file in the sites default directory. So let’s change to that directory with the following command:
cd /var/www/html/sites/default/
Copy the default.settings.php file and rename it to settings.php with the following command:
cp -p default.settings.php settings.php
Drupal’s Web Configuration on Fedora 23
Your server is now configured correctly to run the web-based installation by going to the following:
http://server_domain_or_IP
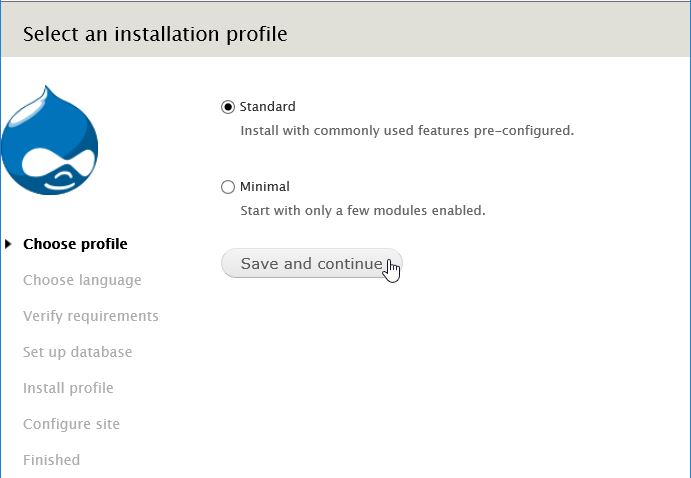
You will see the Drupal installation procedure’s initial page. Choose standard and click “Save and continue.”

This is the Drupal’s web installation wizard on Fedora 23
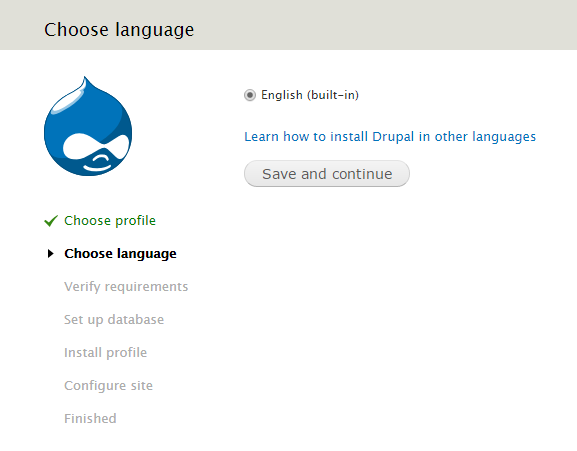
Next select English, or follow Drupal’s instructions on adding a new language. Click “Save and continue”.

Choose the language of your choice
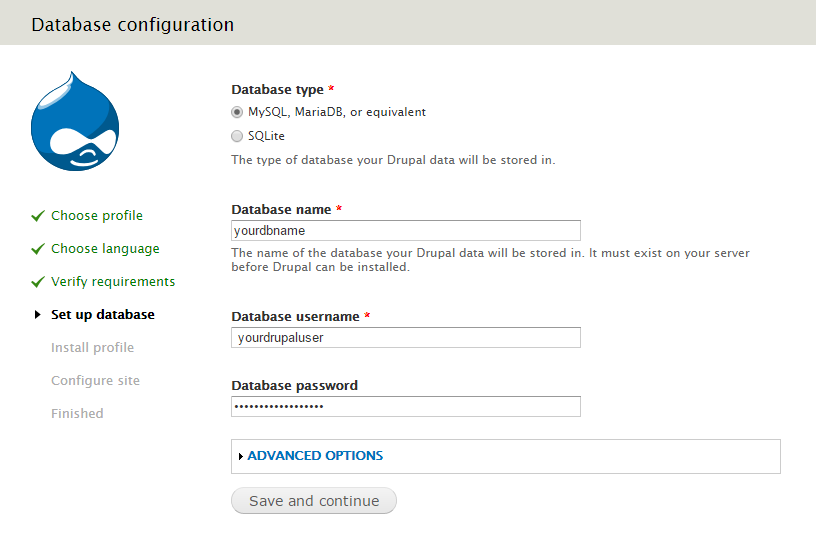
It should skip past “Verify requirements” and you should be on the screen to set up your database. Enter in your information that you set up earlier and click “Save and continue.”

Enter in your Database information that you set up earlier
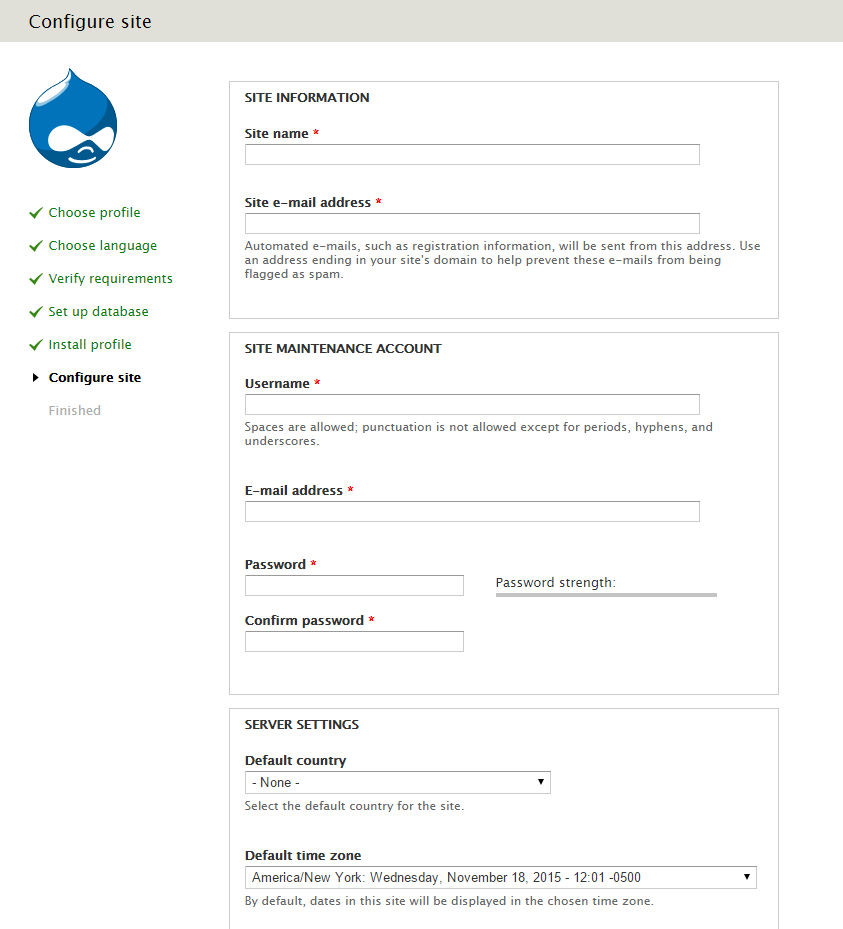
You can now enter your information for the site details.

Enter in your site details
What’s Next?
Congratulations! You have just installed and configured Drupal with Apache on your Fedora 23 Cloud Server. Thank you for following along in this How-To and check back with us for any new updates, and learn more about our reliable HIPAA-compliant cloud hosting solutions.