Table of Contents
- Introduction
- Prerequisites
- Verifying your Private IP range with our Cloud Control Panel
- Step 1 - Log Into Cloud.Atlantic.Net
- Step 2 - Find your Private IP Range.
- Adding the Private IP address to your Ubuntu Server
- Step 3 - Install Net-Tools
- Step 4 - Check Present Status of Eth1
- Step 5 - Update Netplan Config
- Step 6 - Debug the Netplan config
- Step 7 - Apply Netplan
Verified and Tested 01/13/2023
Introduction
In this How-to, we will learn how to configure a private IP address on an Ubuntu Server.
Private networking is a great way to keep the traffic between your servers internal and not accessible publicly. It allows you to communicate between your servers without using your Cloud bandwidth as well. It is also faster than public traversal as it will not require leaving the network to reach the destination server. At this time, private networking within our Cloud will only be able to communicate with same-region servers.
Prerequisites
- A server with Ubuntu. If you do not have a server already, you can spin up any of our affordable VPS hosting solutions in under 30 seconds.
Verifying your Private IP range with our Cloud Control Panel
First, we will need to determine what you are allocated for your private IP range. If you have a Cloud server with us, I will go through how to find the Private IP address range you are allocated. If you do not know your private IP range or address, please consult your network administrator.
Step 1 – Log Into Cloud.Atlantic.Net
Sign in to your Cloud Control Panel:
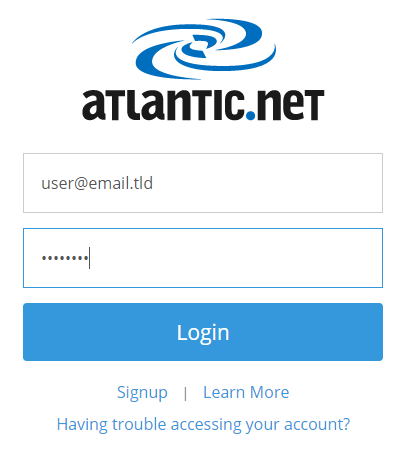 Signing into Cloud Control Panel
Step 2 – Find your Private IP Range.
Once logged in, you will see “Private IPs” listed on the left side.
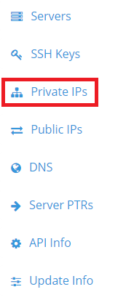
You will see the IP range allocated to your account on the Private IP page. Under “IP” are the Private IPs available to use.
For example:

Once you have the private IP range to use, we will add it to our Ubuntu server.
Adding the Private IP address to your Ubuntu Server
Step 3 – Install Net-Tools
Ensure you have Ubuntu Net-Tools installed on the Server
sudo apt install net-tools
Step 4 – Check Present Status of Eth1
You can check the current status of your network interfaces by using
ip addr show
From the output below, you can see that my eth1 interface is currently DOWN.
eth0: <BROADCAST,MULTICAST,UP,LOWER_UP> mtu 1500 qdisc fq_codel state UP group default qlen 1000
 link/ether 00:00:45:1c:5e:59 brd ff:ff:ff:ff:ff:ff
 inet 69.28.94.89/22 brd 69.28.95.255 scope global eth0
   valid_lft forever preferred_lft forever
 inet6 fe80::200:45ff:fe1c:5e59/64 scope link
   valid_lft forever preferred_lft forever

eth1: <BROADCAST,MULTICAST> mtu 1500 qdisc fq_codel state DOWN group default qlen 1000
 link/ether 00:00:0a:1c:5e:59 brd ff:ff:ff:ff:ff:ff
The interface state can be changed to up or down by using the command:
ifconfig eth1 up
ifconfig eth1 down
Step 5 – Update Netplan Config
Log on to your server and use your text editor to open /etc/netplan/01-netcfg.yaml .In this tutorial, we will be using nano.
nano /etc/netplan/01-netcfg.yaml
We will need to add the private IP address as an additional IP. You can add your private IP address below the existing public IP address as shown below:
Note: Netplan uses YAML so you must adhere to the writing standards of YAML
network:
 version: 2
 renderer: networkd
 ethernets:
   eth0:
     addresses:
       - 69.28.94.89/22
     gateway4: 69.28.92.1
     nameservers:
       addresses:
         - 209.208.127.65
         - 209.208.25.18
   eth1:
      dhcp4: yes
      addresses:
        - 10.126.130.10/24
Step 6 – Debug the Netplan config
Save and close the file, then verify the configuration with the following command:
netplan --debug generate
If everything is fine, you should get the following output:
root@turbogeek:/etc/systemd/network# netplan --debug generate

DEBUG:command generate: running ['/lib/netplan/generate']
** (generate:3802655): DEBUG: 21:59:17.127: starting new processing pass
** (generate:3802655): DEBUG: 21:59:17.128: We have some netdefs, pass them through a final round of validation
** (generate:3802655): DEBUG: 21:59:17.129: eth1: setting default backend to 1
** (generate:3802655): DEBUG: 21:59:17.129: Configuration is valid
** (generate:3802655): DEBUG: 21:59:17.129: eth0: setting default backend to 1
** (generate:3802655): DEBUG: 21:59:17.129: Configuration is valid
** (generate:3802655): DEBUG: 21:59:17.130: Generating output files..
** (generate:3802655): DEBUG: 21:59:17.130: openvswitch: definition eth0 is not for us (backend 1)
** (generate:3802655): DEBUG: 21:59:17.130: NetworkManager: definition eth0 is not for us (backend 1)
** (generate:3802655): DEBUG: 21:59:17.130: openvswitch: definition eth1 is not for us (backend 1)
** (generate:3802655): DEBUG: 21:59:17.130: NetworkManager: definition eth1 is not for us (backend 1)
(generate:3802655): GLib-DEBUG: 21:59:17.131: posix_spawn avoided (fd close requested)
(generate:3802655): GLib-DEBUG: 21:59:17.143: posix_spawn avoided (fd close requested)
Step 7 – Apply Netplan
Next, restart NetPlan to apply the changes:
netplan apply
You can now verify your new IP address using the following command:
ip addr
You should get the following output:
2: eth0: <BROADCAST,MULTICAST,UP,LOWER_UP> mtu 1500 qdisc fq_codel state UP group default qlen 1000
   link/ether 00:00:45:1c:5e:59 brd ff:ff:ff:ff:ff:ff
   inet 69.28.94.89/22 brd 69.28.95.255 scope global eth0
      valid_lft forever preferred_lft forever
   inet6 fe80::200:45ff:fe1c:5e59/64 scope link
      valid_lft forever preferred_lft forever
3: eth1: <BROADCAST,MULTICAST,UP,LOWER_UP> mtu 1500 qdisc fq_codel state UP group default qlen 1000
   link/ether 00:00:0a:1c:5e:59 brd ff:ff:ff:ff:ff:ff
   inet 10.126.130.10/24 brd 10.126.130.255 scope global eth1
      valid_lft forever preferred_lft forever
   inet6 fe80::200:aff:fe1c:5e59/64 scope link
      valid_lft forever preferred_lft forever
You have successfully added a Private IP to your Ubuntu Server! Don’t forget to check out our many other articles and keep checking back for more. Atlantic.Net has a selection of industry-leading cloud servers for a wide variety of business needs.
* This post is for informational purposes only and does not constitute professional, legal, financial, or technical advice. Each situation is unique and may require guidance from a qualified professional.
Readers should conduct their own due diligence before making any decisions.