Backing up your website regularly is a very important task for any webmaster. You should always have a recent backup of your website to prevent data loss in case something goes wrong, but backing up and restoring the WordPress website manually can be difficult for a beginner user.
There are several ways to back up and restore a WordPress website. However, a simple and easy way is to use the UpdraftPlus backup plugin to backup and restore a WordPress website. UpdraftPlus can automate the backup and copy it to a cloud-based drive, such as Google Drive, Dropbox, and more.
In this tutorial, we will show you how to back up and restore a WordPress website with the UpdraftPlus WordPress plugin.
Prerequisites
- A Linux VPS with WordPress installed on the Atlantic.Net Cloud Platform
Step 1 – Install UpdraftPlus Plugin
UpdraftPlus is the world’s highest-ranking and most popular scheduled backup plugin; it allows you to back up your files and database backups into the local or cloud storage and restore with a single click!. This free plugin supports various remote cloud storage options including Dropbox, Google Drive, Amazon S3, UpdraftVault, Rackspace Cloud, FTP, DreamObjects, and Openstack Swift.
Follow the below steps to install the UpdraftPlus plugin:
1 – Go to the WordPress admin dashboard => Plugins => Add New and type UpdraftPlus in search bar. You should see the following screen:
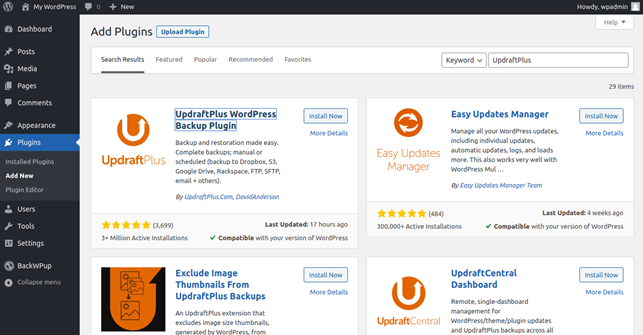
2 – Select the UpdraftPlus WordPress Backup Plugin and click on the Install Now button to install the plugin. Once the plugin has been installed, you should see the following screen:
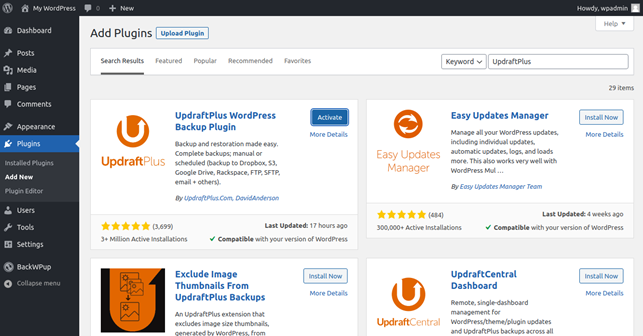
3 – Click on the Activate button to activate the plugin.
Step 2 – Create a WordPress Backup with UpdraftPlus
At this point, the UpdraftPlus backup and restore plugin is installed. Next, you will need to configure UpdraftPlus plugin settings.
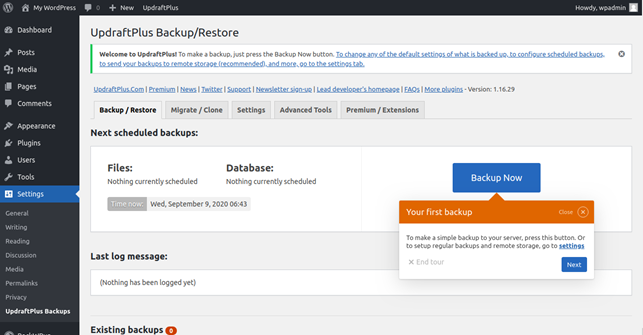
On the WordPress admin dashboard, click on the UpdraftPlus Backups in the left pane. You should see the following screen:
Next, click on the Settings tab. You should see the following screen:
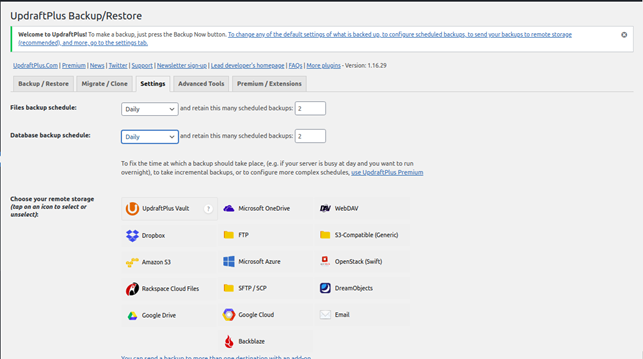
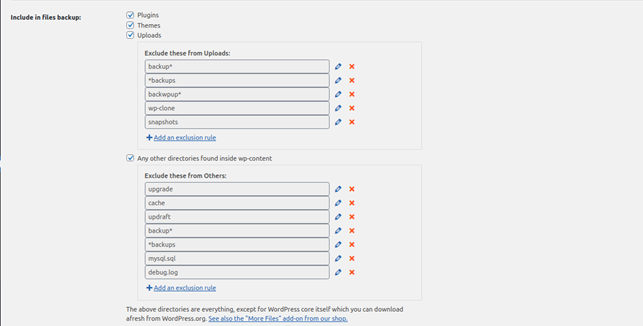
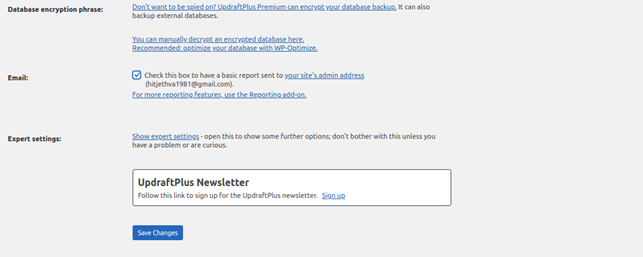
Here, select your database and file backup schedule, choose your remote storage, select include and exclude a directory, check the email checkbox and click on the Save Changes button to save the configuration. You should see the Dropbox storage authentication screen:
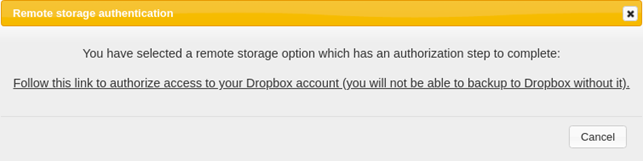
Click on the link. You will be redirected to the Dropbox authentication screen:
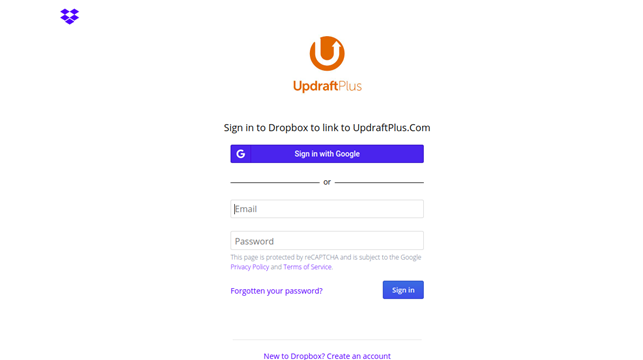
Provide your Dropbox username, password, and click on the Sign-in button. You should see the UpdraftPlus website where you need to click on the ‘Complete Setup’ button to finish the setup.
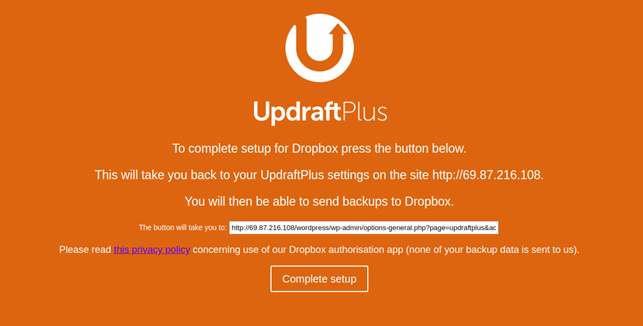
Click on the Complete Setup button to finish the setup.
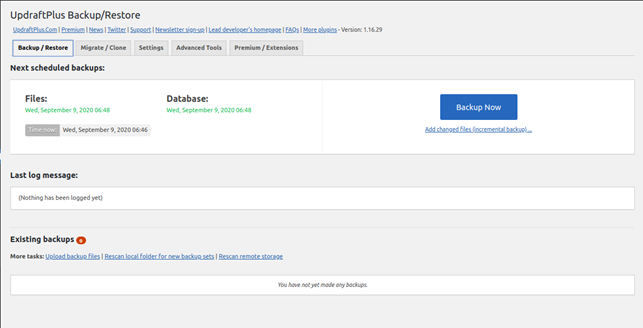
Now, click on the Backup / Restore tab to create a backup of your WordPress website. You should see the following screen:
Click on the Backup Now button to start the backup process. You should see the following screen:
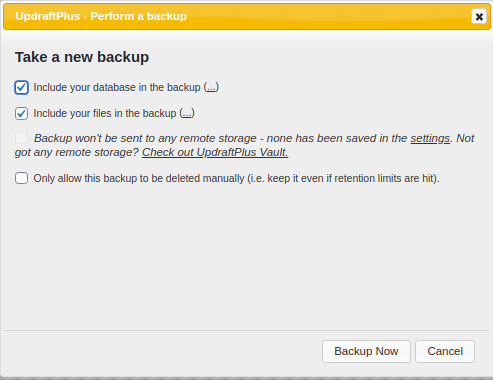
Check the required box and click on the Backup Now button. Once the backup is generated, you should see the following screen:
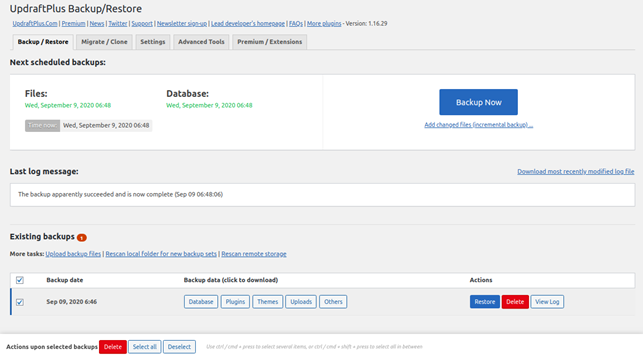
From here, you can also download your generated backup to your local system.
Step 3 – Restore a WordPress Backup with UpdraftPlus
Now that you have up your website, being able to restore it with UpdraftPlus is just as important. UpdraftPlus provides an easy way to restore your website from a backup.
If your website or system has crashed, then you may need to install WordPress and the UpdraftPlus plugin again before proceeding.
You can perform the restoration process using the following steps:
1 – Go to the WordPress admin dashboard and click on the UpdraftPlus Backups in the left pane. You should see the following screen:
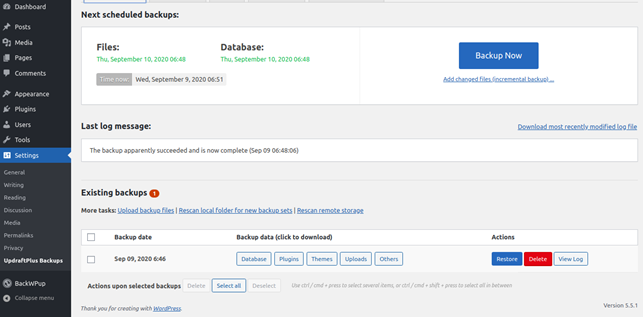
You should see your generated backup file in the above screen. If you don’t find it, you can also upload it from your local system or Dropbox.
2 – Click on the Restore button to start the restoration process. You should see the following screen:
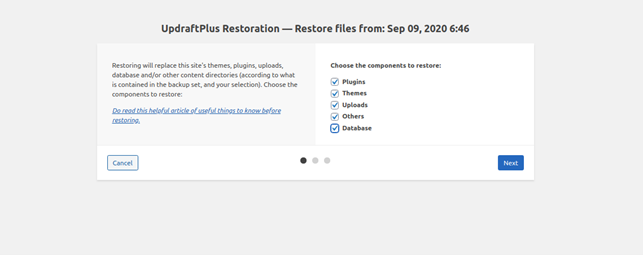
3 – Select the components that you want to restore from the backup and click on the Next button. You should see the following screen:
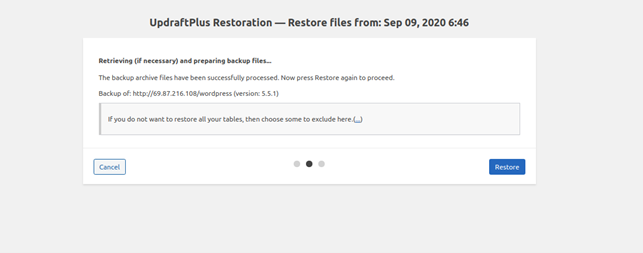
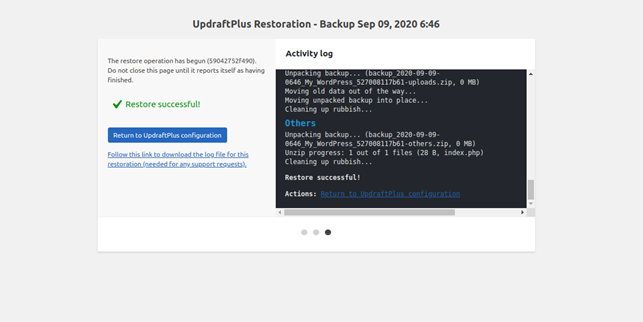
4 – Click on the Restore button to start the process. Once the restoration process has completed successfully, you should see the following screen:
Conclusion
In the above guide, you learned how to backup and restore a WordPress website easily with the UpdraftPlus backup plugin. You can now schedule the backup process to save yourself time – test it out on your WordPress installation on your VPS Hosting account from Atlantic.Net today!
* This post is for informational purposes only and does not constitute professional, legal, financial, or technical advice. Each situation is unique and may require guidance from a qualified professional.
Readers should conduct their own due diligence before making any decisions.