Elasticsearch is a free and open-source NoSQL database used to store, search, and analyze big volumes of data in real-time. It is written in the Java language so it can run on different platforms. Elasticsearch is built on Lucene indexing technology and supports database queries through REST APIs. You can also integrate Elasticsearch with other tools, such as Kibana, Logstash, X-Pack, and other. Generally, it is used in applications that have complex search features and requirements.
In this tutorial, we will learn how to install Elasticsearch on Ubuntu 20.04.
Step 1 – Install Java
Elasticsearch is written in the Java language, so Java must be installed in your system. If not installed, you can install it with the following command:
apt-get install default-jdk -y
Once the Java is installed, verify the installed version of Java using the following command:
java -version
You should see the following output:

Step 2 – Install Elasticsearch
By default, the Elasticsearch package is not available in the Ubuntu default repository, so you will need to add the repository in your system.
First, you need to install an APT transport package to allow access to your repositories via HTTPS:
apt-get install apt-transport-https gnupg2 -y
Next, download and add the GPG key for the Elasticsearch repository with the following command:
wget -qO - https://artifacts.elastic.co/GPG-KEY-elasticsearch | apt-key add -
Next, run the following command to add the repository to your system:
echo "deb https://artifacts.elastic.co/packages/7.x/apt stable main" | tee -a
/etc/apt/sources.list.d/elastic-7.x.list
Next, update the repository and install the Elasticsearch with the following command:
apt-get update -y
apt-get install elasticsearch -y
Once installed, start the Elasticsearch service and enable it to start at boot with the following command:
systemctl start elasticsearch
systemctl enable elasticsearch
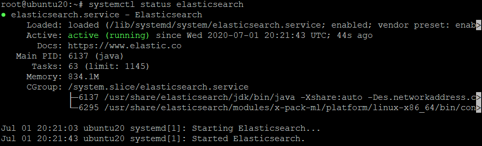
You can also verify the status of Elasticsearch service with the following command:
systemctl status elasticsearch
You should get the following output:
Step 3 – Configure Elasticsearch for Remote Access
The default Elasticsearch configuration is located at /etc/elasticsearch/elasticsearch.yml and it comes preconfigured for basic usage, so you don’t need to configure it if you use only one node in your setup.
In some cases, you need to configure Elasticsearch to be accessed by other hosts. You can allow remote access by editing elasticsearch.yml file:
nano /etc/elasticsearch/elasticsearch.yml
Add the following lines below “Network” section:
transport.host: localhost
transport.tcp.port: 9300
http.port: 9200
network.host: 0.0.0.0
Save and close the file, then restart Elasticsearch service to apply the changes:
systemctl restart elasticsearch
Step 4 – Verify Elasticsearch
At this point, Elasticsearch is installed, configured, and listening on port 9200. Now it’s time to test whether it is working or not.
To test it, go to the remote system and run the following command:
curl http://your-server-ip:9200
You should see the version, date, and hash information in the following output:
{
"name" : "ubuntu2004",
"cluster_name" : "elasticsearch",
"cluster_uuid" : "CqfMwJSsRH-ucofVQxI9cA",
"version" : {
"number" : "7.7.1",
"build_flavor" : "default",
"build_type" : "deb",
"build_hash" : "ad56dce891c901a492bb1ee393f12dfff473a423",
"build_date" : "2020-05-28T16:30:01.040088Z",
"build_snapshot" : false,
"lucene_version" : "8.5.1",
"minimum_wire_compatibility_version" : "6.8.0",
"minimum_index_compatibility_version" : "6.0.0-beta1"
},
"tagline" : "You Know, for Search"
}
Conclusion
Congratulations! You have successfully installed Elasticsearch in Ubuntu 20.04. You can now explore Elasticsearch for more functionality. For more information, visit the Elasticsearch documentation. Install Elasticsearch on your VPS from Atlantic.Net today!
* This post is for informational purposes only and does not constitute professional, legal, financial, or technical advice. Each situation is unique and may require guidance from a qualified professional.
Readers should conduct their own due diligence before making any decisions.