ClickHouse is a free, open-source, fast OLAP database management system used to generate analytical reports using SQL queries in real-time. It is column-oriented and has other important characteristics like user-friendliness, scalability, and security. It stores records in blocks grouped by columns instead of rows. Compared to row-based systems, column-oriented databases spend less time reading and computing the data.
In this post, we will show you how to install and ClickHouse on Ubuntu 20.04 server.
Step 1 – Add ClickHouse Repository
By default, ClickHouse is not included in the Ubuntu 20.04 default repository, so you will need to add the ClickHouse repository to your system.
First, install the required dependencies using the following command:
apt-get install curl gnupg2 wget git apt-transport-https ca-certificates -y
Once all the dependencies are installed, add the GPG key with the following command:
apt-key adv --keyserver keyserver.ubuntu.com --recv E0C56BD4
Output:
Executing: /tmp/apt-key-gpghome.kaYYOnkSVy/gpg.1.sh --keyserver keyserver.ubuntu.com --recv E0C56BD4
gpg: key C8F1E19FE0C56BD4: public key "ClickHouse Repository Key <[email protected]>" imported
gpg: Total number processed: 1
gpg:               imported: 1
Next, add the ClickHouse repository to APT with the following command:
echo "deb http://repo.yandex.ru/clickhouse/deb/stable/ main/" | tee /etc/apt/sources.list.d/clickhouse.list
Next, update the repository with the following command:
apt-get update -y
Step 2 – Install ClickHouse
Now, install the ClickHouse server and client with the following command:
apt-get install clickhouse-server clickhouse-client -y
Once the ClickHouse is installed, start the ClickHouse service and enable it to start at system reboot:
systemctl start clickhouse-server
systemctl enable clickhouse-server
You can now verify the status of the ClickHouse with the following command:
systemctl status clickhouse-server
Output:
● clickhouse-server.service - ClickHouse Server (analytic DBMS for big data)
     Loaded: loaded (/etc/systemd/system/clickhouse-server.service; enabled; vendor preset: enabled)
     Active: active (running) since Wed 2021-05-05 03:17:41 UTC; 4s ago
   Main PID: 26649 (clckhouse-watch)
      Tasks: 46 (limit: 2353)
     Memory: 46.4M
     CGroup: /system.slice/clickhouse-server.service
             ├─26649 clickhouse-watchdog        --config=/etc/clickhouse-server/config.xml --pid-file=/run/clickhouse-server/clickhouse-server>
             └─26650 /usr/bin/clickhouse-server --config=/etc/clickhouse-server/config.xml --pid-file=/run/clickhouse-server/clickhouse-server>

May 05 03:17:41 ubuntu2004 systemd[1]: Started ClickHouse Server (analytic DBMS for big data).
May 05 03:17:41 ubuntu2004 clickhouse-server[26649]: Processing configuration file '/etc/clickhouse-server/config.xml'.
May 05 03:17:41 ubuntu2004 clickhouse-server[26649]: Logging trace to /var/log/clickhouse-server/clickhouse-server.log
May 05 03:17:41 ubuntu2004 clickhouse-server[26649]: Logging errors to /var/log/clickhouse-server/clickhouse-server.err.log
May 05 03:17:41 ubuntu2004 clickhouse-server[26650]: Processing configuration file '/etc/clickhouse-server/config.xml'.
May 05 03:17:41 ubuntu2004 clickhouse-server[26650]: Saved preprocessed configuration to '/var/lib/clickhouse/preprocessed_configs/config.xml'.
May 05 03:17:41 ubuntu2004 clickhouse-server[26650]: Processing configuration file '/etc/clickhouse-server/users.xml'.
May 05 03:17:41 ubuntu2004 clickhouse-server[26650]: Saved preprocessed configuration to '/var/lib/clickhouse/preprocessed_configs/users.xml'.
Step 3 – Set ClickHouse Password
By default, ClickHouse is configured without a password, so you will need to set the password for the default user. You can set it by editing the file users.xml:
nano /etc/clickhouse-server/users.xml
Find the following line:
<password></password>
And, replaced it with the following command:
<password>MyPassword</password>
Save and close the file, then restart the ClickHouse service to apply the changes:
systemctl restart clickhouse-server
Step 4 – Working with ClickHouse
In this section, we will show you how to interact with the ClickHouse database.
First, connect ClickHouse using the following command:
clickhouse-client --password
You will be asked to provide a password for the default user as shown below:
ClickHouse client version 21.4.6.55 (official build).
Password for user (default):
Provide your password and hit ENTER. Once you are connected, you will be redirected to the ClickHouse shell:
Connecting to localhost:9000 as user default.
Connected to ClickHouse server version 21.4.6 revision 54447.

ubuntu2004 :)
To create a database named mydb, run the following command:
ubuntu2004 :) CREATE DATABASE mydb;
Output:
CREATE DATABASE mydb

Query id: 9f82c771-a072-495e-b2a7-cc9618d9b73f

Ok.

0 rows in set. Elapsed: 0.008 sec.
Change the database to mydb, run the following command:
ubuntu2004 :) USE mydb;
Output:
USE mydb

Query id: d94a4fb5-f3fd-41a9-a27f-0bb9efa9e020

Ok.

0 rows in set. Elapsed: 0.002 sec.
To create a table named data, run the following command:
ubuntu2004 :) CREATE TABLE data ( id UInt64, name String, url String, created DateTime ) ENGINE = MergeTree() PRIMARY KEY id ORDER BY id;
Output:
CREATE TABLE data
(
    `id` UInt64,
    `name` String,
    `url` String,
    `created` DateTime
)
ENGINE = MergeTree
PRIMARY KEY id
ORDER BY id

Query id: 6039b4d9-c296-4115-b4bb-06a1bbe5499f

Ok.

0 rows in set. Elapsed: 0.011 sec.
Insert some data into the table with the following command:
ubuntu2004 :) INSERT INTO data VALUES (1, 'hitesh', 'http://example.com', '2021-05-01 00:01:01');
Output:
INSERT INTO data VALUES

Query id: f7dfd959-688a-4481-8fb8-85e49c669b9e

Ok.

1 rows in set. Elapsed: 0.022 sec.
To add a new column, run the following command:
ubuntu2004 :) ALTER TABLE data ADD COLUMN location String;
Output:
ALTER TABLE data
    ADD COLUMN `location` String

Query id: 7d40bfee-0d0c-4113-bcd9-fd89ac42b82b

Ok.

0 rows in set. Elapsed: 0.038 sec.
To retrieve the data from the table, run the following command:
ubuntu2004 :) SELECT url, name FROM data WHERE url = 'http://example.com' LIMIT 1;
Output:
SELECT
    url,
    name
FROM data
WHERE url = 'http://example.com'
LIMIT 1

Query id: 60dd1e11-f2d9-4b33-8403-6e1859fa266a

┌─url────────────────┬─name───┐
│ http://example.com │ hitesh │
└────────────────────┴────────┘

1 rows in set. Elapsed: 0.007 sec.
To delete a column from the data table, run the following command:
ubuntu2004 :) ALTER TABLE data DROP COLUMN location;
Output:
ALTER TABLE data
    DROP COLUMN location

Query id: 6feffa20-7d33-490f-b8b5-a2d3c1ad93a1

Ok.

0 rows in set. Elapsed: 0.017 sec.
To delete a data table, run the following command:
ubuntu2004 :) DROP TABLE data;
Output:
DROP TABLE data

Query id: bbac3bd1-8f1d-40b9-8f35-e5816de45855

Ok.

0 rows in set. Elapsed: 0.008 sec.
To delete a mydb database, run the following command:
ubuntu2004 :) DROP DATABASE mydb;
Output:
DROP DATABASE mydb

Query id: 6fa79629-e2a9-4dcc-ba11-4a6684a085c3

Ok.

0 rows in set. Elapsed: 0.002 sec.
Next, exit from the ClickHouse shell with the following command:
ubuntu2004 :) exit;
Step 5 – Enable ClickHouse Web UI
By default, ClickHouse web UI is disabled. You will need to enable it by editing the file config.xml:
nano /etc/clickhouse-server/config.xml
Uncomment and change the listen_host line and http_server_default_response as shown below:
 <listen_host>0.0.0.0</listen_host>
    <http_server_default_response><![CDATA[<html ng-app="SMI2"><head><base href="http://ui.tabix.io/"></head><body><div ui-view="" class="content-ui"></div><script src="http://loader.tabix.io/master.js"></script></body></html>]]></http_server_default_response>
Save and close the file, then restart the ClickHouse server to apply the changes:
systemctl restart clickhouse-server
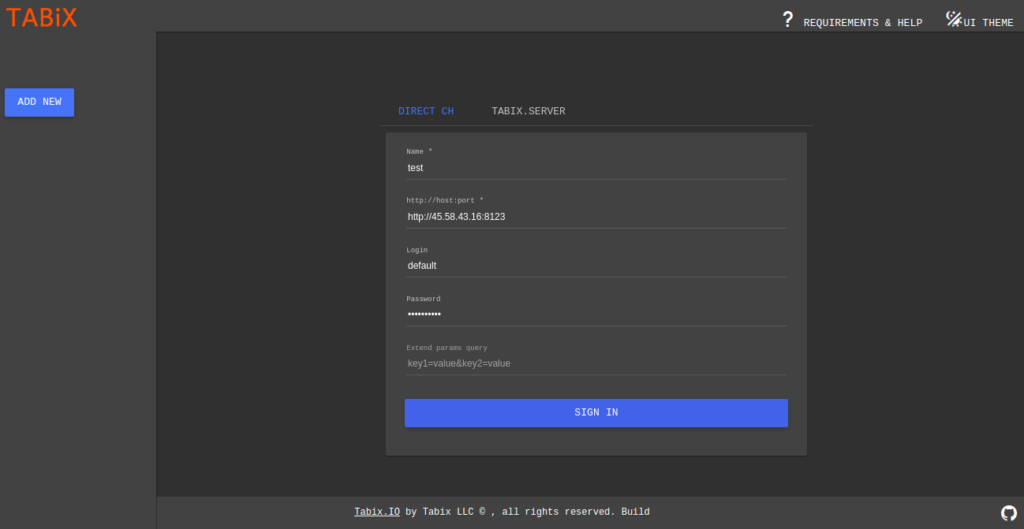
Now, open your web browser and type the URL http://your-server-ip:8123. You should see the ClickHouse login page:
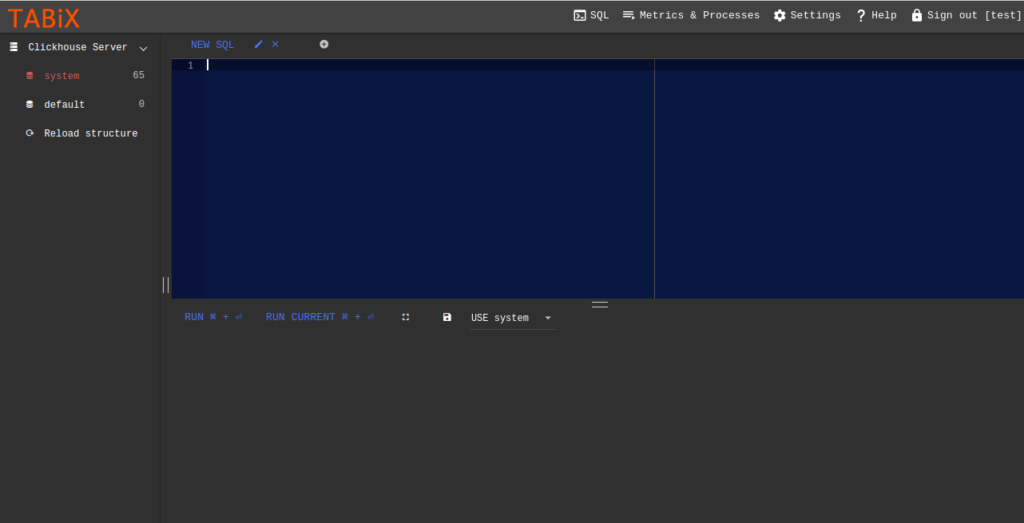
Provide your default username and password then click on the Sign In button. You should see the ClickHouse dashboard on the following page:
Conclusion
Congratulations! You have successfully installed and configured ClickHouse on Ubuntu 20.04. I hope you have now enough knowledge of how to interact with a ClickHouse database on your VPS hosting account. For more information, you can visit the ClickHouse documentation page. https://clickhouse.yandex/docs/en/

