CSF, also known as a “Config Server Firewall,” is one of the most popular and useful firewall applications for Linux. It is based on Iptables and helps to secure your server against SYN flood, port scan, and brute force attacks. CSF monitors log files, and when any wrong attempts are detected from a specific IP, they will be blocked temporarily. CSF also provides a web UI that can be used to block and unblock remote IPs from a web browser. It can be also integrated with cPanel, DirectAdmin, and Webmin.
In this tutorial, we will explain how to install CSF on Ubuntu 20.04.
Step 1 – Install Required Dependencies
First, you will need to install some dependencies required for CSF. You can install all the dependencies with the following command:
apt-get install sendmail dnsutils unzip git perl iptables libio-socket-ssl-perl libcrypt-ssleay-perl
libnet-libidn-perl libio-socket-inet6-perl libsocket6-perl -y
Once all the dependencies are installed, you can proceed to install CSF.
Step 2 – Install CSF
By default, CSF is not available in the Ubuntu standard repository, so you will need to download it from their official website.
wget http://download.configserver.com/csf.tgz
Once downloaded, extract the downloaded file with the following command:
tar -xvzf csf.tgz
Next, change the directory to the extracted directory and install CSF by running the install.sh script:
cd csf
bash install.sh
Once the installation has been completed successfully, you should get the following output:
Installation Completed
Next, verify whether all required Iptables modules are installed with the following command:
perl /usr/local/csf/bin/csftest.pl
If everything is fine, you should get the following output:
Testing ip_tables/iptable_filter...OK
Testing ipt_LOG...OK
Testing ipt_multiport/xt_multiport...OK
Testing ipt_REJECT...OK
Testing ipt_state/xt_state...OK
Testing ipt_limit/xt_limit...OK
Testing ipt_recent...OK
Testing xt_connlimit...OK
Testing ipt_owner/xt_owner...OK
Testing iptable_nat/ipt_REDIRECT...OK
Testing iptable_nat/ipt_DNAT...OK

RESULT: csf should function on this server
Step 3 – Configure CSF
Next, you will need to configure CSF as per your security standard. You can configure it by editing the file /etc/csf/csf.conf:
nano /etc/csf/csf.conf
Change the following line per your requirements:
TESTING = "0"
RESTRICT_SYSLOG = "3"
TCP_IN = "20,21,22,25,53,80,110,143,443,465,587,993,995"

# Allow outgoing TCP ports
TCP_OUT = "20,21,22,25,53,80,110,113,443,587,993,995"

# Allow incoming UDP ports
UDP_IN = "20,21,53,80,443"

# Allow outgoing UDP ports
# To allow outgoing traceroute add 33434:33523 to this list
UDP_OUT = "20,21,53,113,123"

# Allow incoming PING. Disabling PING will likely break external uptime
# monitoring
ICMP_IN = "1"
Save and close the file, then restart the CSF with the following command:
csf -r
Next, run the following command to list all Iptables rules:
csf -l
You should get the following output:
iptables mangle table
=====================
Chain PREROUTING (policy ACCEPT 51 packets, 3332 bytes)
num pkts bytes target prot opt in out source destination

Chain INPUT (policy ACCEPT 46 packets, 3014 bytes)
num pkts bytes target prot opt in out source destination

Chain FORWARD (policy ACCEPT 0 packets, 0 bytes)
num pkts bytes target prot opt in out source destination

Chain OUTPUT (policy ACCEPT 26 packets, 15816 bytes)
num pkts bytes target prot opt in out source destination

Chain POSTROUTING (policy ACCEPT 26 packets, 15816 bytes)
num pkts bytes target prot opt in out source destination

iptables raw table
==================
Chain PREROUTING (policy ACCEPT 51 packets, 3332 bytes)
num pkts bytes target prot opt in out source destination

Chain OUTPUT (policy ACCEPT 27 packets, 15972 bytes)
num pkts bytes target prot opt in out source destination

iptables nat table
==================
Chain PREROUTING (policy ACCEPT 19 packets, 1410 bytes)
num pkts bytes target prot opt in out source destination

Chain INPUT (policy ACCEPT 0 packets, 0 bytes)
num pkts bytes target prot opt in out source destination

Chain OUTPUT (policy ACCEPT 1 packets, 76 bytes)
num pkts bytes target prot opt in out source destination

Chain POSTROUTING (policy ACCEPT 1 packets, 76 bytes)
num pkts bytes target prot opt in out source destination
Step 4 – Enable CSF Web UI
CSF provides a web-based interface to manage the firewall from a web browser. By default, it is disabled in the CSF default configuration file, so you will need to enable it first.
Edit the CSF main configuration file with the following command:
nano /etc/csf/csf.conf
Change the following lines:
#Enable Web UI
UI = "1"

#Listening Port
UI_PORT = "8080"

#Admin username
UI_USER = "admin"

#Admin user password

UI_PASS = "your-password"

#Listening Interface
UI_IP = ""
Save and close the file when you are finished. Then, you will need to edit the /etc/csf/ui/ui.allow file and add your server IP and remote machine IP from where you want to access the CSF web UI.
nano /etc/csf/ui/ui.allow
Add your server IP and remote machine IP:
your-server-ip
remote-machine-ip
Save and close the file, then restart the CSF and LFD service to apply the changes:
csf -r
service lfd restart
At this point, CSF is started and listening on port 8080. You can check it with the following command:
ss -antpl | grep 8080
You should get the following output:

LISTEN 0 5 0.0.0.0:8080 0.0.0.0:* users:(("lfd UI",pid=34346,fd=4))
Step 5 – Access CSF Web Interface
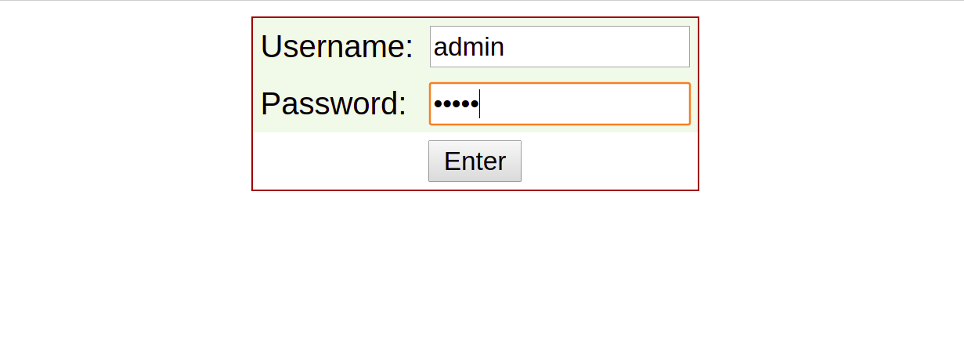
Now, open your web browser and type the URL http://your-server-ip:8080. You will be redirected to the CSF login page:
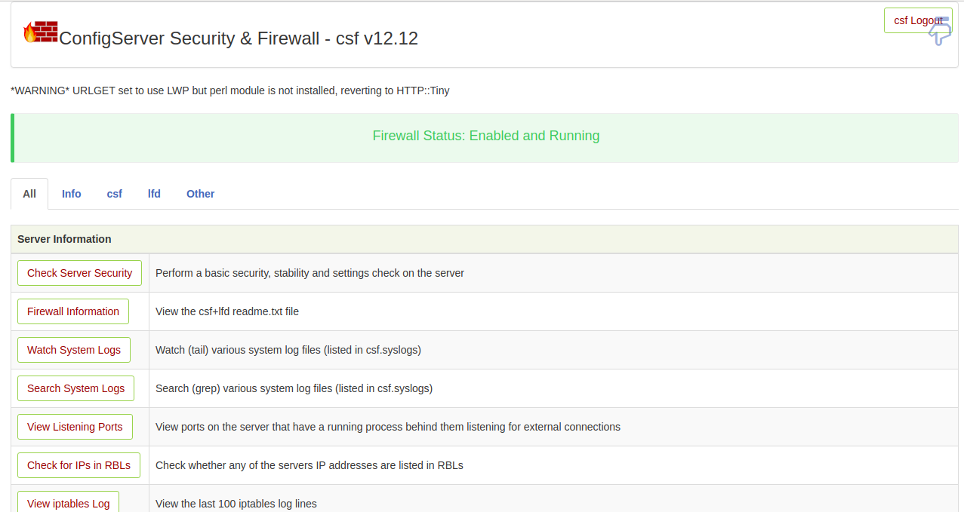
Provide your admin username and password and click on the Enter button. You should see the CSF dashboard in the following screen:
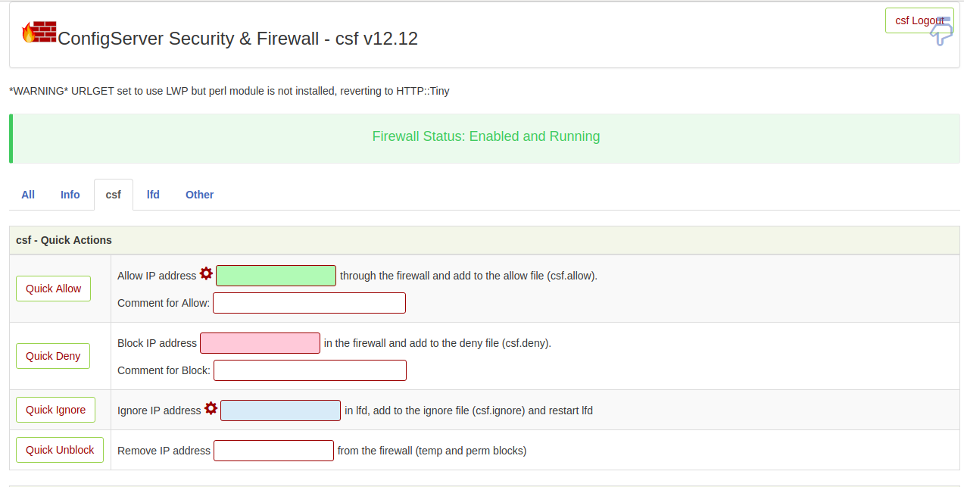
From here, you can manage your firewall and block and unblock any IP address easily.
Step 6 – Manage CSF with Command Line
You can also manage the CSF firewall – for example, allow, deny, or remove an IP address – from the command line interface.
To list all firewall rules, run the following command:
csf -l
To stop CSF, run the following command:
csf -s
To allow a specific IP address, run the following command:
csf -a ip-address
To deny an IP address, run the following command:
csf -d ip-address
To remove blocked IP address from a CSF rule, run the following command:
csf -dr ip-address
To verify whether the IP address is blocked or not, run the following command:
csf -g ip-address
To flush the CSF firewall rules, run the following command:
csf -f
To disable CSF, run the following command:
csf -x
Conclusion
Congratulations! You have successfully installed the CSF firewall on Ubuntu 20.04. You have also enabled a web UI to manage CSF from a web browser. Try CSF today on VPS hosting from Atlantic.Net.


