Hugo is an open-source static website generator designed for small projects and informative sites. It is written in Go language, making it very secure and extremely fast. Hugo provides a great writing experience and is optimized for website viewing. You don’t need to install any dependencies such as PHP, Python, or databases to run Hugo sites.
In this tutorial, we will show you how to install and use the Hugo site generator on Ubuntu 20.04.
Step 1 – Install Hugo
By default, Hugo is not available in the Ubuntu 20.04 default repository, so you will need to download the latest version of Hugo package from the Git repository. You can download it with the following command:
wget https://github.com/gohugoio/hugo/releases/download/v0.79.0/hugo_0.79.0_Linux-64bit.deb
Once the package is downloaded, you can install it with the following command:
dpkg -i hugo_0.79.0_Linux-64bit.deb
If you see any dependency errors, you can resolve them with the following command:
apt-get install -f
After installing Hugo, verify the installed version of Hugo with the following command:
hugo version
You should get the following output:
Hugo Static Site Generator v0.79.0-1415EFDC linux/amd64 BuildDate: 2020-11-27T09:09:02Z
Step 2 – Create a Website Using Hugo
First, create a new website named web1.doamin.com using the hugo command, as shown below:
hugo new site web1.domain.com
You should get the following output:
Congratulations! Your new Hugo site is created in /root/web1.domain.com.

Just a few more steps and you're ready to go:

1.Download a theme into the same-named folder.
Choose a theme from https://themes.gohugo.io/ or
create your own with the "hugo new theme <THEMENAME>" command.
2. Perhaps you want to add some content. You can add single files
with "hugo new <SECTIONNAME>/<FILENAME>.<FORMAT>".
3. Start the built-in live server via "hugo server".
Visit https://gohugo.io/ for quickstart guide and full documentation.
You can see the list of all files and directories generated by Hugo with the following command:
ls web1.domain.com
Output:
archetypes config.toml content data layouts static themes
Step 3 – Create Your First Page
Now, change the directory to your website and create a new page named main.md with the following command:
cd web1.domain.com
hugo new main.md
You should get the following output:
/root/web1.domain.com/content/main.md created
Next, edit the main.md page and add some content:
nano content/main.md
Add the following lines at the end of file:
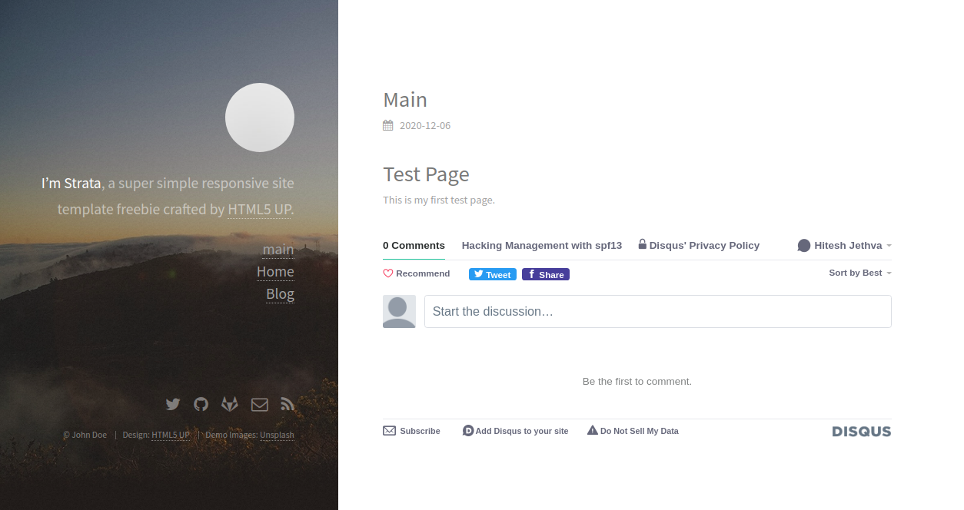
# Test Page
This is my first test page.
Save and close the file when you are finished.
Step 4 – Download and Install a Theme
First, change the directory to themes and download the Hugo theme with the following command:
cd web1.domain.com/themes
wget https://github.com/digitalcraftsman/hugo-strata-theme/archive/master.zip
Once downloaded, unzip the downloaded file with the following command:
unzip master.zip
Next, rename the extracted directory with the following command:
mv hugo-strata-theme-master hugo-strata-theme
Next, copy the sample content from the config.toml file located inside themes directory to the default config.toml file:
cat hugo-strata-theme/exampleSite/config.toml > ../config.toml
Next, edit the config.toml file with the following command:
nano ../config.toml
Change the base URL and define your page name as shown below:
baseurl = "/"
[[menu.main]]
name = "main"
url  = "main"
weight = 5
Save and close the file, then create a landing page layout file with the following command:
nano /root/web1.domain.com/layouts/index.html
Add the following lines:
{{ define "main" }}
{{ if not .Site.Params.about.hide }}
{{ partial "about" . }}
{{ end }}

{{ if not .Site.Params.portfolio.hide }}
{{ partial "portfolio" . }}
{{ end }}

{{ if not .Site.Params.recentposts.hide }}
{{ partial "recent-posts" . }}
{{ end }}

{{ if not .Site.Params.contact.hide }}
{{ partial "contact" . }}
{{ end }}
{{ end }}
Save and close the file.
Step 5 – Build Your Website
Now, change the directory to your website and build your Hugo website using the following command:
cd /root/web1.domain.com
hugo
You should get the following output:
Start building sites …
WARN 2020/12/06 09:21:44 Page.Hugo is deprecated and will be removed in a future release.
Use the global hugo function.
WARN 2020/12/06 09:21:44 Page.RSSLink is deprecated and will be removed in a future release.
Use the Output Format's link, e.g. something like:
{{ with .OutputFormats.Get "RSS" }}{{ .RelPermalink }}{{ end }}

| EN
-------------------+-----
Pages            |  7
Paginator pages  |  0
Non-page files   |  0
Static files     | 26
Processed images |  0
Aliases          |  2
Sitemaps         |  1
Cleaned          |  0
Next, start the Hugo server by specifying your server IP as shown below:
hugo server --bind=0.0.0.0 --baseUrl=http://your-server-ip -D -F
You should get the following output:
Start building sites …
WARN 2020/12/06 09:22:02 Page.Hugo is deprecated and will be removed in a future release.
Use the global hugo function.
WARN 2020/12/06 09:22:02 Page.RSSLink is deprecated and will be removed in a future release.
Use the Output Format's link, e.g. something like:
{{ with .OutputFormats.Get "RSS" }}{{ .RelPermalink }}{{ end }}

| EN
-------------------+-----
Pages            | 11
Paginator pages  |  0
Non-page files   |  0
Static files     | 26
Processed images |  0
Aliases          |  3
Sitemaps         |  1
Cleaned          |  0

Built in 35 ms
Watching for changes in /root/web1.domain.com/{archetypes,content,data,layouts,static,themes}
Watching for config changes in /root/web1.domain.com/config.toml
Environment: "development"
Serving pages from memory
Running in Fast Render Mode. For full rebuilds on change: hugo server --disableFastRender
Web Server is available at http://69.87.216.179:1313/ (bind address 0.0.0.0)
Press Ctrl+C to stop
Step 6 – Access Hugo Web UI
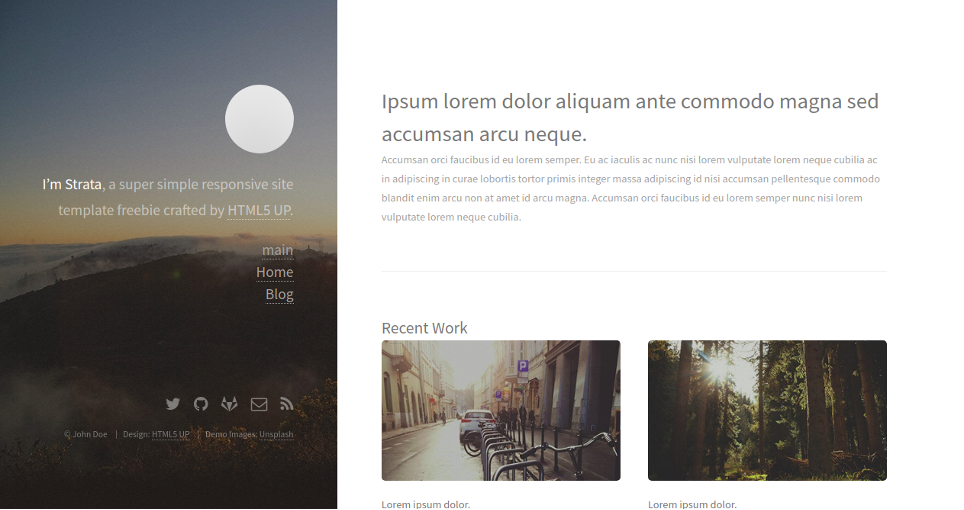
Now, open your web browser and type the URL http://your-server-ip:1313. You should see the Hugo dashboard in the following screen:
Click on main in the left pane. You should see your page in the following screen:
Conclusion
In the above guide, you learned how to install Hugo and generate a static website on Ubuntu 20.04. You should now have enough knowledge to build your own static website easily with Hugo; try it today on VPS hosting from Atlantic.Net!

