Table of Contents
Verified and Tested 03/10/21
Introduction
This tutorial will show you how to install Nginx on Ubuntu 20.04 so that you can successfully run a superior performance based web server while easing the load on your system resources. Nginx is a powerful web server software that can be used on your server.
Install Nginx
To install Nginx, we will need to use the apt-get command so we can install the software:
sudo apt-get install nginx -y
You will now have NGINX installed on your server and can be verified typing in the following with your IP ADDRESS on your browser (http://YOUR.IP.ADD.RESS )
Your IP can be retrieved from the server with following command:
ip addr show wlan0 | grep inet | awk '{ print $2 }'
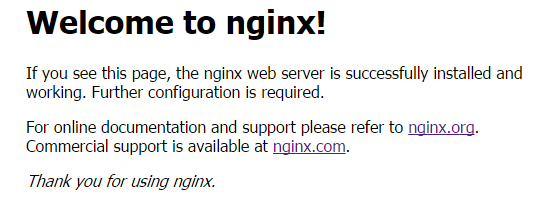
An example of the default webpage Nginx gives you when installed on Ubuntu 20.04
Configure Nginx
We will now configure Nginx by opening the central configuration file and editing the server_name line with your domain.
nano /etc/nginx/sites-available/default
server {
        listen 80 default_server;
        listen [::]:80 default_server ipv6only=on;

        root /usr/share/nginx/html;
        index index.html index.htm;

        # Make site accessible from http://localhost/
        server_name YOURDOMAIN.com;

        location / {
                # First attempt to serve request as file, then
                # as directory, then fall back to displaying a 404.
                try_files $uri $uri/ =404;
                # Uncomment to enable naxsi on this location
                # include /etc/nginx/naxsi.rules
        }

        # Only for nginx-naxsi used with nginx-naxsi-ui : process denied requests
        #location /RequestDenied {
        #       proxy_pass http://127.0.0.1:8080;
        #}

        #error_page 404 /404.html;

        # redirect server error pages to the static page /50x.html
        #
        #error_page 500 502 503 504 /50x.html;
        #location = /50x.html {
        #       root /usr/share/nginx/html;
        #}

        # pass the PHP scripts to FastCGI server listening on 127.0.0.1:9000
        #
        #location ~ \.php$ {
        #       fastcgi_split_path_info ^(.+\.php)(/.+)$;
        #       # NOTE: You should have "cgi.fix_pathinfo = 0;" in php.ini
        #
        #       # With php5-cgi alone:
        #       fastcgi_pass 127.0.0.1:9000;
        #       # With php5-fpm:
        #       fastcgi_pass unix:/var/run/php5-fpm.sock;
        #       fastcgi_index index.php;
        #       include fastcgi_params;
        #}

        # deny access to .htaccess files, if Apache's document root
        # concurs with nginx's one
        #
        #location ~ /\.ht {
        #       deny all;
        #}
}
Save the file and restart the Nginx service so the changes take effect.
systemctl restart nginx
Now you can create/upload your web content to the HTML directory of Nginx (Remember to replace the existing index.html file with your index.html which is your home page) The default directory for Ubuntu 20.04 is /usr/share/nginx/html/. Update the index with the following command:
nano /usr/share/nginx/html/
What Next?
You now have your Ubuntu 20.04 server with Nginx installed, you may now begin building high-performance websites using your newly installed web server. Thank you for following along and feel free to check back with us for further updates.
* This post is for informational purposes only and does not constitute professional, legal, financial, or technical advice. Each situation is unique and may require guidance from a qualified professional.
Readers should conduct their own due diligence before making any decisions.