OpenNMS is a free, open-source, enterprise-grade network monitoring tool for Linux systems. It is used to visualize and monitor local as well as public networks via web browsers. It offers alarm generation, comprehensive fault, performance, and traffic monitoring from a single place. OpenNMS is customizable and can be integrated easily with other applications. If you are looking for a powerful and scalable monitoring solution, then OpenNMS is the right choice for you.
In this post, we will show you how to install the OpenNMS monitoring server on Fedora.
Step 1 – Install Java JDK
OpenNMS is a Java-based application, so you will need Java installed on your server. You can install it using the following command.
dnf install java-11-openjdk-devel curl unzip -y
Once Java is installed, you can verify the Java version with the following command.
java -version
Output.
openjdk version "11.0.15" 2022-04-19
OpenJDK Runtime Environment 18.9 (build 11.0.15+10)
OpenJDK 64-Bit Server VM 18.9 (build 11.0.15+10, mixed mode, sharing)
Step 2 – Install OpenNMS Server
By default, the OpenNMS package is not included in the Fedora default repo, so you will need to install the OpenNMS repo on your server.
Run the following command to install both the OpenNMS repo and key.
rpm --import https://yum.opennms.org/OPENNMS-GPG-KEY
dnf install https://yum.opennms.org/repofiles/opennms-repo-stable-rhel8.noarch.rpm
Next, install the OpenNMS with the following command.
dnf install opennms -y
Step 3 – Configure PostgreSQL
OpenNMS uses PostgreSQL as a database backend. By default, PostgreSQL will be installed automatically during the OpenNMS installation.
First, initialize the PostgreSQL database.
postgresql-setup --initdb --unit postgresql
Output.
 * Initializing database in '/var/lib/pgsql/data'
 * Initialized, logs are in /var/lib/pgsql/initdb_postgresql.log
Next, start and enable the PostgreSQL service.
systemctl start postgresql
systemctl enable postgresql
Next, log in to PostgreSQL, create an OpenNMS user, and set a password.
su - postgres
createuser -P opennms
Enter password for new role:
Enter it again:
Next, create an OpenNMS database and set a Postgres password.
createdb -O opennms opennms
psql -c "ALTER USER postgres WITH PASSWORD 'password';"
exit;
Next, edit the PostgreSQL configuration file.
nano /var/lib/pgsql/data/pg_hba.conf
Find the following lines:
# IPv4 local connections:
host    all             all             127.0.0.1/32            ident
# IPv6 local connections:
host    all             all             ::1/128                 ident
And replace them with the following lines:
host    all             all             127.0.0.1/32            md5
host    all             all             ::1/128                 md5
Save and close the file, then restart the PostgreSQL service to apply the changes.
systemctl restart postgresql
Step 4 – Configure OpenNMS
Next, you will need to edit the OpenNMS configuration file and define your database.
nano /opt/opennms/etc/opennms-datasources.xml
Change the following configurations as per your database.
  <jdbc-data-source name="opennms"
                    database-name="opennms"
                    class-name="org.postgresql.Driver"
                    url="jdbc:postgresql://localhost:5432/opennms"
                    user-name="opennms"
                    password="opennms" />

  <jdbc-data-source name="opennms-admin"
                    database-name="template1"
                    class-name="org.postgresql.Driver"
                    url="jdbc:postgresql://localhost:5432/template1"
                    user-name="postgres"
                    password="password" />
</datasource-configuration>
Save and close the file, then check the Java environment.
/opt/opennms/bin/runjava -s
Output.
runjava: Looking for an appropriate JVM...
runjava: Checking for an appropriate JVM in JAVA_HOME...
runjava: Skipping... JAVA_HOME not set.
runjava: Checking JVM in the PATH: "/usr/lib/jvm/java-11-openjdk-11.0.15.0.10-1.fc34.x86_64/bin/java"...
runjava: Found an appropriate JVM in the PATH: "/usr/lib/jvm/java-11-openjdk-11.0.15.0.10-1.fc34.x86_64/bin/java"
runjava: Value of "/usr/lib/jvm/java-11-openjdk-11.0.15.0.10-1.fc34.x86_64/bin/java" stored in configuration file.
Next, install the OpenNMS packages using the following command.
/opt/opennms/bin/install -dis
Next, start and enable the OpenNMS service.
systemctl enable --now opennms
You can now verify the OpenNMS service status using the following command.
systemctl status opennms
Output.
● opennms.service - OpenNMS server
     Loaded: loaded (/usr/lib/systemd/system/opennms.service; enabled; vendor preset: disabled)
     Active: active (running) since Thu 2023-06-08 04:03:09 EDT; 5s ago
    Process: 4850 ExecStart=/opt/opennms/bin/opennms -s start (code=exited, status=0/SUCCESS)
    Process: 5806 ExecStartPost=/bin/sleep 3 (code=exited, status=0/SUCCESS)
   Main PID: 5807 (java)
      Tasks: 37 (limit: 2328)
     Memory: 175.7M
        CPU: 15.981s
     CGroup: /system.slice/opennms.service
             ├─5805 bash /opt/opennms/bin/opennms -s start
             └─5807 /usr/lib/jvm/java-11-openjdk-11.0.15.0.10-1.fc34.x86_64/bin/java --add-modules=java.base,java.compiler,java.datatransfer,java.desktop,java.instrume>

Jun 08 04:03:11 fedora opennms[5807]: [INFO] Successfully loaded jicmp6 library.
Jun 08 04:03:12 fedora opennms[5807]: [DEBUG] System property 'opennms.library.jicmp' set to '/usr/lib64/libjicmp.so.  Attempting to load jicmp library from this locat>
Jun 08 04:03:12 fedora opennms[5807]: [INFO] Successfully loaded jicmp library.
Jun 08 04:03:12 fedora opennms[5807]: [DEBUG] System property 'opennms.library.jicmp6' set to '/usr/lib64/libjicmp6.so.  Attempting to load jicmp6 library from this lo>
Jun 08 04:03:12 fedora opennms[5807]: [INFO] Successfully loaded jicmp6 library.
Jun 08 04:03:12 fedora opennms[5807]: [INFO] Using ICMP implementation: org.opennms.netmgt.icmp.best.BestMatchPinger
Jun 08 04:03:12 fedora opennms[5807]: [INFO] IPv4 ICMP available? true
Jun 08 04:03:12 fedora opennms[5807]: [INFO] IPv6 ICMP available? true
Jun 08 04:03:12 fedora opennms[5807]: [INFO] Invocation doTestLoadLibraries successful for MBean OpenNMS:Name=TestLoadLibraries
Jun 08 04:03:12 fedora opennms[5807]: [INFO] Invoking init on object OpenNMS:Name=Eventd
Step 5 – Access OpenNMS Dashboard
At this point, OpenNMS is installed and listening on port 8980. You can check it with the following command.
ss -antpl | grep :8980
Output.
LISTEN 0 50 *:8980 *:* users:(("java",pid=5807,fd=1193))
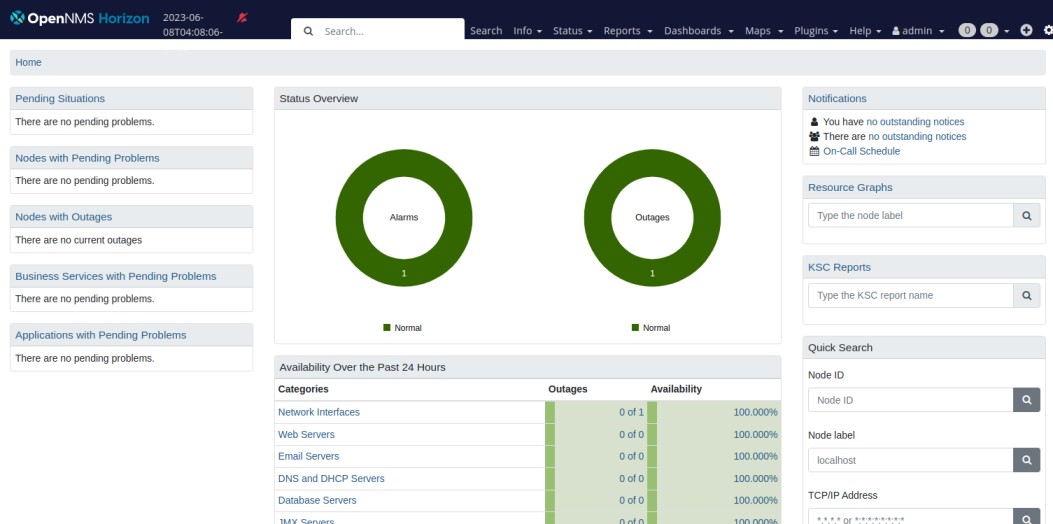
Now, open your web browser and access the OpenNMS dashboard using the URL http://your-server-ip:8980/opennms. You should see the OpenNMS login page.

Provide the default username and password as admin/admin then click on the Login button. You should see the OpenNMS dashboard on the following screen.
Conclusion
Congratulations! You have successfully installed and configured the OpenNMS network monitoring tool on Fedora. You can now add your local and remote devices to the OpenNMS and start monitoring them via the OpenNMS dashboard. You can now easily install and implement OpenNMS on VPS hosting from Atlantic.Net!
* This post is for informational purposes only and does not constitute professional, legal, financial, or technical advice. Each situation is unique and may require guidance from a qualified professional.
Readers should conduct their own due diligence before making any decisions.