OpenNMS, also called “Open Network Management System,” is a free and cross-platform network management platform for Linux and Windows-based operating systems. It is a Java-based tool designed to monitor critical services on remote machines via SNMP and JMX. OpenNMS comes with a web-based console that helps you to monitor and administer networks and applications.
In this tutorial, we will show you how to install OpenNMS on Fedora.
Step 1 – Install Java JDK
OpenNMS is based on Java, so you will need to install the Java JDK on your server. You can install it with the following command.
dnf install java-11-openjdk
After the successful installation, you can verify the Java installation with the following command.
java --version
Output.
openjdk 11.0.15 2022-04-19
OpenJDK Runtime Environment 18.9 (build 11.0.15+10)
OpenJDK 64-Bit Server VM 18.9 (build 11.0.15+10, mixed mode, sharing)
Step 2 – Install and Configure PostgreSQL Database
OpenNMS uses PostgreSQL as a database backend, so you will need to install and configure PostgreSQL to your server.
First, disable the default PostgreSQL repo and enable the PostgreSQL 14 repo with the following command.
dnf module reset postgresql -y
dnf module enable postgresql:14
Next, install the PostgreSQL server with the following command.
dnf install postgresql-server postgresql
Next, initialize the PostgreSQL database using the following command.
postgresql-setup --initdb
Next, start and enable the PostgreSQL service with the following command.
systemctl enable --now postgresql
Next, log in to PostgreSQL:
su - postgres
psql
Create a database and user for OpenNMS with the following command.
create user opennms;
create database opennms owner opennms;
grant all privileges on database opennms to opennms;
Next, set OpenNMS and Postgres password with the following command.
ALTER USER opennms WITH ENCRYPTED password 'secure_password';
ALTER USER postgres WITH PASSWORD 'secure_password';
Finally, exit from the PostgreSQL shell with the following command.
\q
exit
Next, edit the PostgreSQL configuration file.
nano /var/lib/pgsql/data/pg_hba.conf
Find the following lines:
host    all             all             127.0.0.1/32            ident
host    all             all             ::1/128                 ident
And replace them with the following lines:
host    all             all             127.0.0.1/32            md5
host    all             all             ::1/128                 md5
Save and close the file, then reload PostgreSQL to implement the changes.
systemctl reload postgresql
Step 3 – Install and Configure OpenNMS
First, add the OpenNMS repo and import the GPG key using the following command.
dnf -y install https://yum.opennms.org/repofiles/opennms-repo-stable-rhel8.noarch.rpm
rpm --import https://yum.opennms.org/OPENNMS-GPG-KEY
Next, install the OpenNMS package with the following command.
dnf install opennms -y
Next, edit the OpenNMS database configuration file.
nano /opt/opennms/etc/opennms-datasources.xml
Define your database details as shown below.
<jdbc-data-source name="opennms"
                    database-name="opennms"
                    class-name="org.postgresql.Driver"
                    url="jdbc:postgresql://localhost:5432/opennms"
                    user-name="opennms"
                    password="secure_password" />

<jdbc-data-source name="opennms-admin"
                    database-name="template1"
                    class-name="org.postgresql.Driver"
                    url="jdbc:postgresql://localhost:5432/template1"
                    user-name="postgres"
                    password="secure_password" />
Save and close the file, then run the following command to detect the Java environment.
/opt/opennms/bin/runjava -s
Output:
runjava: Looking for an appropriate JVM...
runjava: Checking for an appropriate JVM in JAVA_HOME...
runjava: Skipping... JAVA_HOME not set.
runjava: Checking JVM in the PATH: "/usr/lib/jvm/java-11-openjdk-11.0.15.0.10-1.fc34.x86_64/bin/java"...
runjava: Found an appropriate JVM in the PATH: "/usr/lib/jvm/java-11-openjdk-11.0.15.0.10-1.fc34.x86_64/bin/java"
runjava: Value of "/usr/lib/jvm/java-11-openjdk-11.0.15.0.10-1.fc34.x86_64/bin/java" stored in configuration file.
Next, complete the OpenNMS setup using the following command.
/opt/opennms/bin/install -dis
Output:
Processing SystemIDMigratorOffline: Updates OpenNMS system ID to a random UUID.
- Running pre-execution phase
- Running execution phase
- Saving the execution state
- Running post-execution phase

Finished in 0 seconds
Upgrade completed successfully!

Start OpenNMS Service
Now, start the OpenNMS service and enable it to start at system reboot with the following command.
systemctl start opennms
systemctl enable opennms
You can now check the status of OpenNMS with the following command.
systemctl status opennms
Output:
● opennms.service - OpenNMS server
     Loaded: loaded (/usr/lib/systemd/system/opennms.service; disabled; vendor preset: disabled)
     Active: active (running) since Sat 2023-05-20 00:44:49 EDT; 2s ago
    Process: 6347 ExecStart=/opt/opennms/bin/opennms -s start (code=exited, status=0/SUCCESS)
    Process: 7330 ExecStartPost=/bin/sleep 3 (code=exited, status=0/SUCCESS)
   Main PID: 7329 (java)
      Tasks: 44 (limit: 4666)
     Memory: 313.7M
        CPU: 21.271s
     CGroup: /system.slice/opennms.service
             ├─7328 bash /opt/opennms/bin/opennms -s start
             └─7329 /usr/lib/jvm/java-11-openjdk-11.0.15.0.10-1.fc34.x86_64/bin/java --add-modules=java.base,java.compiler,java.datatransfer,java.desktop,java.instrume>
Step 4 – Access OpenNMS Web UI
At this point, OpenNMS is started and listening on port 8980. You can verify it with the following command.
ss -antpl | grep 8980
Output.
LISTEN 0 50 *:8980 *:* users:(("java",pid=7329,fd=1197))
Now, open your web browser and access the OpenNMS web interface using the URL http://your-server-ip:8980/opennms. You should see the OpenNMS login page.
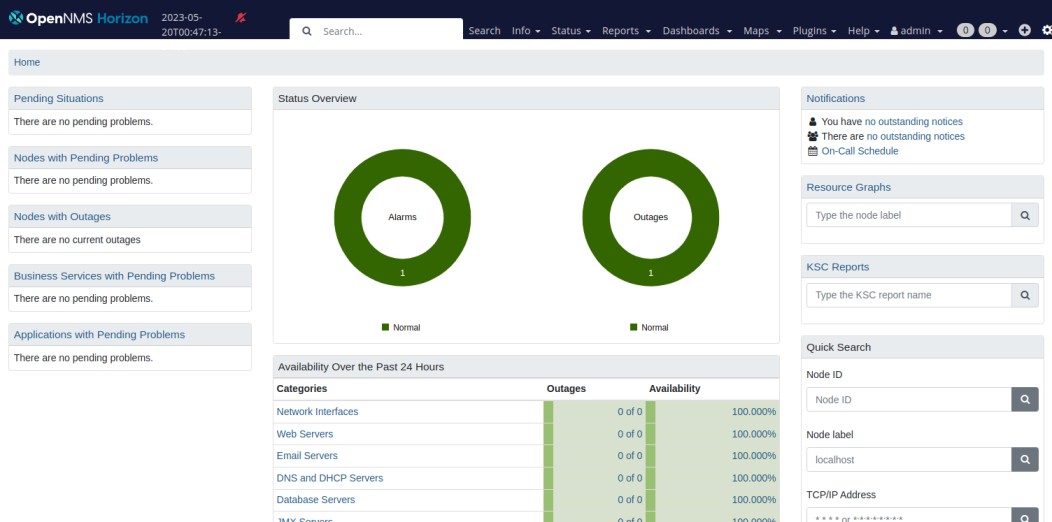
Provide the default username and password as admin/admin then click on the LOGIN button. You should see the OpenNMS dashboard on the following screen.
Conclusion
In this post, we explained how to install OpenNMS on Fedora. I hope you have now enough knowledge to install and set up OpenNMS in your environment easily. You can now install OpenNMS on VPS hosting from Atlantic.Net!

