Table of Contents
Introduction
ownCloud is a software system that provides file storage, synchronization, and sharing services. It can be compared to products such as Dropbox or Google Drive, with the advantage that it is a free and open source solution you can install and manage yourself.
With ownCloud, it is possible to share files and folders on a local computer and have them synchronized with your server.
Using the ownCloud Desktop Client (not covered in this guide), you can keep your files in sync across several devices, including smartphones and tablets. Or, you can use a browser to access your files from any computer connected to the web.
This guide will show you how to install ownCloud and modify some configuration settings.
We will use “example.com” in this guide. Replace it with the domain name or IP address you have configured on your server.
Installing ownCloud
Before you begin, make sure your system is updated. From the command line, type:
sudo apt-get update
sudo apt-get upgrade
Next, add the ownCloud repository to be able to install the newest version of the software.
sudo sh -c "echo 'deb http://download.opensuse.org/repositories/isv:/ownCloud:/community/xUbuntu_14.04/ /' >> /etc/apt/sources.list.d/owncloud.list"
Download and add the repository key.
wget -q http://download.opensuse.org/repositories/isv:ownCloud:community/xUbuntu_14.04/Release.key -O- | sudo apt-key add -
Update the repositories and install ownCloud:
sudo apt-get update
sudo apt-get install owncloud
During the installation process, the package manager will install ownCloud along with all the software dependencies needed.
The MySQL database server is one of these dependencies. If MySQL is not already installed on your server, then the installer will prompt you for a password for the root MySQL user. Remember to choose a secure password, different from the server user’s.
Setting Up ownCloud
You are almost done with the initial setup. Now, you need to create the administrator account.
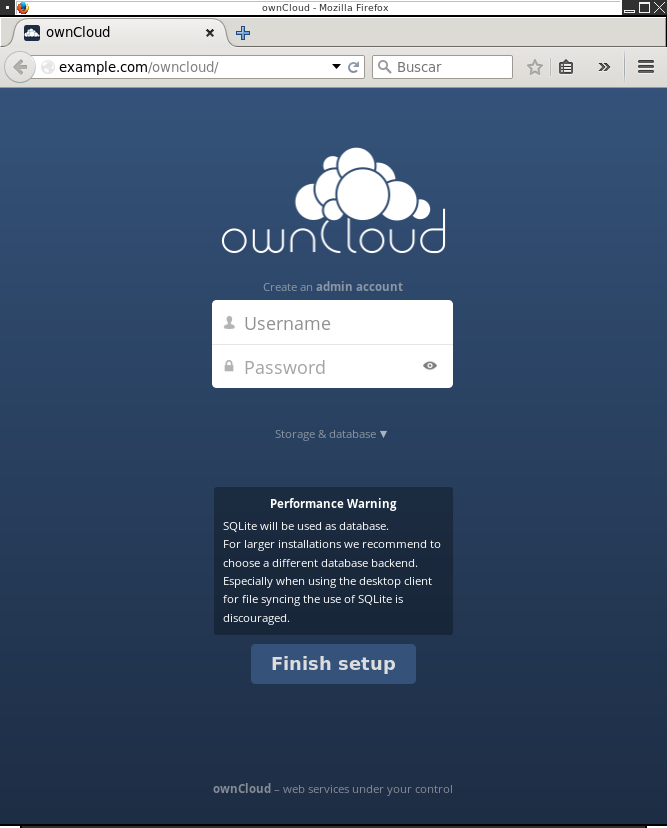
- Using a web browser, go to
http://example.com/owncloud. It will ask you to set a username and password for the administrator account. You can choose any username you wish. In this example, we use admin. ownCloud initial login screen
 - This screen also gives you the option to change the database backend from SQLite (default option) to MySQL/MariaDB or PostgreSQL. We will stick to the default option, although for larger deployments, it is preferable to use one of the alternatives. You can change this database option later, if needed.
- Click on Finish setup. You will be taken to the ownCloud main screen for the administrator user.
A popup window will appear once with links to download the ownCloud client for different platforms. ownCloud popup window featuring client download links
 ownCloud initial login screen
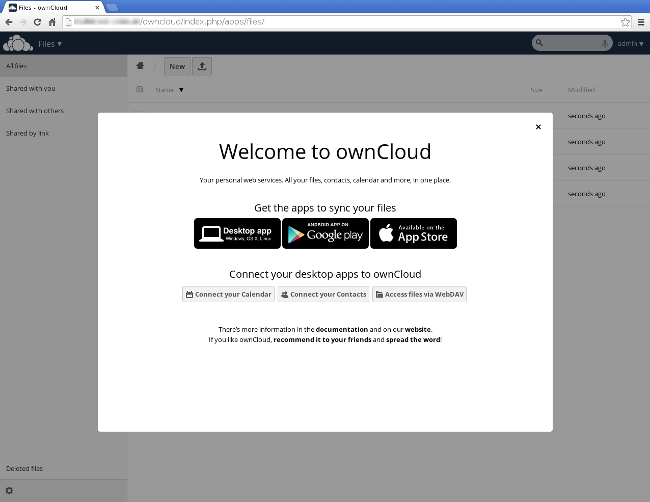 ownCloud popup window featuring client download links
Managing Your ownCloud
Your ownCloud server is ready to be used. In the following couple of steps, you will learn how to add users and how to enable and enforce secure connections.
Add Users
At the top right corner, check the menu that opens under admin (or whatever username you chose for the administrator account), and go to Users to create users for your ownCloud server.
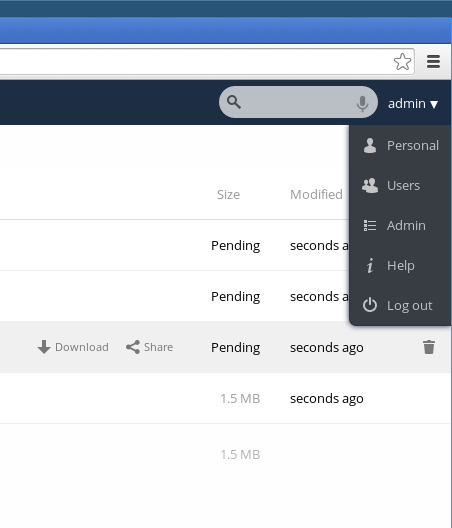 ownCloud menu to create or edit users
When adding users, you can assign quotas for the storage space available to them.
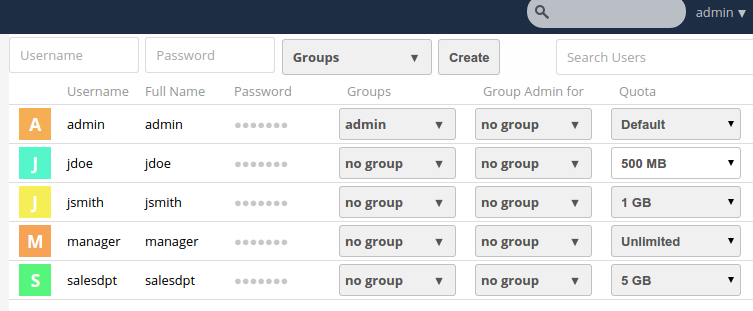 ownCloud user administration screen
Enable HTTPS and Disable HTTP
By default, ownCloud runs on HTTP.
HTTP traffic is sent “in the clear”, so anyone who can access the network has the chance to see usernames and passwords. To protect your data, you should use the HTTPS protocol to access your server using an encrypted data channel.
In this example, we will use a self-signed certificate, but you could use a certificate issued by a recognized Certification Authority, if needed.
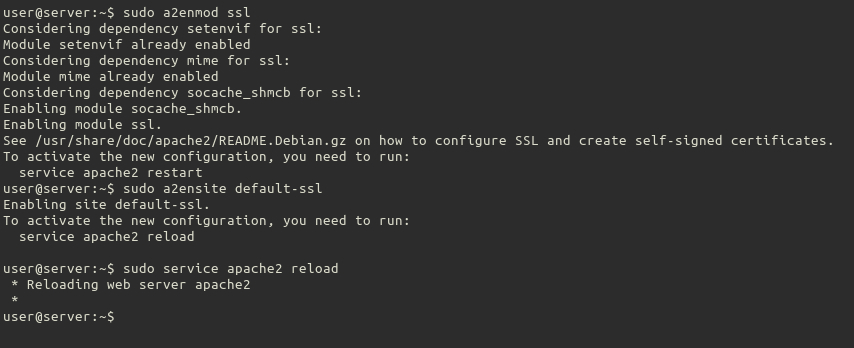
- Enable SSL and install a default, self-signed certificate. From the command line, type:
sudo a2enmod ssl
sudo a2ensite default-ssl
sudo service apache2 reload
Output when enabling and installing self-signed SSL certificate in Apache - Using your preferred text editor, modify the
/etc/apache2/sites-available/default-ssl.conffile, adding the following at the end, before the</VirtualHost>and</IfModule>statements.<Directory /var/www/owncloud> Options Indexes FollowSymLinks MultiViews AllowOverride All Order allow,deny Allow from all # add any possibly required additional directives here # e.g. the Satisfy directive (see below for details): Satisfy Any </Directory>After the modification, the bottom of that file will look like this:
Modified /etc/apache2/sites-available/default-ssl.conf file - Enable the Apache rewrite module.
sudo a2enmod rewrite
sudo service apache2 restart
- Access your ownCloud using HTTPS now. With your browser go to
https://example.com/owncloud(note the https).
The browser will show a warning. It appears because it cannot verify the authenticity of the self-signed certificate you created in step 1 of this section. In this case, it is safe to ignore the warning and to tell the browser to continue.
- Log in as administrator, and go to the admin menu, again on the top right corner of the page.
- Go to the Security section and click on Enforce HTTPS. After you select that option, another one will appear below: Enforce HTTPS for subdomains. Check that one, too. ownCloud Security optionsNow, if you try to access your ownCloud via HTTP, it will automatically redirect you to use HTTPS, instead.
 Output when enabling and installing self-signed SSL certificate in Apache
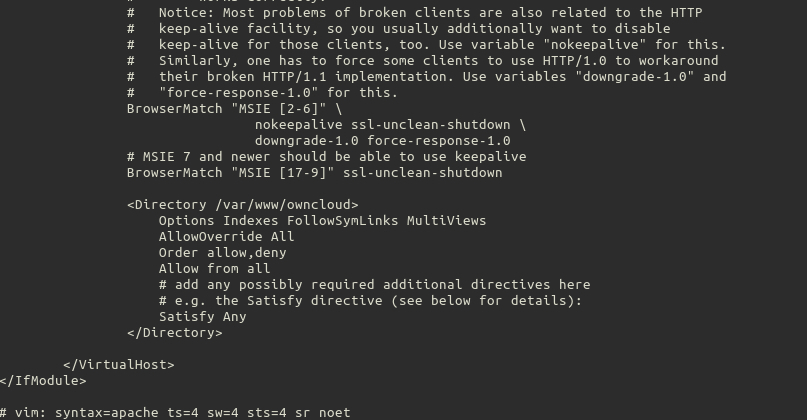 Modified /etc/apache2/sites-available/default-ssl.conf file
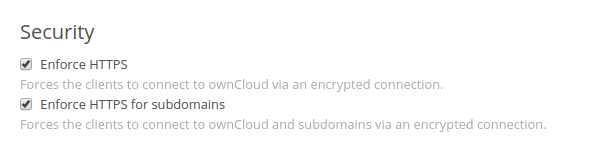 ownCloud Security optionsNow, if you try to access your ownCloud via HTTP, it will automatically redirect you to use HTTPS, instead.
Additional Features
Congratulations, your ownCloud is ready for use. Now that it is up and working, take your time to learn about all its cool features. For a complete reference to these features, take a look at the following links:
Also, when you log into your ownCloud as administrator, among the demo files there is a PDF of the user manual. This document contains more information and tips to help you understand all the features and capabilities available.
Congratulations! You now have a successfully installed ownCloud. Thank you for following along and feel free to check back with us for further updates or learn more about our reliable VPS hosting.
* This post is for informational purposes only and does not constitute professional, legal, financial, or technical advice. Each situation is unique and may require guidance from a qualified professional.
Readers should conduct their own due diligence before making any decisions.