Plesk Onyx is the newest and smoothest upgrade of the traditional Plesk control panel. It is one of the best control panels for Linux and Windows servers. Plesk Onyx is very similar to cPanel and DirectAdmin and makes managing your website easy while providing a set of security improvements designed to help harden your server. It supports various databases, including Docker, Git, Ruby, Node.js, DNSSEC, and many more.
In this tutorial, we will show you how to install Plesk Onyx control panel on CentOS 7.
Step 1 – Download Plesk Onyx Installer
Next, you will need to download the Plesk Onyx installation script from its official website.
You can download it using the wget command:
wget http://autoinstall.plesk.com/plesk-installer
Once downloaded, give execution permissions with the following command:
chmod +x plesk-installer
Next, start the installation using the following command:
./plesk-installer
You will be asked to choose the following options:
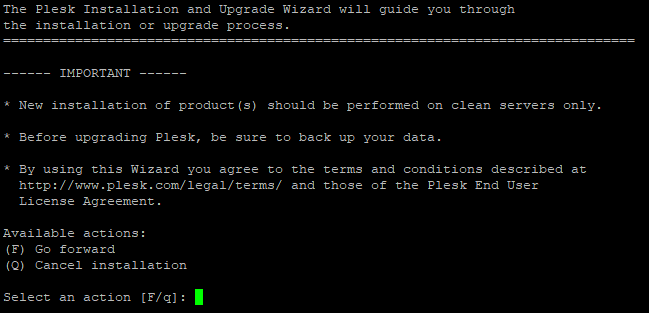
Select an action [F/q]: F
Type F and hit Enter to continue. You should see the following output:
Would you like to help Plesk make better products by sending information
about issues occurred, including installation and upgrade issues? [Y/n]: Y
Type Y and hit Enter. You should see the following output:
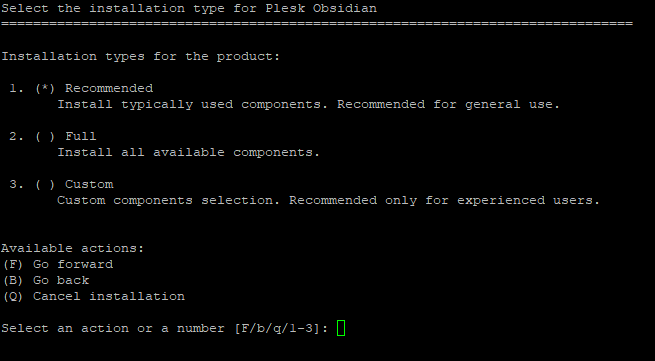
Select an action or a number [F/b/q/1-3]: F
Type F and hit Enter. You should see the following output:
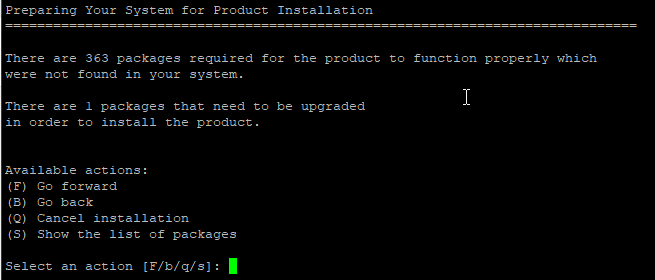
Select an action [F/b/q/s]: F
Type F and hit Enter to start the installation. Once the installation has been completed, you should get the following output:
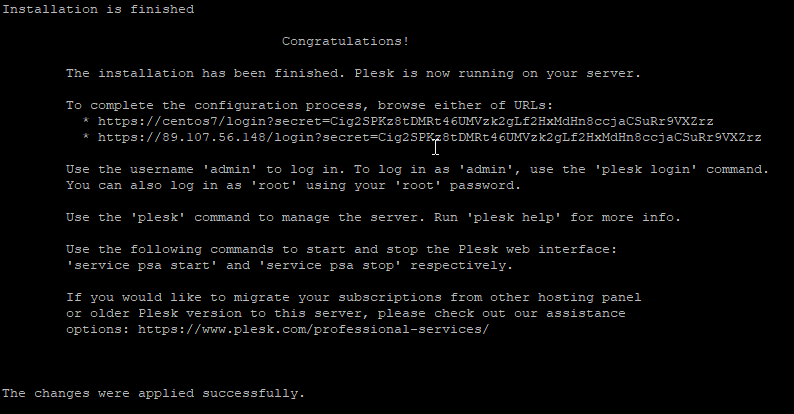
Step 2 – Access Plesk Onyx Web Interface
Now, open your web browser and type the URL from the above. You will be redirected to the following screen:
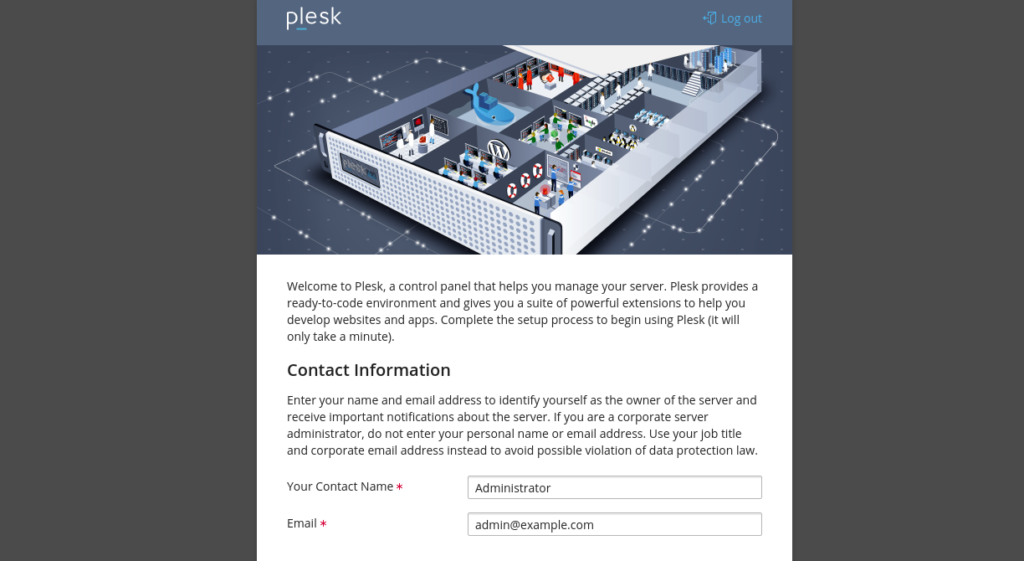
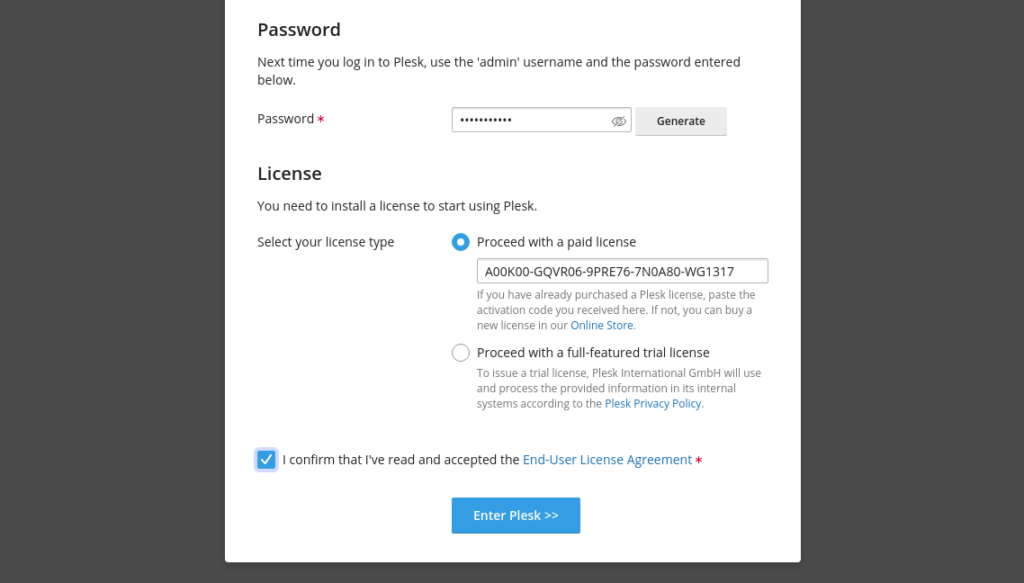
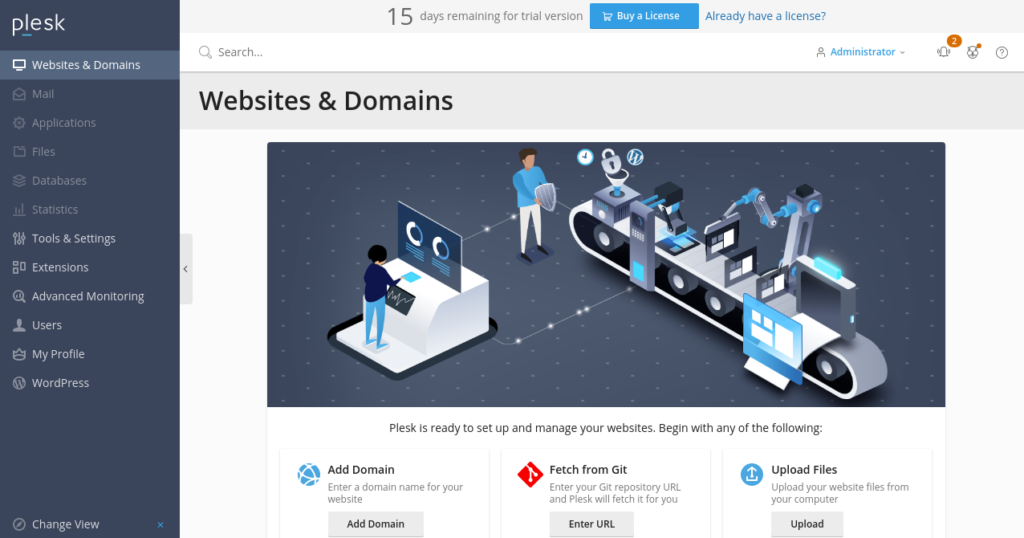
Provide your administrator email, password, License key and click on the Enter Plesk button. You should see the Plesk dashboard in the following screen:
Conclusion
Congratulations! You have successfully installed the Plesk Onyx control panel on CentOS 7. You can now manage your web hosting account, DNS, Domain, Mailbox, and Website easily with Plesk Onyx. For more information, visit the Plesk Onyx documentation. Try Plesk Onyx today with an Atlantic.Net VPS Hosting account!
* This post is for informational purposes only and does not constitute professional, legal, financial, or technical advice. Each situation is unique and may require guidance from a qualified professional.
Readers should conduct their own due diligence before making any decisions.