Table of Contents
Verified and Tested 7/16/2016
Introduction
Plesk is a commercial web hosting platform released under Plesk Inc. Plesk is a cross-platform control panel compatible with both Windows and Linux operating systems. In this article, we will be going over how to install Plesk on your Windows 2012 server.
Prerequisites
A Server with Windows Server 2012. If you do not have a server already, why not spin up a Windows VPS from Atlantic.Net in under 30 seconds.
Alternatively, you can complete this article with the 14 day trial license.
Getting Started!
First, we want to start by logging into the server with administrative credentials (if you have forgotten your password, read our helpful how-to on resetting it). Once you have logged into the server download the Windows Plesk installing at:
Plesk installer
When you click on the link the installer will be automatically downloaded. When the download is completed double click on the .exe file. Once done you will be presented with a pop-up. Click YES and you should be presented with the image below:
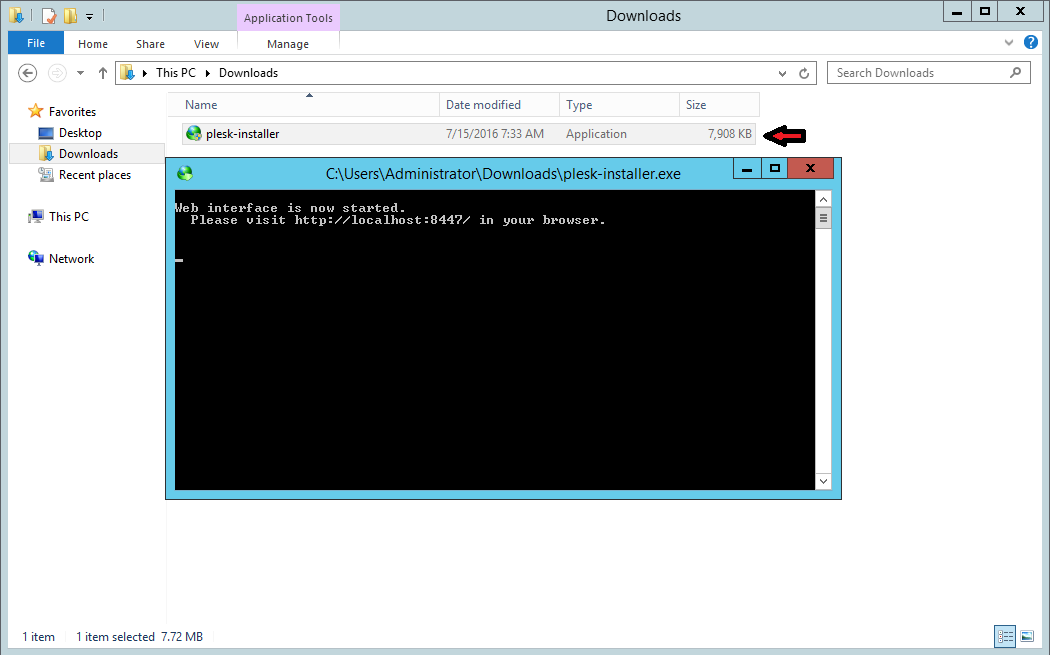 Example of Windows Installer
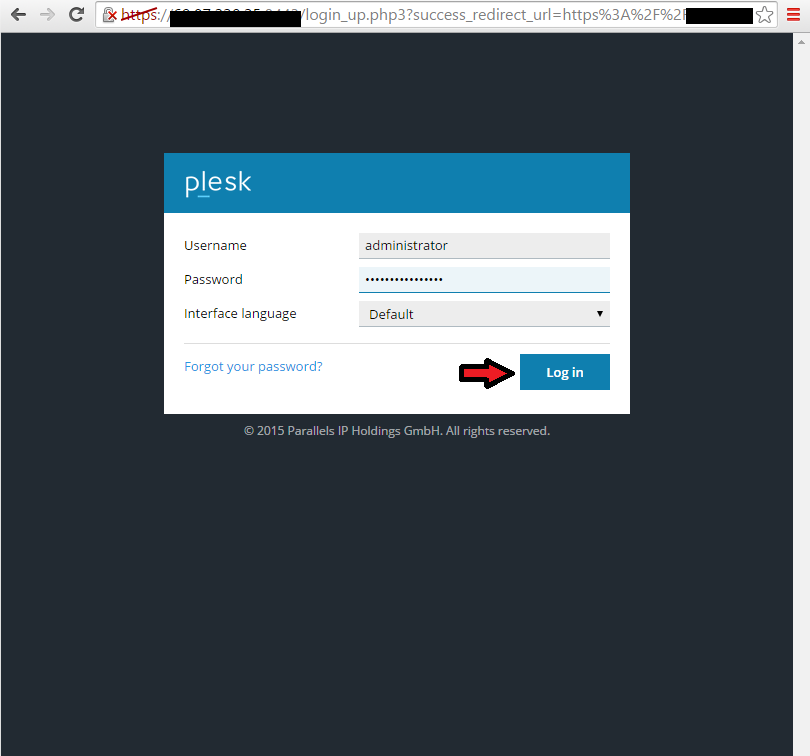
You should now be directed to the Plesk login window in your browser. Login with the administrative credentials for your server.
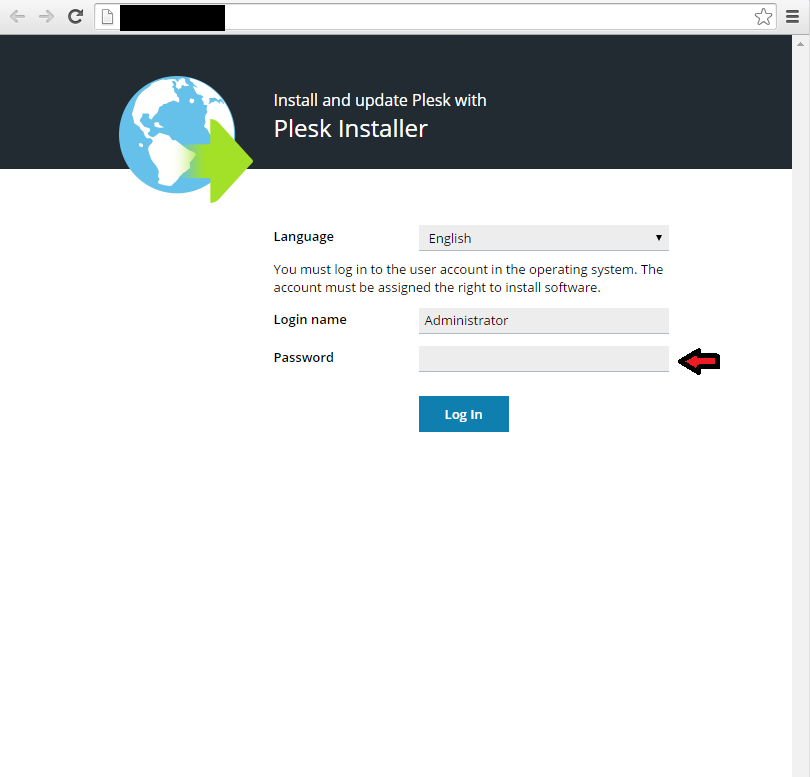 Screenshot of Plesk login page
At this point, you should be presented with the “Install and Update Parallels Products” window. Click on “Install or Upgrade Product”.
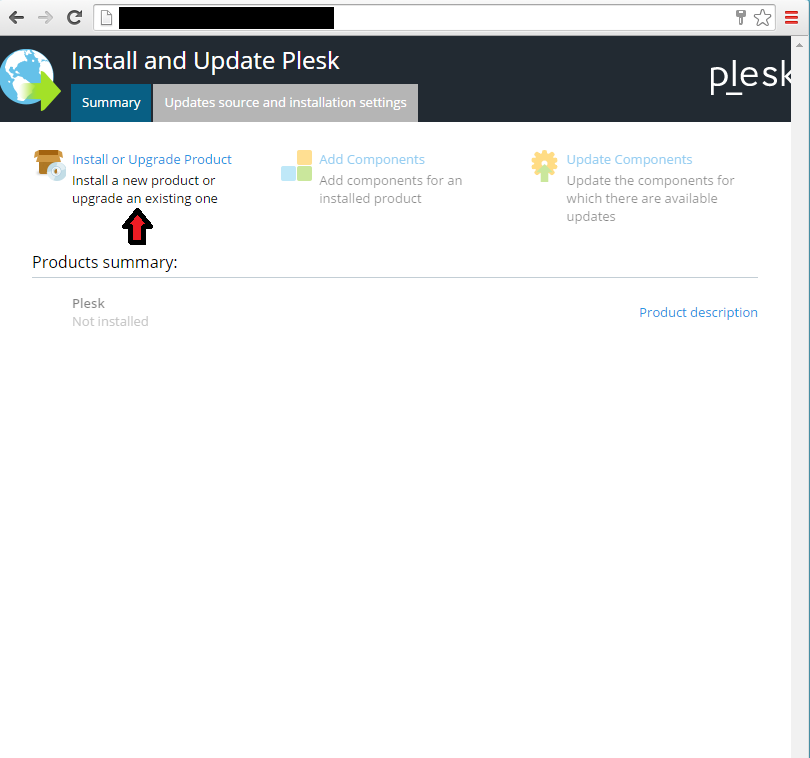 Example of the “Install and Update Plesk” window
Click on the checkbox next to Plesk. Make sure you select the latest stable version from the drop-down and click Continue.
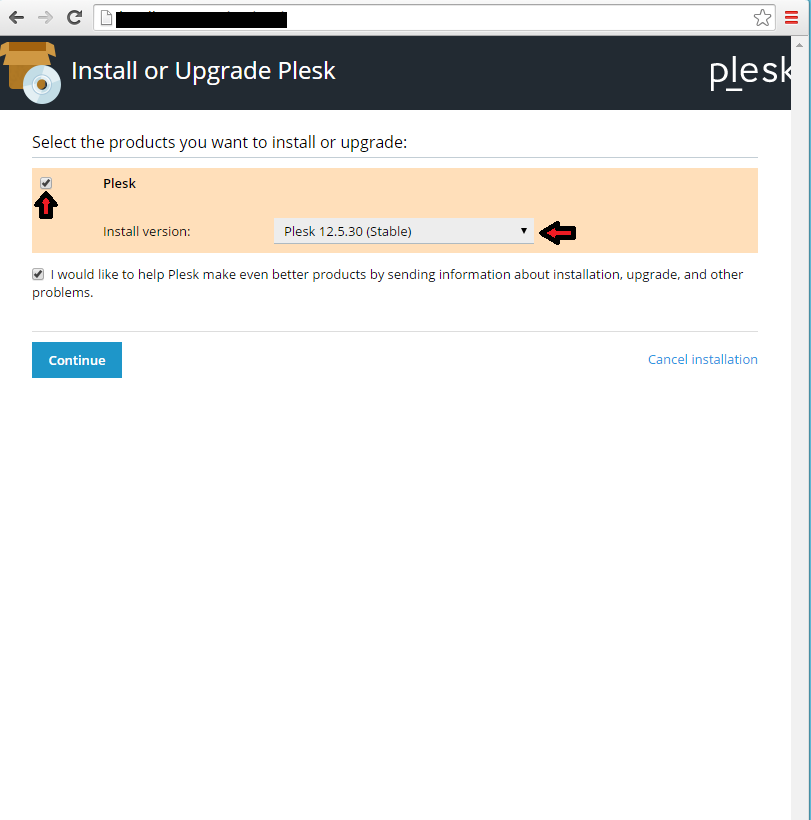 Install or Upgrade Plesk
Next, you will be directed to the “Select Installation Types For The Products” page. Installation type should be full. Make sure the “Preview Components Selection” box is checked and click Continue.
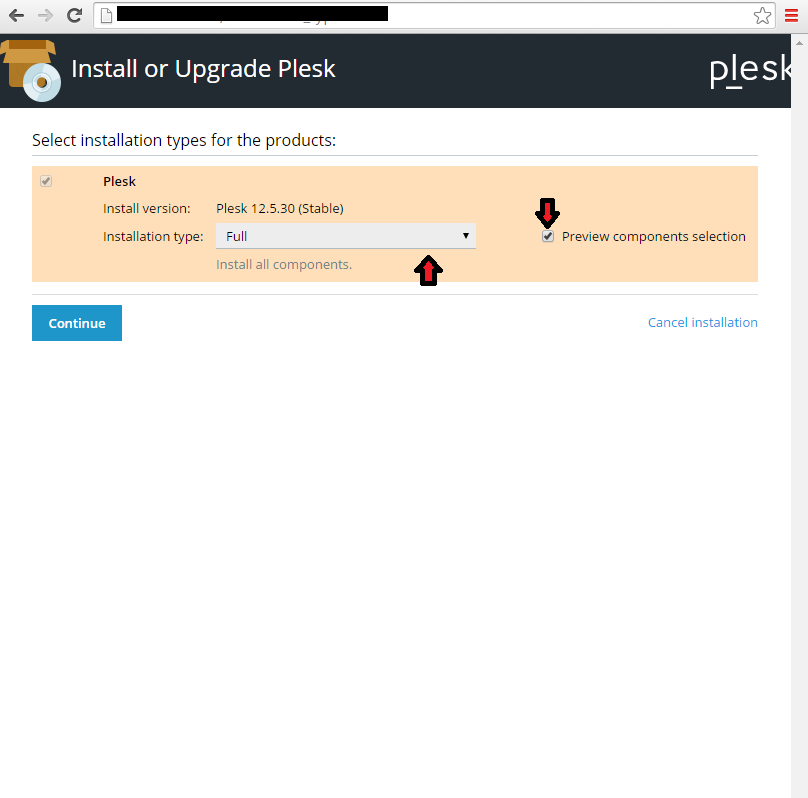 Select Installation Types For The Products
On the next screen select the components you wish to install and click Continue.
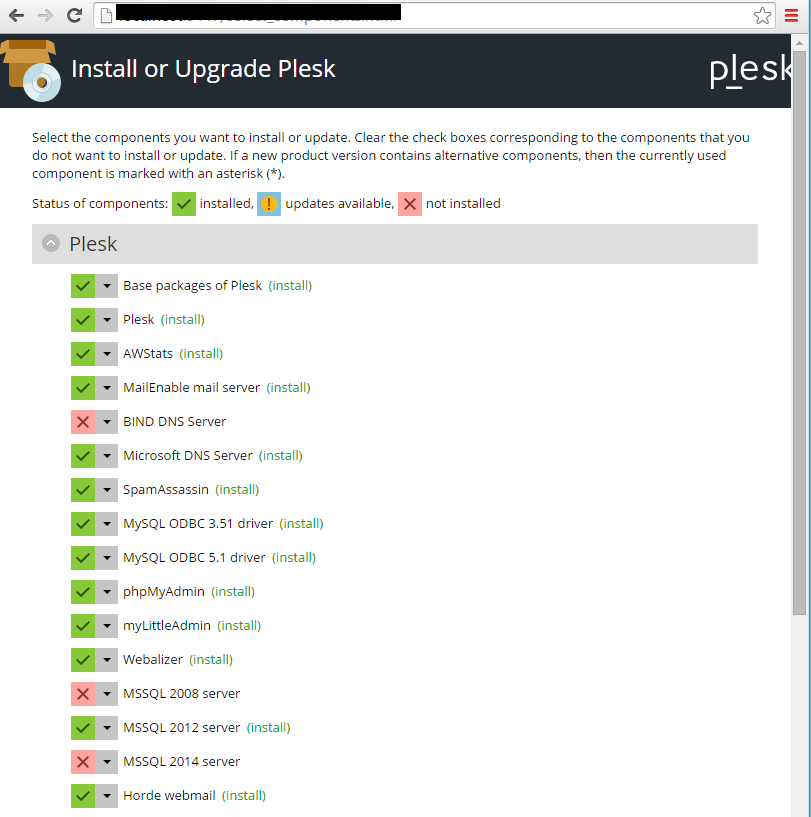 Install Or Upgrade Plesk
After that provide the administrator password you want to set for Plesk. The other fields should auto populate. You do not need to edit these fields as they are taken by default by the Plesk installer. Click Continue.
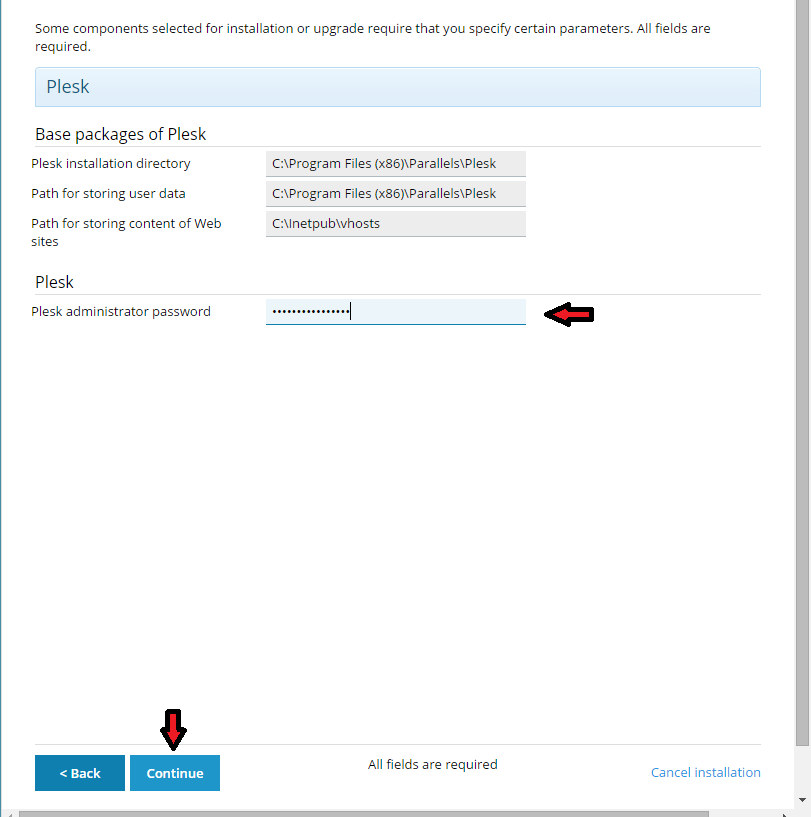 Plesk Base Packages
The Plesk installation should now be started.
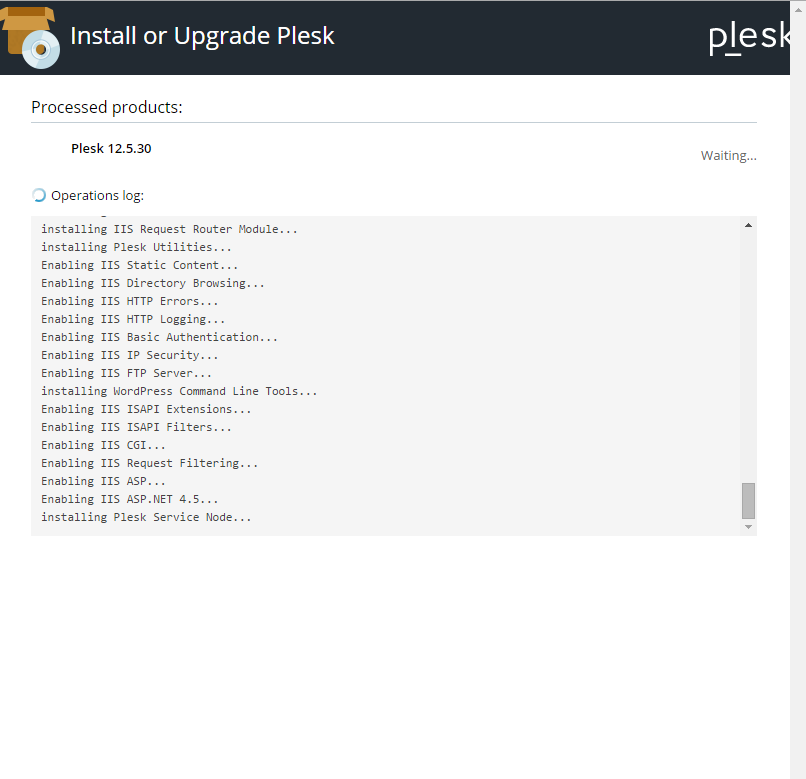 Plesk control panel installation
When the next screen pops up informing you that the installation was successful click on OK.
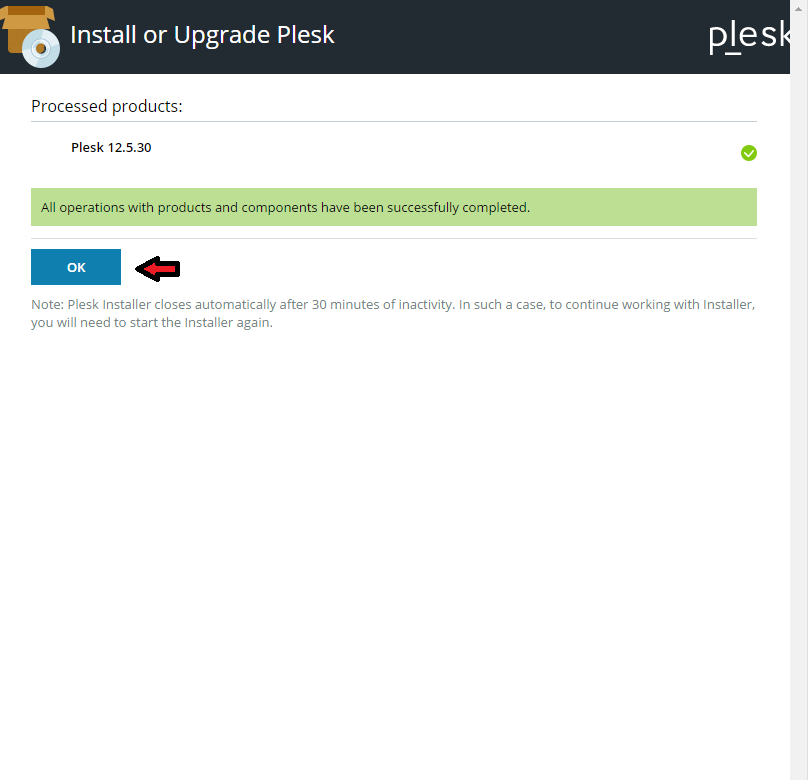 Plesk 12.5.30 installation
You should now have the following page as shown below. If you prefer you can add or remove other components from this page.
 Add/Remove Components
Next step is to visit the following URL in your browser. Use the credentials you set while installing Plesk to access you account.
https://yourserverip:8443
 Plesk Web Login
You will now be presented with the “Parallels End-User License Agreement” page. Check the box to agree to the terms and click Agree to move along.
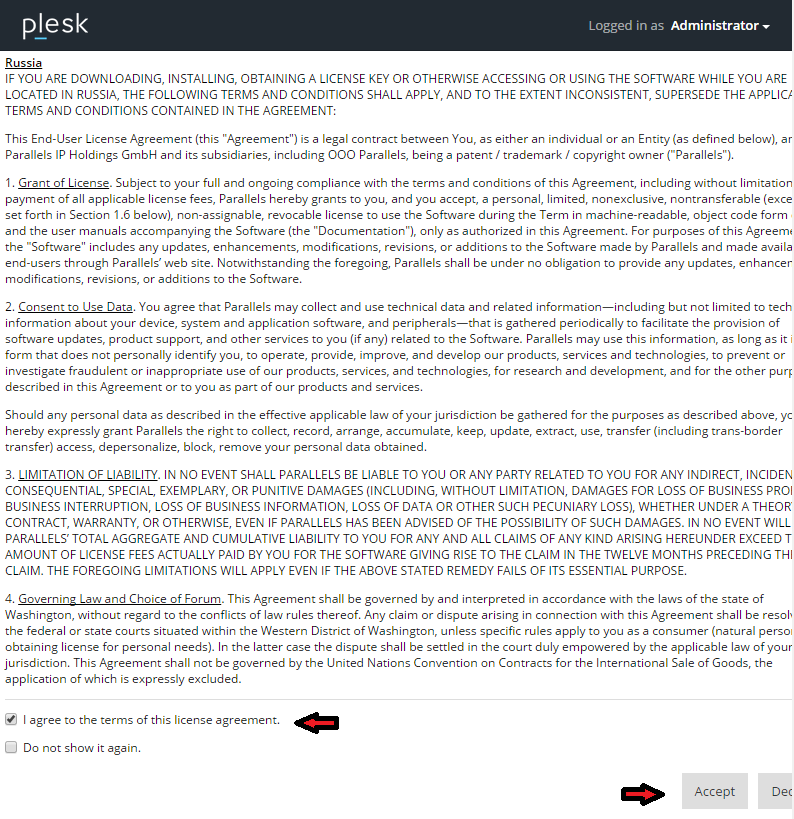 Parallels End-User License Agreement
Click on the option that best describes what you will be using Plesk for. Once done select your interface and then click OK.
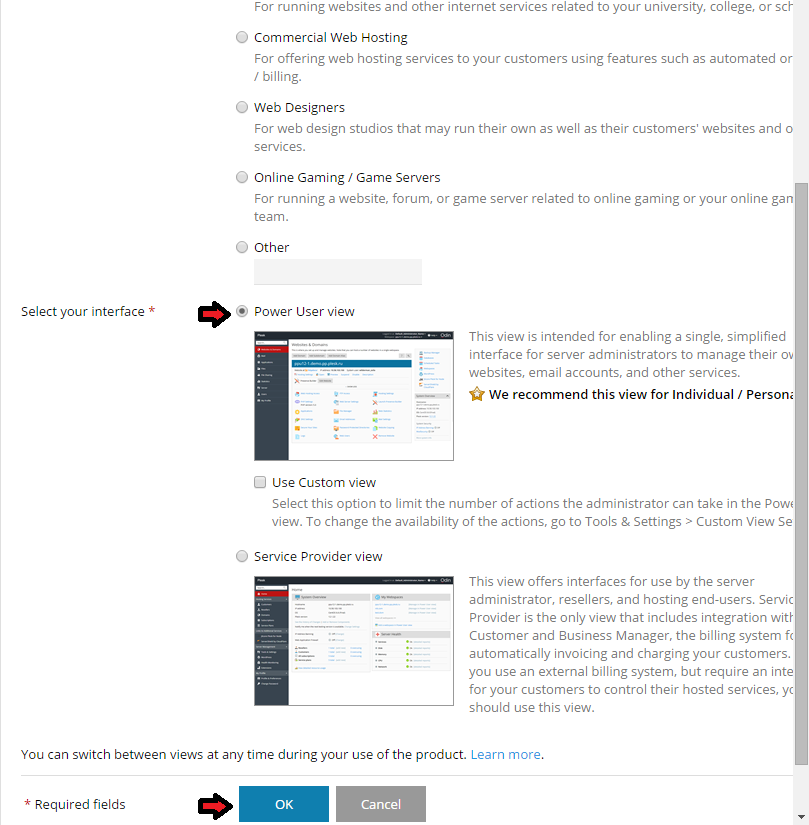 Plesk Interface Installation
On the next screen, you will be prompted to provide the hostname of the server. Once you have edited the hostname field you will be asked to change the default administrator password. Click OK to proceed.
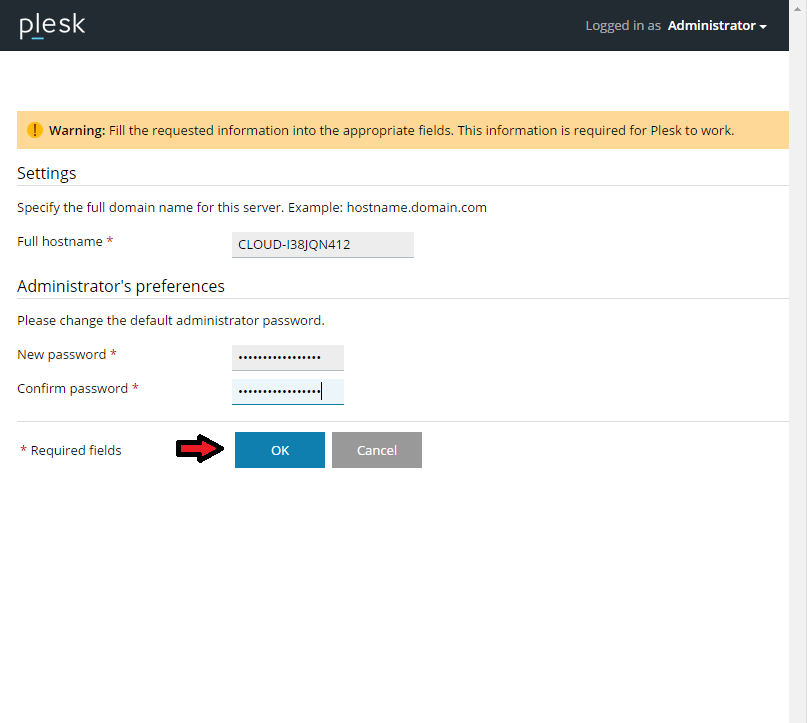 Administrator Preferences Page
When you reach the next page please provide the requested information. Once done editing the required fields click OK.
 Administrator Information
Finally, the next screen will prompt you for your license key. If you have your license key you can add it on this page. If not, you can start your 14 day trial license period.
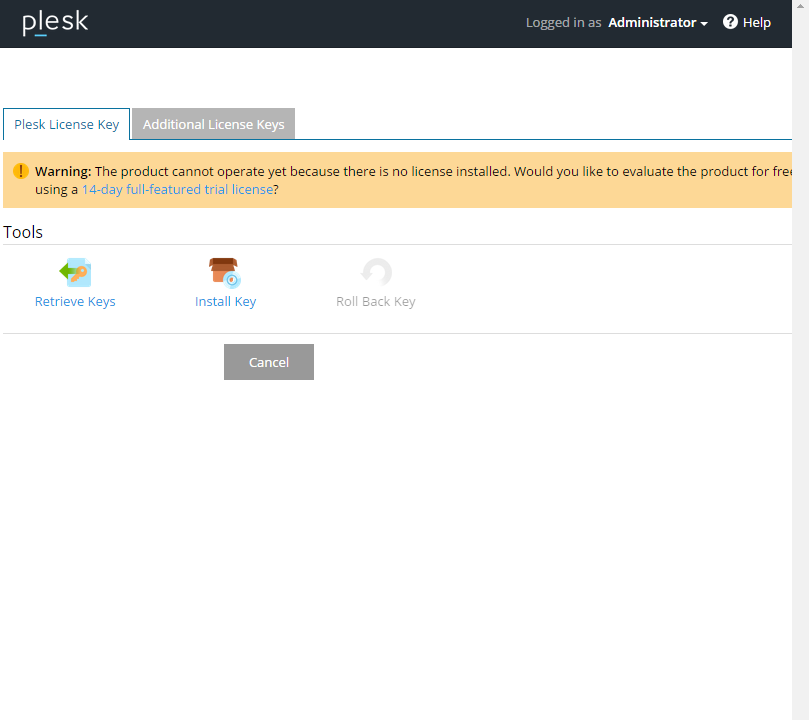 Plesk License Key
Conclusion
Congratulations you have installed Plesk on your Windows 2012 server. We hope this article assisted you with the installation. Thank you for following this How-To, check back for updates or learn more about our reliable VPS hosting solutions.
* This post is for informational purposes only and does not constitute professional, legal, financial, or technical advice. Each situation is unique and may require guidance from a qualified professional.
Readers should conduct their own due diligence before making any decisions.