Pure FTPd is a free and open-source FTP server designed with a strong focus on software security. It can be run on several operating systems including Linux, OpenBSD, NetBSD, FreeBSD, DragonFly BSD, Solaris, and many more. It is a very lightweight and stable daemon that supports various authentication backends such as Linux system users, puredb, MySQL, and PostgeSQL.
In this tutorial, we will explain how to install Pure FTPd with SSL/TLS on Ubuntu 24.04.
Prerequisites
- A fresh Ubuntu 24.04 VPS on the Atlantic.Net Cloud Platform.
- A root password configured on your server.
Step 1 – Create Atlantic.Net Cloud Server
First, log in to your Atlantic.Net Cloud Server. Create a new server, choosing Ubuntu 24.04 as the operating system with at least 1GB RAM. Connect to your Cloud Server via SSH and log in using the credentials highlighted at the top of the page.
Once you are logged in to your Ubuntu 24.04 server, run the following command to update your base system with the latest available packages.
apt-get update -y
Step 2 – Install Pure FTPd
By default, Pure FTPd is available in the Ubuntu 24.04 default repository. You can install it with the following command:
apt-get install pure-ftpd -y
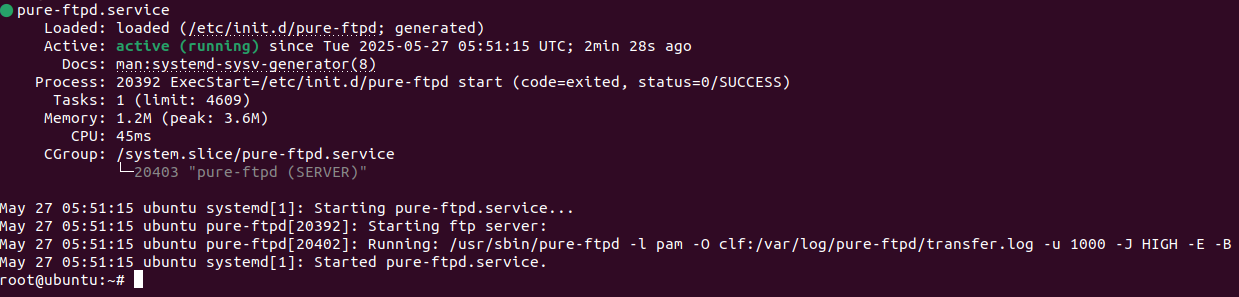
After installing Pure FTPd, you can verify the status of Pure FTPd with the following command:
systemctl status pure-ftpd
You should see the following output:
Step 3 – Create FTP User
Next, you will need to create a FTP user in your system. You can create it with the following command:
adduser vyom
You will be asked to set a password as shown below:
Adding user `vyom' ...
Adding new group `vyom' (1000) ...
Adding new user `vyom' (1000) with group `vyom' ...Creating home directory `/home/vyom' ...
Copying files from `/etc/skel' ...
New password:
Retype new password:
passwd: password updated successfully
Changing the user information for vyom
Enter the new value, or press ENTER for the default
            Full Name []:
            Room Number []:
            Work Phone []:
            Home Phone []:
            Other []:
Is the information correct? [Y/n] Y
Step 4 – Create a Self-signed SSL/TLS certificate
Next, you will need to generate a self-signed certificate for Pure FTPd. You can generate it with the following command:
openssl req -x509 -nodes -newkey rsa:2048 -keyout /etc/ssl/private/pure-ftpd.pem -out /etc/ssl/private/pure-ftpd.pem -days 365
Answer all the questions with answers relevant to your installation, as shown below:
Generating a RSA private key
.......................+++++
....+++++
writing new private key to '/etc/ssl/private/pure-ftpd.pem'
-----
You are about to be asked to enter information that will be incorporated
into your certificate request.
What you are about to enter is what is called a Distinguished Name or a DN.
There are quite a few fields but you can leave some blank
For some fields there will be a default value,
If you enter '.', the field will be left blank.
-----
Country Name (2 letter code) [AU]:IN
State or Province Name (full name) [Some-State]:GUJ
Locality Name (eg, city) []:JUN
Organization Name (eg, company) [Internet Widgits Pty Ltd]:Atlantic
Organizational Unit Name (eg, section) []:IT
Common Name (e.g. server FQDN or YOUR name) []:example
Email Address []:[email protected]
Step 5 – Configure Pure FTPd to use SSL/TLS
Next, you will need to configure Pure FTPd to use the certificate which we have generated above. You can configure it by editing the pure-ftpd.conf file:
nano /etc/pure-ftpd/pure-ftpd.conf
Change the following lines:
TLSCipherSuite               HIGH
CertFile                     /etc/ssl/private/pure-ftpd.pem
Save and close the file when you are finished.
Enable the TLS support.
echo "2" | tee /etc/pure-ftpd/conf/TLS
Then, restart the Pure FTPd service to apply the changes:
systemctl restart pure-ftpd
At this point, Pure FTPd is installed and configured to use SSL/TLS.
Step 6 – Connect FTP Server from Client
Next, you will need to connect to your Pure FTPd server from the client machine using the FileZilla FTP client.
First, open the FileZilla client and click on the Site Manager. You should see the following screen:
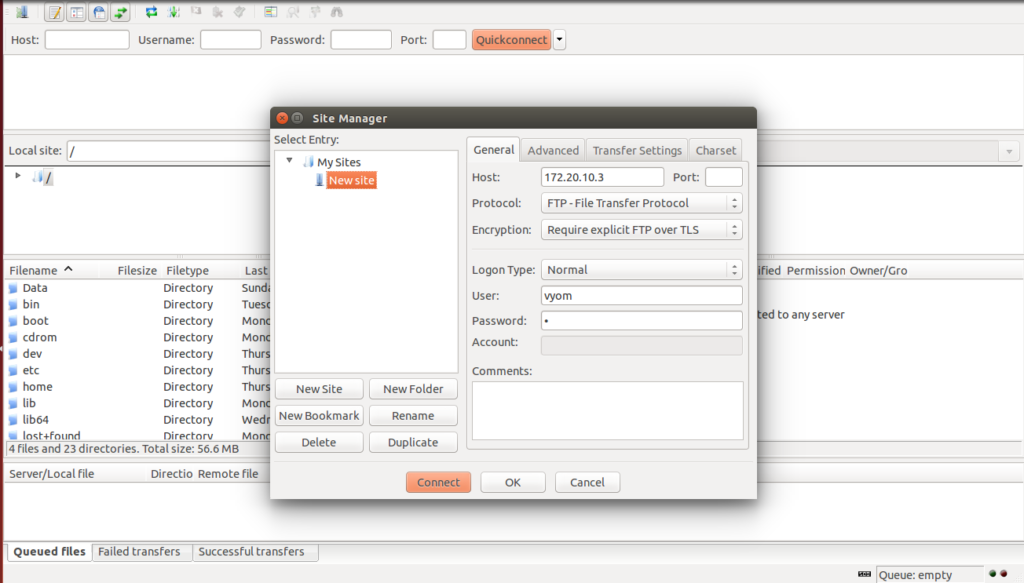
Provide your Pure FTPd server IP, select FTP protocol, select “Require explicit FTP over TLS”, provide your FTP username and password, and click on the Connect button. You will be prompted to accept the certificate as shown below:
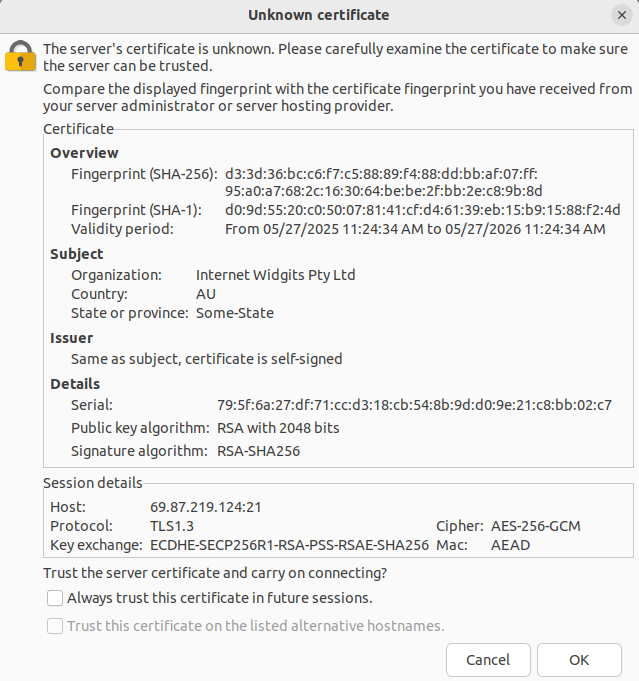
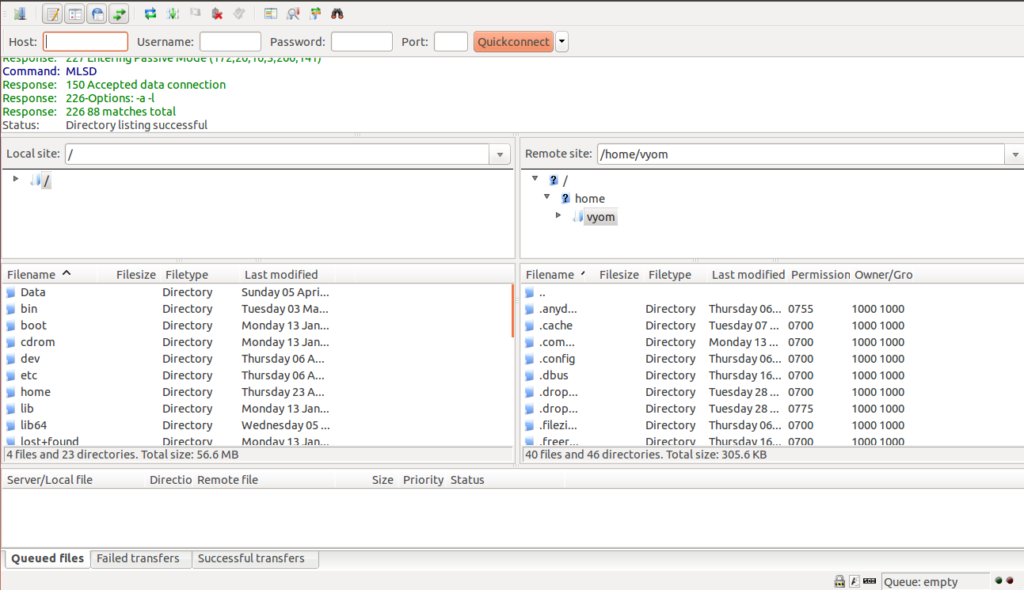
Accept the certificate and click on the OK button. Once you are connected, you should see the following screen:
Conclusion
Congratulations! You have successfully installed Pure FTPd with SSL/TLS support on Ubuntu 24.04 server. You can now upload and download files and directories, to and from the FTP server. Try Pure FTPd today on Linux VPS Hosting from Atlantic.Net!