Verified and Tested 05/19/21
Introduction
This how-to will show you how to install the Zabbix 5.0 Server on a CentOS 7 installation. Zabbix is an open-source monitoring tool that is ideal for monitoring your cloud servers. However, it can monitor many other types of devices. Installing Zabbix can help you find issues with your server before an outage occurs.
Prerequisite
- A CentOS 7 server running LAMP. Please see this post for details on installing LAMP on CentOS 7.
- If you do not have a CentOS 7 server, try a Virtual Private Server today!
 Zabbix Vision by Walker Cahall
 Zabbix Vision by
 Install Zabbix on CentOS 7
To install the Zabbix server, you will need to find out if your CentOS installation is 32-bit or 64-bit.
To do this run the command:
uname -i
uname -i
If it says x86_64, you are using a 64-bit installation.
uname -a
If it says i368, you are using a 32-bit installation.
We will then need to install the Zabbix repository from Zabbix.
For CentOS 7 64-Bit, run the following command:
yum install -y centos-release-scl
rpm -Uvh https://repo.zabbix.com/zabbix/5.0/rhel/7/x86_64/zabbix-release-5.0-1.el7.noarch.rpm
After installing the Zabbix repository, you can now install the Zabbix server. Do that by running the command:
yum install -y zabbix-web-mysql-scl zabbix-apache-conf-scl zabbix-server-mysql zabbix-agent --enablerepo=zabbix-frontend
Now, we need to make some configuration changes before going through the web installation.
Edit the Zabbix config file and set the timezone.
nano /etc/opt/rh/rh-php72/php-fpm.d/zabbix.conf
Change the following line
php_value[date.timezone] = America/New_York:
Next, edit /etc/php.ini with your favorite editor and change the following:
Under Resource limits
max_execution_time = 600

php.ini max_execution_time
max_input_time = 600
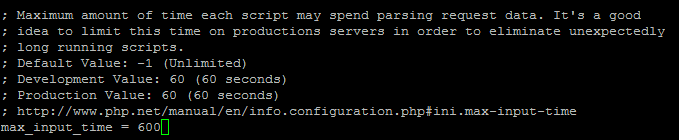
php.ini max_input_time
memory_limit= 256M

php.ini memory_limit
Under Data Handling
post_max_size = 32M

php.ini post_max_size
Under File Uploads
upload_max_filesize = 16M

php.ini upload_max_filesize
Under Module Settings
date.timezone = 'UTC'

php.ini date.timezone
You can change this to a timezone of your choice. In this example, we are using UTC. For a complete list of PHP timezones, go here.
Once done with the php.ini configurations, we can set up the database.
mysql -u root -p
When prompted, enter your MySQL root password that you set up when installing MySQL.
In MySQL, enter the following commands:
create database zabbix character set utf8 collate utf8_bin;
Make sure you set your own secure password where it says [insert-password-here]
grant all privileges on zabbix.* to zabbix@localhost identified by '[insert-password-here]';
flush privileges;
exit
After creating the database, we need to add the initial Zabbix schema and data. To do that, run the following commands (for the MySQL commands, you will be prompted for the Zabbix password you set when you created the database):
cd /usr/share/doc/zabbix-server-mysql*/
zcat create.sql.gz | mysql -u zabbix -p zabbix
Once schema and data have been added to the database, we need to edit the Zabbix configuration file.
Use a text editor to edit /etc/zabbix/zabbix_server.conf and make sure the following are set:
DBHost=localhost
DBName=zabbix
DBUser=zabbix
DBPassword=[insert-password-here]
Once the conf file is set, you can now start the Zabbix server and restart Apache.
systemctl start rh-php72-php-fpm
systemctl restart zabbix-server zabbix-agent httpd
Now, we can go to the web installation. In your browser, go to http://yourhostname-or-ipaddress/zabbix
If you are unsure what your IP address is, run the following:
ifconfig

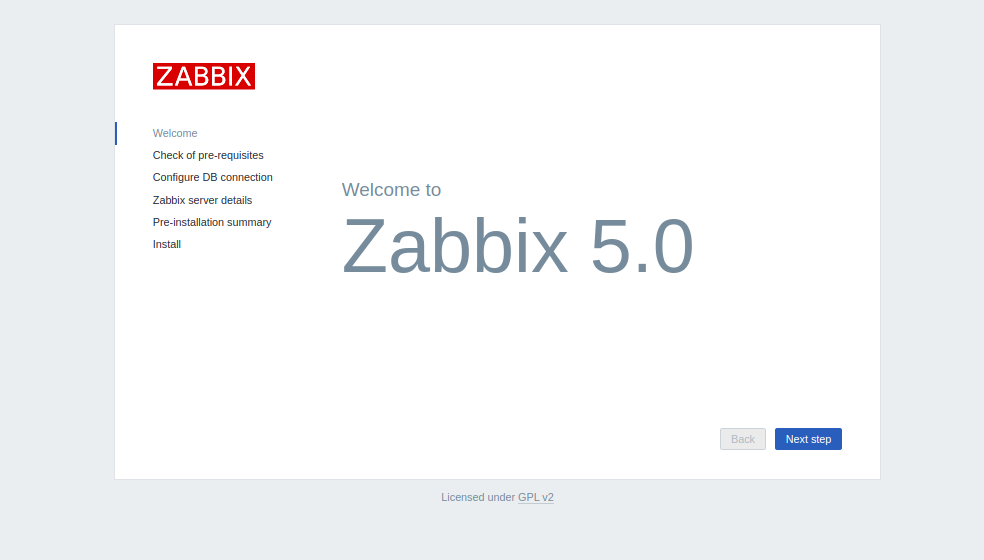
In our example, we would put http://192.68.0.2/zabbix in the address bar and get the following page. Click Next
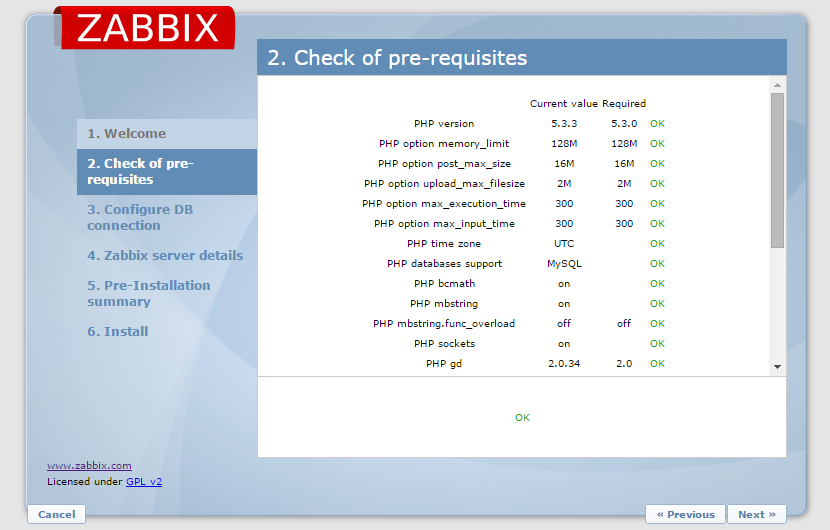
Make sure everything says OK. If not, look at your php.ini file and make the appropriate changes.
Click next if everything is OK.
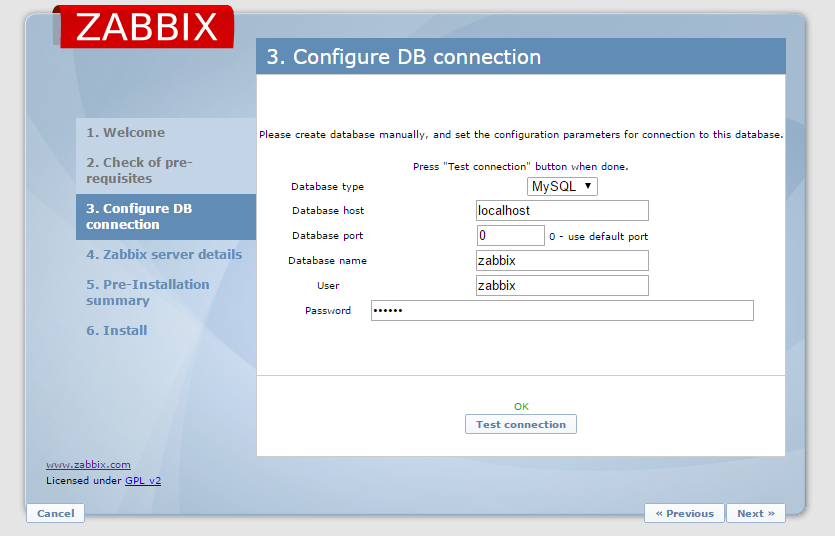
Input your database information that you set up earlier and click test connection.
If it says OK click next, if not check your database information again to see if it is accurate.
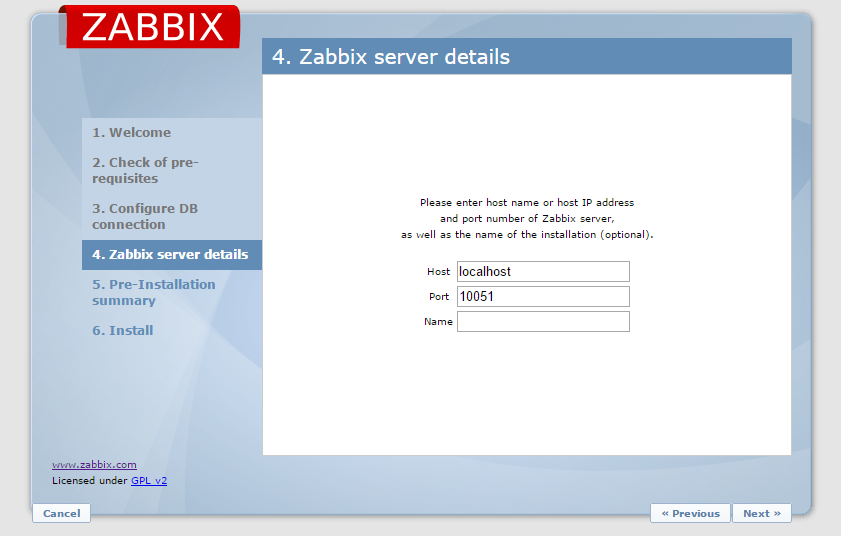
For most installations, you can keep the defaults. If you would like, you can set a name for the installation. Once done, click next.
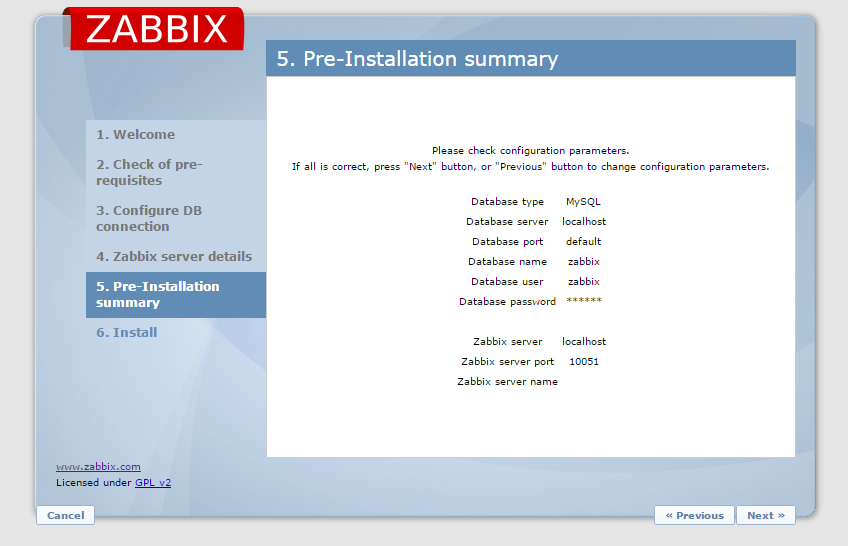
Verify your installation and click next.
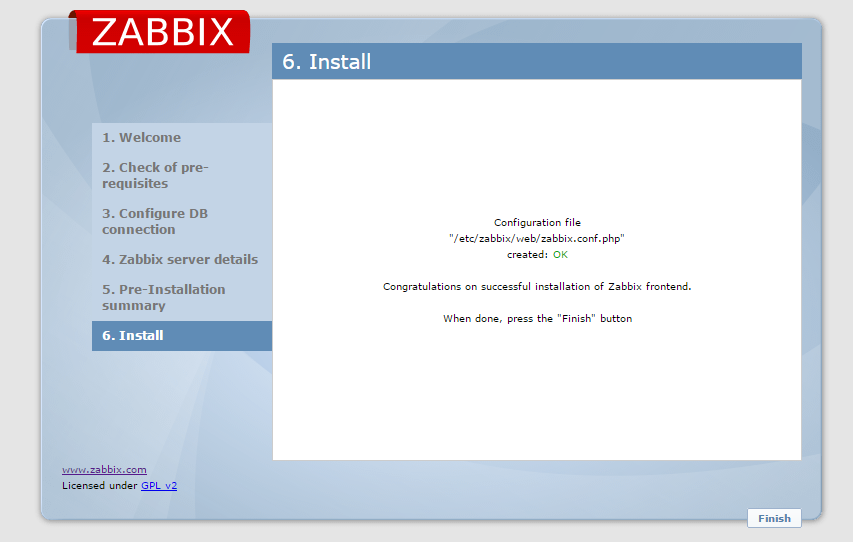
Click finished to go to the login page.
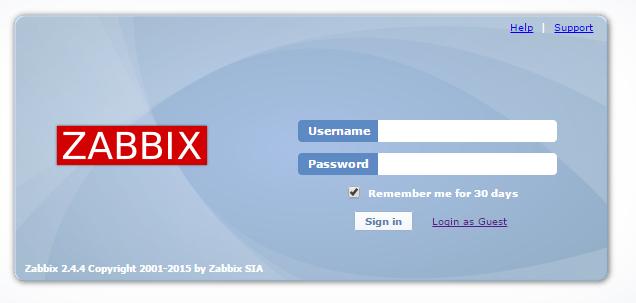
You can then log into Zabbix with the default logins.
Username: Admin
Password: zabbix
Congratulations! You have now installed Zabbix on Centos 7. Thank you for following along this how to! Come back for updates, and try a VPS Hosting solution from Atlantic.Net.