Django is an open-source web framework used for developing Python-based websites. It is built by experienced developers to make it easier for the rapid development of secure and maintainable websites. It is based on the Model View Template design that reduces a lot of hassles that a developer has to face during the development of a website.
In this post, we will show you how to install Django on Arch Linux.
Step 1 – Configure Repository
By default, the default repository is outdated in Arch Linux, so you will need to modify the default mirror list. You can do it by editing the mirror list configuration file:
nano /etc/pacman.d/mirrorlist
Remove all lines and add the following lines:
## Score: 0.7, United States
Server = http://mirror.us.leaseweb.net/archlinux/$repo/os/$arch
## Score: 0.8, United States
Server = http://lug.mtu.edu/archlinux/$repo/os/$arch
Server = http://mirror.nl.leaseweb.net/archlinux/$repo/os/$arch
## Score: 0.9, United Kingdom
Server = http://mirror.bytemark.co.uk/archlinux/$repo/os/$arch
## Score: 1.5, United Kingdom
Server = http://mirrors.manchester.m247.com/arch-linux/$repo/os/$arch
Server = http://archlinux.dcc.fc.up.pt/$repo/os/$arch
## Score: 6.6, United States
Server = http://mirror.cs.pitt.edu/archlinux/$repo/os/$arch
## Score: 6.7, United States
Server = http://mirrors.acm.wpi.edu/archlinux/$repo/os/$arch
## Score: 6.8, United States
Server = http://ftp.osuosl.org/pub/archlinux/$repo/os/$arch
## Score: 7.1, India
Server = http://mirror.cse.iitk.ac.in/archlinux/$repo/os/$arch
## Score: 10.1, United States
Server = http://mirrors.xmission.com/archlinux/$repo/os/$arch
Save and close the file, then update all the package indexes with the following command:
pacman -Syu
Step 2 – Install Python Dependencies
Django is a Python-based application. So you will need to install Python and other dependencies to your server. You can install all of them using the following command.
pacman -S python python-pip
Next, update the PIP package with the following command.
pip3 install --upgrade pip
Next, install the virtualenv package.
pip3 install virtualenv
Next, verify the PIP version using the following command.
pip3 --version
You will get the following output.
pip 23.0 from /usr/lib/python3.10/site-packages/pip (python 3.10)
Step 3 – Install and Configure MySQL Database Server
First, install the MySQL server using the following command.
pacman -S mysql
Next, initialize the MySQL database using the following command.
mysql_install_db --user=mysql --basedir=/usr --datadir=/var/lib/mysql
Next, start and enable the MySQL service with the following command.
systemctl start mysqld
systemctl enable mysqld
Next, log into the MySQL shell with the following command.
mysql
Once logged in, create a database and user for Django:
CREATE DATABASE django;
CREATE USER 'django'@'localhost' IDENTIFIED BY 'yourpassword';
Next, grant all the privileges to the Django database with the following command.
GRANT ALL ON django.* TO 'django'@'localhost';
Now, flush the privileges and exit from the MySQL shell with the following command.
FLUSH PRIVILEGES;
EXIT;
Step 4 – Install Django Arch Linux
First, create a Django project directory and create a virtual environment for Django using the following command.
mkdir django
cd django
python3 -m venv djangoenv
Next, activate the virtual environment with the following command.
source djangoenv/bin/activate
Next, install Django using the following command.
pip install django
You will get the following output.
Collecting django
  Downloading Django-4.1.6-py3-none-any.whl (8.1 MB)
     ━━━━━━━━━━━━━━━━━━━━━━━━━━━━━━━━━━━━━━━━ 8.1/8.1 MB 29.9 MB/s eta 0:00:00
Collecting asgiref<4,>=3.5.2
  Downloading asgiref-3.6.0-py3-none-any.whl (23 kB)
Collecting sqlparse>=0.2.2
  Using cached sqlparse-0.4.3-py3-none-any.whl (42 kB)
Installing collected packages: sqlparse, asgiref, django
Successfully installed asgiref-3.6.0 django-4.1.6 sqlparse-0.4.3

[notice] A new release of pip available: 22.3.1 -> 23.0
[notice] To update, run: pip install --upgrade pip
Next, install the MySQL client package.
pip install mysqlclient
Next, create a Django project with the following command.
django-admin startproject djangoproject .
Next, edit the Django configuration file with the following command.
nano djangoproject/settings.py
Add your server IP or domain name as shown below:
ALLOWED_HOSTS = ['your_server_ip']
Find the following database section.
DATABASES = {
'default': {
'ENGINE': 'django.db.backends.sqlite3',
'NAME': BASE_DIR / 'db.sqlite3',
}
}
And replace them with the following lines.
DATABASES = {
'default': {
'ENGINE': 'django.db.backends.mysql',
'NAME': 'django',
'USER': 'django',
'PASSWORD': 'yourpassword',
'HOST': '127.0.0.1',
'PORT' : '3306',
}
}
Next, add/modify the following lines:
import os

STATIC_URL='/static/'
STATIC_ROOT=os.path.join(BASE_DIR, 'static/')

MEDIA_URL='/media/'
MEDIA_ROOT=os.path.join(BASE_DIR, 'media/')
Save and close the file when you are done. Then, migrate the database with the following command.
./manage.py makemigrations
./manage.py migrate
You will get the following output.
Operations to perform:
  Apply all migrations: admin, auth, contenttypes, sessions
Running migrations:
  Applying contenttypes.0001_initial... OK
  Applying auth.0001_initial... OK
  Applying admin.0001_initial... OK
  Applying admin.0002_logentry_remove_auto_add... OK
  Applying admin.0003_logentry_add_action_flag_choices... OK
  Applying contenttypes.0002_remove_content_type_name... OK
  Applying auth.0002_alter_permission_name_max_length... OK
  Applying auth.0003_alter_user_email_max_length... OK
  Applying auth.0004_alter_user_username_opts... OK
  Applying auth.0005_alter_user_last_login_null... OK
  Applying auth.0006_require_contenttypes_0002... OK
  Applying auth.0007_alter_validators_add_error_messages... OK
  Applying auth.0008_alter_user_username_max_length... OK
  Applying auth.0009_alter_user_last_name_max_length... OK
  Applying auth.0010_alter_group_name_max_length... OK
  Applying auth.0011_update_proxy_permissions... OK
  Applying auth.0012_alter_user_first_name_max_length... OK
  Applying sessions.0001_initial... OK
Step 5 – Create a Django Superuser
Next, create an administrative user for Django using the following command.
./manage.py createsuperuser
Define your email address and password as shown below:
Username (leave blank to use 'root'): hiteshj
Email address: admin@example.com
Password:
Password (again):
Superuser created successfully.
Next, copy all static files with the following command.
./manage.py collectstatic
Step 6 – Start Django Server
At this point, Django is installed and configured. You can now start Django using the following command.
./manage.py runserver 0.0.0.0:8000
You should see the following output.
Watching for file changes with StatReloader
Performing system checks...

System check identified no issues (0 silenced).
February 06, 2023 - 08:00:46
Django version 4.1.6, using settings 'djangoproject.settings'
Starting development server at http://0.0.0.0:8000/
Quit the server with CONTROL-C.
Step 7 – Access Django Web UI
Django is now started and listens on port 8000. You can now access it using the URL http://your-server-ip:8000/admin. You should see the Django login page on the following screen.
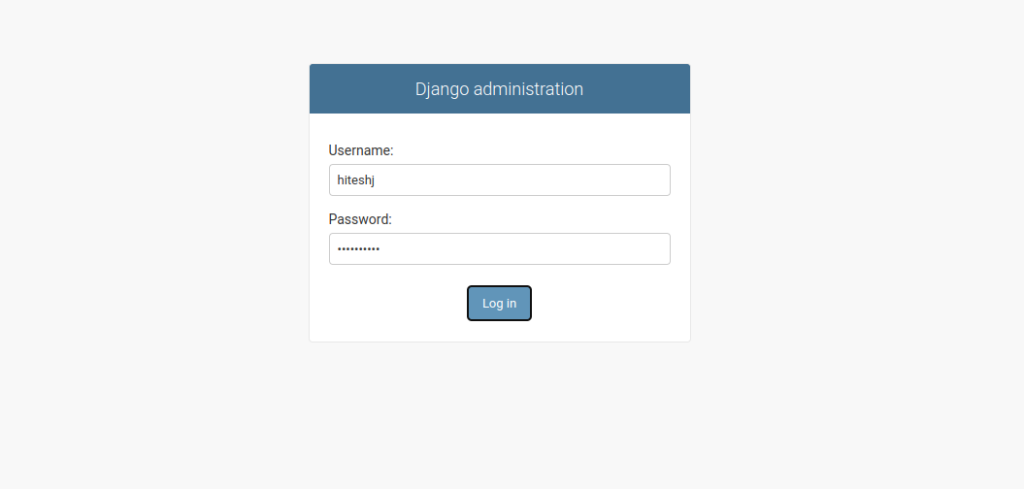
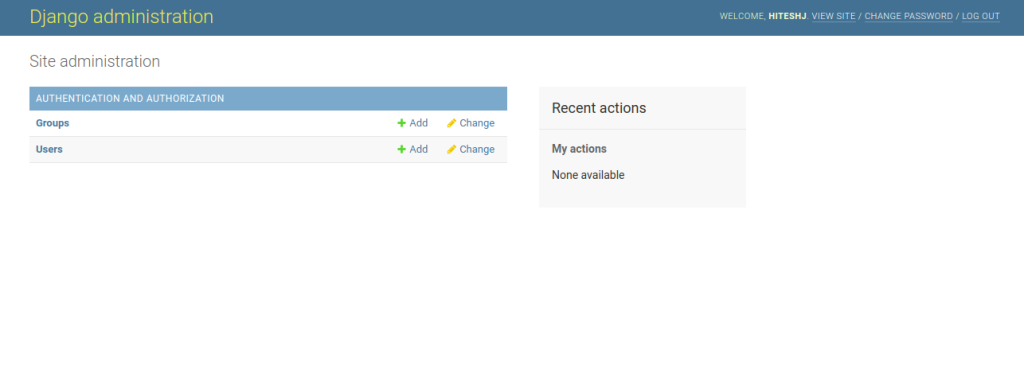
Provide your admin username and password and click on the Login button. You should see the Django dashboard on the following screen.
Conclusion
Congratulations! You have successfully installed and configured Django on Arch Linux. You can now start developing and deploying Python applications using the Django framework. You can set up a Django on a dedicated server hosting from Atlantic.Net!
* This post is for informational purposes only and does not constitute professional, legal, financial, or technical advice. Each situation is unique and may require guidance from a qualified professional.
Readers should conduct their own due diligence before making any decisions.