pgAdmin is an open-source platform for managing PostgreSQL servers via GUI. It is a cross-platform solution that enables businesses to create, view, and modify PostgreSQL objects. It offers a simple and user-friendly web-UI to interact with the Postgres database sessions. If you are looking for an open-source administration panel for managing PostgreSQL, then pgAdmin is the best choice for you.
In this post, we will show you how to install pgAdmin on Arch Linux.
Step 1 – Configure Repository
By default, the default repository is outdated in Arch Linux, so you will need to modify the default mirror list. You can do it by editing the mirror list configuration file:
nano /etc/pacman.d/mirrorlist
Remove all lines and add the following lines:
## Score: 0.7, United States
Server = http://mirror.us.leaseweb.net/archlinux/$repo/os/$arch
## Score: 0.8, United States
Server = http://lug.mtu.edu/archlinux/$repo/os/$arch
Server = http://mirror.nl.leaseweb.net/archlinux/$repo/os/$arch
## Score: 0.9, United Kingdom
Server = http://mirror.bytemark.co.uk/archlinux/$repo/os/$arch
## Score: 1.5, United Kingdom
Server = http://mirrors.manchester.m247.com/arch-linux/$repo/os/$arch
Server = http://archlinux.dcc.fc.up.pt/$repo/os/$arch
## Score: 6.6, United States
Server = http://mirror.cs.pitt.edu/archlinux/$repo/os/$arch
## Score: 6.7, United States
Server = http://mirrors.acm.wpi.edu/archlinux/$repo/os/$arch
## Score: 6.8, United States
Server = http://ftp.osuosl.org/pub/archlinux/$repo/os/$arch
## Score: 7.1, India
Server = http://mirror.cse.iitk.ac.in/archlinux/$repo/os/$arch
## Score: 10.1, United States
Server = http://mirrors.xmission.com/archlinux/$repo/os/$arch
Save and close the file, then update all the package indexes with the following command:
pacman -Syu
Step 2 – Install PostgreSQL
By default, the PostgreSQL package is included in the Arch Linux main repository. You can install it using the following command:
pacman -S postgresql
Once the PostgreSQL is installed, you can verify the PostgreSQL version using the following command:
postgres --version
You will get the following output:
postgres (PostgreSQL) 15.1
Next, initialize the PostgreSQL database with the following command:
sudo -u postgres initdb --locale en_US.UTF-8 -D /var/lib/postgres/data
Next, start the PostgreSQL service using the following command.
systemctl start postgresql
By default, there is not any password for postgres user.
To set it, log in with Postgres user and set the password using the following command:
su - postgres
psql -c "alter user postgres with password 'password'"
Next, exit from the PostgreSQL shell with the following command.
exit
Step 3 – Install pgAdmin
First, install the PIP package using the following command.
pacman -S python-pip
Next, update the setuptools package to the latest version.
python -m pip install --upgrade setuptools
Next, install the pgAdmin4 package using the PIP command.
pip install pgadmin4
Once pgAdmin is installed you can proceed to the next step.
Step 4 – Start pgAdmin
Next, run the following command to start the pgAdmin4.
pgadmin4
You will be asked to set a user and password as shown below to start the server.
NOTE: Configuring authentication for SERVER mode.
Enter the email address and password to use for the initial pgAdmin user account:
Email address: hitjethva@gmail.com
Password:
Retype password:
pgAdmin 4 – Application Initialisation
=================
Starting pgAdmin 4. Please navigate to http://127.0.0.1:5050 in your browser.
2023-02-06 05:58:30,522: WARNING werkzeug: WebSocket transport not available. Install simple-websocket for improved performance.
* Serving Flask app ‘pgadmin’ (lazy loading)
* Environment: production
WARNING: This is a development server. Do not use it in a production deployment.
Use a production WSGI server instead.
* Debug mode: off
Note: Don’t do anything on this terminal because it will stop the pgAdmin4 server.
Step 5 – Install Nginx for pgAdmin4
At this point, pgAdmin is started and listens on port 5050. Now, you will need to configure Nginx as a reverse proxy to access the pgAdmin web UI.
Open another terminal and install the Nginx with the following command.
pacman -S nginx
Next, edit the Nginx configuration file:
nano /etc/nginx/nginx.conf
Add the following line above the last line:
server {
    listen 8080;

    server_name _;

    location / {
        proxy_pass http://127.0.0.1:5050;
    }
}
Save and close the file, then restart the Nginx service to apply the changes.
systemctl restart nginx
Step 6 – Access pgAdmin4 Web UI
Now, open your web browser and access the pgAdmin4 web interface using the URL http://your-server-ip:8080. You should see the pgAdmin4 login screen.

Provide your email address and password and click on the Login button. You should see the pgAdmin default dashboard on the following screen:
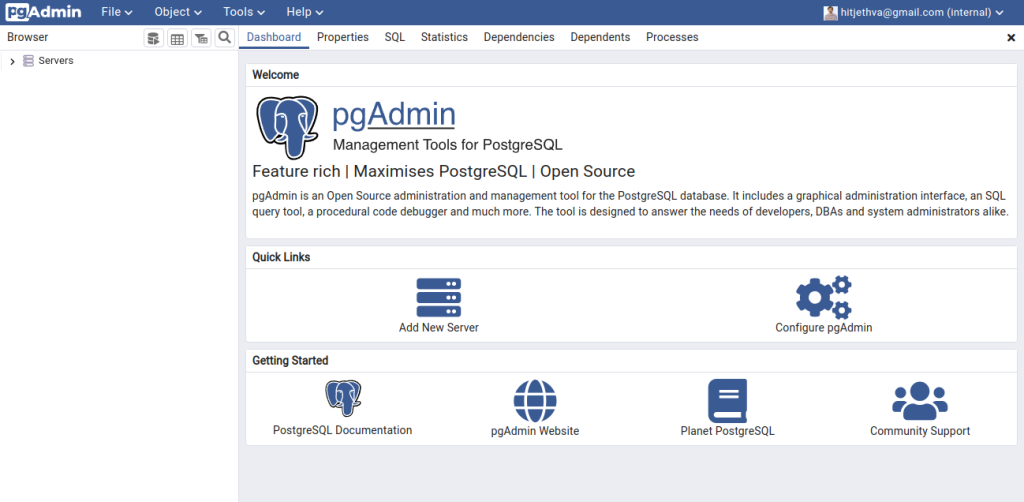
Next, click on the Add New Server button. You should see the following screen:
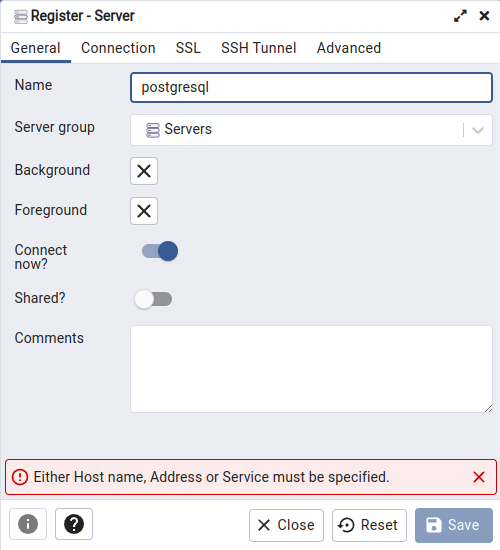
In the General tab, provide the name of the server and click on the Connection tab. You should see the following screen:
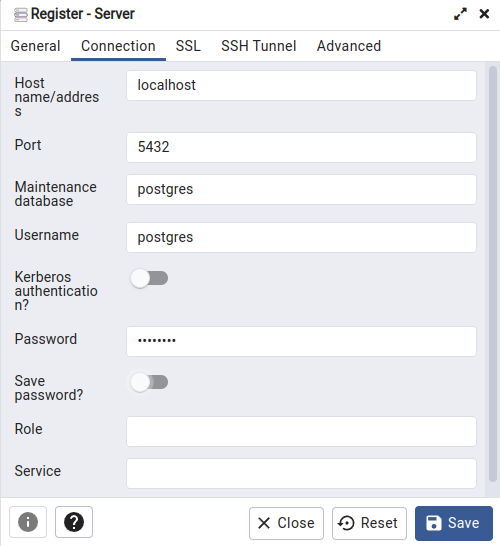
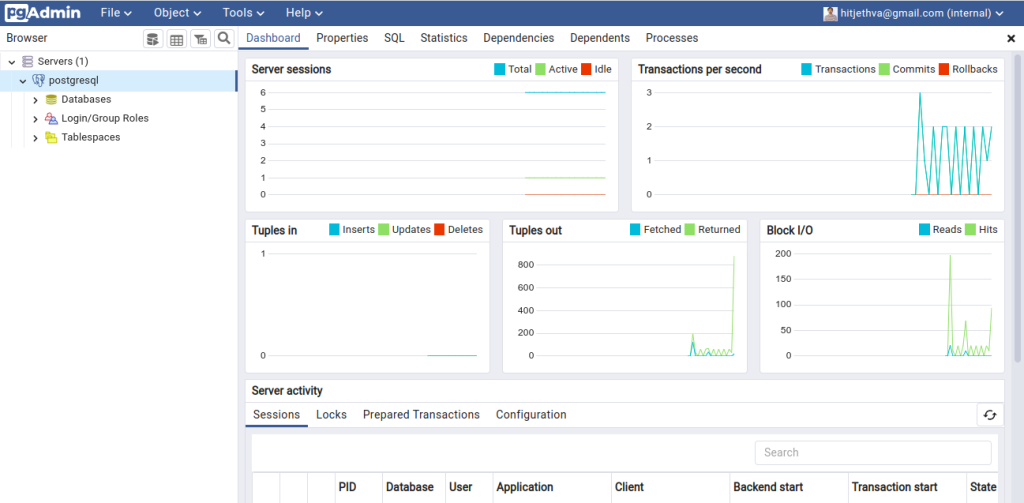
Provide the Hostname or IP address of the server that you want to connect to, as well as the Port number, PostgreSQL username, and password, and click on the Save button. Once the connection has been established, you should see the detailed information about your PostgreSQL database in the left pane:
Conclusion
In this post, you learned how to install pgAdmin4 on Arch Linux. You can now use pgAdmin4 to connect any remote PostgreSQL server and manage it via a web interface. You can try the pgAdmin on dedicated server hosting from Atlantic.Net!
* This post is for informational purposes only and does not constitute professional, legal, financial, or technical advice. Each situation is unique and may require guidance from a qualified professional.
Readers should conduct their own due diligence before making any decisions.