Jira is an issue tracking and project management application developed by the Australian software company Atlassian. It is used by agile development teams to track bugs, stories, epics, and other tasks. It comes with an intuitive and user-friendly web interface to track issues from a web browser. If you are looking for a self-hosted platform to build and manage your content then Jira is the right choice for you.
In this post, we will show you how to install Jira on Rocky Linux 8.
Step 1 – Install Java JDK
Jira is a Java-based application, so you will need to install Java JDK to your system. You can install it by running the following command:
dnf install java-11-openjdk java-11-openjdk-devel -y
Once Java is installed, verify the Java installation using the following command:
java -version
You should see the Java version in the following output:
openjdk version "11.0.13" 2021-10-19 LTS
OpenJDK Runtime Environment 18.9 (build 11.0.13+8-LTS)
OpenJDK 64-Bit Server VM 18.9 (build 11.0.13+8-LTS, mixed mode, sharing)
Step 2 – Install and Configure MySQL
Jira uses MySQL as a database backend, so you will need to install MySQL server on your server. You can install it by running the following command:
dnf install @mysql
After the installation, start and enable the MySQL service with the following command:
systemctl start mysqld
systemctl enable mysqld
Next, edit the MySQL configuration file and tweak some settings:
nano /etc/my.cnf.d/mysql-server.cnf
Add the following lines inside the [mysqld] section:
default-storage-engine=INNODB
character_set_server=utf8mb4
innodb_default_row_format=DYNAMIC
innodb_log_file_size=2G
sql_mode = NO_AUTO_VALUE_ON_ZERO
Save and close the file, then restart the MySQL service to apply the changes:
systemctl restart mysqld
Next, log in to MySQL with the following command:
mysql
Once you are logged in, create a database and user for Jira:
CREATE DATABASE jira CHARACTER SET utf8mb4 COLLATE utf8mb4_bin;
CREATE USER 'jira'@'localhost' IDENTIFIED BY 'yourpassword';
Next, grant all required privileges to the Jira database with the following command:
GRANT SELECT,INSERT,UPDATE,DELETE,CREATE,DROP,REFERENCES,ALTER,INDEX on jira.* TO 'jira'@'localhost';
Next, flush the privileges and exit from MySQL using the command below:
FLUSH PRIVILEGES;
EXIT;
Step 3 – Install Jira
First, go to the Jira official download page and use the wget command to download the latest version of Jira:
wget https://www.atlassian.com/software/jira/downloads/binary/atlassian-jira-software-8.20.2-x64.bin
Once the Jira is downloaded, make it executable with the following command:
chmod +x atlassian-jira-software-8.20.2-x64.bin
Next, run the downloaded binary file to start the installation:
./atlassian-jira-software-8.20.2-x64.bin
You will be asked to start the installation:
This will install Jira Software 8.20.2 on your computer.
OK [o, Enter], Cancel [c]
Press Enter key to start the installation. You will be asked to choose the installation option:
Click Next to continue, or Cancel to exit Setup.

Choose the appropriate installation or upgrade option.
Please choose one of the following:
Express Install (use default settings) [1], Custom Install (recommended for advanced users) [2, Enter], Upgrade an existing Jira installation [3]
1
Type 1 and press the Enter key to start with express installation. You will be asked to install Jira as a service:
Details on where Jira Software will be installed and the settings that will be used.
Installation Directory: /opt/atlassian/jira
Home Directory: /var/atlassian/application-data/jira
HTTP Port: 8080
RMI Port: 8005
Install as service: Yes
Install [i, Enter], Exit [e]
Just press the Enter key to continue. Once Jira is installed, you should see the following output:
Extracting files ...


Please wait a few moments while Jira Software is configured.

Installation of Jira Software 8.20.2 is complete
Start Jira Software 8.20.2 now?
Yes [y, Enter], No [n]
y
Type y and press the Enter key to start Jira. You should see the following output:
Please wait a few moments while Jira Software starts up.
Launching Jira Software ...

Installation of Jira Software 8.20.2 is complete
Your installation of Jira Software 8.20.2 is now ready and can be accessed
via your browser.
Jira Software 8.20.2 can be accessed at http://localhost:8080
Finishing installation ...
Next, download the Java MySQL connector using the command below:
wget https://dev.mysql.com/get/Downloads/Connector-J/mysql-connector-java-8.0.26.zip
Next, unzip the downloaded file using the following command:
dnf install unzip
unzip mysql-connector-java-8.0.26.zip
Next, copy the MySQL connector file to the appropriate directory:
cp mysql-connector-java-8.0.26/mysql-connector-java-8.0.26.jar /opt/atlassian/jira/lib
Step 4 – Create a Systemd Service File for Jira
Next, you will need to create a systemd service file to manage the Jira service:
nano /etc/systemd/system/jira.service
Add the following lines:
[Unit]
Description=Atlassian JIRA Software Server
After=network.target mysqld.service

[Service]
Type=forking
User=jira
ExecStart=/opt/atlassian/jira/bin/start-jira.sh
ExecStop=/opt/atlassian/jira/bin/stop-jira.sh
ExecReload=/opt/atlassian/jira/bin/start-jira.sh | sleep 60 | /opt/atlassian/jira/bin/stop-jira.sh

[Install]
WantedBy=multi-user.target
Save and close the file, then reload the systemd daemon with the following command:
systemctl daemon-reload
Next, stop the Jira script using the following command:
/opt/atlassian/jira/bin/stop-jira.sh
Next, start and enable the Jira service using systemd:
systemctl start jira
systemctl enable jira
Next, edit the Jira configuration file with the following command:
nano /opt/atlassian/jira/conf/server.xml
Modify the following section and include ProxyName and ProxyPort:
        <Connector port="8080" relaxedPathChars="[]|" relaxedQueryChars="[]|{}^\`"<>"
                   maxThreads="150" minSpareThreads="25" connectionTimeout="20000" enableLookups="false"
                   maxHttpHeaderSize="8192" protocol="HTTP/1.1" useBodyEncodingForURI="true" redirectPort="8443"
                   acceptCount="100" disableUploadTimeout="true" bindOnInit="false" scheme="http"
                   proxyName="jira.linuxbuz.com" proxyPort="80"/>
Save and close the file, then restart the Jira service to apply the changes:
systemctl restart jira
Step 5 – Configure Nginx as a Reverse Proxy
Next, you will need to install and configure the Nginx as a reverse proxy for Jira.
First, install the Nginx package with the following command:
dnf install nginx -y
Next, start and enable the Nginx service using the following command:
systemctl start nginx
systemctl enable nginx
Next, create an Nginx virtual host configuration file:
nano /etc/nginx/conf.d/jira.conf
Add the following lines:
server {
    listen 80;
    server_name jira.linuxbuz.com;
    location / {
        proxy_set_header X-Forwarded-Host $host;
        proxy_set_header X-Forwarded-Server $host;
        proxy_set_header X-Forwarded-For $proxy_add_x_forwarded_for;
        proxy_pass http://jira.linuxbuz.com:8080;
        client_max_body_size 10M;
    }
}
Save and close the file, then edit the nginx.conf file and set the hash_bucket size:
nano /etc/nginx/nginx.conf
Add the following line below htttp {:
server_names_hash_bucket_size 64;
Save and close the file, then restart the Nginx service to apply the changes:
systemctl restart nginx
Step 6 – Access Jira Web Installation Wizard
Now, open your web browser and access the Jira web installation wizard using the URL http://jira.linuxbuz.com. You should see the Jira setup page:
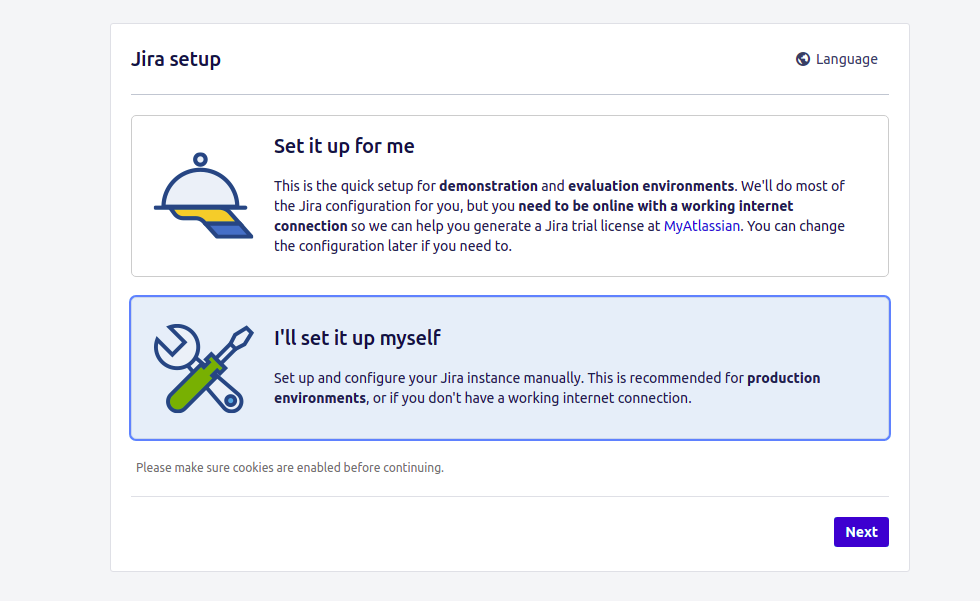
Select “I’ll set it up myself” and click on Next. You should see the database setup page:
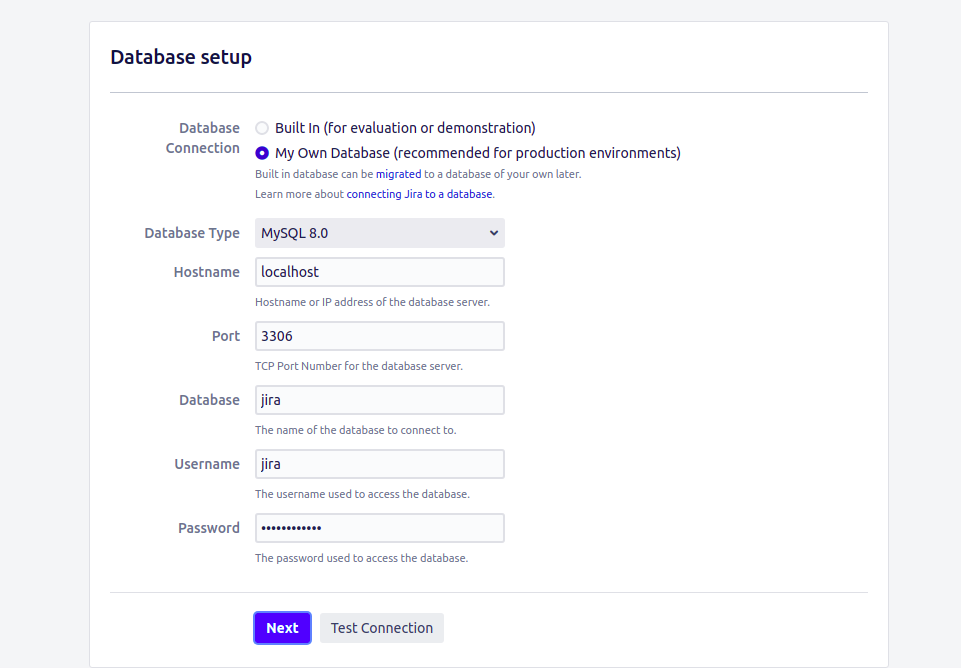
Provide your database information and click on Next. You should see an application properties page:
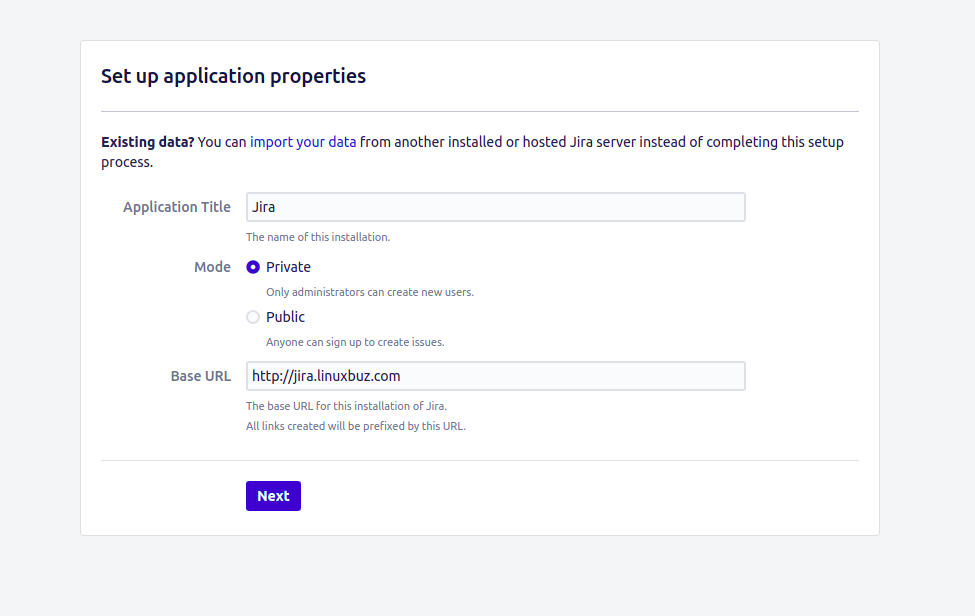
Provide your application name and base URL and click on the Next button. You should see the Jira license page:
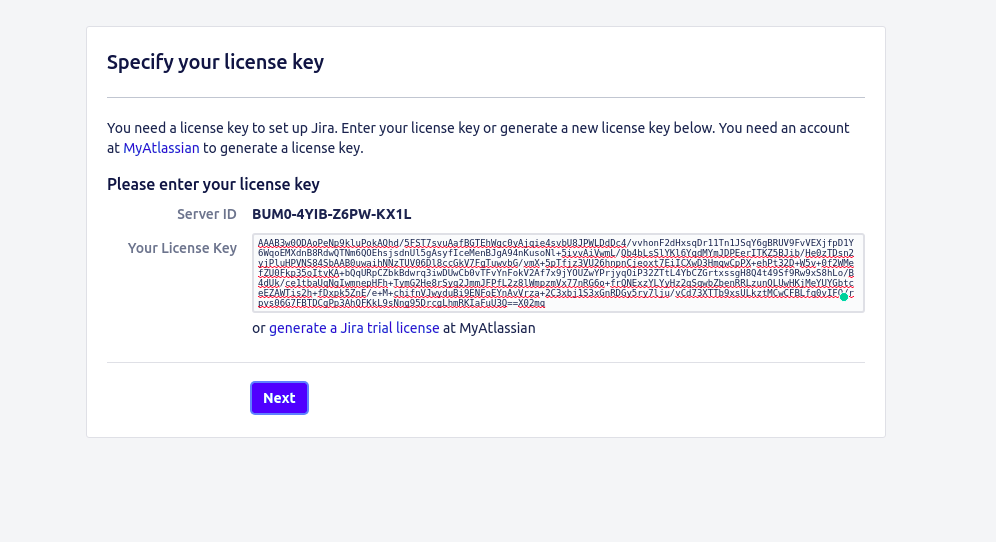
Provide your Jira software license and click on the Next button. You should see the administrator account setup page:

Provide your admin username, password, and email, and click on Next. You should see the Setup email notification page:
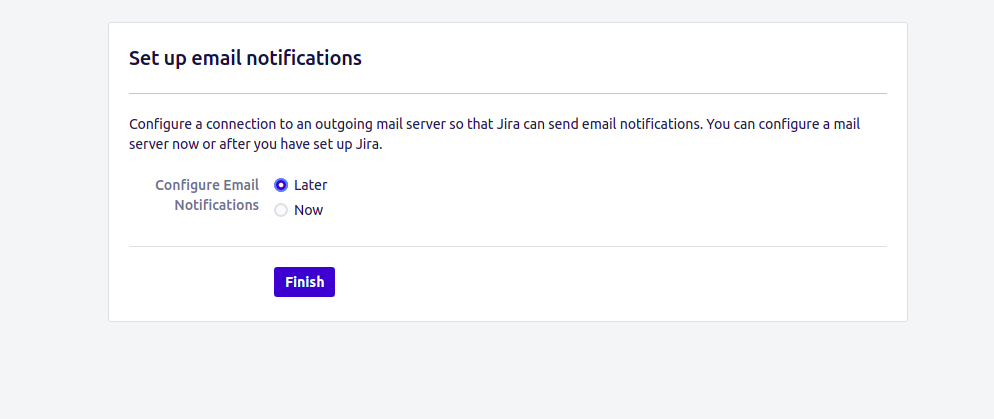
Click on the Finish button to complete the setup. You should see the Jira language selection page:
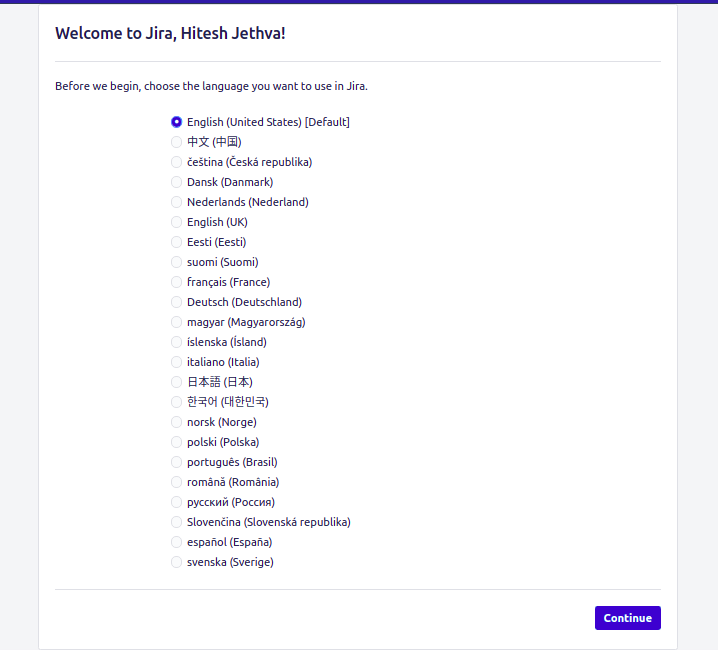
Select your language and click on Continue. You should see Choose an avatar page:

Click on Next. You should see the Project creation page:
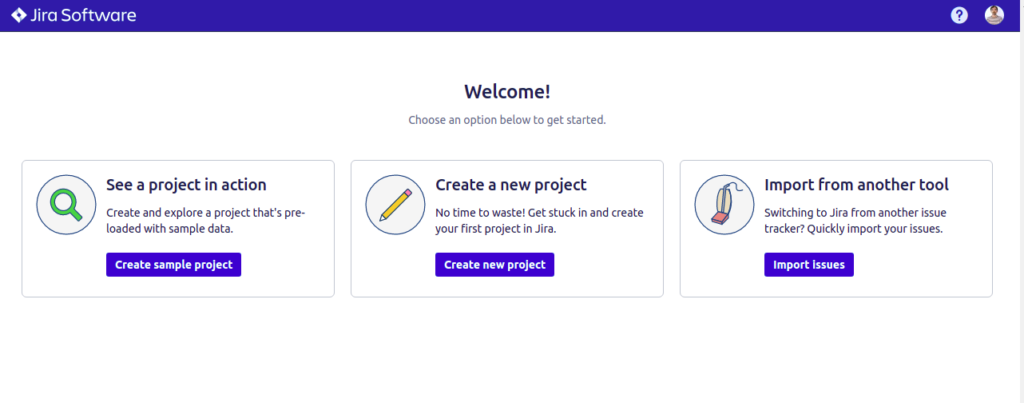
Click on Create new project. You should see the following page:
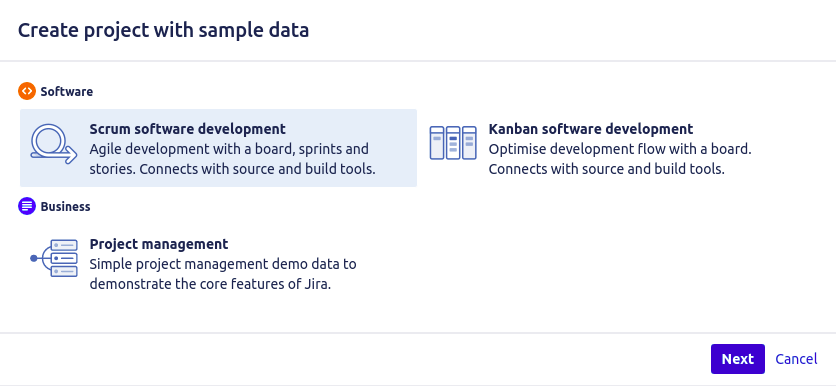
Select Scrum software development and click on Next. You should see the following page:
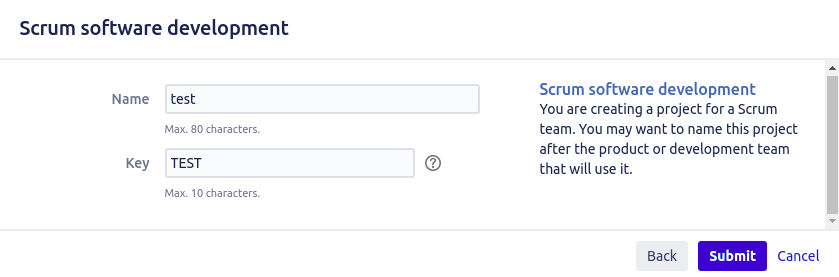
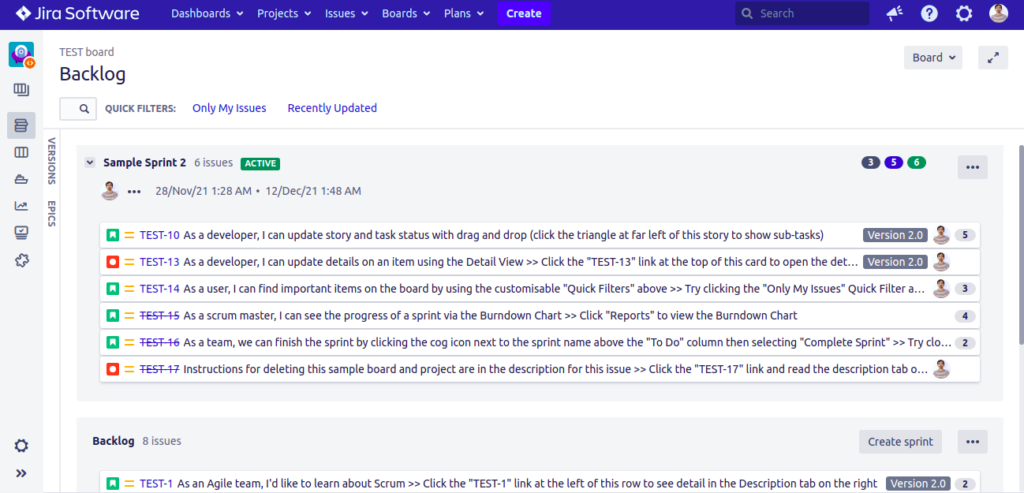
Provide your project name, key and click on Submit. You should see the Jira dashboard on the following page:
Conclusion
Congratulations! You have successfully installed Jira with Nginx on Rocky Linux 8. You can now implement Jira in your organization and start managing and tracking your projects from a central location. Try it on dedicated hosting from Atlantic.Net!