Table of Contents
- Prerequisites
- Step 1: Update the Server and Install Required Dependencies
- Step 2: Install Git Large File Storage (LFS)
- Step 3: Clone the Stable Diffusion Model Repository
- Step 4: Clone the Stable Diffusion Web UI Repository
- Step 5: Configure the Model for Web UI
- Step 6: Install FastAPI Framework
- Step 7: Launch the Stable Diffusion Web UI
- Step 8: Test the Stable Diffusion Web UI
- Conclusion
Stable Diffusion is a text-to-image generation AI model developed by CompVis. It leverages deep learning techniques to produce visually stunning images based on natural language prompts. However, running such a powerful model requires significant computational resources, which is why we use an Atlantic.Net GPU server.
An Atlantic.Net GPU server instance provides the necessary GPU acceleration, ensuring the model operates efficiently. By combining this power with a user-friendly web interface, you can create images seamlessly and share the experience with others.
This guide will explain how to deploy your Stable Diffusion Web UI on the Ubuntu 22.04 GPU server.
Prerequisites
Before proceeding, ensure you have the following:
- An Ubuntu 22.04 server with an NVIDIA GPU and a minimum of 6 GB GPU RAM.
- NVIDIA Drivers and CUDA Toolkit installed and configured on your server.
Step 1: Update the Server and Install Required Dependencies
Update all the packages to the updated version.
apt update -yInstall Python and other required dependencies.
apt install python3 python3-pip -yOnce installed, verify the versions to ensure everything is set up correctly:
python3 --version
pip3 --version
Step 2: Install Git Large File Storage (LFS)
Stable Diffusion uses large checkpoint files that standard Git cannot handle. Git LFS (Large File Storage) is designed to manage these large files effectively.
Install Git Large File Storage (LFS).
apt install git-lfs -yAfter installation, initialize Git LFS to enable its functionality globally:
git lfs installYou should see the following output:
Git LFS initialized.
Step 3: Clone the Stable Diffusion Model Repository
The Stable Diffusion model is hosted on Hugging Face, a platform for AI and machine learning models.
Use Git to clone the Stable Diffusion model repository:
git clone https://huggingface.co/CompVis/stable-diffusion-v-1-4-originalThis repository contains the sd-v1-4.ckpt checkpoint file, which is the core of the model. Cloning this repository might take some time, depending on your internet speed, as it includes large files (7.14GB)
Step 4: Clone the Stable Diffusion Web UI Repository
The Stable Diffusion Web UI simplifies interaction with the model. Instead of using command-line tools, you can access all features through a graphical interface.
Run the following command to clone the Web UI repository:
git clone https://github.com/AUTOMATIC1111/stable-diffusion-webui.gitThis repository contains all the scripts, assets, and backend logic required to host the Stable Diffusion model on a web server.
Step 5: Configure the Model for Web UI
To make the Stable Diffusion model available in the Web UI, you need to move the model checkpoint file (sd-v1-4.ckpt) to the appropriate directory.
Copy the sd-v1-4.ckpt checkpoint file from the Stable Diffusion directory to the stable-diffusion-webui/models/Stable-diffusion/ Web UI directory and rename it as model.ckpt
cp ~/stable-diffusion-v-1-4-original/sd-v1-4.ckpt ~/stable-diffusion-webui/models/Stable-diffusion/model.ckptOnce the checkpoint file is copied, you can delete the original Stable Diffusion directory to free up disk space:
rm -rf ~/stable-diffusion-v-1-4-originalStep 6: Install FastAPI Framework
FastAPI is a high-performance Python framework used to build the backend for the Web UI.
Use pip to install FastAPI.
pip3 install fastapiThis framework will handle HTTP requests sent to the Web UI, making it responsive and efficient.
Step 7: Launch the Stable Diffusion Web UI
You’re now ready to start the Web UI. The launch.py script initializes the server and makes the interface accessible.
Start the Stable Diffusion Web UI.
cd stable-diffusion-webui
python3 launch.py --listen
The –listen flag allows you to access the Web UI from any device on the same network.
During the launch, the server will load the model and initialize the interface. This process may take a few minutes. Once complete, you’ll see a message indicating the web server is running, along with the URL to access the UI. Please note your GPU must have 6GB of available RAM to start the application.
Step 8: Test the Stable Diffusion Web UI
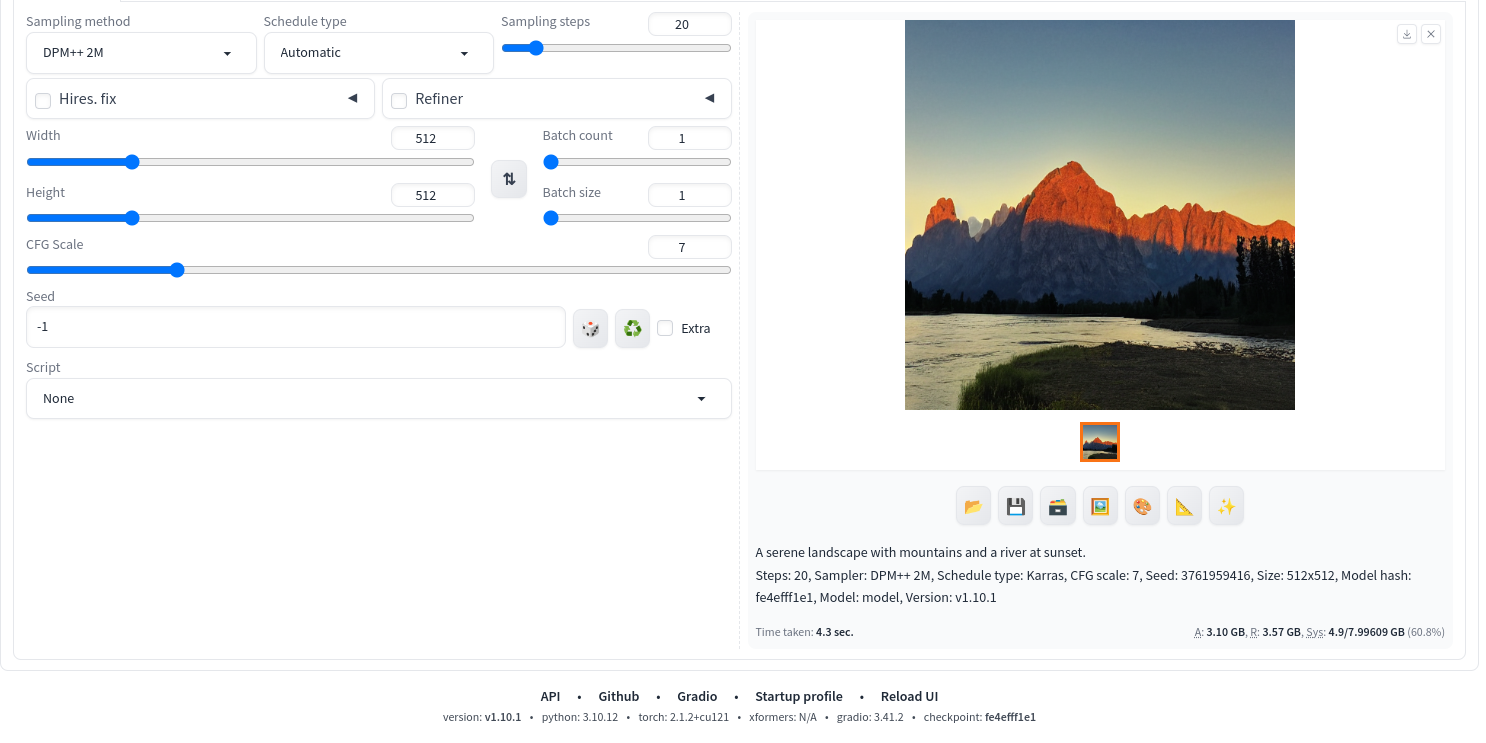
1. Open your web browser and access the Stable Diffusion Web UI using the URL http://your-server-ip:7860

2. Under the Stable Diffusion checkpoint dropdown menu, select model.ckpt.
3. Select the txt2img tab.
4. Enter a prompt, such as:
A serene landscape with mountains and a river at sunset5. Adjust the image dimensions (width and height) for better results.
6. Click the Generate button to create your image. The generated image will appear in the UI and can be downloaded.
Conclusion
Congratulations! You’ve successfully set up a Stable Diffusion Web UI using an Atlantic.Net GPU server instance. This interface allows you to generate stunning AI images directly from your web browser. Experiment with different prompts and settings to unleash the full potential of Stable Diffusion.
* This post is for informational purposes only and does not constitute professional, legal, financial, or technical advice. Each situation is unique and may require guidance from a qualified professional.
Readers should conduct their own due diligence before making any decisions.