Table of Contents
- Prerequisites
- Step 1 - Create a MyScale Cluster Online
- Step 2 – Update Ubuntu and Install Python
- Step 3 – Install Jupyter Lab
- Step 4 – Configure Jupyter Lab
- Step 5 – Create a Systemctl Service File
- Step 6 – Access Jupyter Lab
- Step 7 - Start the Python3 Notebook
- Step 8 - Install ClickHouse Connect and Prerequisites
- Step 8 - Build a Dataset
- Step 10 - Run a Vector Search on the Data
- Step 11 - Creating Datasets
- Step 12 - Populating Data to MyScale
- Step 13 - Connect to MyScale
- Step 14 - Index the Data
- Step 15 - You Are Now Ready to Query MyScale
MyScale allows you to run similarity searches with SQL. This guide will provide a step-by-step procedure for installing MyScale locally on an Ubuntu server.
Prerequisites
Before you begin the installation process, ensure you have the following prerequisites in place:
- An Ubuntu server
- root or sudo privileges
Step 1 – Create a MyScale Cluster Online
- Create a signup login for MyScale at the following website https://myscale.com.
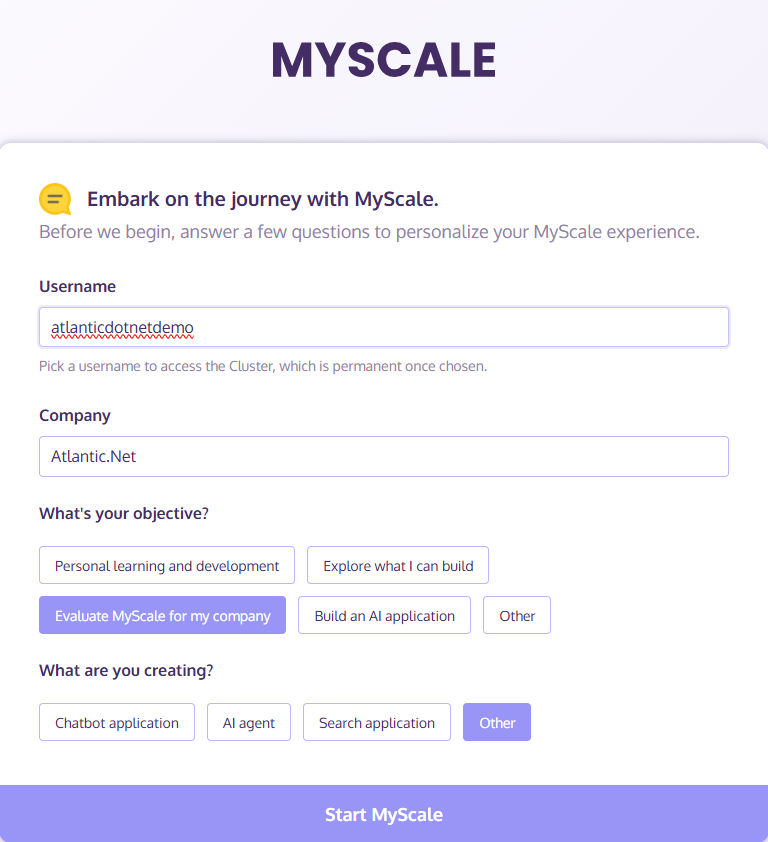
- Give yourself a Username, set your Company, and fill in the required information:
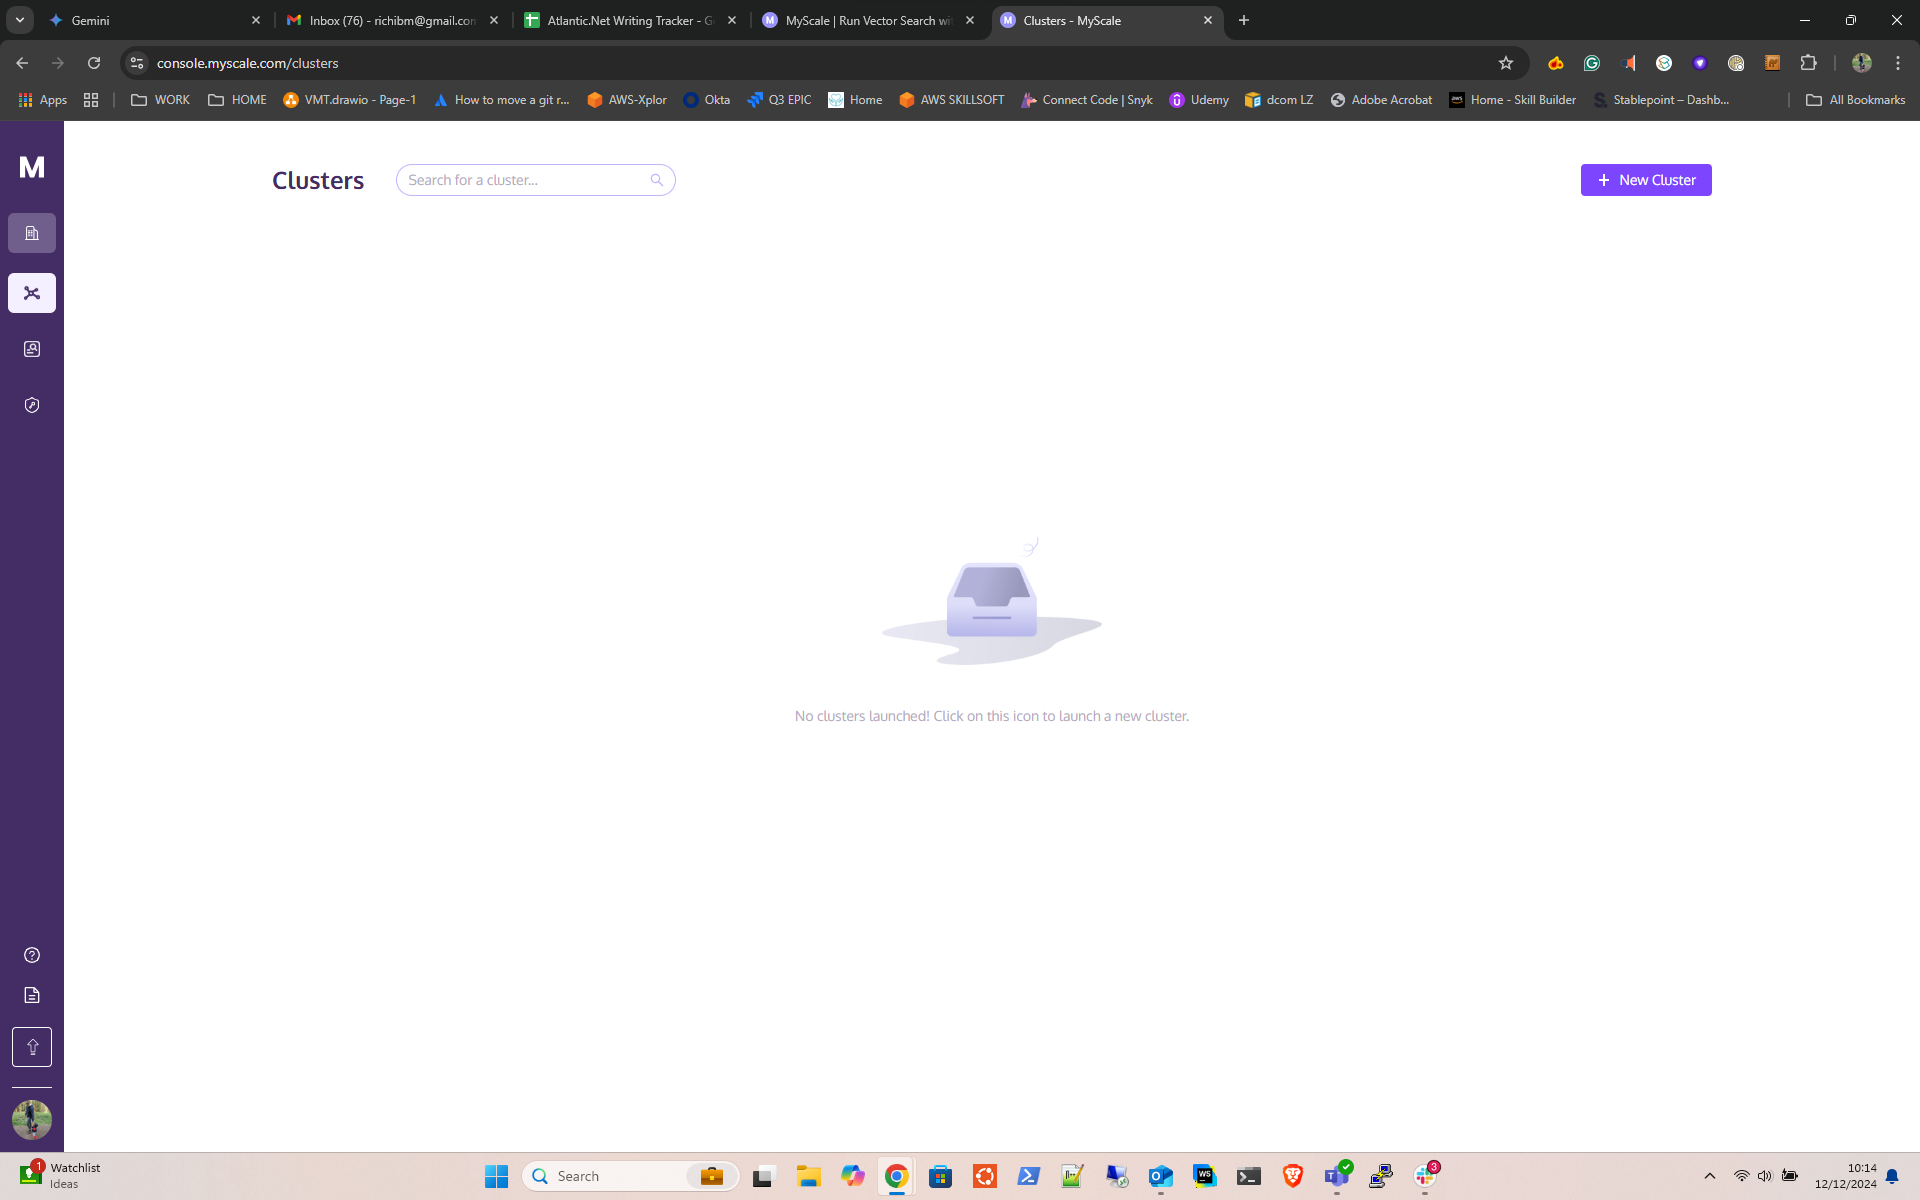
- Click on the New Cluster button on the top right:
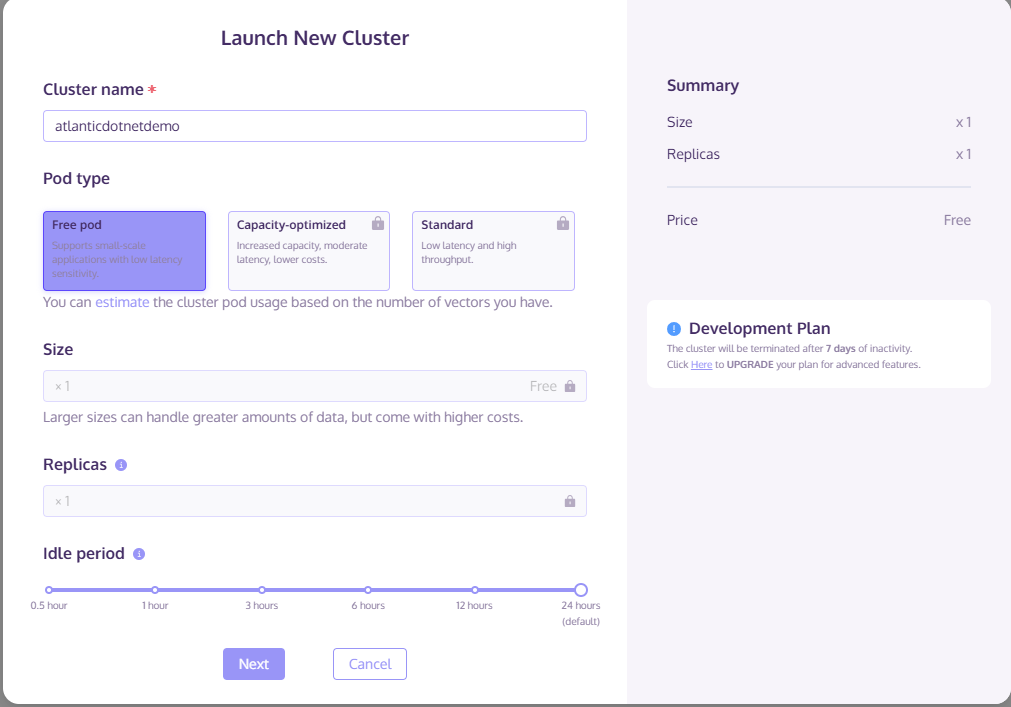
- Launch a Cluster, give it a name, select the free tier:
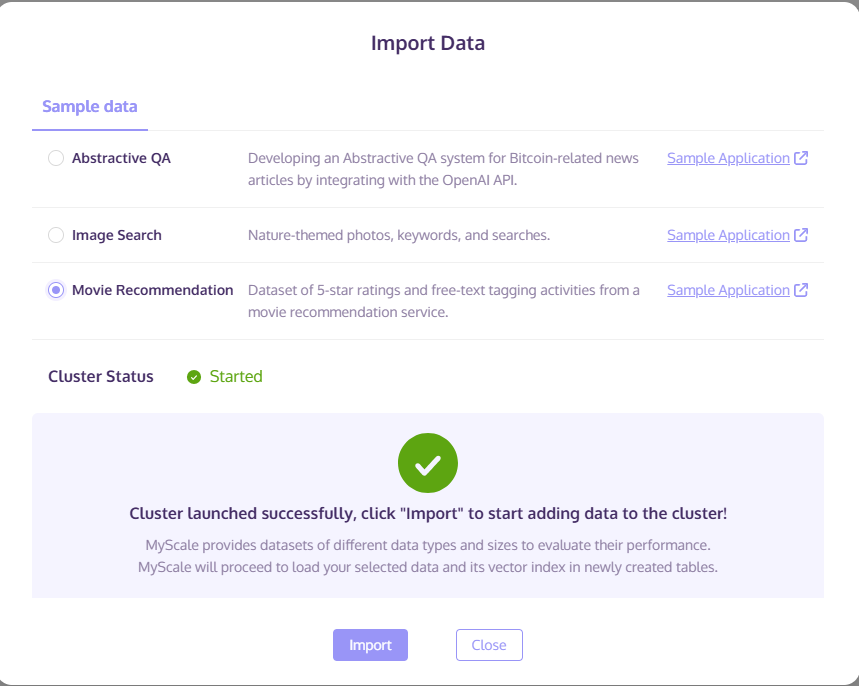
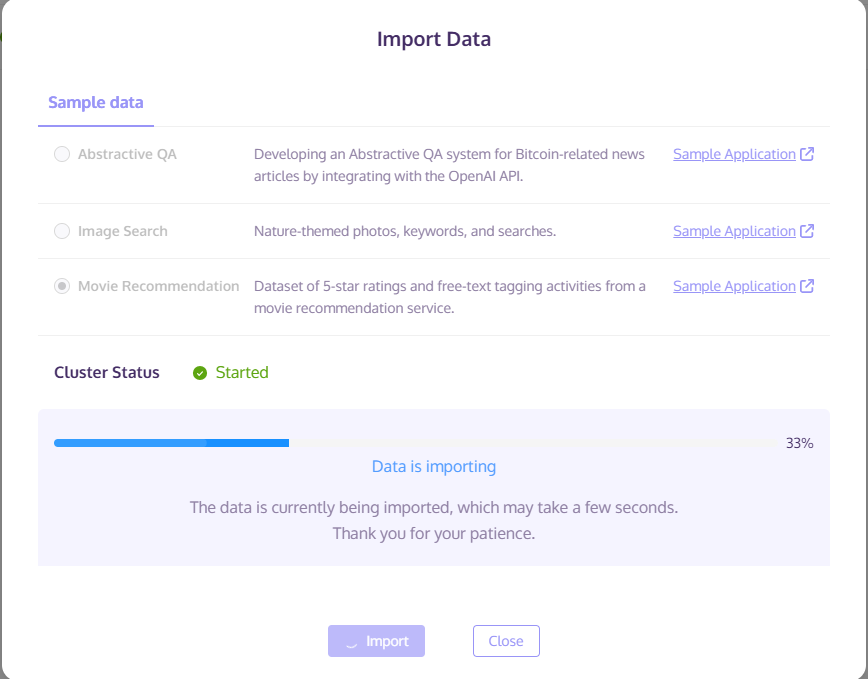
- Once completed, you get given the option to import demo data. In this example we will choose the “movie recommendation” demo data. Next, click import:
- The data will now import.
- Wait a few moments for the cluster to initialize:

- Important: Make sure you get the “Connection Details” from your MyScale cluster. Simply click the tab in the top right corner and select “Connection Details.” You will need this information for later in the procedure.

Step 2 – Update Ubuntu and Install Python
- First, update Ubuntu:
apt update
apt upgrade -y
- MyScale requires Python. You can install it using the following commands:
apt install python3 python3-pip unzip -y
Note: You may be prompted to restart services after installation. Just click <ok>.
- Next, install the Python virtual environment package.
pip install -U virtualenv
Step 3 – Install Jupyter Lab
- Now, install Jupyter Lab using the pip command.
pip3 install jupyterlab
- This command installs Jupyter Lab and its dependencies. Next, edit the .bashrc file.
nano ~/.bashrc
- Define your Jupyter Lab path as shown below; simply add it to the bottom of the file:
export PATH=$PATH:~/.local/bin/
- Reload the changes using the following command.
source ~/.bashrc
- Next, test run the Jupyter Lab locally using the following command to make sure everything starts.
jupyter lab --allow-root --ip=0.0.0.0 --no-browser
- Check the output to make sure there are no errors. Upon success, you will see the following output.
[C 2023-12-05 15:09:31.378 ServerApp] To access the server, open this file in a browser:
http://ubuntu:8888/lab?token=aa67d76764b56c5558d876e56709be27446
http://127.0.0.1:8888/lab?token=aa67d76764b56c5558d876e56709be27446
Press the CTRL+C to stop the server.
Step 4 – Configure Jupyter Lab
By default, Jupyter Lab doesn’t require a password to access the web interface.
- To secure Jupyter Lab, generate the Jupyter Lab configuration using the following command.
jupyter-lab --generate-config
Output.
Writing default config to: /root/.jupyter/jupyter_lab_config.py
- Next, set the Jupyter Lab password.
jupyter-lab password
Set your password as shown below:
Enter password:
Verify password:
[JupyterPasswordApp] Wrote hashed password to /root/.jupyter/jupyter_server_config.json
- You can verify your hashed password using the following command.
cat /root/.jupyter/jupyter_server_config.json
Output.
{
"IdentityProvider": {
"hashed_password": "argon2:$argon2id$v=19$m=10240,t=10,p=8$zf0ZE2UkNLJK39l8dfdgHA$0qIAAnKiX1EgzFBbo4yp8TgX/G5GrEsV29yjHVUDHiQ"
}
}
Note this information, as you will need to add it to your config.
- Next, edit the Jupyter Lab configuration file.
nano /root/.jupyter/jupyter_lab_config.py
- Define your server IP, hashed password, and other configurations as shown below:
c.ServerApp.ip = 'your-server-ip'
c.ServerApp.open_browser = False
c.ServerApp.password = 'argon2:$argon2id$v=19$m=10240,t=10,p=8$zf0ZE2UkNLJK39l8dfdgHA$0qIAAnKiX1EgzFBbo4yp8TgX/G5GrEsV29yjHVUDHiQ'
c.ServerApp.port = 8888
Make sure you format the file exactly as above. For example, the port number is not in brackets, and the False boolean must have a capital F.c.
- Save and close the file when you are done.
Step 5 – Create a Systemctl Service File
- Next, create a systemd service file to manage Jupyter Lab.
nano /etc/systemd/system/jupyter-lab.service
- Add the following configuration:
[Service]
Type=simple
PIDFile=/run/jupyter.pid
WorkingDirectory=/root/
ExecStart=/usr/local/bin/jupyter lab --config=/root/.jupyter/jupyter_lab_config.py --allow-root
User=root
Group=root
Restart=always
RestartSec=10
[Install]
WantedBy=multi-user.target
- Save and close the file, then reload the systemd daemon.
systemctl daemon-reload
- Next, start the Jupyter Lab service using the following command.
systemctl start jupyter-lab
- You can now check the status of the Jupyter Lab service using the following command.
systemctl status jupyter-lab
- Jupyter Lab is now starting and listening on port 8888. You can verify it with the following command.
ss -antpl | grep jupyter
Output.
LISTEN 0 128 104.219.55.40:8888 0.0.0.0:* users:(("jupyter-lab",pid=156299,fd=6))
Step 6 – Access Jupyter Lab
Now, open your web browser and access the Jupyter Lab web interface using the URL http://your-server-ip:8888. You will see Jupyter Lab on the following screen.

Provide the password you set during the installation and click on Log in. You will see the Jupyter Lab dashboard on the following screen:
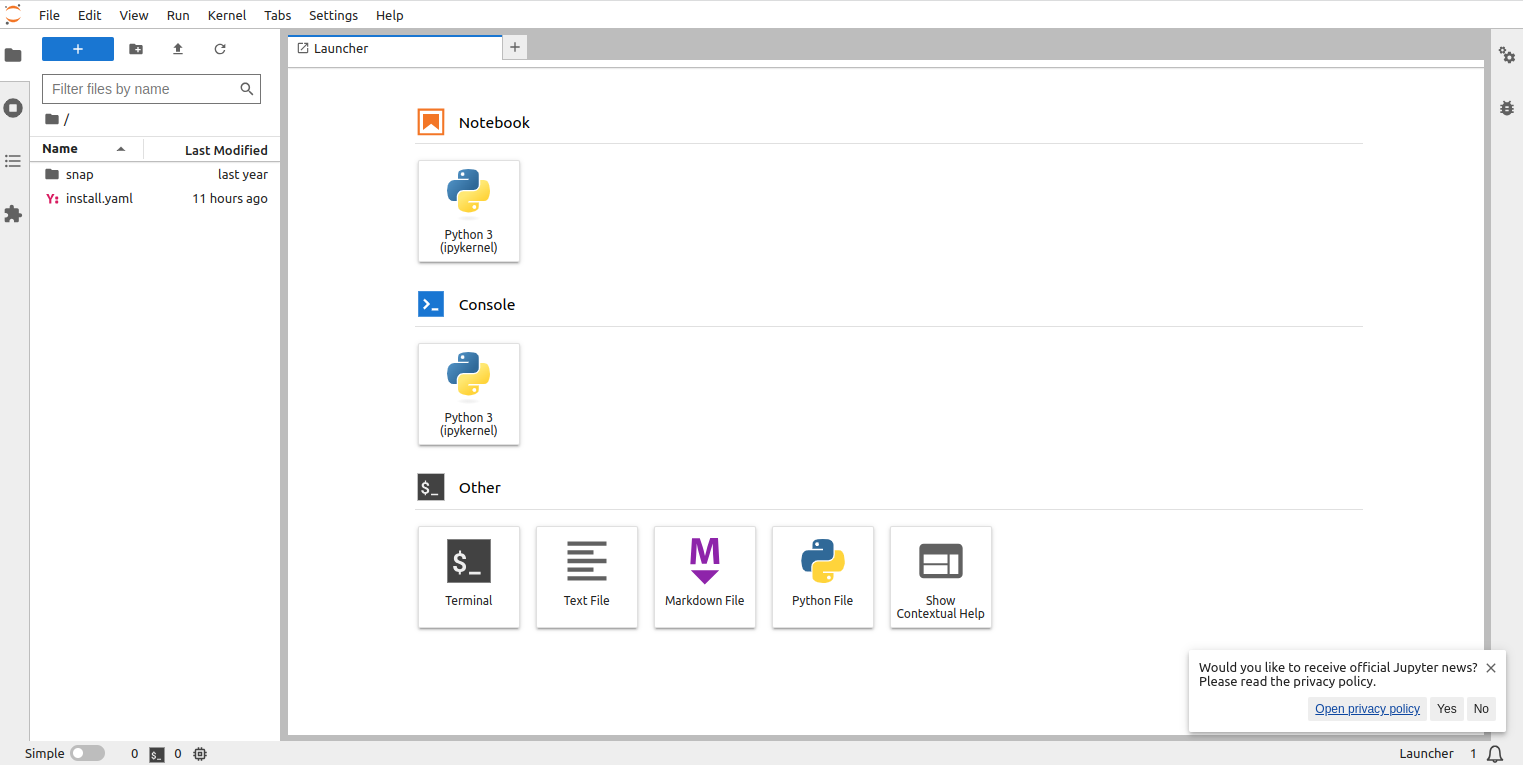
Step 7 – Start the Python3 Notebook
You can now start the Python 3 Notebook.
Step 8 – Install ClickHouse Connect and Prerequisites
- Switch over to your Jupyter Notebook and run:
!pip install -U clickhouse-connect scikit-learn unzip pandas matplotlib datasets pyarrow
- Download some additional sample data:
!wget https://files.grouplens.org/datasets/movielens/ml-latest-small.zip
- Unzip the Sample Data
!unzip ml-latest-small.zip
Step 8 – Build a Dataset
This example uses information provided from the MyScale GitHub Page.
- Let’s start building a dataset by:
- Importing necessary files
- Loading movie metadata
- Add TMDB IDs (filtered)
import pandas as pd
# obtain movie metadata
original_movie_metadata = pd.read_csv('ml-latest-small/movies.csv')
movie_metadata = original_movie_metadata[['movieId', 'title', 'genres']]
movie_metadata['genres'] = movie_metadata['genres'].str.split('|', expand=False)
# add tmdbId to movie metadata dataframe
original_movie_links = pd.read_csv('ml-latest-small/links.csv')
movie_info = pd.merge(movie_metadata, original_movie_links, on=["movieId"])[['movieId', 'title', 'genres', 'tmdbId']]
# filter tmdb valid movies
movie_info = movie_info[movie_info['tmdbId'].notnull()]
movie_info['tmdbId'] = movie_info['tmdbId'].astype(int).astype(str)
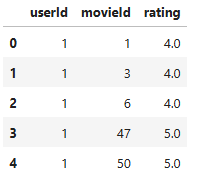
movie_info.head()
You should see output like this:

- Now run this command:
- Load User Ratings
- Check dataset properties
# get movie user rating info
movie_user_rating = pd.read_csv('ml-latest-small/ratings.csv')# remove ratings of movies which don't have tmdbId
movie_user_rating = movie_user_rating[movie_user_rating['movieId'].isin(movie_info['movieId'])]
movie_user_rating = movie_user_rating[["userId", "movieId", "rating"]]
movie_user_rating.head()
The procedure generates two dataframes:
- movie_info: Contains movie information (ID, title, genres, TMDB ID).
- movie_user_rating: Contains user ratings for movies.
Now run this command:
movie_user_rating.nunique()
You Should see output like this:
userId      610
movieId    9716
rating       10
dtype: int64
Step 10 – Run a Vector Search on the Data
This part of your procedure focuses on generating vector embeddings for users and movies, and then preparing the data for loading into MyScale.
Run the following commands to use NMF. NMF is a dimensionality reduction technique that decomposes a matrix into two smaller matrices with non-negative values. This is suitable for user-item interaction data like movie ratings, as the values are inherently non-negative.
from sklearn.decomposition import NMF
from sklearn.preprocessing import MaxAbsScaler
from scipy.sparse import csr_matrixuser_indices, user_ids = pd.factorize(movie_user_rating['userId'])
item_indices, movie_ids = pd.factorize(movie_user_rating['movieId'])
rating_sparse_matrix = csr_matrix((movie_user_rating['rating'], (user_indices, item_indices)))# normalize matrix with MaxAbsScaler
max_abs_scaler = MaxAbsScaler()
rating_sparse_matrix = max_abs_scaler.fit_transform(rating_sparse_matrix)
This will create a user-item matrix, we can fit an NMF model with the matrix.
# create NMF model with settings
dimension = 512
nmf_model = NMF(n_components=dimension, init='nndsvd', max_iter=500)# rating sparse matrix decomposition with NMF
user_vectors = nmf_model.fit_transform(rating_sparse_matrix)
item_vectors = nmf_model.components_.Terror = nmf_model.reconstruction_err_
print("Reconstruction error: ", error)
# generate user vector matrix, containing userIds and user vectors
user_vector_df = pd.DataFrame(zip(user_ids, user_vectors), columns=['userId', 'user_rating_vector']).reset_index(drop=True)# generate movie vector matrix, containing movieIds and movie vectors
movie_rating_vector_df = pd.DataFrame(zip(movie_ids, item_vectors), columns=['movieId', 'movie_rating_vector'])
Step 11 – Creating Datasets
We now have four dataframes: movie metadata, user movie ratings, user vectors and movie vectors. We will merge the relevant dataframes into a single dataframe.
In the step we will:
- Merge the movie_rating_vector_df (containing movie vectors) with the movie_info DataFrame (containing movie metadata) using the movieId column.
- Keep the user_rating_df (containing user ratings) separate for later use.
- Convert the dataframesto Parquet format using pyarrow. Parquet is a columnar storage format that is efficient for analytical queries and data warehousing. This is a good choice for storing data that will be loaded into MyScale.
user_rating_df = movie_user_rating.reset_index(drop=True)
# add movie vectors into movie metadata and remove movies without movie vector
movie_info_df = pd.merge(movie_info, movie_rating_vector_df, on=["movieId"]).reset_index(drop=True)
movie_info_df.head()
import pyarrow as pa
import pyarrow.parquet as pq# create table objects from the data and schema
movie_table = pa.Table.from_pandas(movie_info_df)
user_table = pa.Table.from_pandas(user_vector_df)
rating_table = pa.Table.from_pandas(user_rating_df)# write the table to parquet files
pq.write_table(movie_table, 'movie.parquet')
pq.write_table(user_table, 'user.parquet')
pq.write_table(rating_table, 'rating.parquet')
Step 12 – Populating Data to MyScale
To populate data to MyScale, first, we load data into panda dataframes.
In [1]:
from datasets import load_dataset

movie = load_dataset("myscale/recommendation-examples", data_files="movie.parquet", split="train")
user = load_dataset("myscale/recommendation-examples", data_files="user.parquet", split="train")
rating = load_dataset("myscale/recommendation-examples", data_files="rating.parquet", split="train")

# transform datasets to panda Dataframe
movie_info_df = movie.to_pandas()
user_vector_df = user.to_pandas()
user_rating_df = rating.to_pandas()

# convert embedding vectors from np array to list
movie_info_df['movie_rating_vector'] = movie_info_df['movie_rating_vector'].apply(lambda x: x.tolist())
user_vector_df['user_rating_vector'] = user_vector_df['user_rating_vector'].apply(lambda x: x.tolist())
You should see output like this:
Generating train split: 9716 examples [00:00, 46166.81 examples/s]
Generating train split: 610 examples [00:00, 60321.24 examples/s]
Generating train split: 100823 examples [00:00, 13216311.29 examples/s]
Step 13 – Connect to MyScale
- Now connect to MyScale:
import clickhouse_connect

client = clickhouse_connect.get_client(
host='msc-xxxxxxxx.us-east-1.aws.myscale.com',
port=443,
username='atlanticdotnetdemo_org_default',
password='123456789'
)
- Now prep the data to dump into MyScale:
client.command("DROP TABLE IF EXISTS default.myscale_movies")
client.command("DROP TABLE IF EXISTS default.myscale_users")
client.command("DROP TABLE IF EXISTS default.myscale_ratings")# create table for movies
client.command(f"""
CREATE TABLE default.myscale_movies
(
movieId Int64,
title String,
genres Array(String),
tmdbId String,
movie_rating_vector Array(Float32),
CONSTRAINT vector_len CHECK length(movie_rating_vector) = 512
)
ORDER BY movieId
""")# create table for user vectors
client.command(f"""
CREATE TABLE default.myscale_users
(
userId Int64,
user_rating_vector Array(Float32),
CONSTRAINT vector_len CHECK length(user_rating_vector) = 512
)
ORDER BY userId
""")# create table for user movie ratings
client.command("""
CREATE TABLE default.myscale_ratings
(
userId Int64,
movieId Int64,
rating Float64
)
ORDER BY userId
""")
- Now upload to MyScale:
client.insert("default.myscale_movies", movie_info_df.to_records(index=False).tolist(), column_names=movie_info_df.columns.tolist())
client.insert("default.myscale_users", user_vector_df.to_records(index=False).tolist(), column_names=user_vector_df.columns.tolist())
client.insert("default.myscale_ratings", user_rating_df.to_records(index=False).tolist(), column_names=user_rating_df.columns.tolist())# check count of inserted data
print(f"movies count: {client.command('SELECT count(*) FROM default.myscale_movies')}")
print(f"users count: {client.command('SELECT count(*) FROM default.myscale_users')}")
print(f"ratings count: {client.command('SELECT count(*) FROM default.myscale_ratings')}")
You should see output like this:
movies count: 9716
users count: 610
ratings count: 100823
Step 14 – Index the Data
Now index the data in MyScale:
# create vector index with cosine
client.command("""
ALTER TABLE default.myscale_movies
ADD VECTOR INDEX movie_rating_vector_index movie_rating_vector
TYPE MSTG('metric_type=IP')
""")
You can check the status with this command:
# check the status of the vector index, make sure vector index is ready with 'Built' status
get_index_status="SELECT status FROM system.vector_indices WHERE name='movie_rating_vector_index'"
print(f"index build status: {client.command(get_index_status)}")
Check the output to make sure it changes from this:
index build status: InProgress
To this:
index build status: Built
Step 15 – You Are Now Ready to Query MyScale
Lets now query the vector database:
import matplotlib.pyplot as plt
import numpy as np
import pandas as pdrandom_user = client.query("SELECT * FROM default.myscale_users ORDER BY rand() LIMIT 1")
assert random_user.row_count == 1
target_user_id = random_user.first_item["userId"]
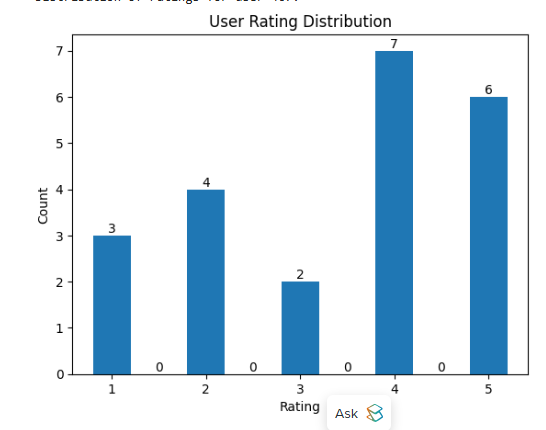
target_user_vector = random_user.first_item["user_rating_vector"]print("currently selected user id={} for movie recommendation\n".format(target_user_id))# user rating plot
target_user_ratings = user_rating_df.loc[user_rating_df['userId'] == target_user_id]['rating'].tolist()
bins = np.arange(1.0, 6, 0.5)
# Compute the histogram
hist, _ = np.histogram(target_user_ratings, bins=bins)
print("Distribution of ratings for user {}:".format(target_user_id))
plt.bar(bins[:-1], hist, width=0.4)
plt.xlabel('Rating')
plt.ylabel('Count')
plt.title('User Rating Distribution')
for i in range(len(hist)):
plt.text(bins[i], hist[i], str(hist[i]), ha='center', va='bottom')
plt.show()
You should see output like this:
You can also use the following command to find the top 10 movies by rating:
top_k = 10
# query the database to find the top K recommende
# d movies
recommended_results = client.query(f"""
SELECT movieId, title, genres, tmdbId, distance(movie_rating_vector, {target_user_vector}) AS dist
FROM default.myscale_movies
WHERE movieId not in (
SELECT movieId
from default.myscale_ratings
where userId = {target_user_id}
)
ORDER BY dist DESC
LIMIT {top_k}
""")recommended_movies = pd.DataFrame.from_records(recommended_results.named_results())
rated_score_scale = client.query(f"""
SELECT max(rating) AS max, min(rating) AS min
FROM default.myscale_ratings
WHERE userId = {target_user_id}
""")
max_rated_score = rated_score_scale.first_row[0]
min_rated_score = rated_score_scale.first_row[1]print("Top 10 movie recommandations with estimated ratings for user {}".format(target_user_id))
max_dist = recommended_results.first_row[4]
recommended_movies['estimated_rating'] = min_rated_score + ((max_rated_score - min_rated_score) / max_dist) * recommended_movies['dist']
recommended_movies[['movieId', 'title', 'estimated_rating', 'genres']]
This concludes the procedure for installing MyScale on an Ubuntu server and running a basic movie recommendation query. You can now experiment with different parameters and datasets to further explore the capabilities of MyScale – try it on GPU hosting from Atlantic.Net!
* This post is for informational purposes only and does not constitute professional, legal, financial, or technical advice. Each situation is unique and may require guidance from a qualified professional.
Readers should conduct their own due diligence before making any decisions.