Machine learning (ML) and data science are transforming industries with intelligent solutions. However, deploying ML models as web applications can be challenging. It often requires knowledge of backend and frontend tools like Flask, React, or JavaScript. For many, this process is both complex and time-consuming.
Streamlit is a game-changer for such scenarios. It enables machine learning engineers to create interactive web applications quickly without needing advanced web development skills. This Python-based, open-source framework is designed for data scientists and ML engineers. Applications built with Streamlit are easy to scale, making it ideal for both prototypes and production systems.
In this guide, we’ll show you how to deploy a deep-learning model using Streamlit. You’ll learn to create a simple, interactive application in no time.
Prerequisites
Before starting the deployment, ensure you have the following:
- An Ubuntu 22.04 server with an NVIDIA GPU.
- NVIDIA Drivers and CUDA Toolkit.
Step 1: Set Up Your Environment
1. Update your Ubuntu server to ensure all packages are up-to-date.
apt update
apt upgrade -y
2. If Python3 and pip3 are not already installed, install them.
apt install python3 python3-pip -y3. Install PyTorch with GPU support.
pip3 install torch torchvision torchaudio --index-url https://download.pytorch.org/whl/cu1244. Install Streamlit and other dependencies.
pip3 install streamlit
pip3 install numpy pandas scikit-learn matplotlib
Step 2: Create the Streamlit Application
1. Create a new directory for your Streamlit app and navigate to it.
mkdir streamlit_app && cd streamlit_app2. The model uses ImageNet class labels to interpret predictions. Download the labels file:
wget https://gist.githubusercontent.com/ageitgey/4e1342c10a71981d0b491e1b8227328b/raw/24d78ea09a31fdff540a8494886e0051e3ad68f8/imagenet_classes.txt3. Create a new Streamlit app.
nano app.pyAdd the following content:
"""Create an Image Classification Web App using PyTorch and Streamlit."""
# import libraries
from PIL import Image
from torchvision import models, transforms
import torch
import streamlit as st

# set title of app
st.title("Simple Image Classification Application")
st.write("")

# enable users to upload images for the model to make predictions
file_up = st.file_uploader("Upload an image", type = "jpg")


def predict(image):
    """Return top 5 predictions ranked by highest probability.

    Parameters
    ----------
    :param image: uploaded image
    :type image: jpg
    :rtype: list
    :return: top 5 predictions ranked by highest probability
    """
    # create a ResNet model
    resnet = models.resnet101(pretrained = True)

    # transform the input image through resizing, normalization
    transform = transforms.Compose([
        transforms.Resize(256),
        transforms.CenterCrop(224),
        transforms.ToTensor(),
        transforms.Normalize(
            mean = [0.485, 0.456, 0.406],
            std = [0.229, 0.224, 0.225]
            )])

    # load the image, pre-process it, and make predictions
    img = Image.open(image)
    batch_t = torch.unsqueeze(transform(img), 0)
    resnet.eval()
    out = resnet(batch_t)

    with open('imagenet_classes.txt') as f:
        classes = [line.strip() for line in f.readlines()]

    # return the top 5 predictions ranked by highest probabilities
    prob = torch.nn.functional.softmax(out, dim = 1)[0] * 100
    _, indices = torch.sort(out, descending = True)
    return [(classes[idx], prob[idx].item()) for idx in indices[0][:5]]


if file_up is not None:
    # display image that user uploaded
    image = Image.open(file_up)
    st.image(image, caption = 'Uploaded Image.', use_column_width = True)
    st.write("")
    st.write("Just a second ...")
    labels = predict(file_up)

    # print out the top 5 prediction labels with scores
    for i in labels:
        st.write("Prediction (index, name)", i[0], ",   Score: ", i[1])
This app is a simple image classification tool built with Streamlit and PyTorch. It allows users to upload a JPEG image and processes it using a pre-trained ResNet-101 model, which is a deep-learning model trained on the ImageNet dataset. The app resizes and normalizes the uploaded image to prepare it for prediction, then outputs the top 5 predictions along with their probabilities.
Step 3: Configure Streamlit
Streamlit needs to be configured to allow external access from your browser.
1. Create a .streamlit directory in your home folder.
mkdir ~/.streamlit2. Create a Streamlit configuration file.
nano ~/.streamlit/config.tomlAdd the following configuration:
[server]
headless = true
enableCORS = false
port = 8501
Save and close the file.
Step 4: Run the Streamlit Application
Your Streamlit app is installed and configured. Now, it’s time to start it.
1. Run the app using the following command.
streamlit run app.pyOutput:
Collecting usage statistics. To deactivate, set browser.gatherUsageStats to False.

  You can now view your Streamlit app in your browser.

  Network URL: http://your-server-ip:8501
  External URL: http://your-server-ip:8501
2. Open your browser and navigate to http://your-server-ip:8501. You will see your app dashboard.
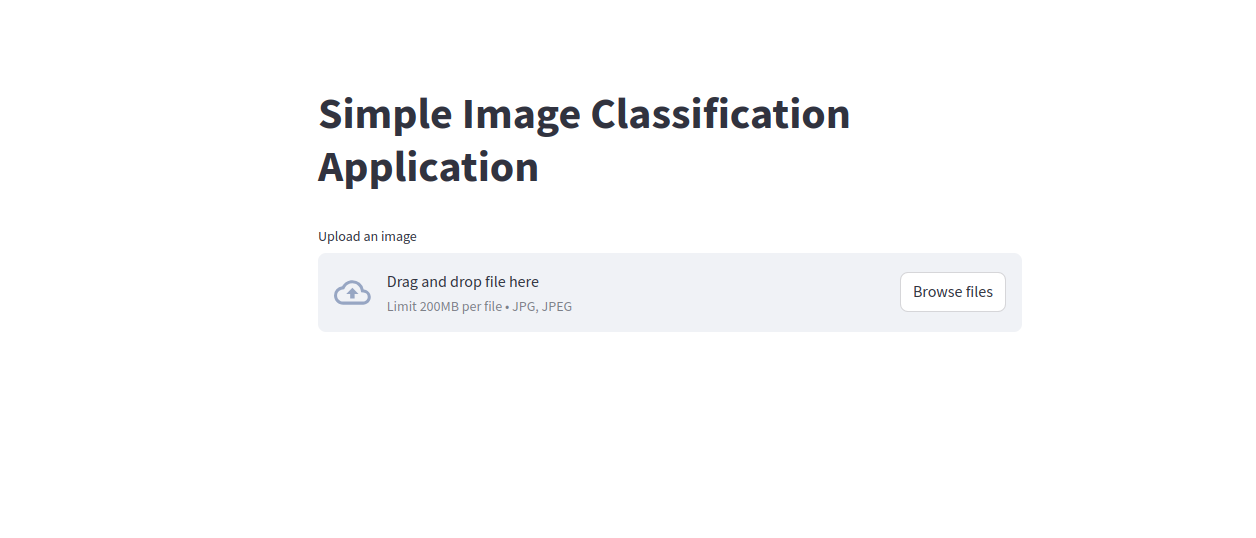
3. Click on Browse files and upload any image (JPEG format).
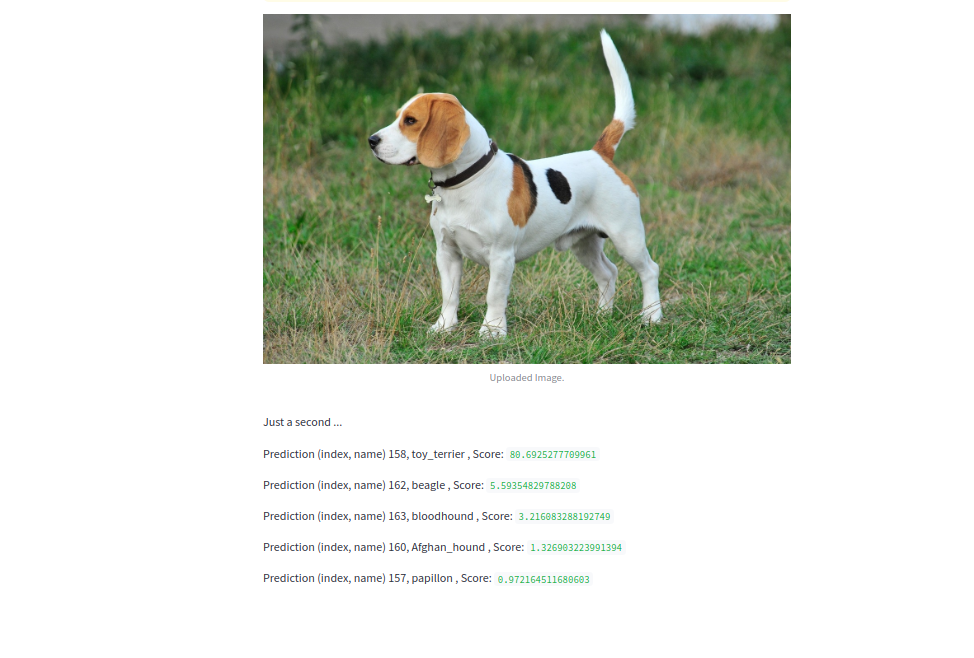
4. The app will display the image and predict the top 5 classes with their probabilities.
Step 5: Monitor GPU Usage
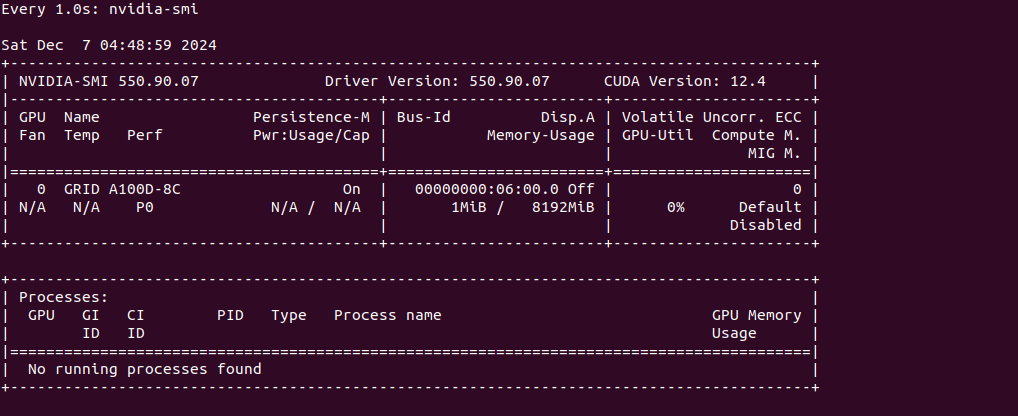
To ensure that your model is utilizing the GPU, monitor its activity with:
watch -n 1 nvidia-smiThis command displays real-time GPU usage.
Conclusion
Congratulations! You’ve successfully deployed a deep learning model using PyTorch and Streamlit on an Ubuntu 22.04 GPU server. Your web application is now live and can classify images uploaded by users. This deployment leverages GPU acceleration for fast predictions and offers an intuitive interface for non-technical users.
* This post is for informational purposes only and does not constitute professional, legal, financial, or technical advice. Each situation is unique and may require guidance from a qualified professional.
Readers should conduct their own due diligence before making any decisions.