
Verified and Tested 10/25/17
Introduction
Virtual Private Networks, or VPNs, are a method of employing encryption to allow users to access a private network securely and share data remotely through public networks. Though VPNs connect over public interfaces, it’s secure and appears as a private network. Because VPNs offer an inherent increase in security, they are often used by enterprise corporations as a way of connecting to remote data centers. If you’d like to read up about VPNs further, head over to our What Is a VPN series.
This article will guide you through connecting to your Managed Atlantic.Net VPN.
Note: This article is for Atlantic.Net customers with Managed Hosting Services. If you are interested in Managed Hosting Services, please contact our Sales team by emailing sales@atlantic.net or by calling 866-618-DATA (3282).
Following completion of your VPN by our Network Operations Center, you will receive an e-mail with the information necessary to setup your VPN connection. The information you need before configuring your connection is below. If you do not have this information, contact our Support team by emailing support@atlantic.net or calling 866-618-DATA (3282).
Choose Your VPN Type: OpenVPN | OpenVPN on Mac | OpenVPN on Linux
OpenVPN
Prerequisites
- OpenVPN Configuration file – This file will be provided to you either by your company or by the Atlantic.Net Network Operations Center. Place this on your computer in a place that is easy to find, like the Desktop. (the file ends in .ovpn)
- VPN Username – This is your user.
- VPN Password – This is your password.
Setup OpenVPN for Windows
Installing OpenVPN
Download the latest version of OpenVPN here. Click on the OpenVPN installer for Windows Vista and later.
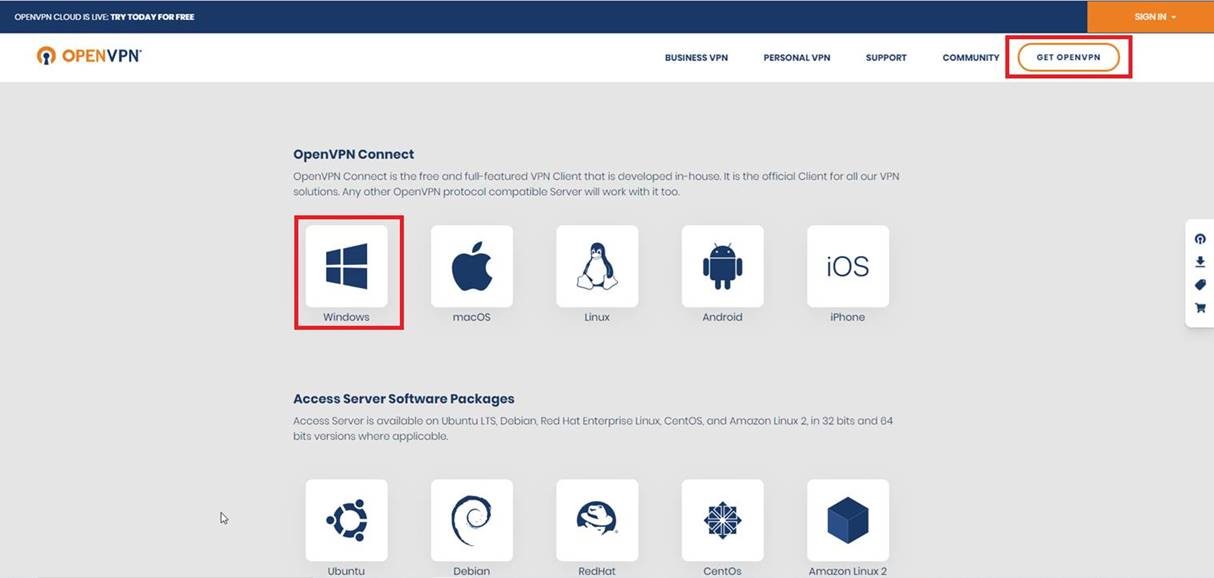
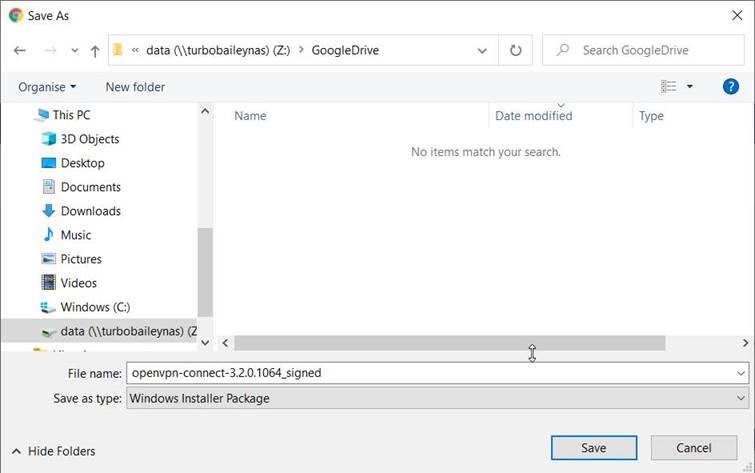
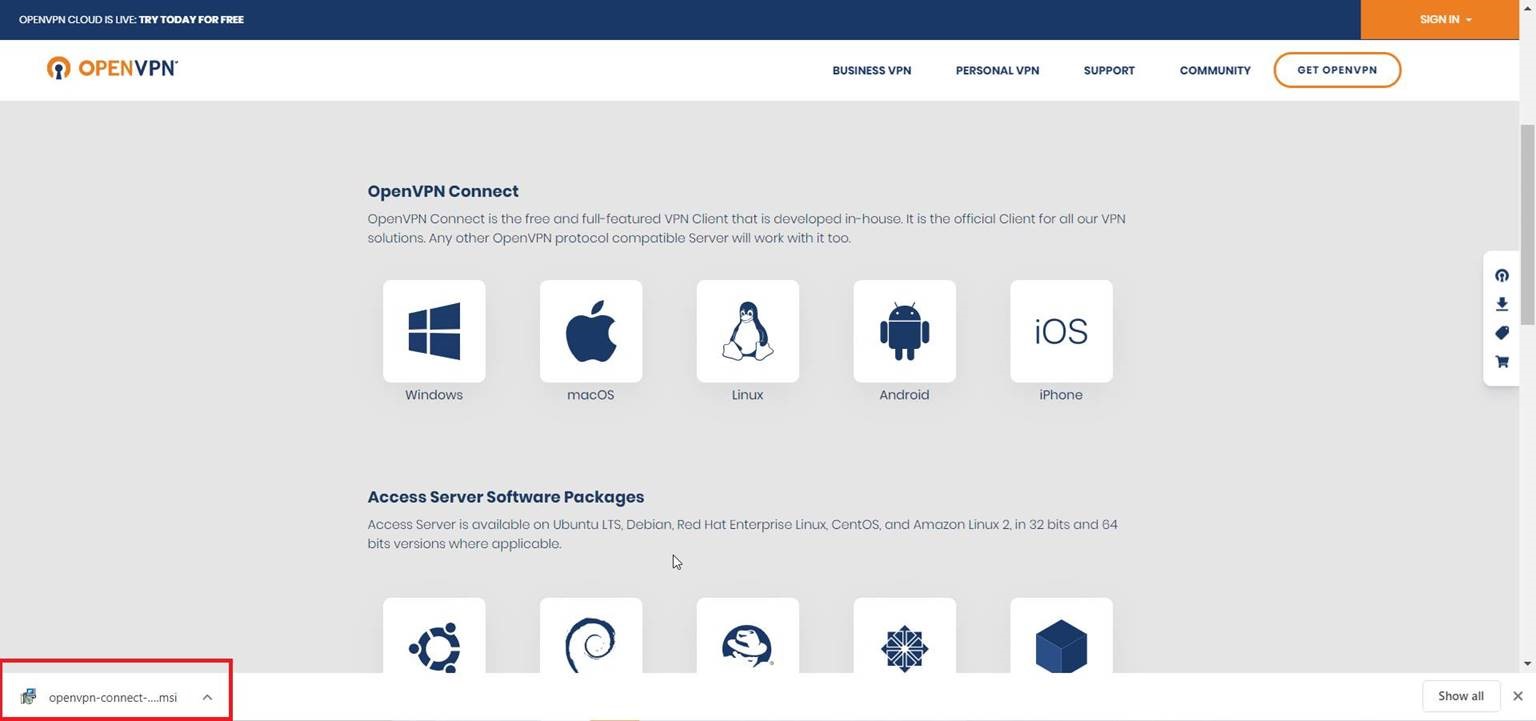
In most web browsers, once the file has finished downloading, it will appear at the bottom. Click on this to run the OpenVPN installation program. Note: If you do not see it at the bottom of your web browser, the program that was downloaded can be found in whatever folder your downloads normally go to.
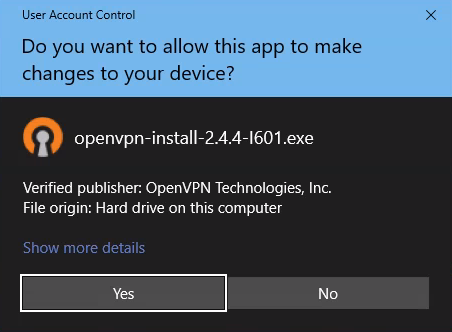
On most versions of Windows, you will get a popup box asking if you want to allow this program to make changes to your device. Should you get this popup box, answer Yes.
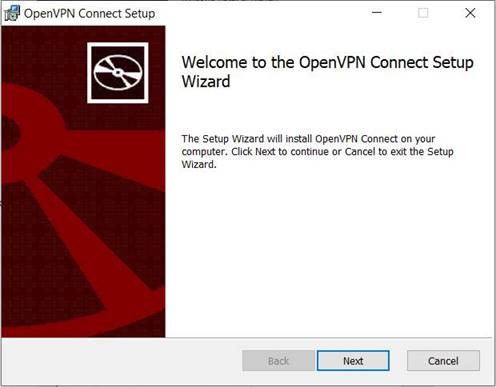
The OpenVPN installer should now be loaded. Click Next on the Welcome screen.
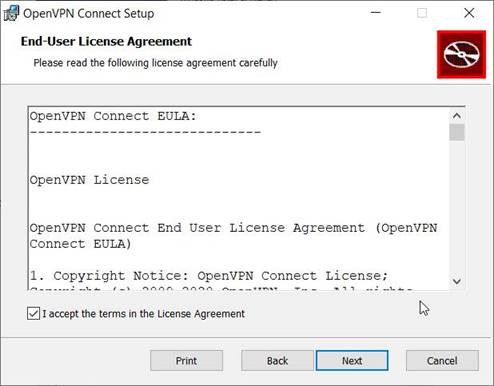
Next, click I Agree if you agree to the terms of the license.
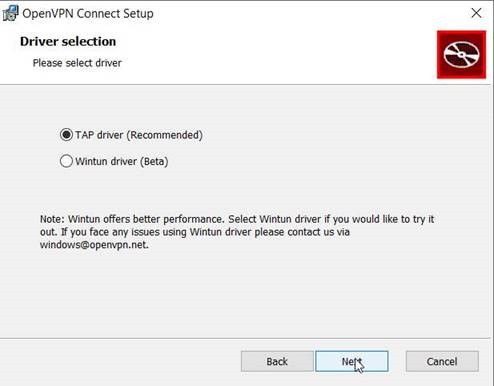
On the Driver selection screen, keep TAP driver selected, and click Next.
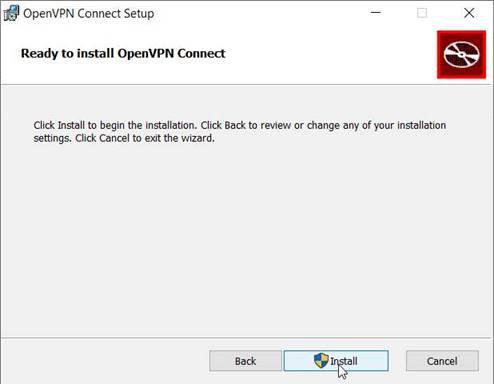
Click Install to begin the installation.
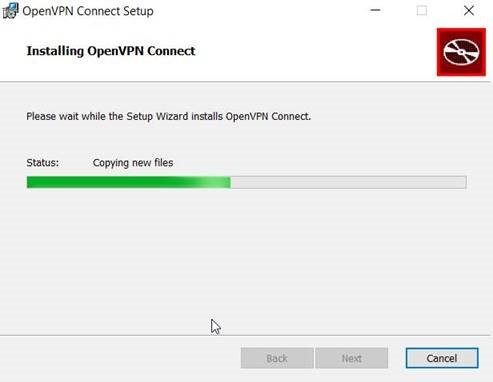
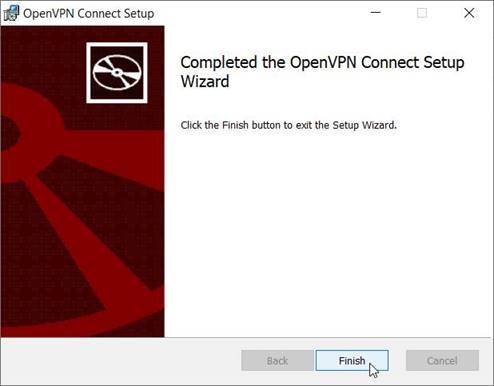
Once the installation has completed, click Finish.
Logging in to OpenVPN
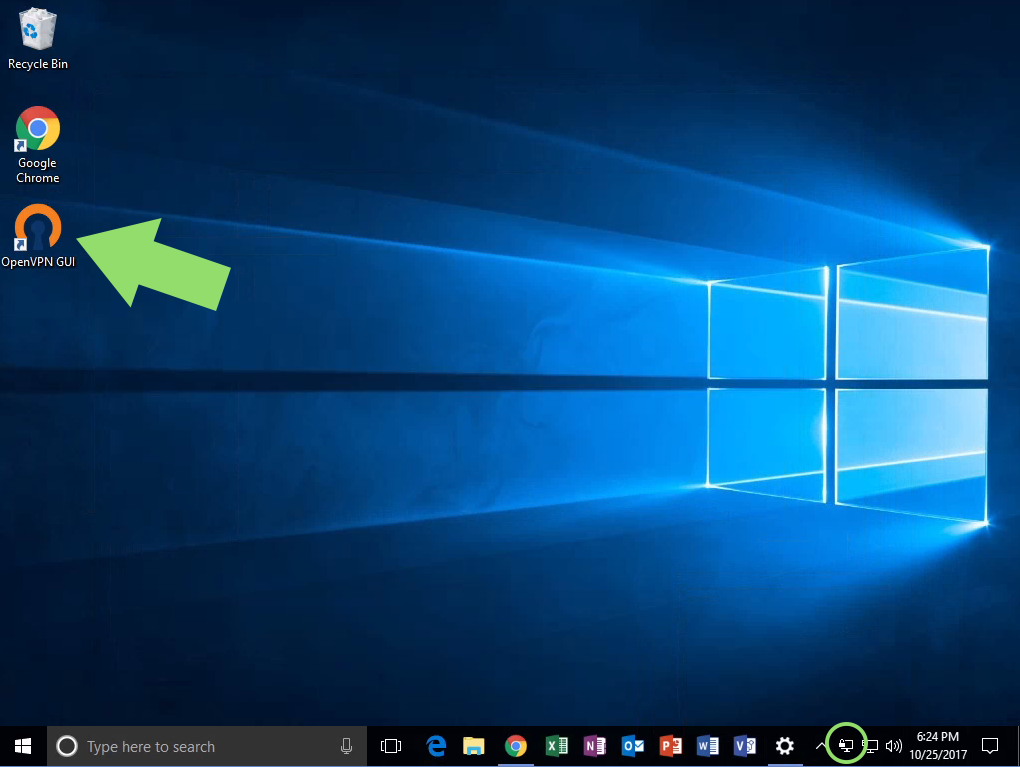
Now that OpenVPN is installed, you should see an icon on your desktop called OpenVPN GUI. Double click this to open OpenVPN. You should now see the OpenVPN icon in the system tray.
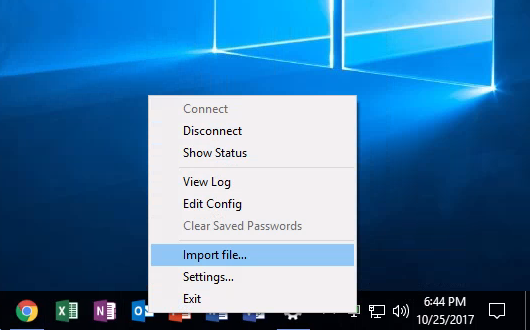
Now, right-click the OpenVPN icon in the system tray, and select Import File.
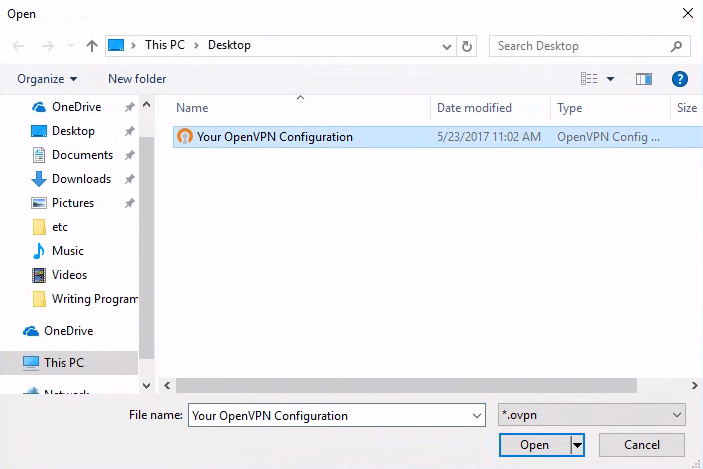
Select your OpenVPN configuration file (the .ovpn file that was provided by Atlantic.Net), and then click Open.
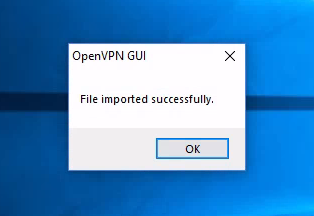
If successful, you will be notified that the configuration important successfully. Click OK.
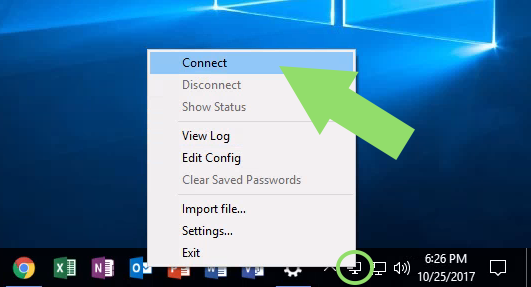
Right-click the OpenVPN icon that’s in the system tray again, and then click Connect.
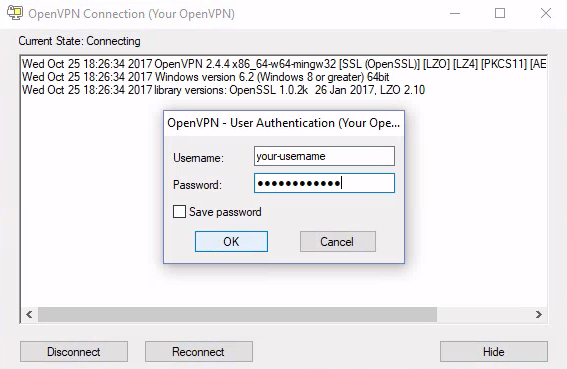
Finally, enter your VPN username and password, and click OK.
If you connected successfully, the OpenVPN Connection window will disappear, and the OpenVPN icon in your system tray will be green.
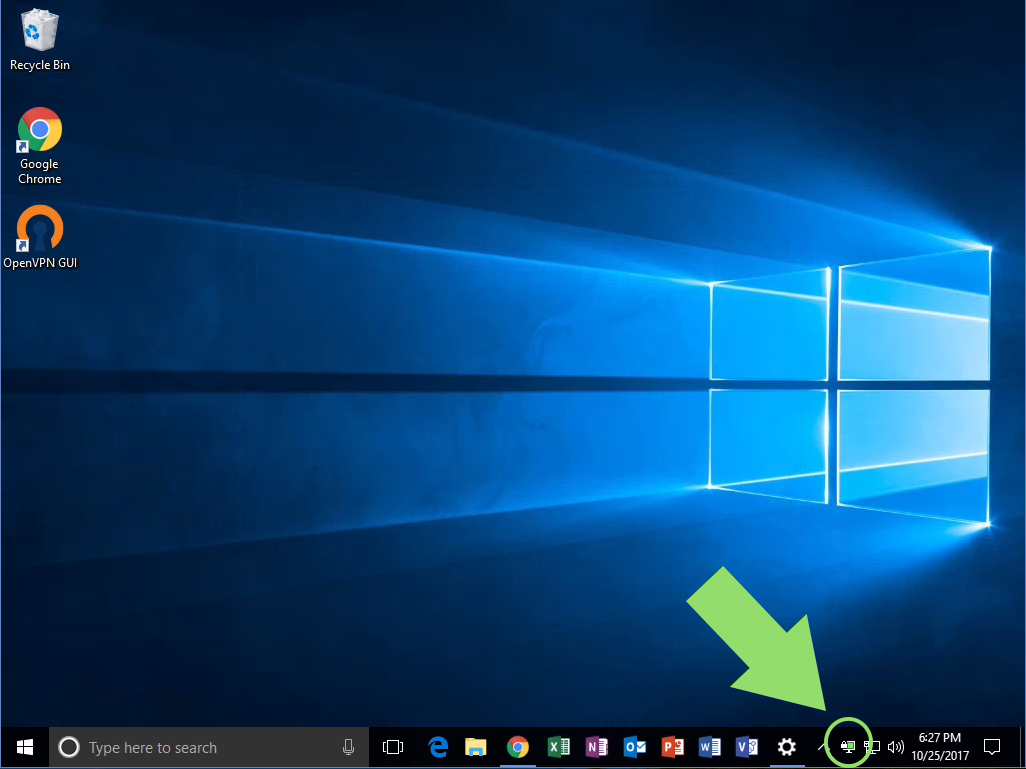
Congratulations! You’ve successfully connected to your Atlantic.Net VPN with OpenVPN.
Accessing Your Server
Now that you’re connected to the VPN, it’s very easy to access your server(s). You will connect to your server(s) how you would normally (be it via Remote Desktop or SSH, depending on the system), except you will use the provided private IP address.
OpenVPN on Mac
Prerequisites
- OpenVPN Configuration file – This file will be provided to you either by your company or by the Atlantic.Net Network Operations Center. Place this on your computer in a place that is easy to find, like the Desktop. (the file ends in .ovpn)
- OpenVPN Private Key password
Setup OpenVPN for Mac
Installing OpenVPN
Download the latest version of OpenVPN from here as shown below.
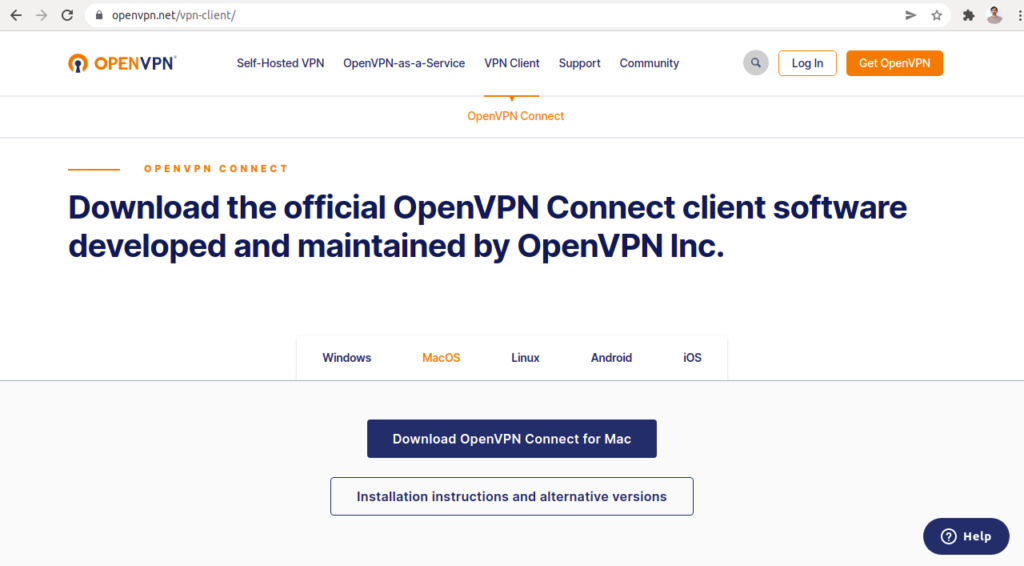
Click on the Download OpenVPN Connect for Mac to download it on your system.
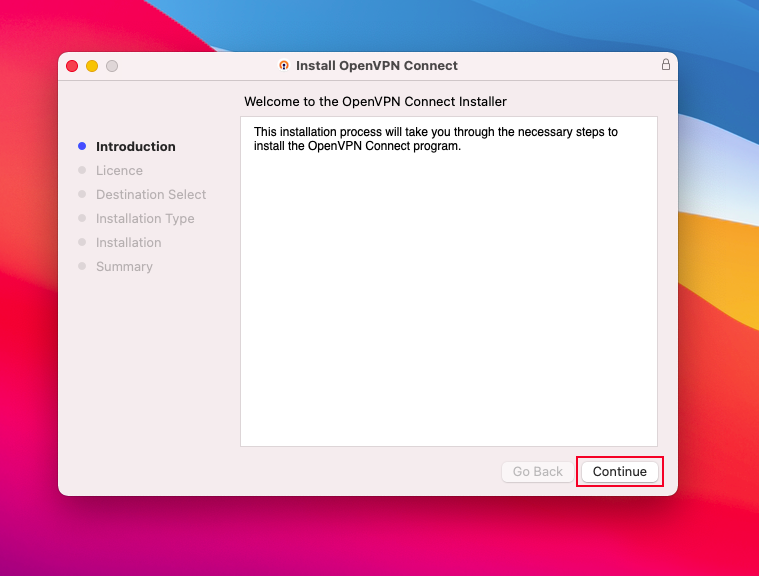
Begin installation of OpenVPN for Mac OS, navigate to your Downloads folder, and double click the openvpn-connect-v3-macos.dmg (DMG) file you just downloaded to start the installation. Click Continue on the Welcome screen.
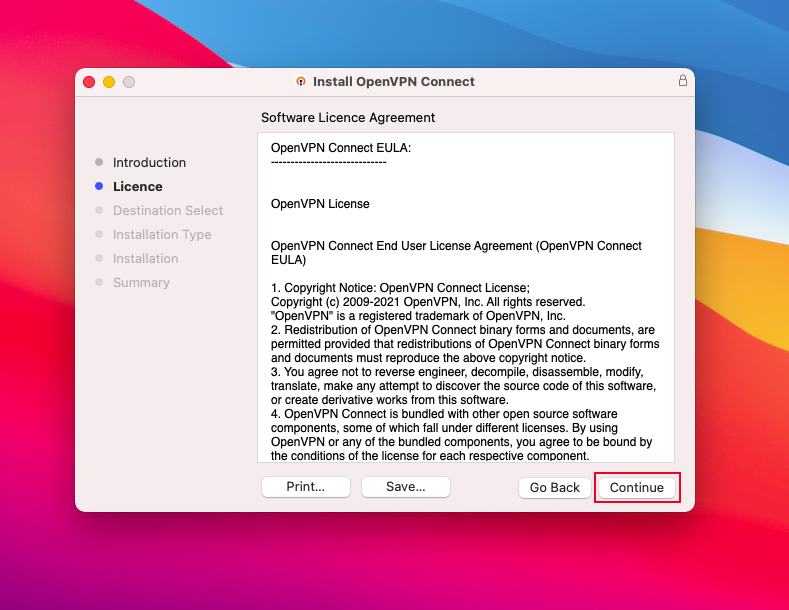
Next, read the licensing terms. Then click on Continue.
Click on the Install to start the installation.
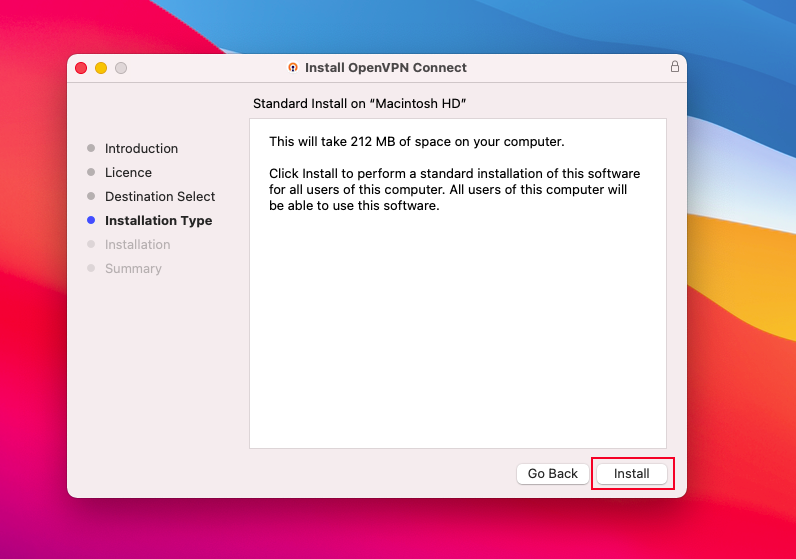
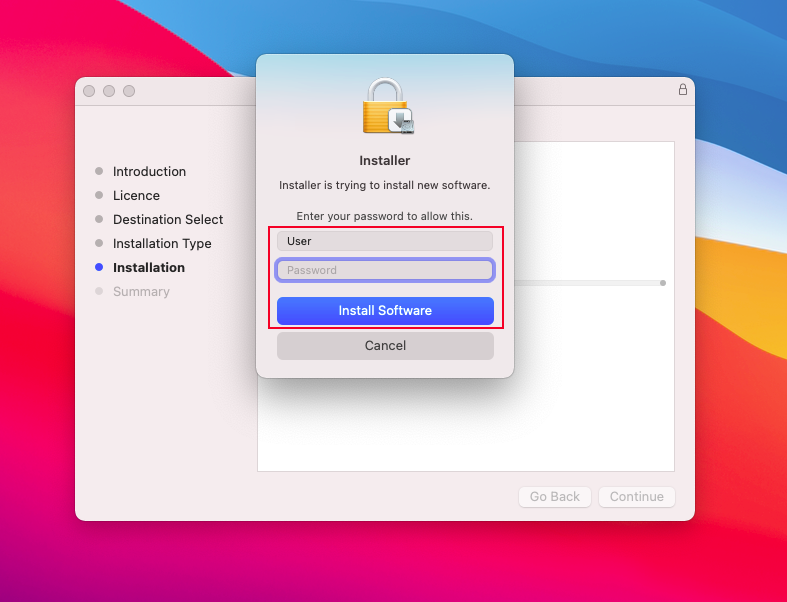
You will be asked to provide your device password, if you have one configured, and click Install Software. Wait for the installation process to complete.
Once the installation has been completed successfully, you should see the following screen:
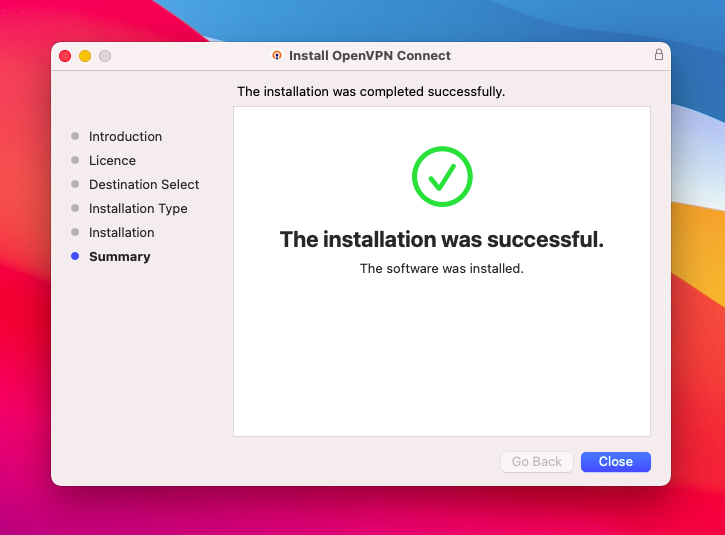
Click on the Close to end the installation process.
Connect to OpenVPN Server
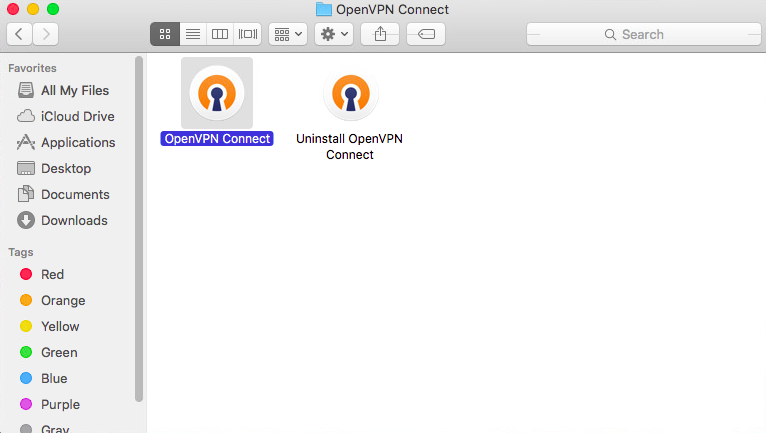
Now that OpenVPN is installed, you should see an icon on the Applications menu. Double click on to open OpenVPN.
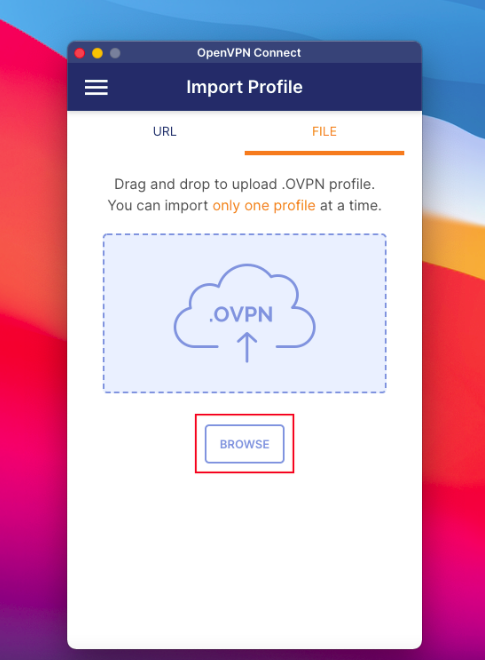
In the FILE tab, click on the BROWSE then select the .ovpn file that was provided by Atlantic.Net.
OpenVPN client automatically fills the Profile name and Server Hostname from the .ovpn file which we have selected in the previous step. Click on the Save Private Key Password and then enter the Private Key password.
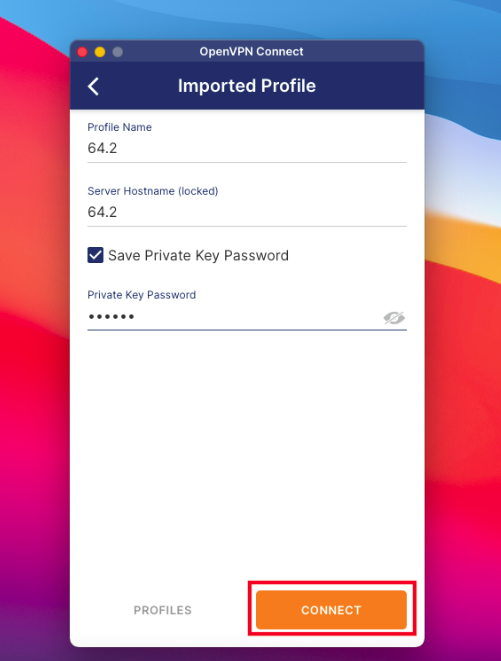
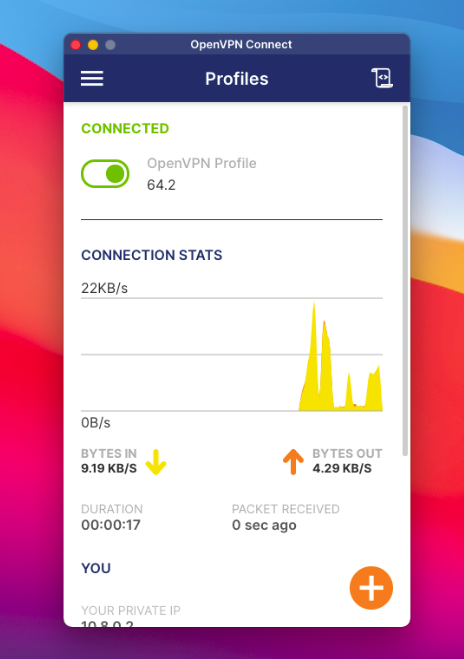
Click on the CONNECT to connect to the OpenVPN server. After the successful connection, you should see the following screen:
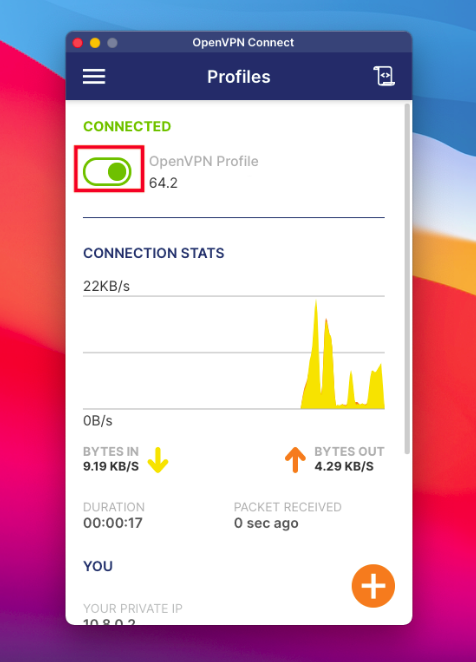
To disconnect the OpenVPN server, click on the Disconnect button as shown in the below picture.
OpenVPN on Linux
First, install the OpenVPN software packages for Network Manager and Gnome:
sudo apt-get install -yq \
  network-manager-openvpn \
  network-manager-openvpn-gnome;
Once installed, your network manager will now have a new VPN type available.
Next, Save the VPN profile that was email to you to your desktop, download folder, or documents folder.
We are now going to import the VPN profile into the Network Manager configuration.
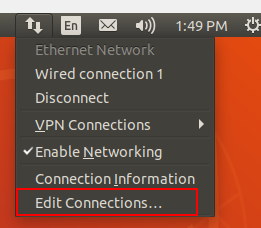
Click on the Network Manager and select “Edit Connections…”
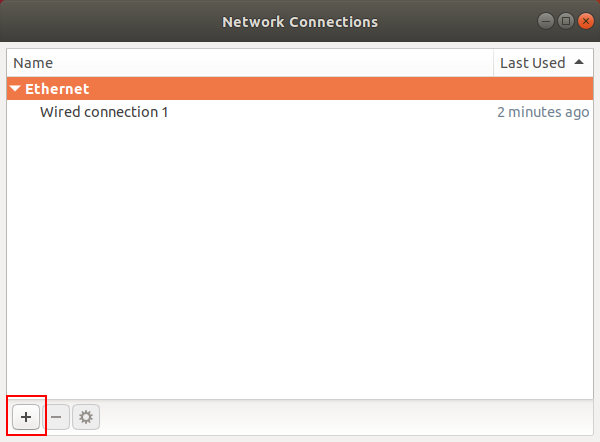
Next, click on the PLUS (+) icon at the lower left of the window.
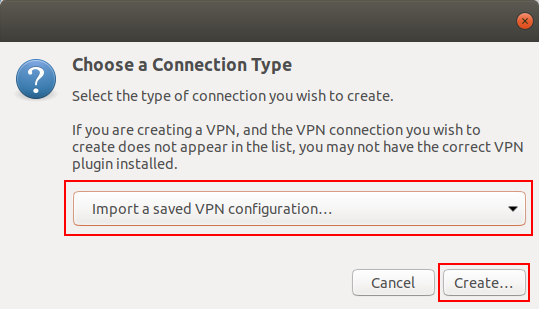
From the new window that opens, select the drop-down selection, go to the last entry, and select “Import a saved VPN configuration,” then press the [CREATE] button.
Now locate the saved VPN profile that was saved to your local PC and double click the file.
The application will then import all of the settings from the VPN profile into the Network Manager settings. Click the [SAVE] button at the bottom of the window.
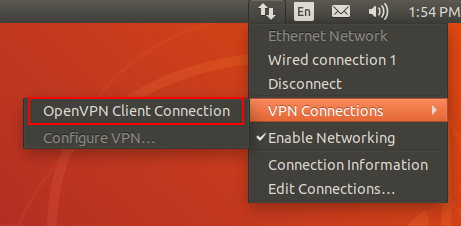
The VPN connection will now show up under your available VPN connections.
Learn more about Atlantic.Net’s Dedicated Server Hosting and Dedicated Servers.

Written by
Alexander Wise is Content Editor for Atlantic.Net. He has over 15 years of experience in editing, copywriting, and managing content.