Squid is a free and open-source web proxy caching server that supports different protocols, such as HTTP, HTTPS, FTP, and SSL. It is mainly used as a caching proxy server and can greatly improve the server performance by caching repeated requests, filtering web traffic, and accessing geo-restricted content.
Squid can act as an intermediary between the client and web server. After connecting the Squid proxy, you will be able to anonymously access Internet services and bypass local network restrictions.
In this tutorial, we will learn how to install and configure Squid Proxy on CentOS 8.
Step 1 – Install Squid Proxy Server
The Squid package is available in the CentOS 8 default repository. You can install it by just running the following command:
dnf install squid -y
Once installed, start the Squid proxy service and enable it to start at reboot with the following command:
systemctl start squid
systemctl enable squid
Step 2 – Configure IP Based Authentication
There are several ways to configure Squid to accept connections and serve as an HTTP proxy. In this section, we will configure Squid to authenticate clients based on their IP addresses.
Open the Squid default configuration file at /etc/squid/squid.conf:
nano /etc/squid/squid.conf
Add the following line at the beginning of the file:
acl user1 src 192.168.0.10
acl user2 src 192.168.0.11
http_access allow user1 user2
Save and close the file when you are finished, then restart the Squid service to apply the changes:
systemctl restart squid
In the above step, substitute your relevant information as below:
user1 and user2 is the name that identifies the client computers.
192.168.0.10 and 192.168.0.11 is the IP address of the client computer.
Step 3 – Configure User Based Authentication
In this section, we will configure Squid to authenticate a client with usernames and passwords.
First, install the Apache utility package in your system:
dnf install httpd-tools -y
Next, create a file to store Squid users and passwords and change the ownership of the password file:
touch /etc/squid/squid_passwd
chown squid /etc/squid/squid_passwd
Next, create a new squid user with name user1 using the following command:
htpasswd /etc/squid/squid_passwd user1
You will be asked to create a password for this user as shown below:
New password:
Re-type new password:
Adding password for user user1
Next, create another user named user2 with the following command:
htpasswd /etc/squid/squid_passwd user2
Provide a password for this user as shown below:
New password:
Re-type new password:
Adding password for user user2
You can now verify both users with the following command:
cat /etc/squid/squid_passwd
You should get the following output:
user1:$apr1$szXO3OTj$37MuRy2V06mIAOiRpFjnr1
user2:$apr1$MCAckv0h$0VwDLLhAfMLaLm3Xvk3H/0
Next, edit the Squid configuration file:
nano /etc/squid/squid.conf
Add the following lines at the beginning of the file:
auth_param basic program /usr/lib64/squid/basic_ncsa_auth /etc/squid/squid_passwd
acl ncsa_users proxy_auth REQUIRED
http_access allow ncsa_users
Save and close the file, then restart the Squid proxy service to apply the changes:
systemctl restart squid
Step 4 – Configure Combined Authentication
In this section, we will configure Squid to authenticate a client based on the IP address and username/password.
Edit the Squid default configuration file:
nano /etc/squid/squid.conf
Find the following lines which you added earlier:
auth_param basic program /usr/lib64/squid/basic_ncsa_auth /etc/squid/squid_passwd
acl ncsa_users proxy_auth REQUIRED
http_access allow ncsa_users
acl user1 src 192.168.0.10
acl user2 src 192.168.0.11
http_access allow user1 user2
And replace them with the following lines:
acl user1 src 192.168.0.10
acl user2 src 192.168.0.11
auth_param basic program /usr/lib64/squid/basic_ncsa_auth /etc/squid/squid_passwd
acl ncsa_users proxy_auth REQUIRED
http_access allow user1 user2 ncsa_users
Save and close the file, then restart the Squid proxy service to apply the changes:
systemctl restart squid
Step 5 – Configure Squid to Anonymize Traffic
Next, you will need to add some rules to mask client IP addresses from the servers that receive traffic from your Squid HTTP proxy.
You can do it by editing the Squid default configuration file:
nano /etc/squid/squid.conf
Add the following lines at the beginning of the file:
forwarded_for off
request_header_access Allow allow all
request_header_access Authorization allow all
request_header_access WWW-Authenticate allow all
request_header_access Proxy-Authorization allow all
request_header_access Proxy-Authenticate allow all
request_header_access Cache-Control allow all
request_header_access Content-Encoding allow all
request_header_access Content-Length allow all
request_header_access Content-Type allow all
request_header_access Date allow all
request_header_access Expires allow all
request_header_access Host allow all
request_header_access If-Modified-Since allow all
request_header_access Last-Modified allow all
request_header_access Location allow all
request_header_access Pragma allow all
request_header_access Accept allow all
request_header_access Accept-Charset allow all
request_header_access Accept-Encoding allow all
request_header_access Accept-Language allow all
request_header_access Content-Language allow all
request_header_access Mime-Version allow all
request_header_access Retry-After allow all
request_header_access Title allow all
request_header_access Connection allow all
request_header_access Proxy-Connection allow all
request_header_access User-Agent allow all
request_header_access Cookie allow all
request_header_access All deny all
Save and close the file, then restart the Squid proxy service to apply the changes:
systemctl restart squid
Step 6 – Test Squid Proxy
At this point, your Squid proxy server is configured to accept client connections based on the IP address and username/password and anonymously handle Internet traffic.
Next, you will need to configure your Client computer’s browser settings to use your Squid server as an HTTP proxy.
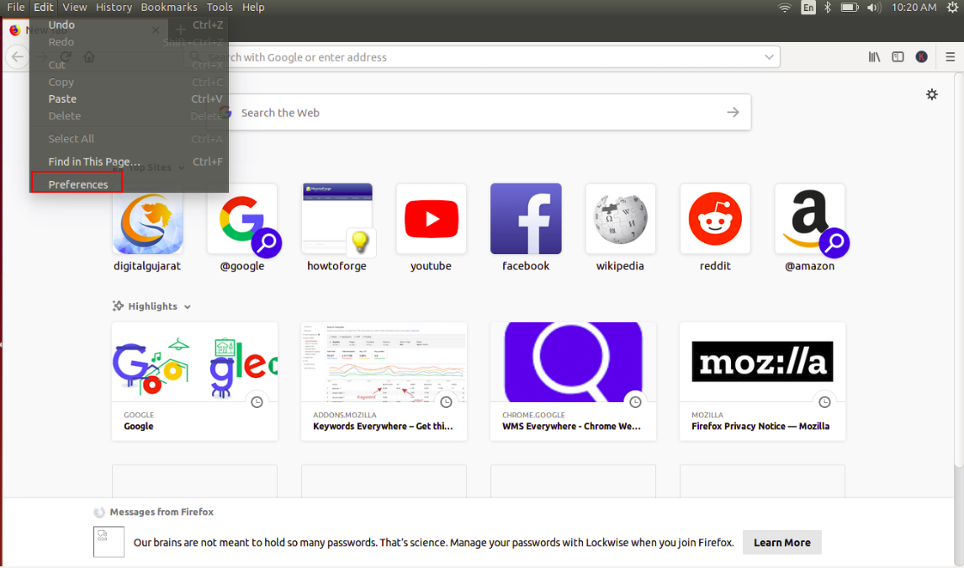
On the client computer, open Mozilla Firefox and click on Edit => Preferences as shown below:
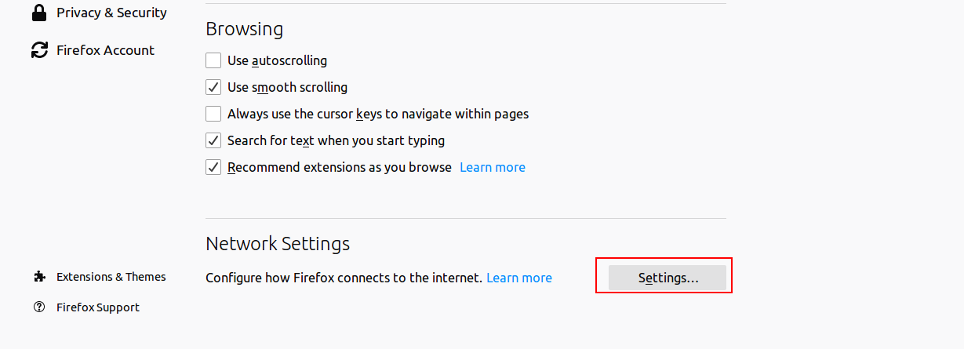
Scroll down to the Network Settings section and click on Settings. You should see the following page:
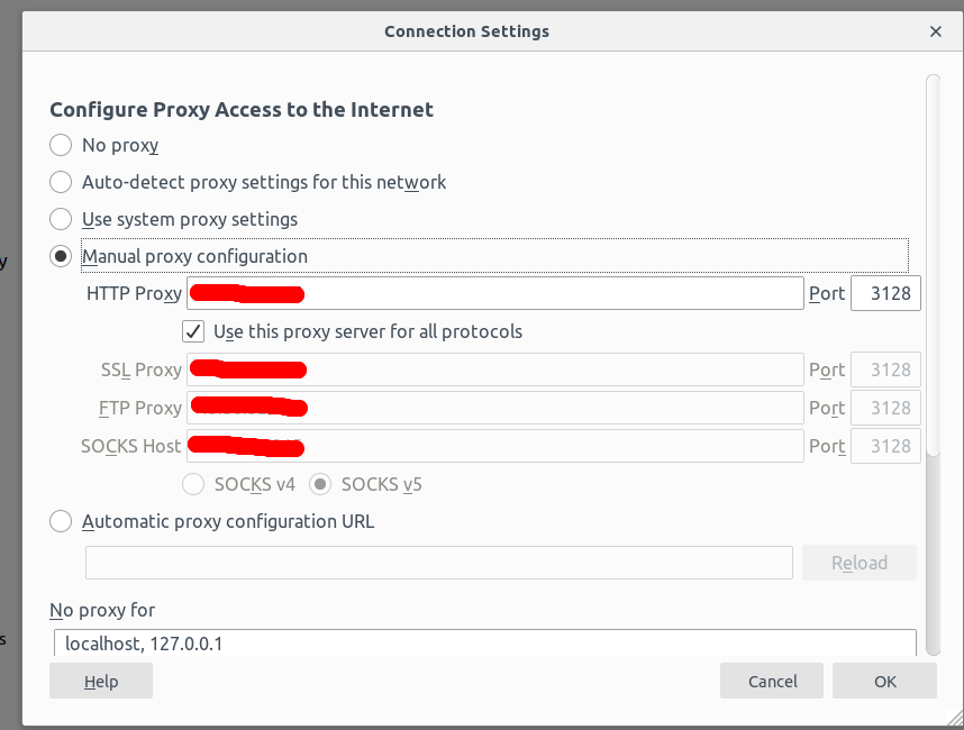
Select the Manual proxy configuration radio button, enter your Squid server IP address in the HTTP Host field and 3128 in the Port field, select the “Use this proxy server for all protocols” check box, and click on the OK button to save the settings.
Now your browser is configured to browse the Internet through the Squid proxy.
To verify it, type the URL What is my ip. You will be asked to provide a username and password as shown below:

Provide your Squid proxy server username and password which you have created earlier and click on the OK button. You should see the following page:
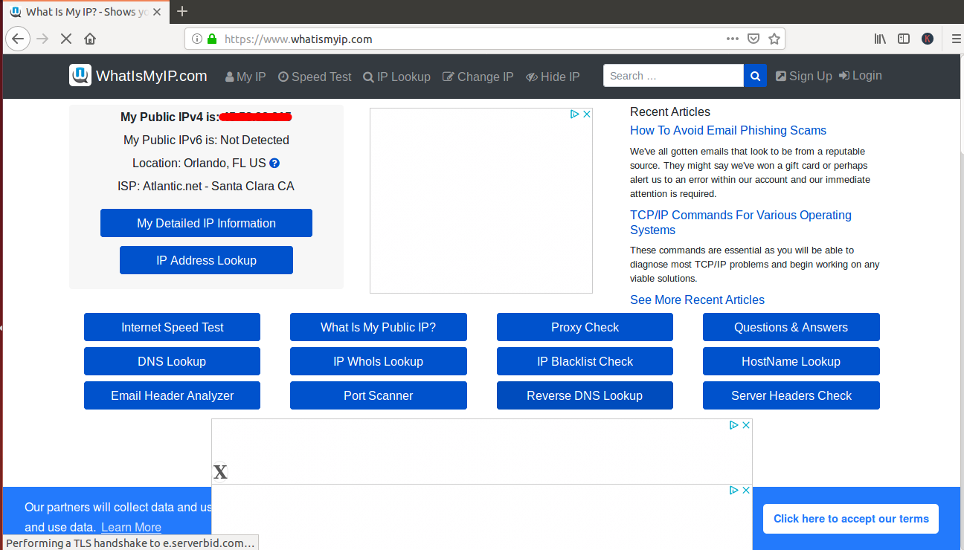
On the above page, you should see your Squid server’s IP address IP address instead of the IP address of your client computer.
Conclusion
In the above guide, you learned how to configure Squid as an HTTP proxy server on CentOS 8 and configure your browser to use it. You can now surf the web anonymously and keep Firefox from tracking you. Try out Squid on a VPS hosting account from Atlantic.Net today!
* This post is for informational purposes only and does not constitute professional, legal, financial, or technical advice. Each situation is unique and may require guidance from a qualified professional.
Readers should conduct their own due diligence before making any decisions.