Rocket.Chat is a free, open-source, self-hosted chat application that allows you to host your own chat server. It is very similar to Slack and offers similar features including file sharing, ticketing systems, video chat, and conferencing. With Rocket.Chat, you can chat with team members, create channels and private groups, make video and audio calls, share screens, and upload files.
Features
- Powerful APIs
- Remote video monitoring
- Free audio and video conferencing
- LiveChat and LDAP group sync
- Screen and file sharing
- Desktop and mobile notifications
- Public and private multi-user rooms
Rocket.Chat is the best choice for you if you are looking for an open-source chat platform to host in the Cloud.
In this tutorial, we will show you how to install and configure Rocket.Chat on Ubuntu 18.04 VPS.
Step 1 – Install Nodejs
Rocket.Chat requires Node.js and other dependencies for building npm packages from the source.
First, install the necessary dependencies using the following command.
apt-get install -y ca-certificates curl gnupg graphicsmagick
Next, download the Node.js GPG key.
mkdir -p /etc/apt/keyrings
curl -fsSL https://deb.nodesource.com/gpgkey/nodesource-repo.gpg.key | gpg --dearmor -o /etc/apt/keyrings/nodesource.gpg
Next, add the NodeSource repo to the APT source list.
echo "deb [signed-by=/etc/apt/keyrings/nodesource.gpg] https://deb.nodesource.com/node_18.x nodistro main" | tee /etc/apt/sources.list.d/nodesource.list
Then, update the repository index and install the Ndoe.js with the following command.
apt update
apt-get install -y nodejs
Next, verify the Node.js version using the following command.
node -v
Output.
v18.19.0
Step 2 – Install MongoDB
Rocket.Chat requires MongoDB to be installed on your server. By default, the latest version of MongoDB is not available in the Ubuntu 18.04 default repository, so you will need to add the MongoDB repository to your server.
First, download and add the official repository key with the following command:
apt-key adv --keyserver hkp://keyserver.ubuntu.com:80 --recv 9DA31620334BD75D9DCB49F368818C72E52529D4
Next, add the MongoDB repository by running the following command:
add-apt-repository 'deb [arch=amd64] https://repo.mongodb.org/apt/ubuntu bionic/mongodb-org/4.0 multiverse'
Once the repository is added, update the repository and install MongoDB with the following command:
apt-get update -y
apt-get install mongodb-org -y
Once the MongoDB is installed, start the MongoDB service and enable it to start after system reboot:
systemctl start mongod
systemctl enable mongod
By default, MongoDB listening on port 27017. You can check it with the following command:
netstat -ant
Output:
Active Internet connections (servers and established)
Proto Recv-Q Send-Q Local Address           Foreign Address         State
tcp        0      0 127.0.0.1:27017         0.0.0.0:*               LISTEN
tcp        0      0 127.0.0.53:53           0.0.0.0:*               LISTEN
tcp        0      0 0.0.0.0:22              0.0.0.0:*               LISTEN
Step 3 – Configure MongoDB
Rocket.Chat uses the MongoDB replica set to improve the performance, so you will need to configure the MongoDB replica set. You can configure it with the following command:
echo -e "replication:\n replSetName: \"rs01\"" | tee -a /etc/mongod.conf
Next, restart the MongoDB service to apply the changes:
systemctl restart mongod
Next, log in to MongoDB shell and initiate the replica set with the following command:
mongo
rs.initiate()
You should see the following output:
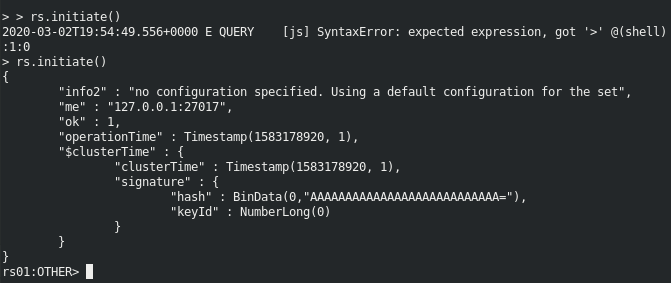
At this point, MongoDB is installed and configured with the replica set.
Type Exit to leave MongoDB.
Step 4 – Install RocketChat
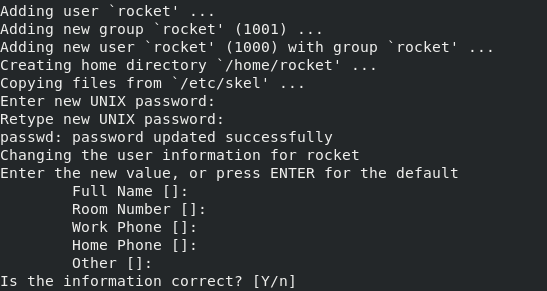
Before starting, it is recommended to create a new user and group to run Rocket.Chat.
First, create a new user with the name rocket with the following command:
adduser rocket
You should get the following output:
Next, allow Nginx to access the Rocket.Chat directory by adding the rocket user to www-data group:
usermod -a -G rocket www-data
Next, switch the user to rocket and download the latest version of Rocket.Chat with the following command:
su - rocket
curl -L https://releases.rocket.chat/latest/download -o rocket.chat.tgz
Once the download is completed, extract the downloaded file with the following command:
tar zxf rocket.chat.tgz
Next, move the extracted directory to Rocket.Chat using the following command:
mv bundle Rocket.Chat
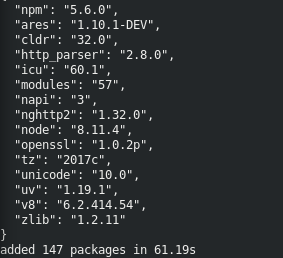
Next, change the directory to Rocket.Chat/programs/server directory and install all required npm packages with the following command:
cd Rocket.Chat/programs/server
npm install
Note: Rocket.Chat will take a few minutes to install
Once all the packages are installed, you should see the following output:
Next, set the required environment variables to test the Rocket.Chat installation:
export PORT=3000
export ROOT_URL=http://0.0.0.0:3000/
export MONGO_URL=mongodb://localhost:27017/rocketchat
export MONGO_OPLOG_URL=mongodb://localhost:27017/local?replSet=rs01
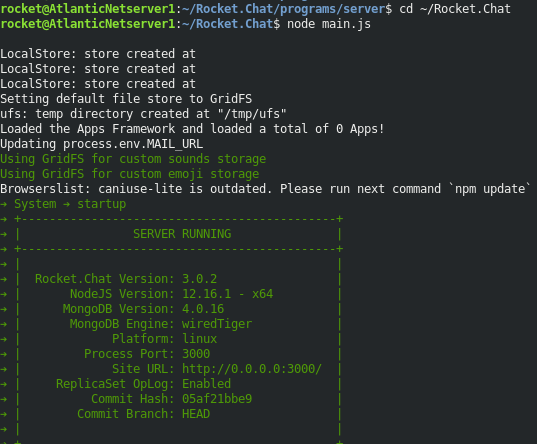
Next, change the directory to Rocket.Chat and start the Rocket.Chat server using the following command:
cd ~/Rocket.Chat
node main.js
Note: This process can take several minutes to complete
You should get the following output:
Next, stop the Rocket.Chat server with CTRL+C then run the following command to exit from the rocket user:
exit
Step 5 – Create a Systemd Service File for RocketChat
Next, create a systemd service file to start and stop the Rocket.Chat service:
nano /etc/systemd/system/rocketchat.service
Add the following lines:
[Unit]
Description=Rocket.Chat server
After=network.target nss-lookup.target mongod.target


[Service]
StandardOutput=syslog
StandardError=syslog
SyslogIdentifier=rocketchat
User=rocket
Environment=MONGO_URL=mongodb://localhost:27017/rocketchat MONGO_OPLOG_URL=mongodb://localhost:27017/local?replSet=rs01 ROOT_URL=http://node1.example.com PORT=3000
ExecStart=/usr/bin/nodejs /home/rocket/Rocket.Chat/main.js


[Install]
WantedBy=multi-user.target
Save and close the file when you are finished. Then, reload the systemd daemon with the following command:
systemctl daemon-reload
Next, start the Rocket.Chat service and enable it to start after system reboot:
systemctl start rocketchat
systemctl enable rocketchat
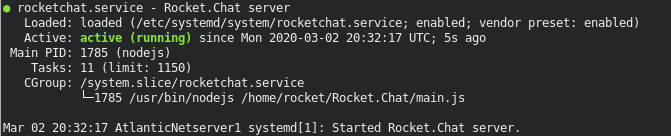
You can now verify the Rocket.Chat service using the following command:
systemctl status rocketchat
You should get the following output:
Step 6 – Set Up a Reverse Proxy with Nginx
Next, you will need to install and configure Nginx as a reverse proxy to forward the client requests coming on port 3000 to the Nginx port 80.
First, install the Nginx web server with the following command:
apt-get install nginx -y
Next, create an Nginx virtual host configuration file with the following command:
nano /etc/nginx/sites-available/rocket
Add the following lines:
server {
  listen 80;

  server_name    node1.example.com;
  access_log /var/log/nginx/rocket-access.log;
  error_log /var/log/nginx/rocket-error.log;

  location / {
        proxy_set_header X-Forwarded-Host $host;
        proxy_set_header X-Forwarded-Server $host;
        proxy_set_header X-Forwarded-For $proxy_add_x_forwarded_for;
        proxy_pass http://127.0.0.1:3000/;
  }
}
Save and close the file when you are finished. Then, enable the virtual host with the following command:
ln -s /etc/nginx/sites-available/rocket /etc/nginx/sites-enabled/
Finally, restart the Nginx service to apply the configuration changes:
systemctl restart nginx
Step 7 – Access RocketChat Web Interface
Now, open your web browser and navigate to the URL http://node1.example.com. You will be redirected to the Rocket.Chat Setup Wizard:
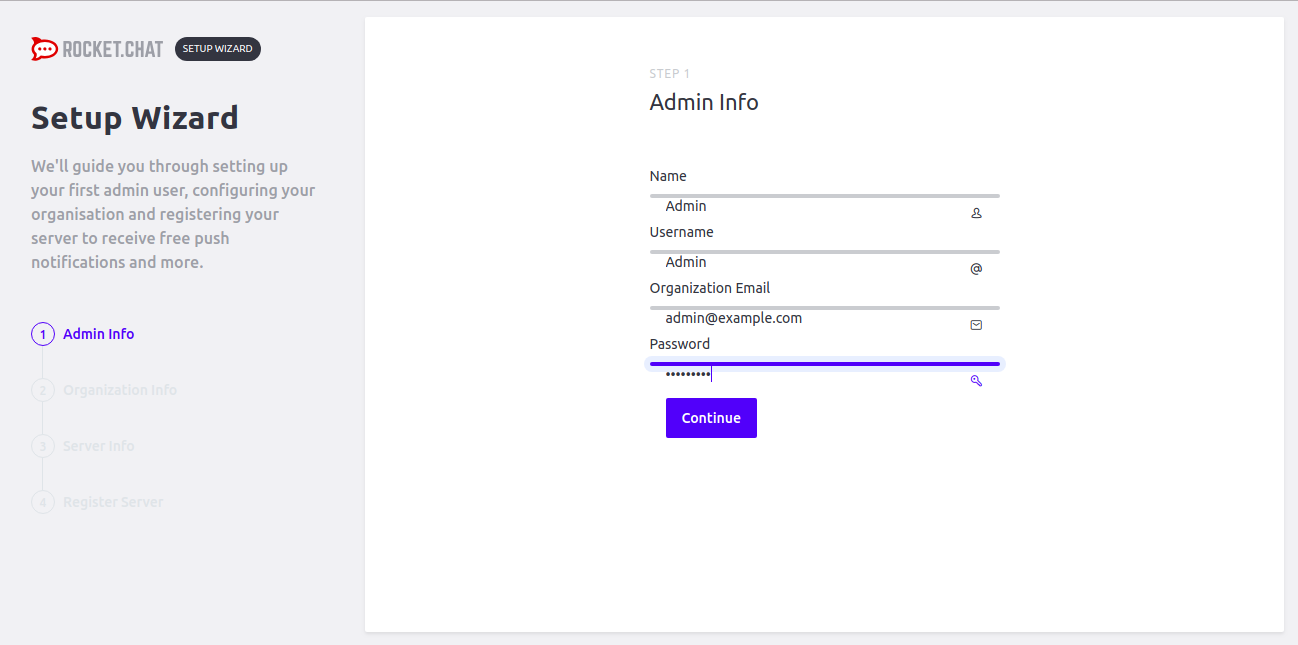
Provide your admin username, email, password details and click on the Continue button. You should see the following page:
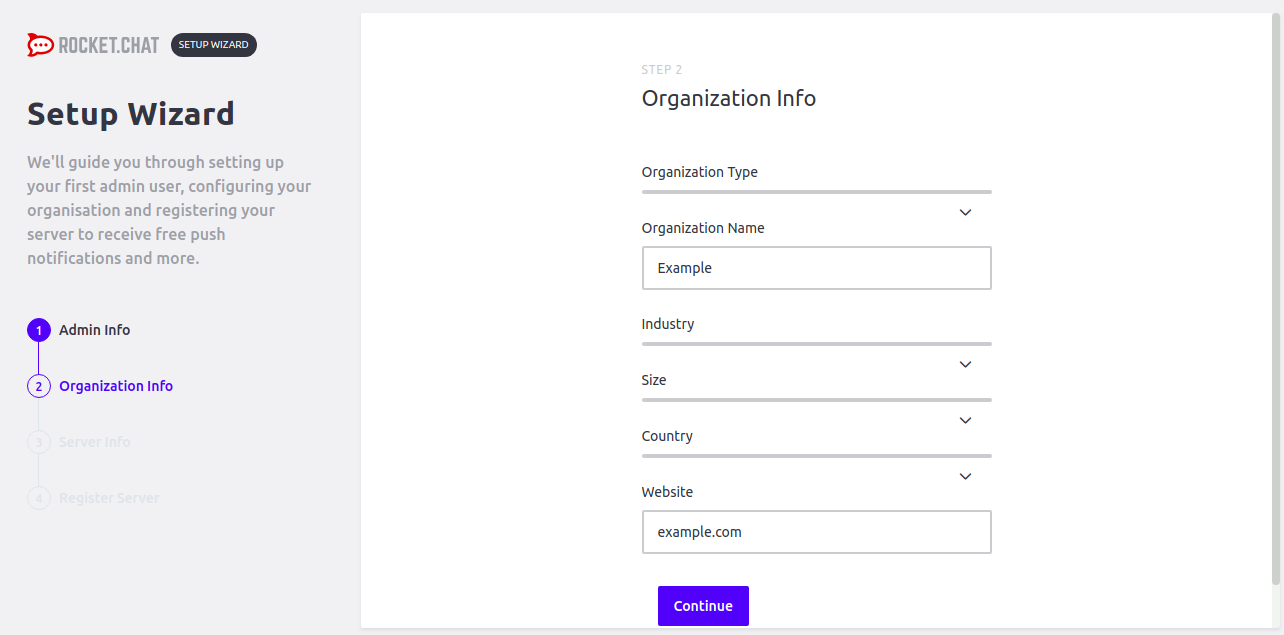
Next, provide your organization info and click on the Continue button. You should see the following page:
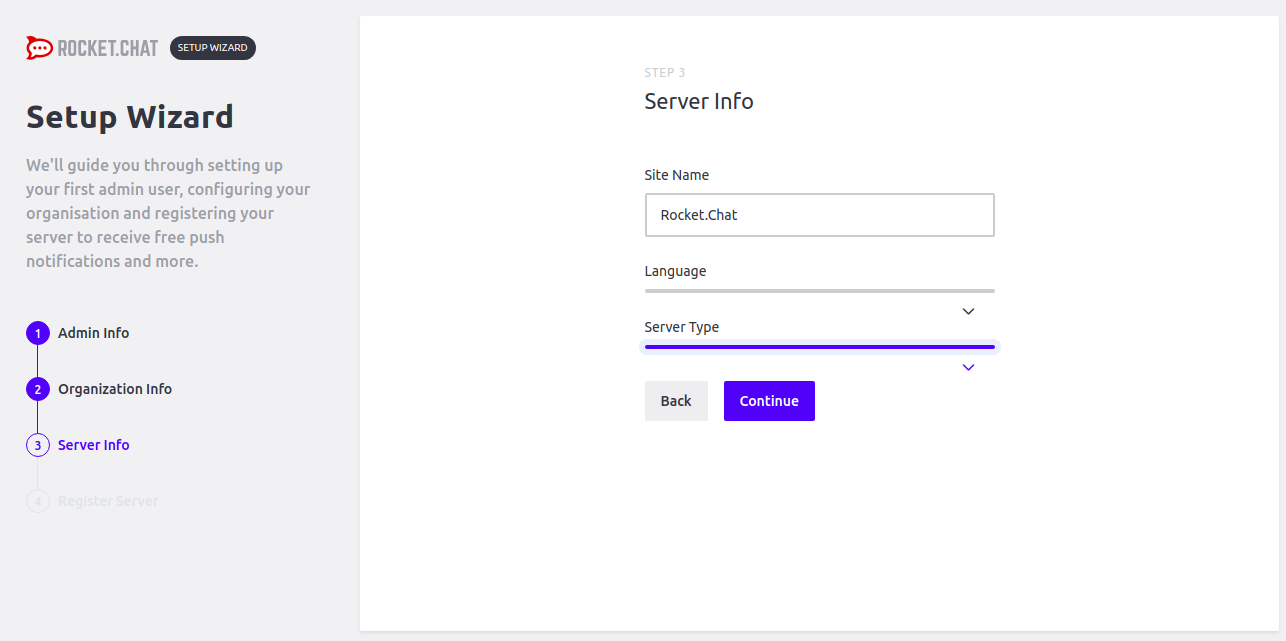
Next, provide your server information and click on the Continue button. You should see the following page:
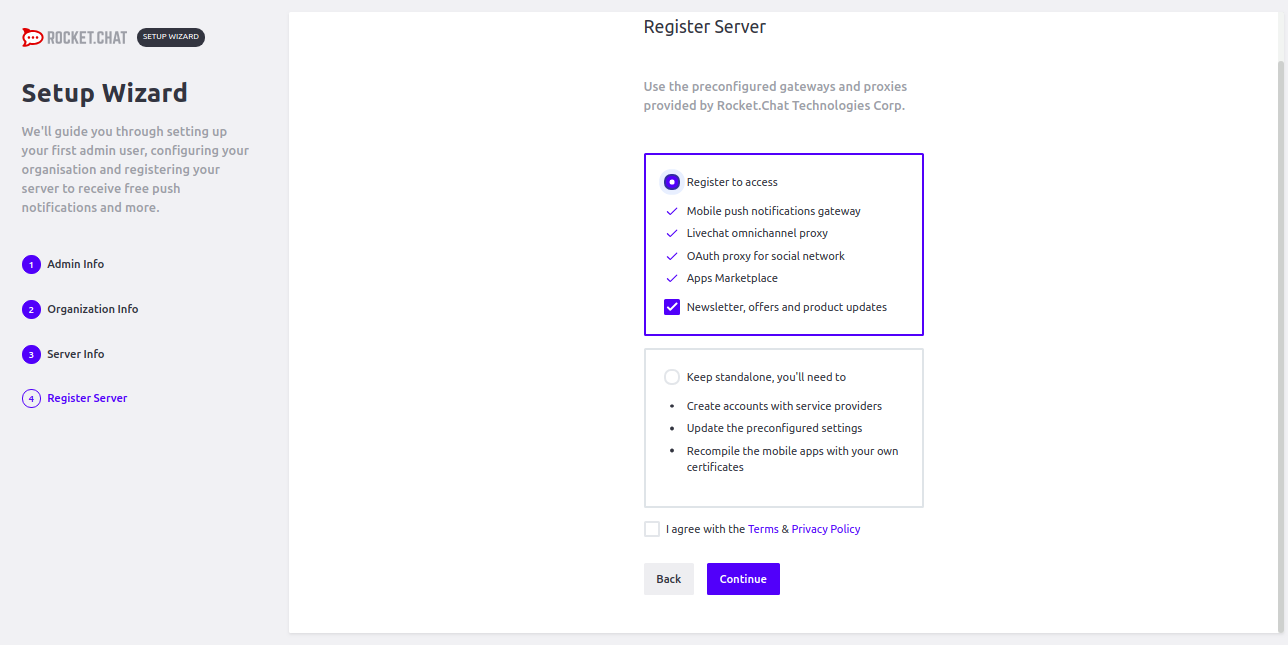
Next, use Rocket.Chat’s preconfigured gateways and proxies, and click on the Continue button. You should see the following page:
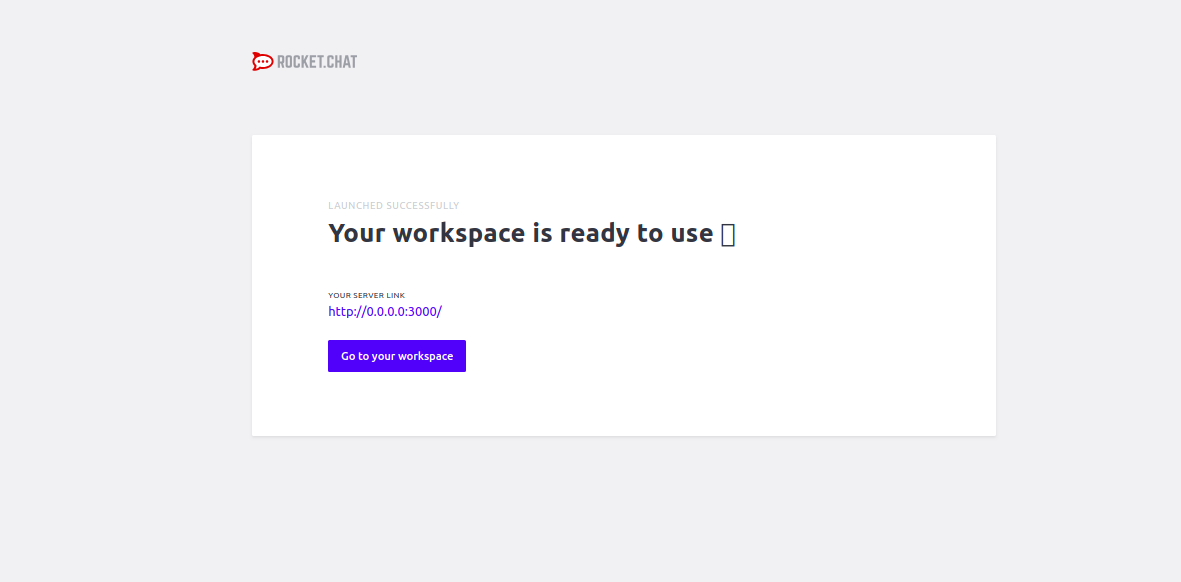
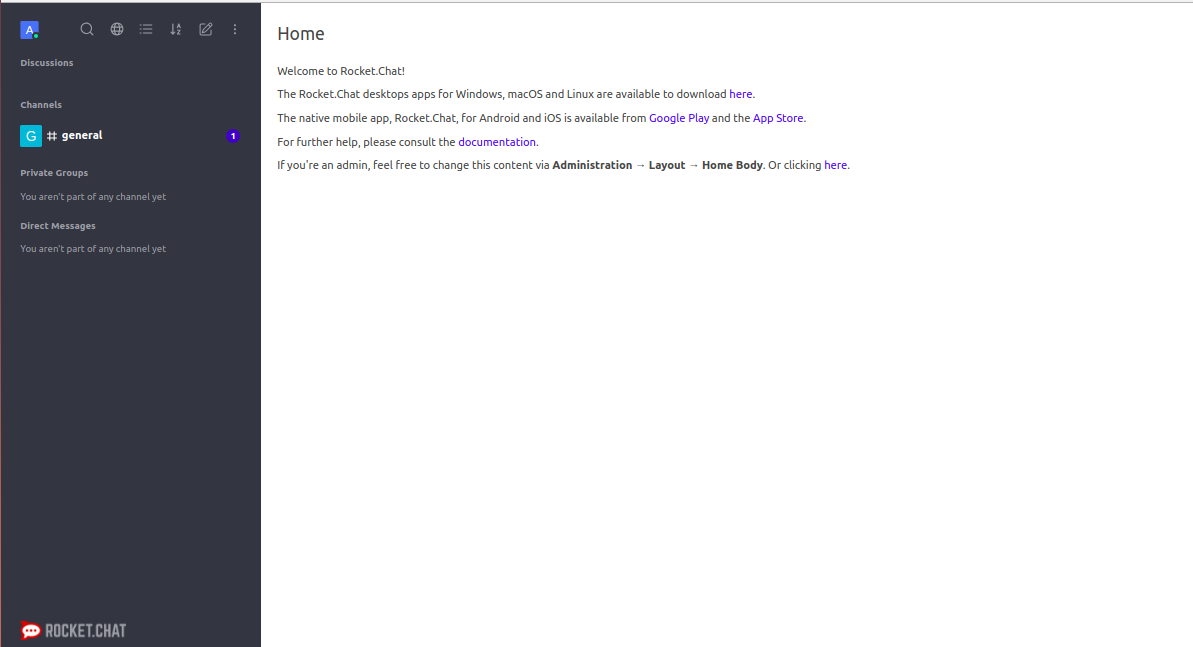
Now, click on the Go to your workspace button. You will be redirected to the Rocket.Chat default dashboard:
Conclusion
Congratulations! You have successfully installed and configured Rocket.Chat server with Nginx as a reverse proxy on Ubuntu 18.04 VPS. You can visit the Rocket.Chat Doc to learn the new chat system. Get started with Rocket.Chat today on an Atlantic.Net VPS!
* This post is for informational purposes only and does not constitute professional, legal, financial, or technical advice. Each situation is unique and may require guidance from a qualified professional.
Readers should conduct their own due diligence before making any decisions.