Fathom is a privacy-focused web analytics platform designed to provide website owners with valuable insights into visitor behavior while prioritizing user privacy and data protection. Unlike traditional analytics solutions that may compromise user privacy through invasive tracking methods, Fathom offers a streamlined approach that respects user anonymity and confidentiality.
This tutorial will show you how to install Fathom Web Analytics on Ubuntu 22.04.
Step 1 – Install Nginx and PostgreSQL
First, you will need to install an Nginx web server and PostgreSQL database on your server. You can install both using the following command.
apt update -y
apt install postgresql nginx
Next, connect to the PostgreSQL shell:
sudo -u postgres psql
Then, create a database and user for Fathom.
CREATE USER fathom WITH CREATEDB CREATEROLE PASSWORD 'password';
CREATE DATABASE fathomdb OWNER fathom;
You can exit from the PostgreSQL shell using the following command.
exit
Step 2 – Download Fathom
First, download the latest version of Fathom from the Git repository.
wget https://github.com/usefathom/fathom/releases/download/v1.3.1/fathom_1.3.1_linux_amd64.tar.gz
Once the download is completed, extract the downloaded file to /usr/local/bin directory.
tar -C /usr/local/bin -xzf fathom_1.3.1_linux_amd64.tar.gz
Set execution permissions on the Fathom binary file.
chmod +x /usr/local/bin/fathom
Now, you can verify the Fathom version using the following command.
fathom --version
Output.
Fathom version 1.3.1, commit b252c743cc1ef1979f351ab77f99b2ae4aba9aa9, built at 2023-01-31T20:07:23Z
Step 3 – Configure Fathom
First, add a user for Fathom.
useradd -r -d /opt/fathom fathom
Next, create a directory to store the Fathom configuration.
mkdir -p /opt/fathom
Set ownership to the Fathom directory.
chown -R fathom:fathom /opt/fathom
Then, generate a secret key.
head /dev/urandom | tr -dc A-Za-z0-9 | head -c 20 ; echo ''
Output.
hq0FyGDLQ6uJH2B2plC3
Next, create a directory to store Fathom data.
cd /opt/fathom
sudo -u fathom mkdir -p /opt/fathom/data
Then, create an environment variable file for Fathom.
sudo -u fathom nano /opt/fathom/data/.env
Add the following configurations.
FATHOM_GZIP=true
FATHOM_DEBUG=true
FATHOM_DATABASE_DRIVER="postgres"
FATHOM_DATABASE_NAME="fathomdb"
FATHOM_DATABASE_USER="fathom"
FATHOM_DATABASE_PASSWORD="password"
FATHOM_DATABASE_HOST="127.0.0.1"
FATHOM_DATABASE_SSLMODE="disable"
FATHOM_SECRET="hq0FyGDLQ6uJH2B2plC3"
Save and close the file, then navigate to the Fathom data directory and run the Fathom server using the following command.
cd /opt/fathom/data
sudo -u fathom fathom server
If everything is fine, you will see the following output.
INFO[0000] Fathom version 1.3.1, commit b252c743cc1ef1979f351ab77f99b2ae4aba9aa9, built at 2023-01-31T20:07:23Z
INFO[0000] Configuration file: /opt/fathom/data/.env
INFO[0000] Connected to postgres database: fathomdb on 127.0.0.1
[DEPRECATED] packr.NewBox has been deprecated.
	Use packr.New instead.
INFO[0000] Applied 26 database migrations!
INFO[0000] Server is now listening on :8080
Press CTRL+C to stop the server.
Step 4 – Create a Service File
Next, you will need to create a systemd file to manage Fathom server. You can create it using the following command.
nano /etc/systemd/system/fathom.service
Add the following lines:
[Unit]
Description=Starts the fathom server
Requires=network.target
After=network.target

[Service]
Type=simple
User=fathom
Restart=always
RestartSec=3
WorkingDirectory=/opt/fathom/data
ExecStart=/usr/local/bin/fathom server

[Install]
WantedBy=multi-user.target
Save the file, then reload the systemd daemon to apply the changes.
systemctl daemon-reload
Next, start and enable the Fathom service.
systemctl start fathom
systemctl enable fathom
You can check the Fathom service using the following command.
systemctl status fathom
Output.
● fathom.service - Starts the fathom server
     Loaded: loaded (/etc/systemd/system/fathom.service; disabled; vendor preset: enabled)
     Active: active (running) since Mon 2024-03-04 03:30:50 UTC; 16s ago
   Main PID: 38355 (fathom)
      Tasks: 6 (limit: 4579)
     Memory: 6.5M
        CPU: 45ms
     CGroup: /system.slice/fathom.service
             └─38355 /usr/local/bin/fathom server

Mar 04 03:30:50 ubuntu22 systemd[1]: Started Starts the fathom server.
Mar 04 03:30:50 ubuntu22 fathom[38355]: time="2024-03-04T03:30:50Z" level=info msg="Fathom version 1.3.1, commit b252c743cc1ef1979f351ab77f99b2ae4aba9aa9, built at 202>
Mar 04 03:30:50 ubuntu22 fathom[38355]: time="2024-03-04T03:30:50Z" level=info msg="Configuration file: /opt/fathom/data/.env"
Mar 04 03:30:50 ubuntu22 fathom[38355]: time="2024-03-04T03:30:50Z" level=info msg="Connected to postgres database: fathomdb on 127.0.0.1"
Mar 04 03:30:50 ubuntu22 fathom[38355]: [DEPRECATED] packr.NewBox has been deprecated.
Mar 04 03:30:50 ubuntu22 fathom[38355]:         Use packr.New instead.
Mar 04 03:30:50 ubuntu22 fathom[38355]: time="2024-03-04T03:30:50Z" level=info msg="Server is now listening on :8080"
Step 5 – Create an Admin User for Fathom
Next, you will need to create an administrative user for Fathom. You can create it using the following command.
cd /opt/fathom/data
sudo -u fathom fathom user add --email="hitjethva@gmail.com" --password="password"
You will see the following output.
INFO[0000] Fathom version 1.3.1, commit b252c743cc1ef1979f351ab77f99b2ae4aba9aa9, built at 2023-01-31T20:07:23Z
INFO[0000] Configuration file: /opt/fathom/data/.env
INFO[0000] Connected to postgres database: fathomdb on 127.0.0.1
[DEPRECATED] packr.NewBox has been deprecated.
	Use packr.New instead.
INFO[0000] Created user hitjethva@gmail.com
Step 6 – Configure Nginx for Fathom
Next, create an Nginx virtual host configuration file for Fathom.
nano /etc/nginx/conf.d/fathom.conf
Add the following lines:
server {
    listen 80;
    server_name fathom.example.com;

    location / {
        proxy_set_header X-Real-IP $remote_addr;
        proxy_set_header X-Forwarded-For $remote_addr;
        proxy_set_header Host $host;
        proxy_pass http://127.0.0.1:8080;
    }
}
Save the file, then edit the Nginx main configuration file.
nano /etc/nginx/nginx.conf
Add the following line after the line http {:
server_names_hash_bucket_size 64;
Save the file, then verify the Nginx configurations for any syntax errors.
nginx -t
Output.
nginx: the configuration file /etc/nginx/nginx.conf syntax is ok
nginx: configuration file /etc/nginx/nginx.conf test is successful
Finally, restart the Nginx service to apply the changes.
systemctl restart nginx
Step 7 – Access Fathom Web Interface
Now, open your web browser and access the Fathom web UI using the URL http://fathom.example.com. You will see the Fathom login page.
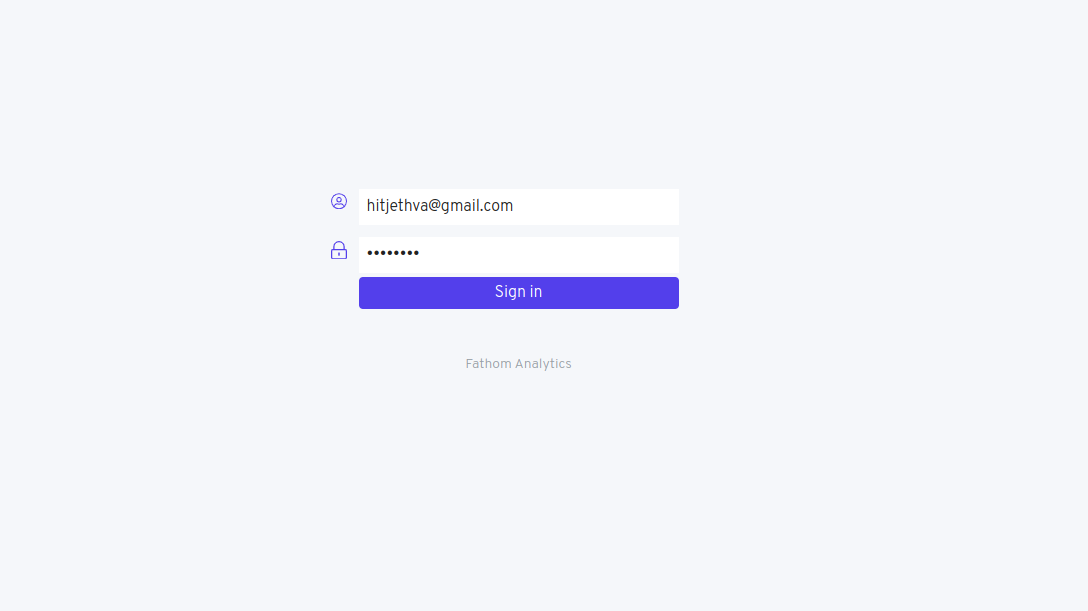
Provide your admin username and password and click on Sign in. You will see the following page.
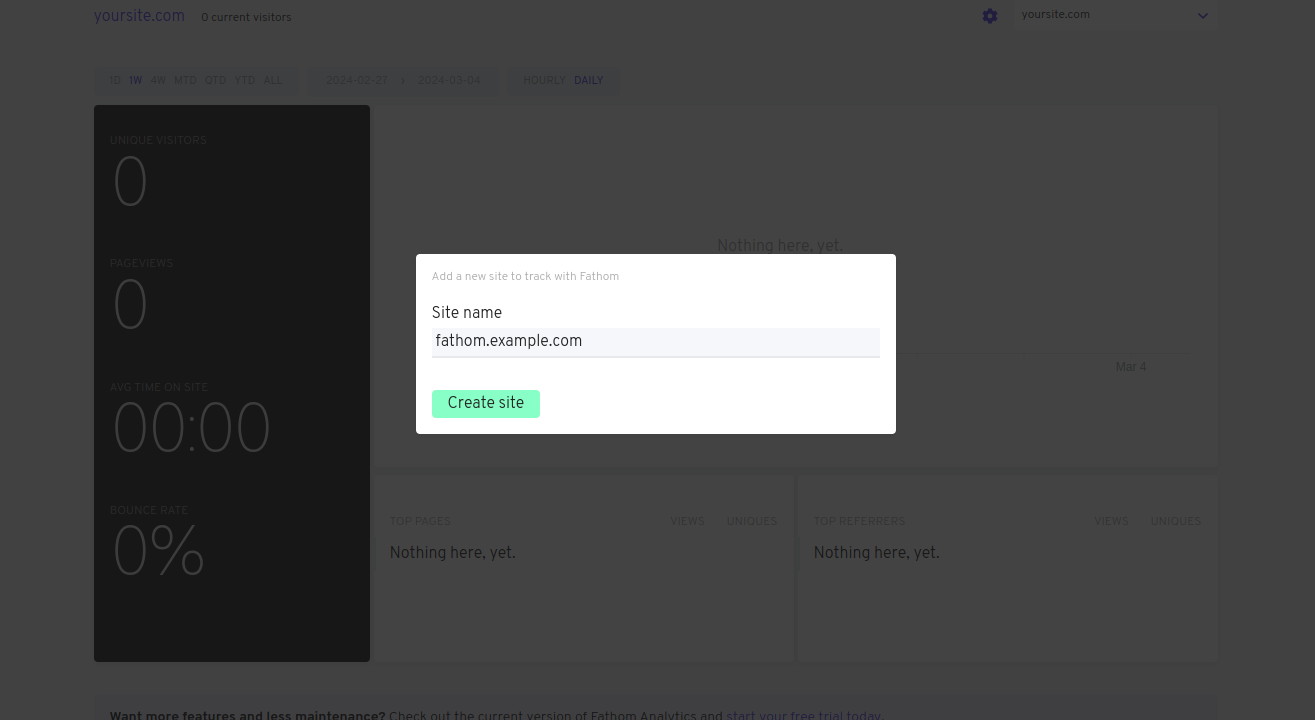
Define your site name and click on Create Site. You will see the following page.
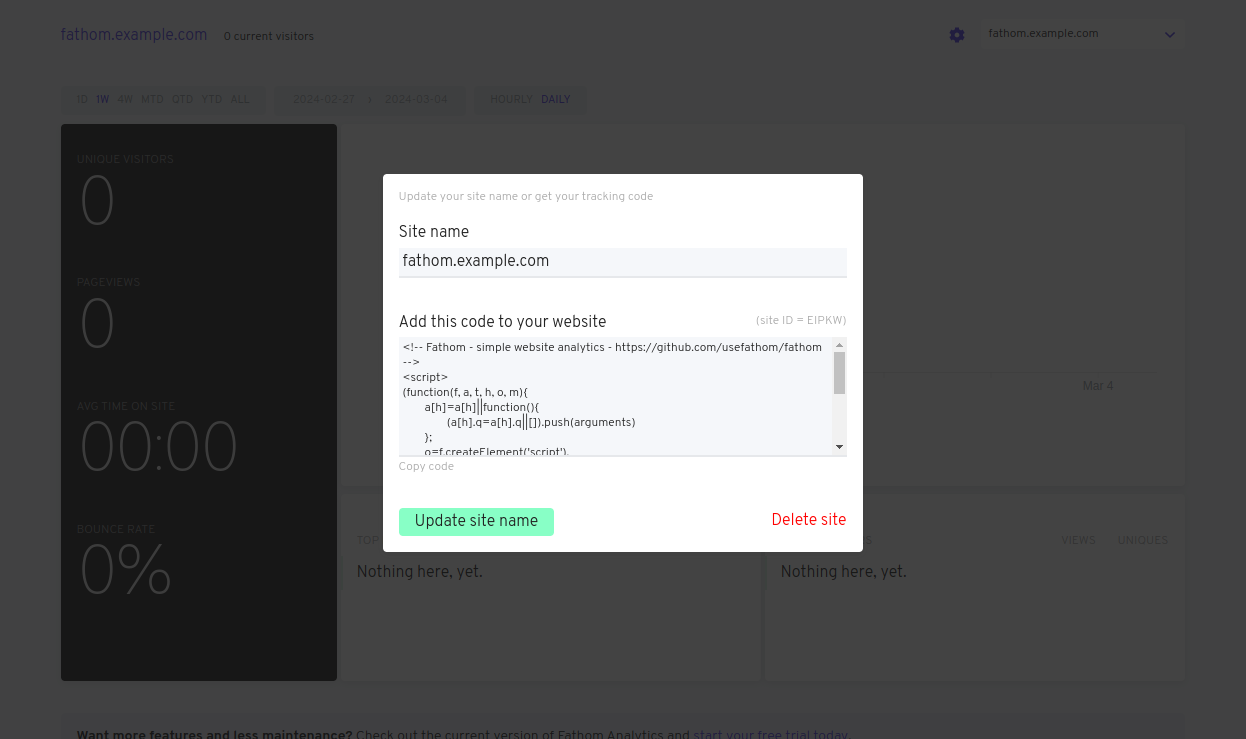
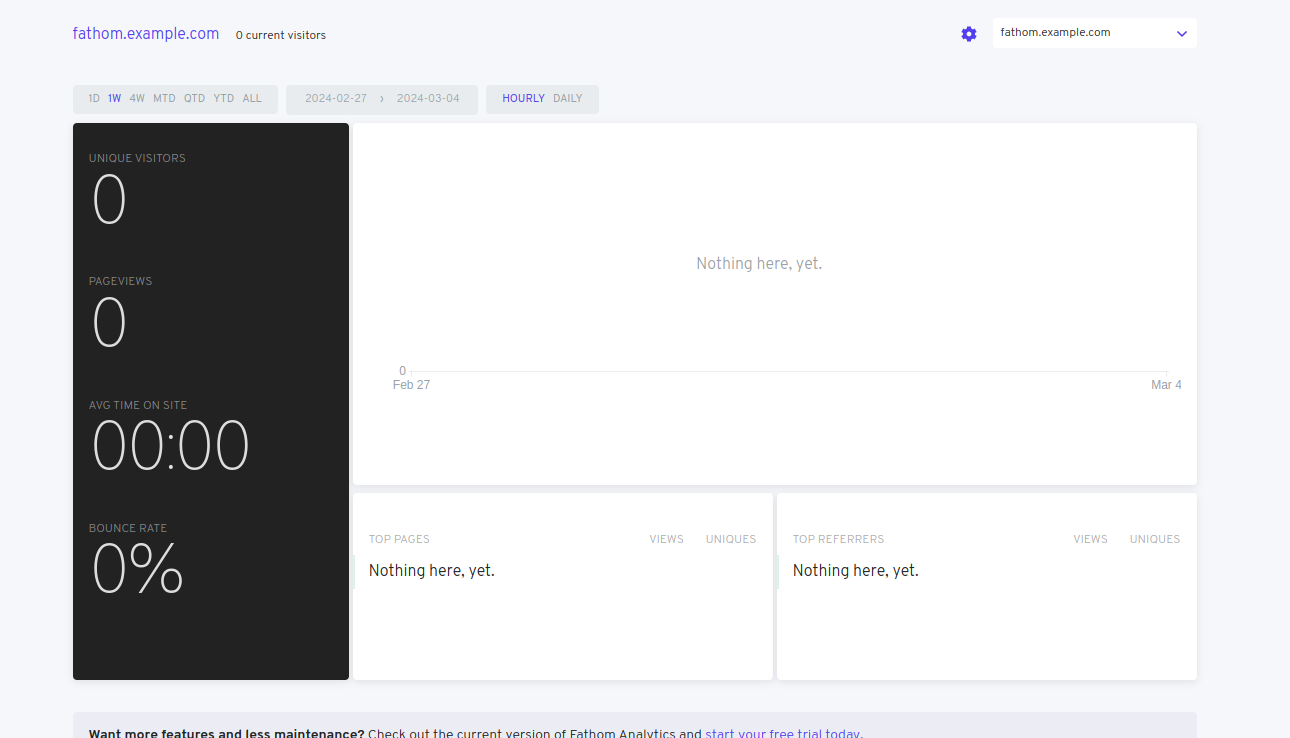
Click on Update site name. You will see the Fathom dashboard on the following page.
Conclusion
By following the installation steps outlined in this article, users can deploy Fathom on their Ubuntu 22.04 servers and begin tracking essential metrics such as page views, unique visitors, and referrers securely and competently. Try to deploy Fathom on VPS hosting from Atlantic.Net! and start tracking visitor behaviors.
* This post is for informational purposes only and does not constitute professional, legal, financial, or technical advice. Each situation is unique and may require guidance from a qualified professional.
Readers should conduct their own due diligence before making any decisions.