FreeScout Help Desk is an open-source customer support and ticketing system designed to streamline communication and collaboration within organizations. It offers a range of features to help businesses manage customer inquiries, resolve issues efficiently, and provide excellent customer service.
In this post, we will explain how to install FreeScout Help Desk on Ubuntu 22.04.
Step 1 – Install LEMP Server
Before starting, you must install the Nginx, MariaDB, PHP and other PHP extensions on your server. You can install all of them using the following command.
apt update -y
apt install nginx mariadb-server libmariadb-dev git php-fpm php-mysql php-mbstring php-xml php-imap php-zip php-gd php-curl php-intl
Once all the packages are installed, edit the php.ini file.
nano /etc/php/8.1/fpm/php.ini
Change the following settings.
memory_limit = 512M
date.timezone = UTC
upload_max_filesize = 16M
cgi.fix_pathinfo=0
Save and close the file, then restart the PHP-FPM service to apply the changes.
systemctl restart php8.1-fpm
Step 2 – Create a Database
FreeScout uses MariaDB as a database backend, so you will need to create a database and user for FreeScout.
First, connect to the MariaDB shell.
mysql
Once you are connected to the MariaDB shell, create a database and user.
CREATE DATABASE freescout CHARSET utf8mb4 COLLATE utf8mb4_unicode_ci;
GRANT ALL PRIVILEGES ON freescout.* TO freescout@localhost IDENTIFIED BY "password";
Next, flush the privileges using the following command.
FLUSH PRIVILEGES;
Finally, exit from the MariaDB shell using the following command.
EXIT;
Step 3 – Download FreeScout
First, create a directory for FreeScout inside the Nginx web root directory.
mkdir -p /var/www/freescout
Then, navigate to the FreeScout directory and download the latest version of FreeScout inside that directory.
cd /var/www/freescout
git clone https://github.com/freescout-helpdesk/freescout .
Next, set proper permissions and ownership to the FreeScout directory.
chown -R www-data:www-data /var/www/freescout
find /var/www/freescout -type f -exec chmod 664 {} \;
find /var/www/freescout -type d -exec chmod 775 {} \;
Step 4 – Configure Nginx for FreeScout
Next, you will need to create a Nginx virtual host configuration file for FreeScout.
nano /etc/nginx/conf.d/freescout.conf
Add the following code.
server {
    listen 80;

    server_name freescout.example.com;
    root /var/www/freescout/public;
    index index.php index.html index.htm;

    error_log /var/www/freescout/storage/logs/web-server.log;

    location / {
        try_files $uri $uri/ /index.php?$query_string;
    }
    location ~ \.php$ {
        fastcgi_split_path_info ^(.+\.php)(/.+)$;
        fastcgi_pass unix:/run/php/php8.1-fpm.sock;
        fastcgi_index index.php;
        fastcgi_param SCRIPT_FILENAME $document_root$fastcgi_script_name;
        include fastcgi_params;
    }
    # Uncomment this location if you want to improve attachments downloading speed.
    # Also make sure to set APP_DOWNLOAD_ATTACHMENTS_VIA=nginx in the .env file.
    #location ^~ /storage/app/attachment/ {
        #    internal;
        #    alias /var/www/freescout/storage/app/attachment/;
    #}
    location ~* ^/storage/attachment/ {
        expires 1M;
        access_log off;
        try_files $uri $uri/ /index.php?$query_string;
    }
    location ~* ^/(?:css|js)/.*\.(?:css|js)$ {
        expires 2d;
        access_log off;
        add_header Cache-Control "public, must-revalidate";
    }
    location ~* ^/(?:css|fonts|img|installer|js|modules|[^\\\]+\..*)$ {
        expires 1M;
        access_log off;
        add_header Cache-Control "public";
    }
    location ~ /\. {
        deny  all;
    }
}
Save and close the file, then edit the Nginx main configuration file.
nano /etc/nginx/nginx.conf
Add the following line after the line http {:
server_names_hash_bucket_size 64;
Then, restart the Nginx service to reload the changes.
systemctl restart nginx
Step 5 – Access FreeScout Web UI
Now, open your web browser and access the FreeScout web interface using the URL http://freescout.example.com. You will see the FreeScout installation page.
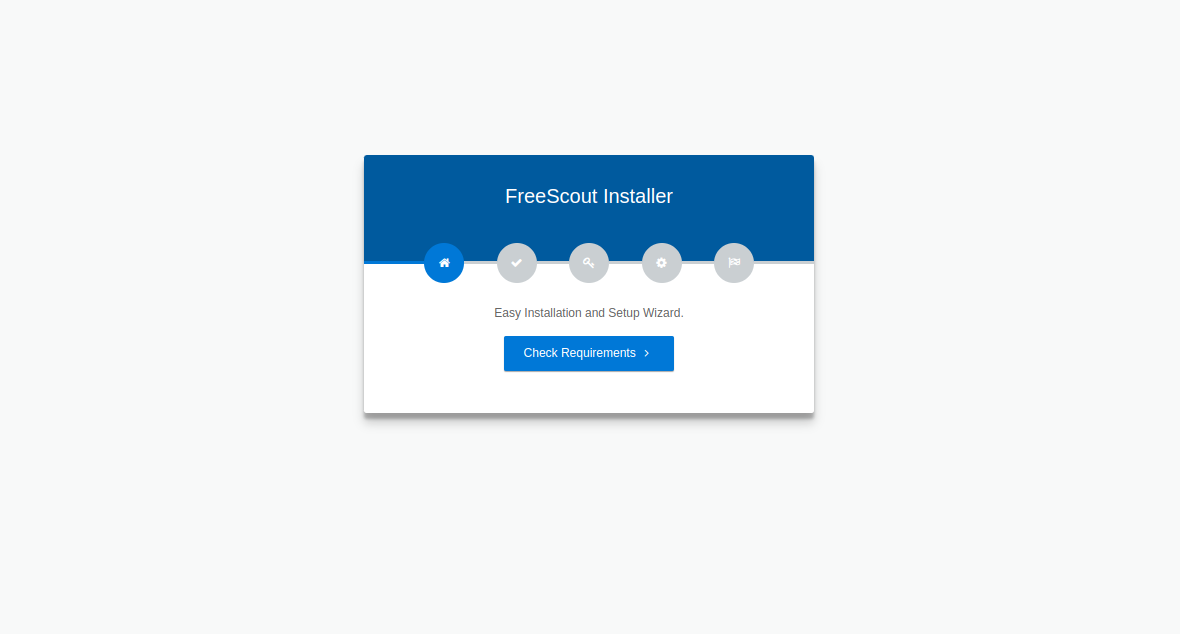
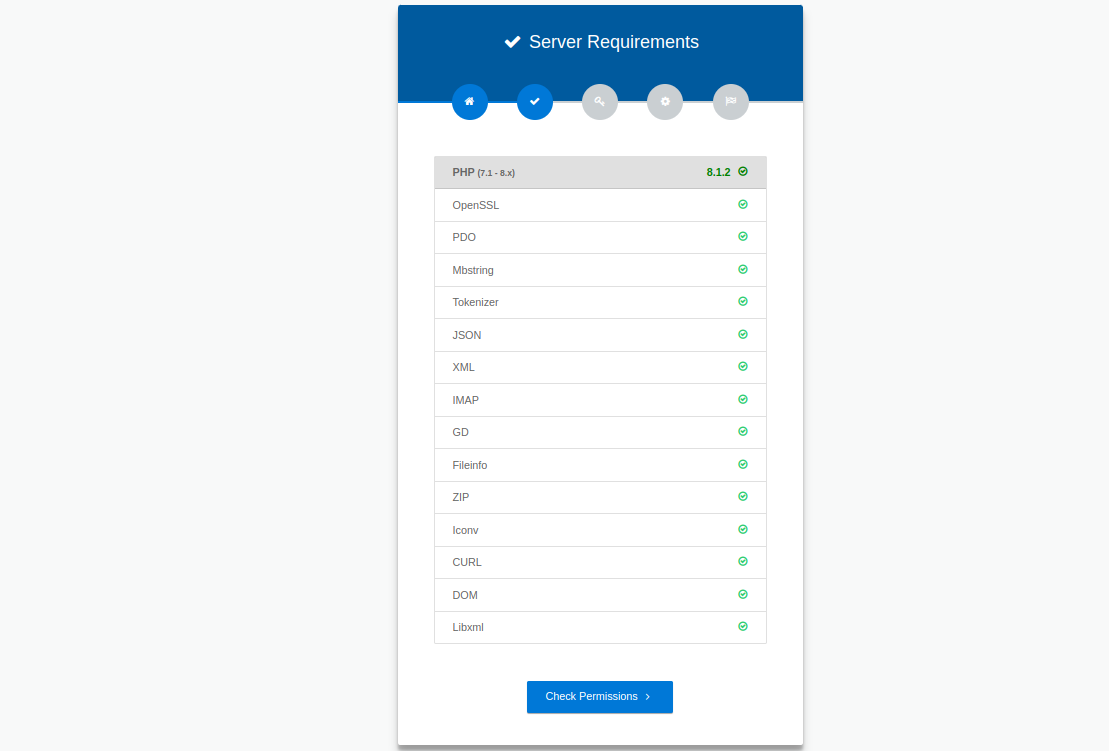
Click on Check Requirements. You will see the server requirements page.
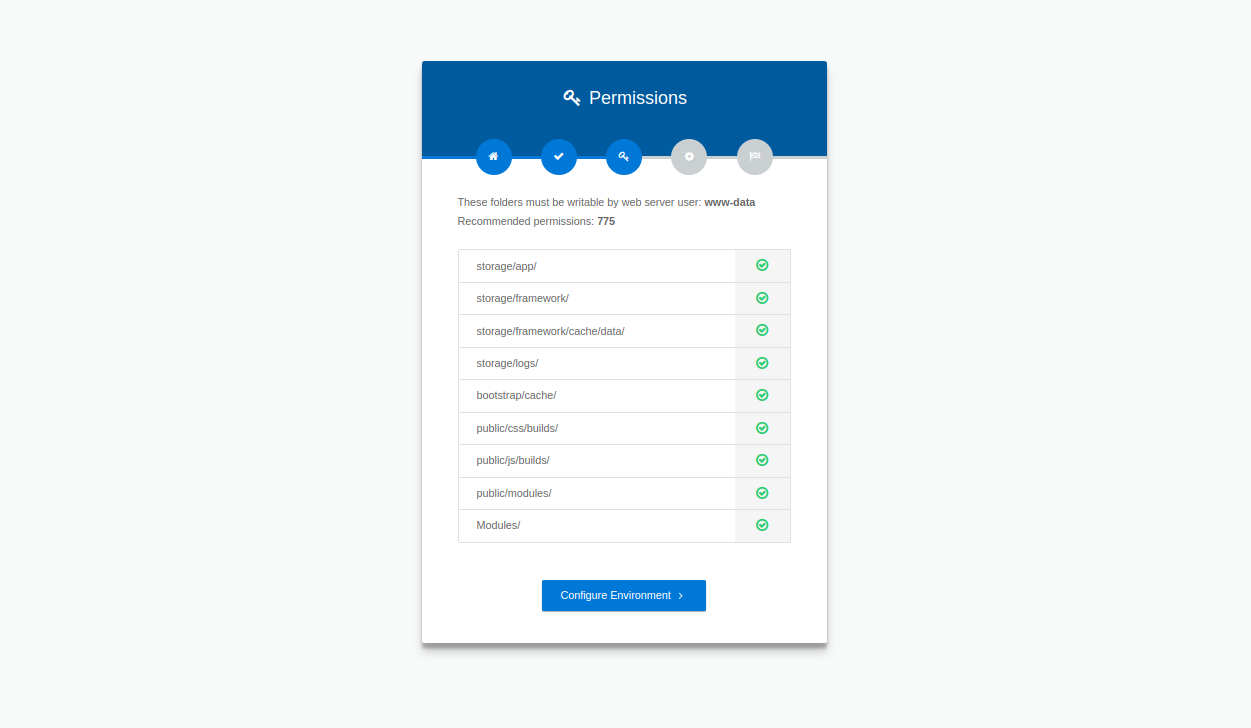
Click on Check Permissions. You will see the Permissions page.
Click on Configure Environments. You will see the Settings page.
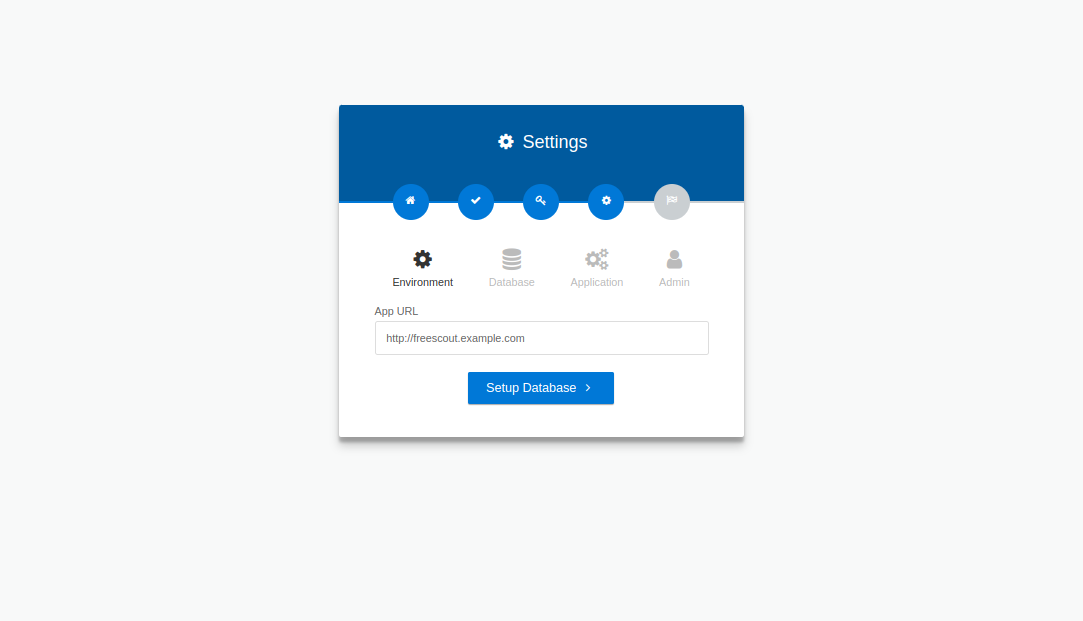
Define your website URL and click on Setup Database. You will see the Database setup page.
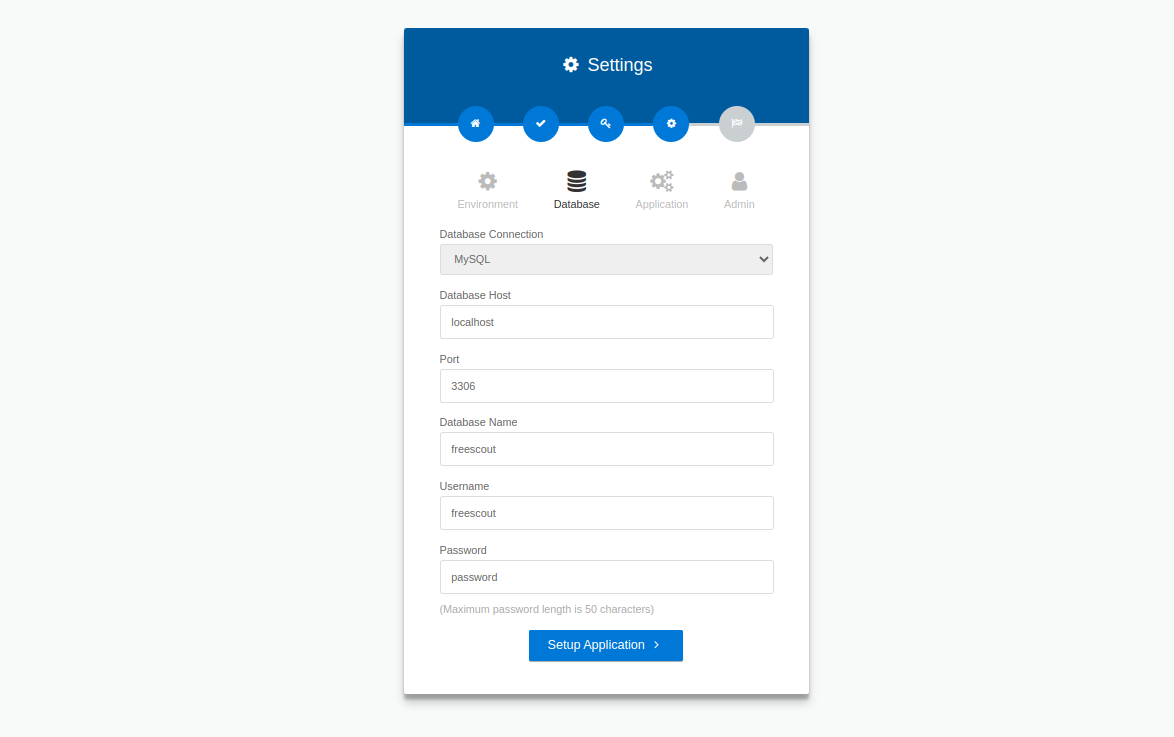
Define your database credentials and click on Setup Application. You will see the Language selection page.
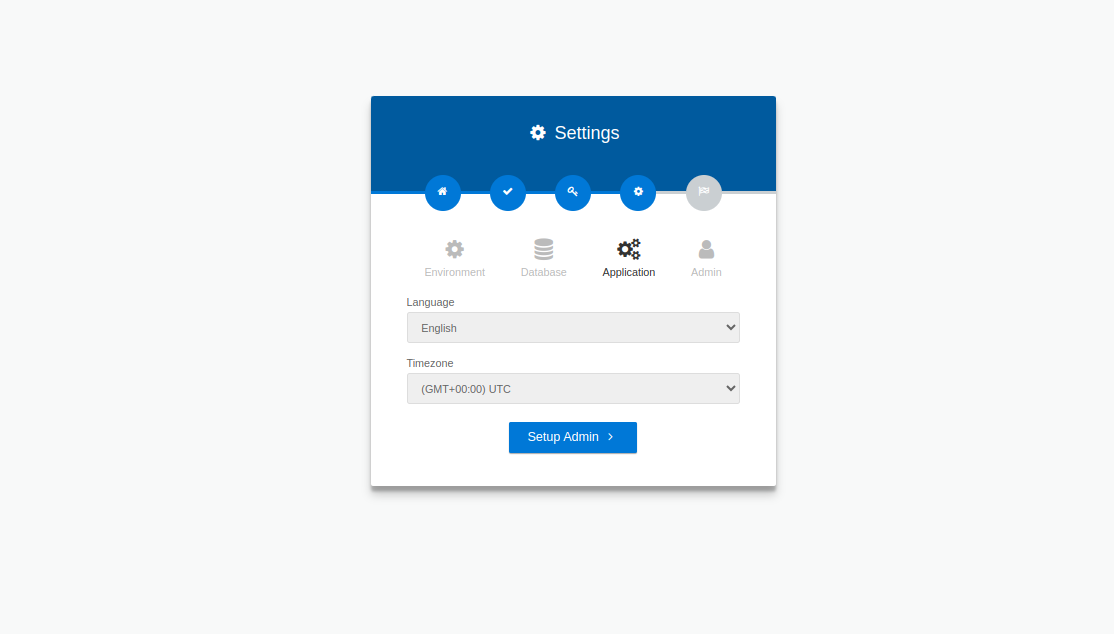
Select your language and click on Setup Admin. You will see the admin user creation page.

Define your admin username, email, and password, and click on Install. You will see the following page.
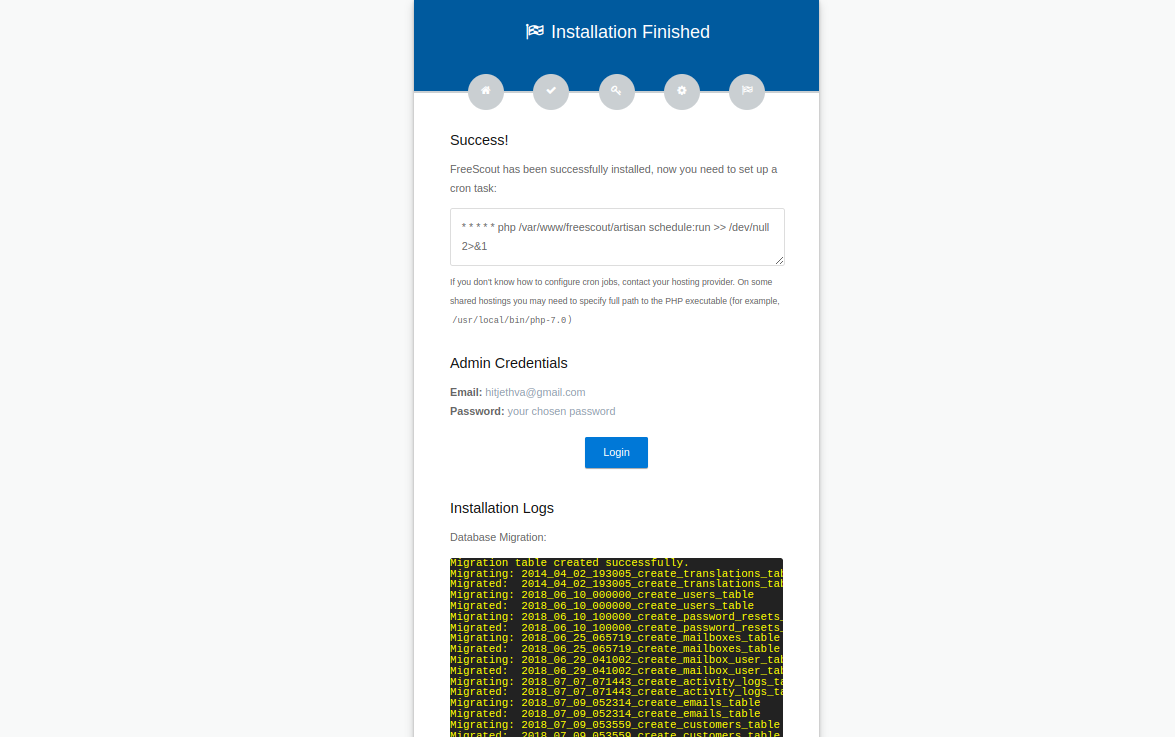
Click on Login. You will see the FreeScout login page.
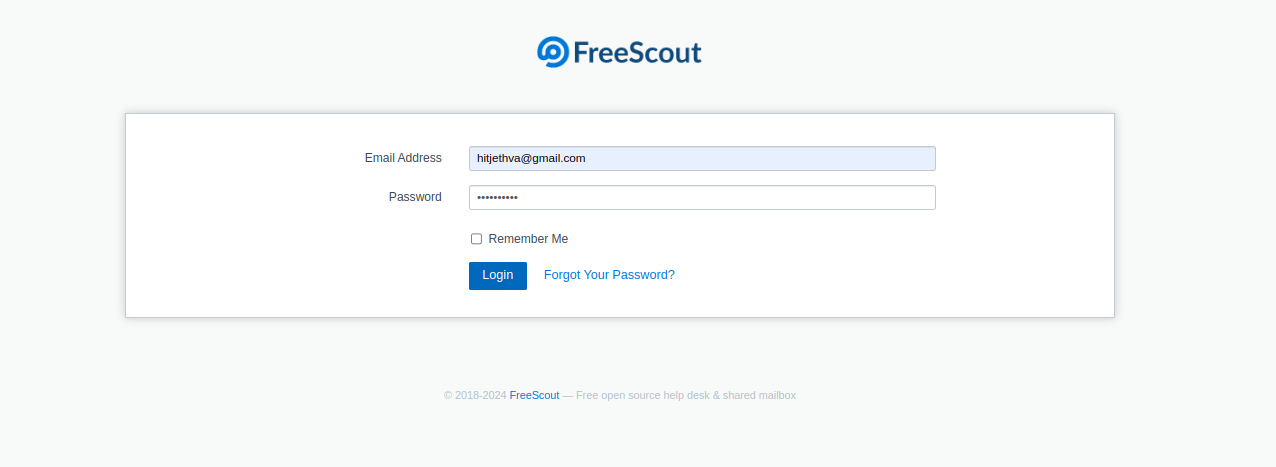
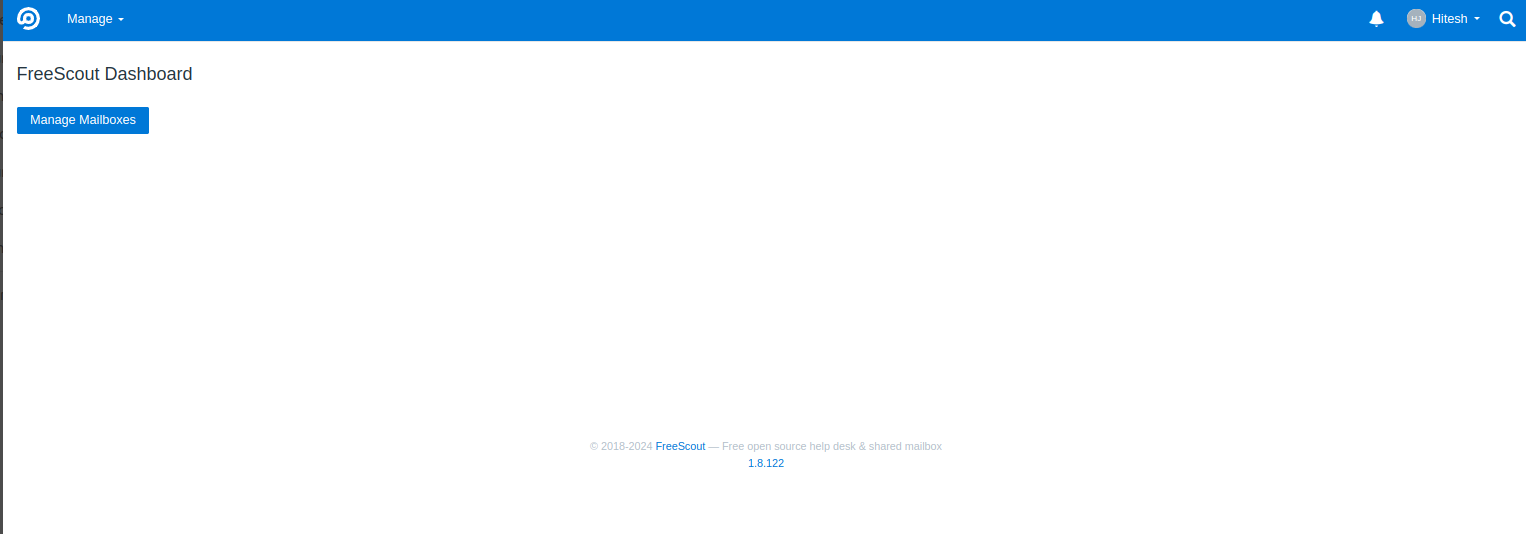
Provide your admin username and password and click on Login. You will see the FreeScout dashboard on the following page.
Conclusion
FreeScout Help Desk helps businesses to streamline their customer support operations and enhance overall efficiency. By following the installation steps outlined in this article, organizations can leverage FreeScout’s comprehensive features and user-friendly interface to effectively manage customer inquiries, resolve issues promptly, and deliver exceptional customer service. Try to deploy the FreeScout help desk on VPS hosting from Atlantic.Net!
* This post is for informational purposes only and does not constitute professional, legal, financial, or technical advice. Each situation is unique and may require guidance from a qualified professional.
Readers should conduct their own due diligence before making any decisions.