Joomla is a free, open-source content management system (CMS). It is one of the most widely used content management systems. Joomla is written in PHP and can be used to build an eCommerce store, blog, or personal website with little coding knowledge. It comes with a simple and easy-to-use web interface that helps you create a dynamic and powerful website within a minute. Joomla’s 10,000+ add-ons help you to customize the appearance and functionality of your website. It supports several operating systems including Linux, Windows, Mac OS, FreeBSD, and Solaris, and easily integrates with Gmail and OpenID.
In this guide, we will show you how to install Joomla CMS on CentOS 8 server.
Prerequisites
- A fresh CentOS 8 VPS.
- A valid domain name pointed to your IP address. In this tutorial, we will use joomla.example.com.
- A root password is configured on your server.
Note : You can refer the Atlantic DNS Guide to manage the DNS records.
Step 1 – Install LAMP Server
Joomla runs on the Linux Apache webserver, and it is written in PHP and uses MariaDB for the database backend. Therefore, you will need to install the Apache, MariaDB, PHP and other PHP extensions to your system. You can install all of them with the following command:
dnf install httpd mariadb-server php php-cli php-common php-spl php-hash php-ctype php-json php-mbstring php-zip php-gd php-curl php-mysqli php-xml unzip -y
Once all the packages are installed, open the php.ini file and tweak some settings as per your requirements:
nano /etc/php.ini
Change the following values:
memory_limit = 256
output_buffering = Off
max_execution_time = 300
date.timezone = Europe/London
Note that you should set your time zone to your local time zone (which you can find here www.php.net) and that in our example, the default output_buffering setting is “off.” Save and close the file when you are finished. Then, start the Apache and MariaDB services and enable them to start after system reboot with the following command:
systemctl start httpd
systemctl start mariadb
systemctl enable httpd
systemctl enable mariadb
At this point, the LAMP server is installed. You can now proceed to the next step.
Step 2 – Configure the MariaDB Database
By default, MariaDB is not secured. You can secure it using the following script:
mysql_secure_installation
This script will set the MariaDB root password, remove anonymous users, disallow root login remotely, and remove the test database, as shown below:
Enter current password for root (enter for none): Just Press Enter
Set root password? [Y/n] Y
Remove anonymous users? [Y/n] Y
Disallow root login remotely? [Y/n] Y
Remove test database and access to it? [Y/n] Y
Reload privilege tables now? [Y/n] Y
Once you are done, log in to the MariaDB shell with the following command:
mysql -u root -p
Provide your root password, then create a database and user for Joomla:
CREATE DATABASE joomladb;
GRANT ALL PRIVILEGES ON joomladb.* TO 'joomla'@'localhost' IDENTIFIED BY 'password';
Next, flush the privileges and exit from the MariaDB shell with the following command:
FLUSH PRIVILEGES;
EXIT;
Once the MariaDB is configured, you can proceed to the next step.
Step 3 – Install Joomla
First, you will need to download the latest version of Joomla from its official website. At the time of writing this article, the latest stable version of Joomla is 3.9.15. You can download it with the following command:
wget https://downloads.joomla.org/cms/joomla3/3-9-15/Joomla_3-9-15-Stable-Full_Package.zip?format=zip -O joomla.zip
Once downloaded, unzip the downloaded file to the Apache web root directory:
unzip joomla.zip -d /var/www/html/joomla
Next, give proper permissions to the Joomla directory:
chown -R apache:apache /var/www/html/joomla/
chmod -R 775 /var/www/html/joomla/
Once you are done, you can proceed to the next step.
Step 4 – Configure Apache for Joomla
Next, you will need to configure the Apache virtual host to serve Joomla.
You can create a new virtual host file using the following command:
nano /etc/httpd/conf.d/joomla.conf
Add the following lines:
<VirtualHost *:80>
   ServerAdmin admin@example.com
   DocumentRoot "/var/www/html/joomla"
   ServerName joomla.example.com
   ErrorLog "/var/log/httpd/example.com-error_log"
   CustomLog "/var/log/httpd/example.com-access_log" combined

<Directory "/var/www/html/joomla">
   DirectoryIndex index.html index.php
   Options FollowSymLinks
   AllowOverride All
   Require all granted
</Directory>
</VirtualHost>
Save and close the file when you are finished. Then, restart the Apache web service to apply the changes:
systemctl restart httpd
Step 5 – Configure Firewall
If the firewalld service is enabled on your system, you will need to allow HTTP/HTTPS port through firewalld.
First, check the firewalld service using the following command:
systemctl status firewalld
You should see that firewalld service is not running:
● firewalld.service - firewalld - dynamic firewall daemon
   Loaded: loaded (/usr/lib/systemd/system/firewalld.service; disabled; vendor preset: enabled)
   Active: inactive (dead)
     Docs: man:firewalld(1)
You can start the firewalld service and enable it to start after system reboot with the following command:
systemctl start firewalld
systemctl enable firewalld
Next, allow HTTP and HTTPS port through firewalld with the following command:
firewall-cmd --permanent --add-service=http
firewall-cmd --permanent --add-service=https
Next, reload the firewalld to apply the changes:
firewall-cmd --reload
After this, firewalld is configured to allow Joomla accessible from the remote host.
Step 6 – Access Joomla Web Interface
Open your web browser and open the URL http://joomla.example.com. You will be redirected to the following screen:
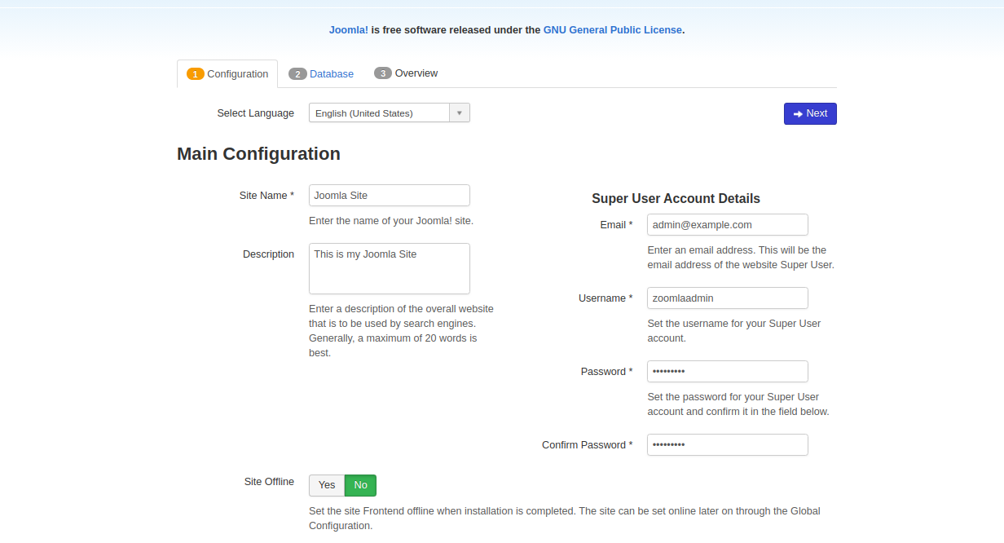
Provide your site name, site information, email address, admin username, and password and click on the Next button. You should see the following screen:
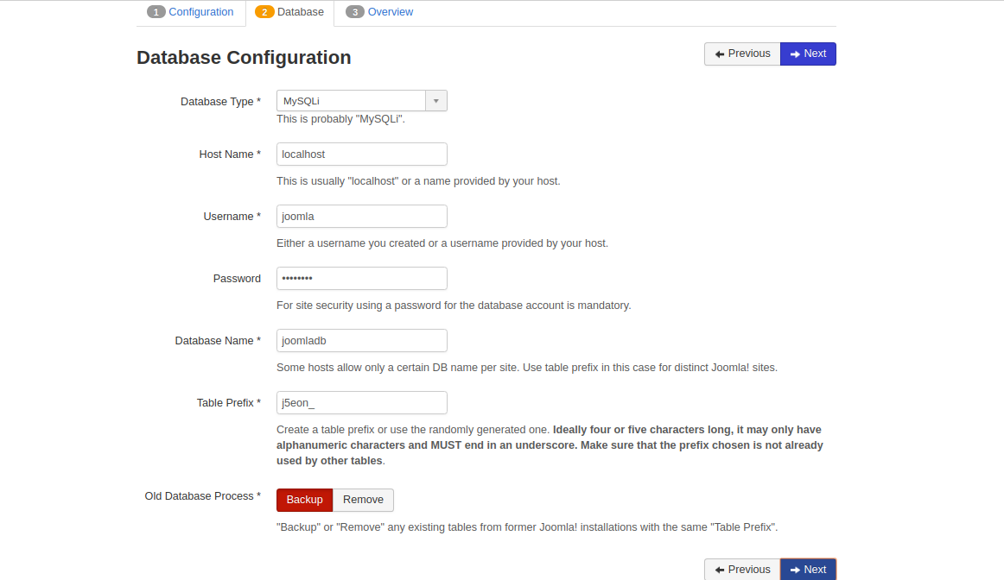
Provide your Joomla database credentials (which you created early) and click on the Next button. You should see the following screen:
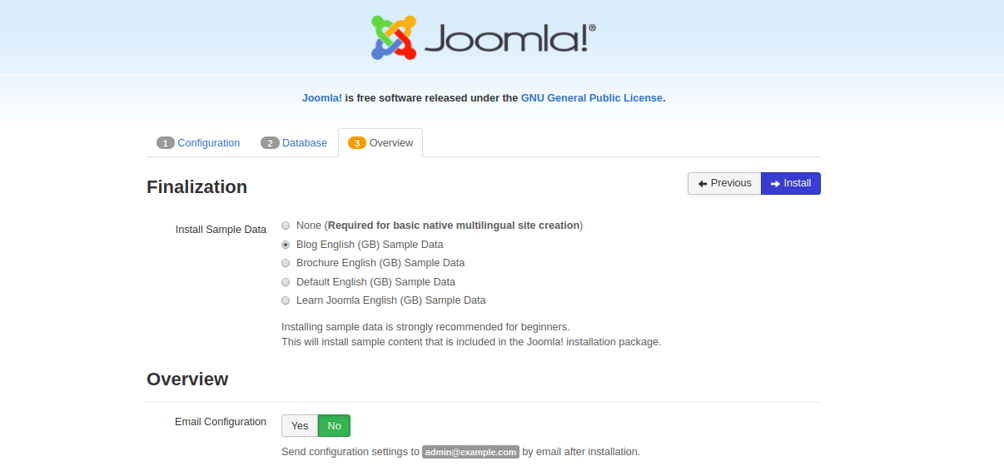
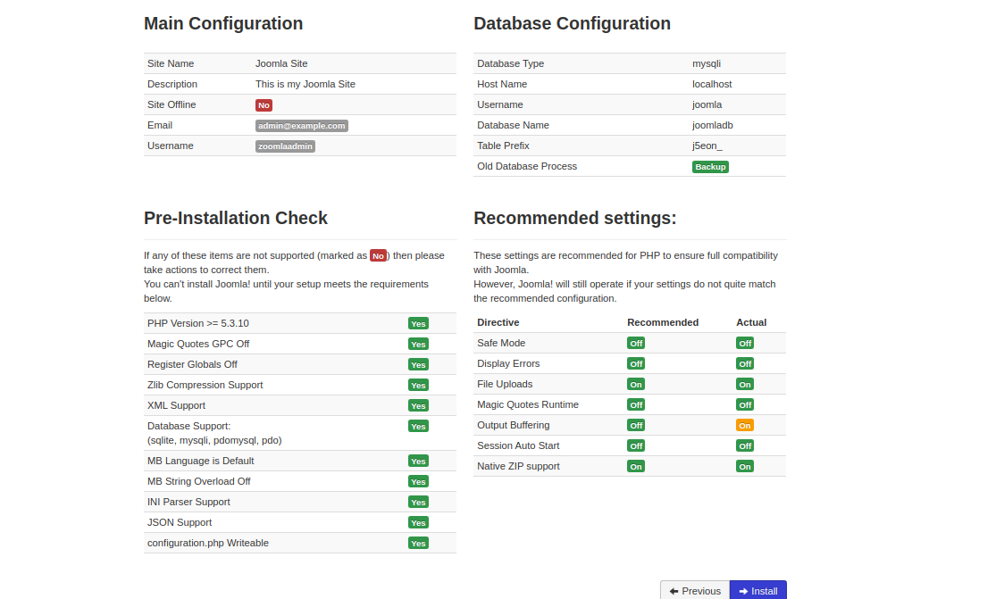
Now, review the configuration and click on the Install button to start the installation. Once the installation has been completed, you should see the following screen:
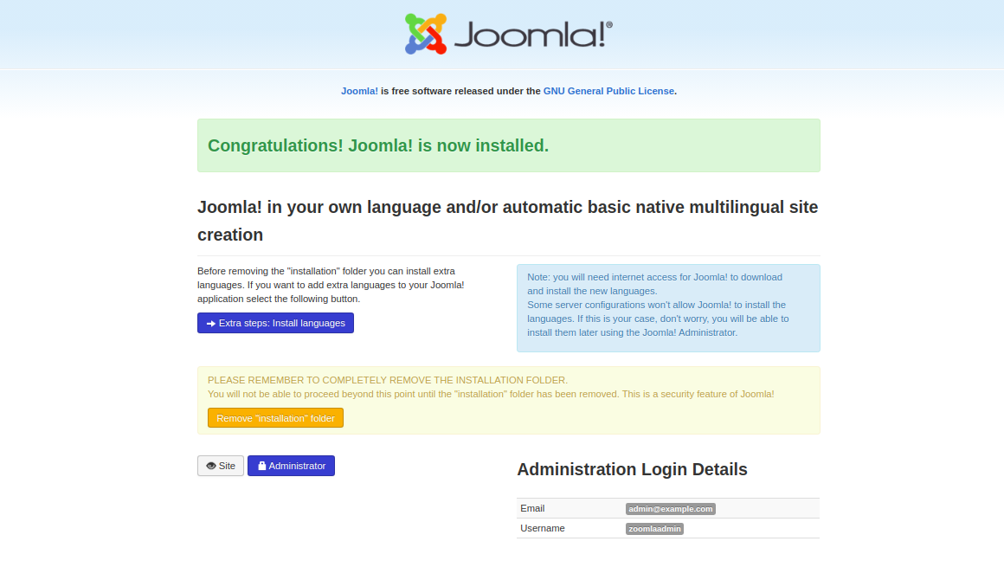
Next, click on the “Remove installation folder” button to completely remove the installation directory from your system. You should see the following screen:
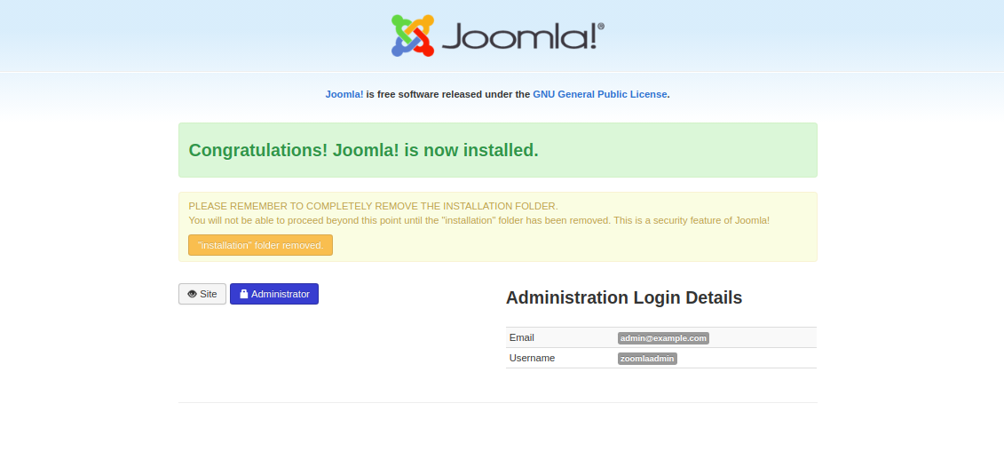
Next, click on the Administrator button. You will be redirected to the Joomla admin panel shown in the following screen:
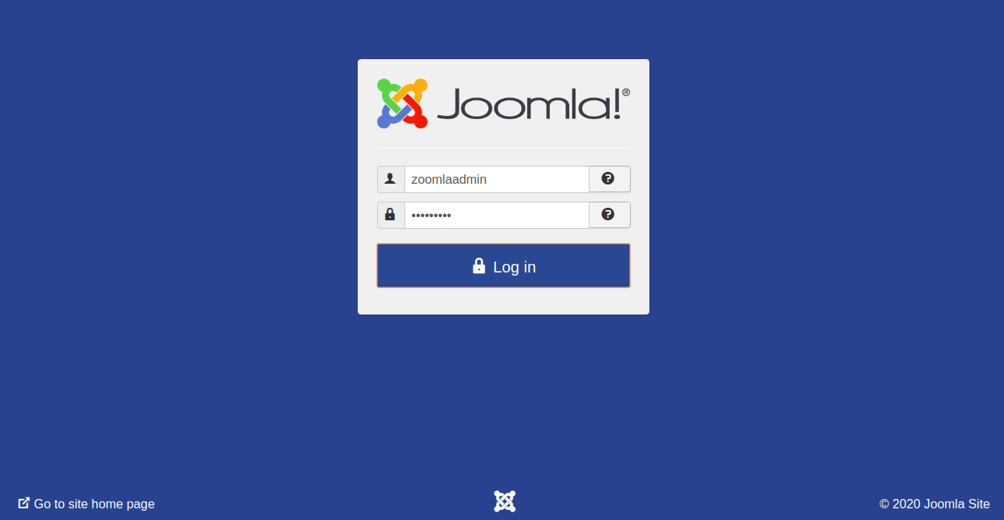
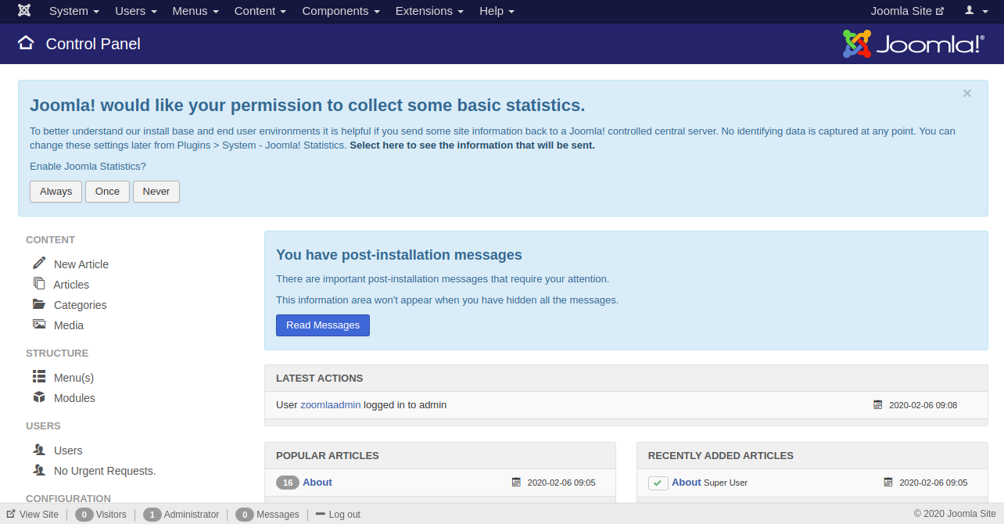
Provide your Joomla admin username and password and click on the Log in button. You should see the Joomla default dashboard in the following screen:
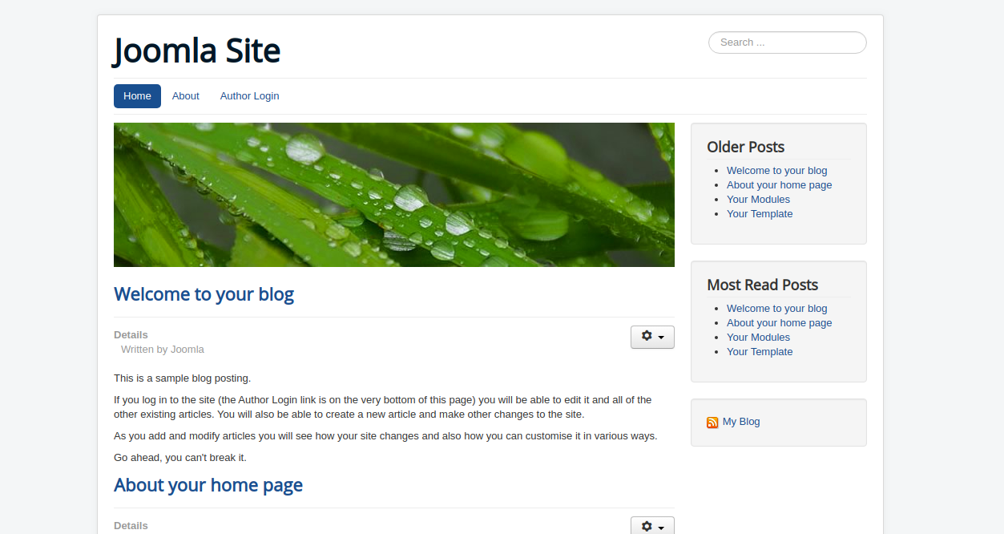
You can also access the Joomla website by visiting the URL http://joomla.example.com as shown below:
Conclusion
Congratulations! You have successfully installed Joomla CMS on CentOS 8 server. You can now able to build your own website or blog using the Joomla admin panel. Get started with Joomla on a VPS Hosting plan from Atlantic.Net!
* This post is for informational purposes only and does not constitute professional, legal, financial, or technical advice. Each situation is unique and may require guidance from a qualified professional.
Readers should conduct their own due diligence before making any decisions.