Jenkins is a free and open-source continuous integration (CI) and continuous delivery (CD) application written in the Java programming language. It is specially designed to monitor the execution of repetitive jobs and tests and while reporting any changes in the code to you in real-time. It is a cross-platform application that can be run on Windows, Linux, and any other operating system. Jenkins is very popular because of its simple interface, UI customization, support for different version control systems and great extensibility.
Jenkins comes with a rich set of features, including support for more than 1000 plugins, bug detection, static code analysis, unit test execution, building projects and deploying applications.
In this tutorial, we will show you how to install Jenkins on Ubuntu 18.04.
Step 1 – Install Java 8
Jenkins is a Java-based application and does not support Java versions 10 and 11, so you will need to install the Java 8 OpenJDK package on your system.
Run the following command to install Java 8 on your system.
apt-get install openjdk-8-jdk -y
Once the Java package is installed, you can verify the installed version of Java with the following command:
java -version
You should get the following output:
openjdk version "1.8.0_232"
OpenJDK Runtime Environment (build 1.8.0_232-8u232-b09-0ubuntu1~18.04.1-b09)
OpenJDK 64-Bit Server VM (build 25.232-b09, mixed mode)
Step 2 – Install Jenkins
By default, Jenkins is not available in the Ubuntu 18.04 default repository, so you will need to add the Jenkins repository to your system.
First, download and add the GPG keys of the Jenkins repository with the following command:
wget -q -O - https://pkg.jenkins.io/debian/jenkins.io.key | apt-key add -
![]()
Next, add the Jenkins repository with the following command:
sh -c 'echo deb http://pkg.jenkins.io/debian-stable binary/ > /etc/apt/sources.list.d/jenkins.list'
Once the repository is added, update the repository and install the Jenkins package with the following command:
apt-get update -y
apt-get install jenkins -y
After installing the Jenkins package, verify the status of Jenkins with the following command:
systemctl status jenkins
You should get the following output:
● jenkins.service - LSB: Start Jenkins at boot time
   Loaded: loaded (/etc/init.d/jenkins; generated)
   Active: active (exited) since Mon 2020-01-27 09:08:35 UTC; 51s ago
     Docs: man:systemd-sysv-generator(8)
    Tasks: 0 (limit: 1150)
   CGroup: /system.slice/jenkins.service

Jan 27 09:08:34 ubuntu1804 systemd[1]: Starting LSB: Start Jenkins at boot time...
Jan 27 09:08:34 ubuntu1804 jenkins[4251]: Correct java version found
Jan 27 09:08:34 ubuntu1804 jenkins[4251]:  * Starting Jenkins Automation Server jenkins
Jan 27 09:08:34 ubuntu1804 su[4297]: Successful su for jenkins by root
Jan 27 09:08:34 ubuntu1804 su[4297]: + ??? root:jenkins
Jan 27 09:08:34 ubuntu1804 su[4297]: pam_unix(su:session): session opened for user jenkins by (uid=0)
Jan 27 09:08:34 ubuntu1804 su[4297]: pam_unix(su:session): session closed for user jenkins
Jan 27 09:08:35 ubuntu1804 jenkins[4251]:    ...done.
Jan 27 09:08:35 ubuntu1804 systemd[1]: Started LSB: Start Jenkins at boot time.
At this point. Jenkins is installed and running on your server.
Step 3 – Set Up Jenkins
By default, Jenkins is listening on the port 8080. You can access it by visiting the URL http://your-server-ip:8080 in your web browser. You should see the following screen:
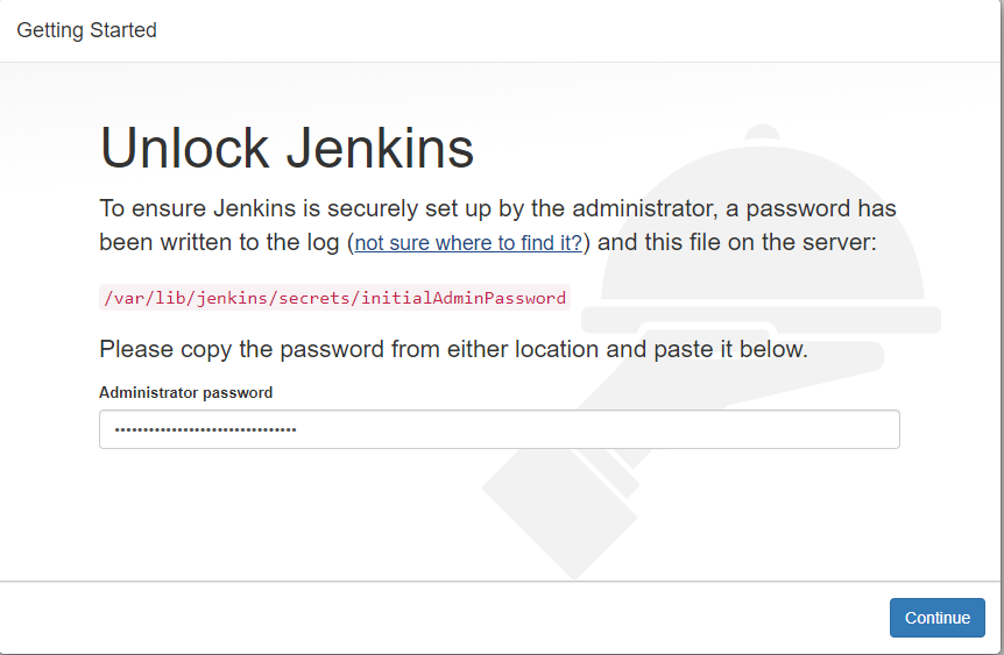
From the above screen, copy the location of the initial password, open your terminal, and run the following command to display the password:
cat /var/lib/jenkins/secrets/initialAdminPassword
Output:
[YOUR UNIQUE PASSWORD]
Copy this password from the terminal, paste it into the above screen, and click on the Continue button. After a few minutes, you will see the following screen.
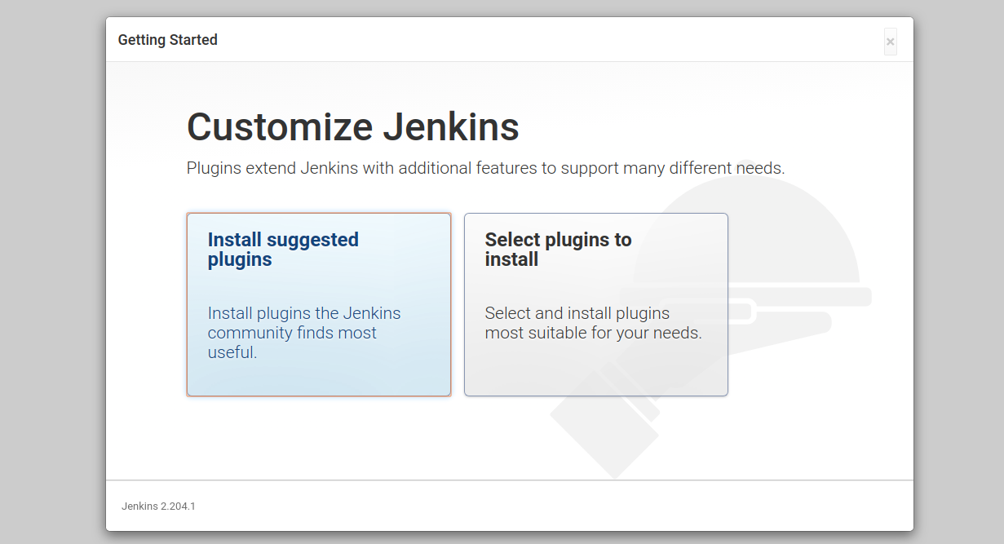
From here, you can install suggested plugins or install your desired plugins. Click on Install suggested plugins to start the installation process. You should see the following screen:

Once the installation has been completed, you will be redirected to the following screen:
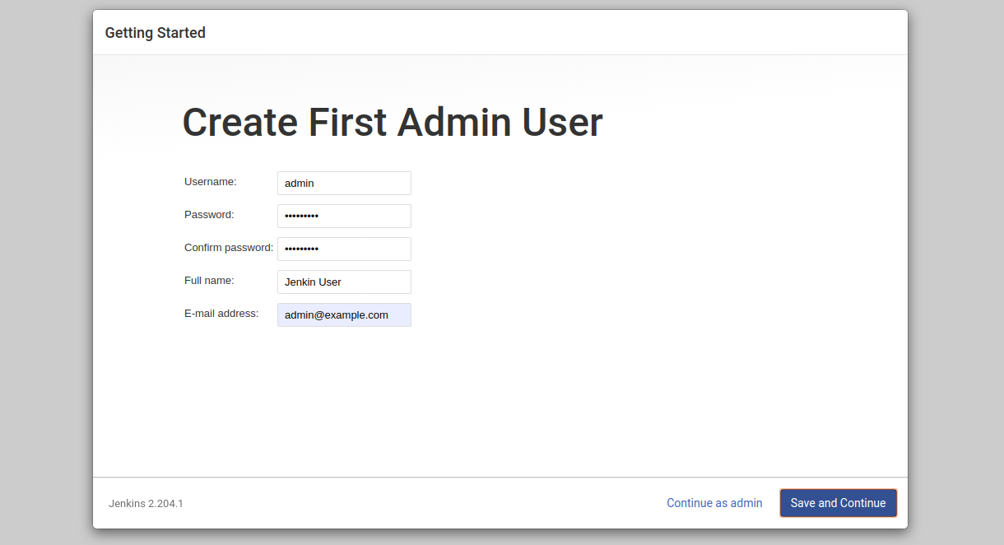
Provide your administrative username, password, and email and click on the Save and Continue button. You should see an Instance Configuration screen:
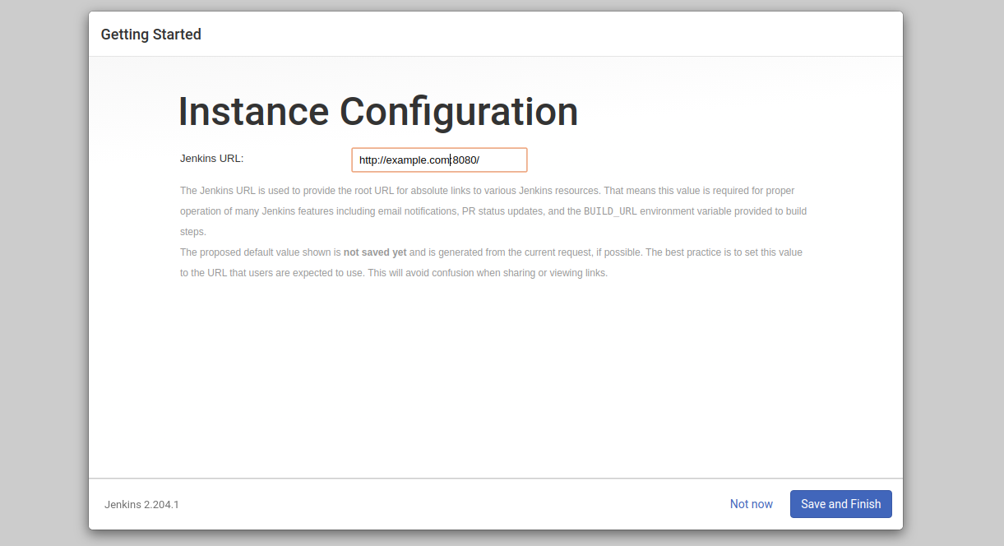
Confirm the preferred URL for your Jenkins instance and click on the Save and Finish button. You should see the following screen:

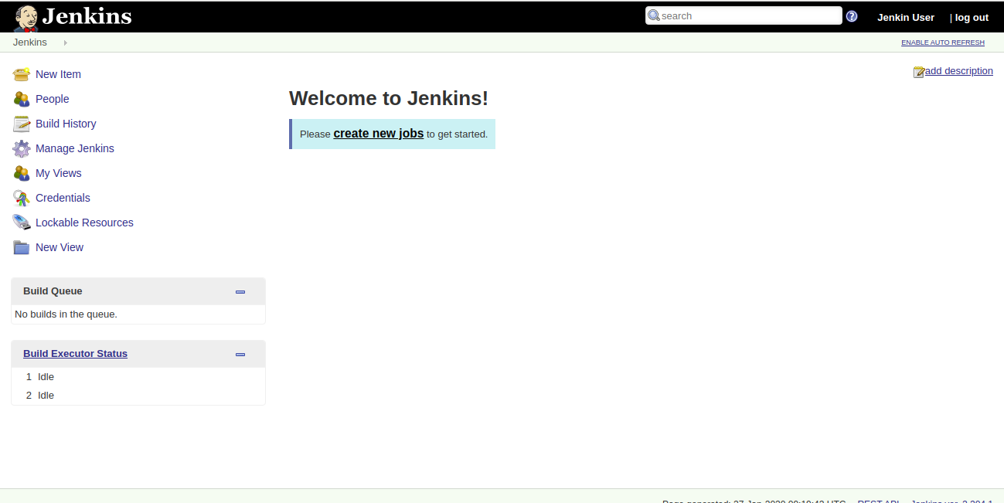
Jenkins is now ready. You can click on the Start using Jenkins button. You will be redirected to the Jenkins dashboard as shown below:
Conclusion
Congratulations! Jenkins is now installed and ready to automate the development tasks. You can now start exploring Jenkins and working with it as soon as possible – try it out on your virtual private server from Atlantic.Net!
* This post is for informational purposes only and does not constitute professional, legal, financial, or technical advice. Each situation is unique and may require guidance from a qualified professional.
Readers should conduct their own due diligence before making any decisions.