Memcached is an open-source, high-performance, general-purpose distributed memory object caching system. It helps to speed up dynamic websites by caching data, user authentication tokens, and API calls in RAM. Memcached also provides a mechanism to share the data across multiple application instances. Generally, it is used to speed up php-based applications including Joomla, WordPress, Drupal, and Python.
In this tutorial, we will show you how to install and configure Memcached on Debian 10.
Step 1 – Install Memcached
By default, Memcached is available in the Debian standard repository. You can install it by just running the following command:
apt-get update -y
apt-get install memcached libmemcached-tools -y
Once the Memcached is installed, you can check the status of Memcached with the following command:
systemctl status memcached
You should get the following output:
memcached.service - memcached daemon
Loaded: loaded (/lib/systemd/system/memcached.service; enabled; vendor preset: enabled)
Active: active (running) since Sun 2020-12-06 13:36:23 UTC; 4s ago
Docs: man:memcached(1)
Main PID: 15969 (memcached)
Tasks: 10 (limit: 2359)
Memory: 3.3M
CGroup: /system.slice/memcached.service
└─15969 /usr/bin/memcached -m 64 -p 11211 -u memcache -l 127.0.0.1 -P
/var/run/memcached/memcached.pid
By default, Memcached listens on port 11211. You can verify it with the following command:
ss -antpl | grep 11211
You should get the following output:
LISTEN 0 128 127.0.0.1:11211 0.0.0.0:*
users:(("memcached",pid=15969,fd=26))
Step 2 – Configure Memcached
The default Memcached configuration file is located at /etc/memcached.conf. You can change the Memcached default port and configure it for external access using the file:
nano /etc/memcached.conf
Change the following lines if you want to configure Memcached for external access.
-l your-server-ip
-p 11211
Save and close the file, then restart the Memcached service to apply the changes:
systemctl restart memcached
Step 3 – Enable Memcached for PHP and Python
You will need to install a PHP extension for Memcached if you want to enable Memcached for a php-based web application. You can install it with the following command:
apt-get install php php-memcached -y
If you want to enable Memcached for Python applications, you can install the Python Memcached extension with the following command:
apt-get install python3-pip -y
pip3 install pymemcache
pip3 install python3-memcached
Step 4 – Verify Memcached Installation
At this point, Memcached is installed and running. Now it’s time to test whether it is enabled in PHP or not.
First, install the Apache webserver with the following command:
apt-get install apache2 libapache2-mod-php -y
Next, create a new info.php file inside Apache web root directory:
nano /var/www/html/info.php
Add the following lines:
<?php
phpinfo();
?>
Save and close the file, then restart the Apache to apply the changes.
systemctl restart apache2
Now, open your web browser and access the info.php page using the URL http://your-server-ip/info.php. You should see the following page: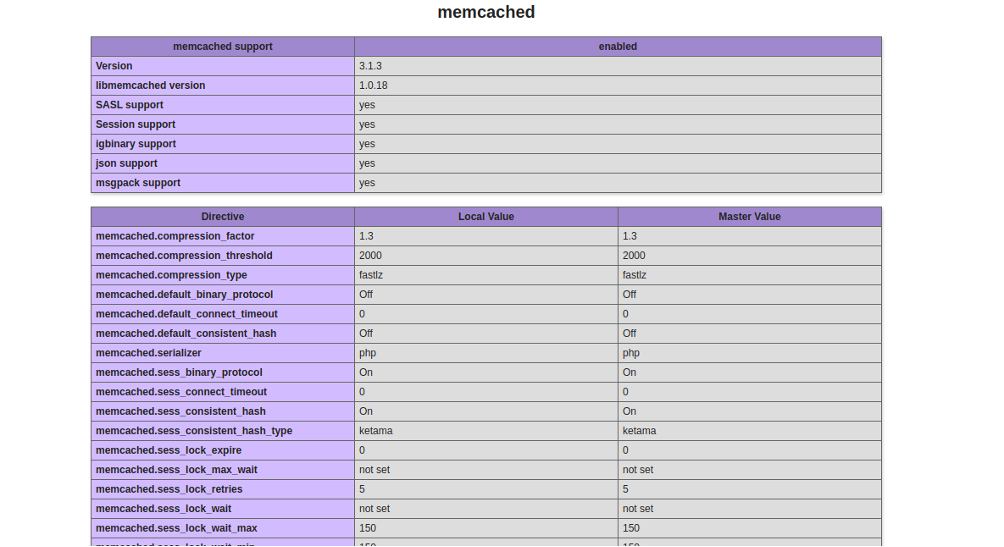
As you can see, Memcached is enabled in PHP.
Conclusion
In the above guide, you learned how to install Memcached on Debian 10. You also learned how to enable Memcached in PHP and Python. You can now easily integrate your website with Memcached and speed up page loading time; give it a try on VPS hosting from Atlantic.Net.