sysPass is a free, open-source, multiuser password manager written in PHP. It is designed for business and personal use, allowing you to save your passwords securely. sysPass comes with a simple and easy-to-use web interface where you can save and share passwords with other users and groups. It offers a rich set of features, including centralized password management, encryption, security, permissions, access control, language configuration, and more.
In this post, we will show you how to install sysPass password manager on Oracle Linux 8.
Step 1 – Install the LAMP Server
Before starting, you will need to install a LAMP server on your system. First, install the Apache and MariaDB server package using the following command:
dnf install httpd mariadb-server -y
Next, enable the PHP 7.4 module with the following command:
dnf module enable php:7.4
Next, install PHP with other required extensions using the following command:
dnf install php php-fpm php-mysqli php-pdo php-pear php-cgi php-cli php-common php-gd php-json php-readline php-curl php-intl php-ldap php-xml php-mbstring git -y
Once all the PHP packages are installed, edit the PHP configuration file and change the recommended settings:
nano /etc/php.ini
Change the following settings:
post_max_size = 100M
upload_max_filesize = 100M
max_execution_time = 7200
memory_limit = 512M
date.timezone = UTC
Save the file, then start and enable the Apache service with the following command:
systemctl start mariadb httpd php-fpm
systemctl enable mariadb httpd php-fpm
Step 2 – Create a Database for sysPass
Next, you will need to create a database and user for sysPass. First, connect to MariaDB with the following command:
mysql
Once you are connected, create a database and user with the following command:
create database syspass;
grant all privileges on syspass.* to syspass@localhost identified by "securepassword";
Next, flush the privileges and exit from MariaDB with the following command:
flush privileges;
exit;
Step 3 – Install sysPass
First, download the latest version of sysPass from the Git repository using the following command:
git clone https://github.com/nuxsmin/sysPass.git
Once the download is completed, move the downloaded directory to the Apache web root:
mv sysPass /var/www/html/syspass
Next, change the ownership and permissions of the sysPass directory:
chown -R apache:apache /var/www/html/syspass
chmod 750 /var/www/html/syspass/app/{config,backup}
Next, you will also need to install Composer to install PHP dependencies. To do so, create a Composer installation file:
nano /var/www/html/syspass/install-composer.sh
Add the following codes:
#!/bin/sh
 EXPECTED_SIGNATURE="$(wget -q -O - https://composer.github.io/installer.sig)"
 php -r "copy('https://getcomposer.org/installer', 'composer-setup.php');"
 ACTUAL_SIGNATURE="$(php -r "echo hash_file('sha384', 'composer-setup.php');")"
 if [ "$EXPECTED_SIGNATURE" != "$ACTUAL_SIGNATURE" ]
 then
     >&2 echo 'ERROR: Invalid installer signature'
     rm composer-setup.php
     exit 1
 fi
 php composer-setup.php --quiet
 RESULT=$?
 rm composer-setup.php
 exit $RESUL
Save and close the file, then navigate to the sysPass directory and install Composer with the following command:
cd /var/www/html/syspass/
sh install-composer.sh
Next, install all required PHP dependencies with the following command:
php composer.phar install --no-dev
Step 4 – Configure Apache for sysPass
Next, create an Apache virtual host configuration file for sysPass:
nano /etc/httpd/conf.d/syspass.conf
Add the following codes:
<VirtualHost *:80>
ServerAdmin admin@your-domain.com
DocumentRoot "/var/www/html/syspass"
ServerName syspass.example.com
<Directory "/var/www/html/syspass/">
Options MultiViews FollowSymlinks
AllowOverride All
Order allow,deny
Allow from all
</Directory>
TransferLog /var/log/httpd/syspass_access.log
ErrorLog /var/log/httpd/syspass_error.log
</VirtualHost>
Save and close the file, then restart the Apache service to apply the changes:
systemctl restart httpd
To check the Apache status, run the following command:
systemctl status httpd
You should see the following output:
● httpd.service - The Apache HTTP Server
   Loaded: loaded (/usr/lib/systemd/system/httpd.service; disabled; vendor preset: disabled)
  Drop-In: /usr/lib/systemd/system/httpd.service.d
           └─php-fpm.conf
   Active: active (running) since Tue 2022-07-19 07:23:26 EDT; 11s ago
     Docs: man:httpd.service(8)
 Main PID: 36714 (httpd)
   Status: "Running, listening on: port 80"
    Tasks: 213 (limit: 11409)
   Memory: 25.2M
   CGroup: /system.slice/httpd.service
           ├─36714 /usr/sbin/httpd -DFOREGROUND
           ├─36715 /usr/sbin/httpd -DFOREGROUND
           ├─36716 /usr/sbin/httpd -DFOREGROUND
           ├─36717 /usr/sbin/httpd -DFOREGROUND
           └─36718 /usr/sbin/httpd -DFOREGROUND

Jul 19 07:23:25 oraclelinux8 systemd[1]: httpd.service: Succeeded.
Jul 19 07:23:25 oraclelinux8 systemd[1]: Stopped The Apache HTTP Server.
Jul 19 07:23:25 oraclelinux8 systemd[1]: Starting The Apache HTTP Server...
Step 5 – Access sysPass Web UI
Now, open your web browser and type the URL http://syspass.example.com to access the sysPass web interface. You should see the following screen:
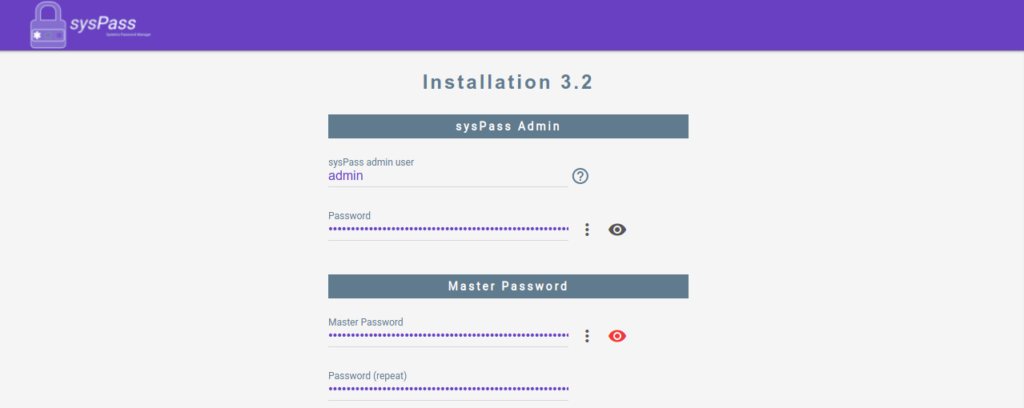

Define your admin username, password, database, and language, and click on the INSTALL button. Once sysPass has been installed, you will be redirected to the sysPass login screen:
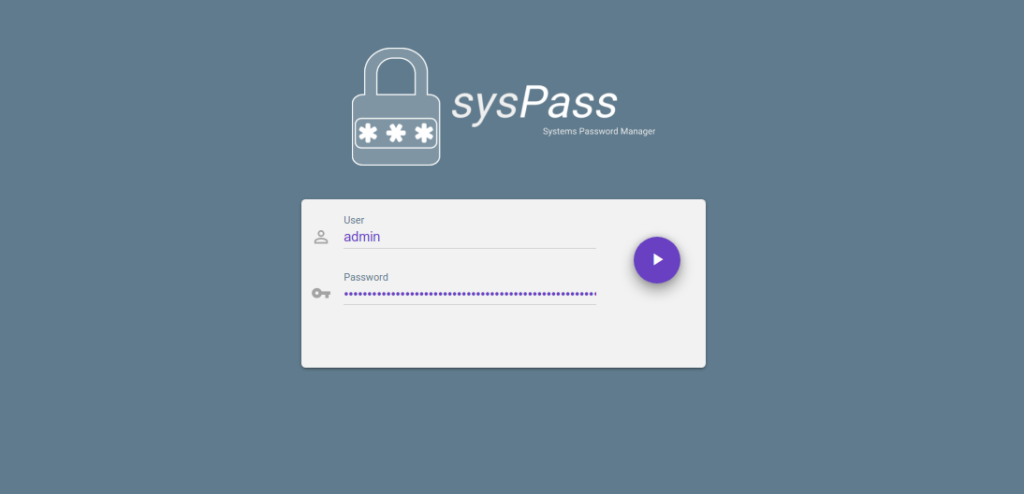
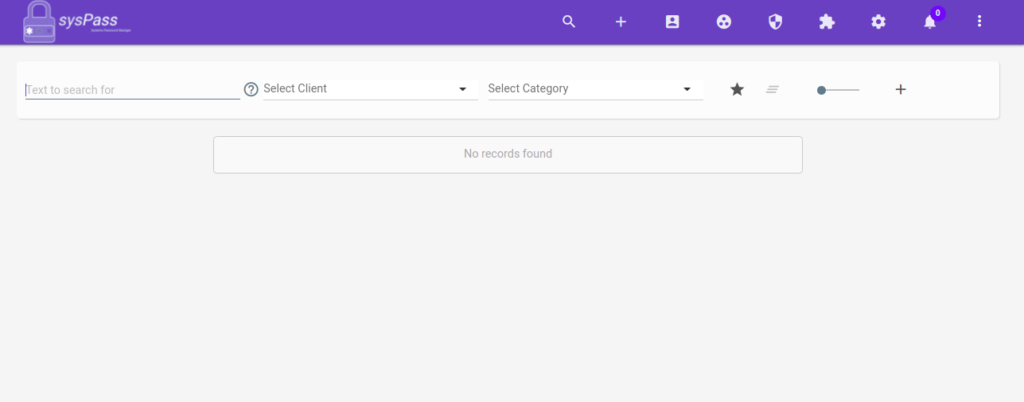
Type your admin username and password and click on the > button. You should see the sysPass dashboard.
Conclusion
In this tutorial, you learned how to install sysPass password manager on Oracle Linux 8. You can now explore the sysPass features and start implementing sysPass in your organization. Give it a try using VPS hosting from Atlantic.Net!
* This post is for informational purposes only and does not constitute professional, legal, financial, or technical advice. Each situation is unique and may require guidance from a qualified professional.
Readers should conduct their own due diligence before making any decisions.