Table of Contents
Verified and Tested 03/25/2015
Introduction
This guide will take you through configuring Nameservers on a cPanel & WHM server. These Nameservers will be your name servers and will be usable for your domains. This guide assumes you have already gone through the initial configuration steps for your server and that you can log into WHM. We will be using BIND for our DNS services.
Set up Nameservers via cPanel & WHM
The first step to creating your name servers in cPanel & WHM is to obtain a secondary public IP address and assign it to your server. If you do not know how to do this, you may follow the guide here. It is recommended to reserve 2 IPs for this so that your Nameservers run on their IPs and your websites can run on a third.
The second thing to do is make sure that BIND or your choice of DNS services is enabled. To do this in WHM type “nameserver” in the search bar and go to “Nameserver Selection.” Once there simply look to see if you have a service enabled. If not, we will be using BIND in this tutorial so select BIND and hit “Save.” This will install BIND.
Once the check/installation of DNS services is complete, you will want to make sure you have your website or DNS zone created. You can follow this guide here if you do not know how to make a website or this guide here if you do not know how to make a DNS zone. You only need to do one or the other. If you are hosting your website on this server, then create the website, otherwise if your website is elsewhere, just make the DNS zone.
Once you have the website or zone made, you will need to edit it. To do this type “dns” in the search bar and go to the “Edit DNS Zone.” Once there select the website/zone you will be making the nameservers out of and click on Edit.
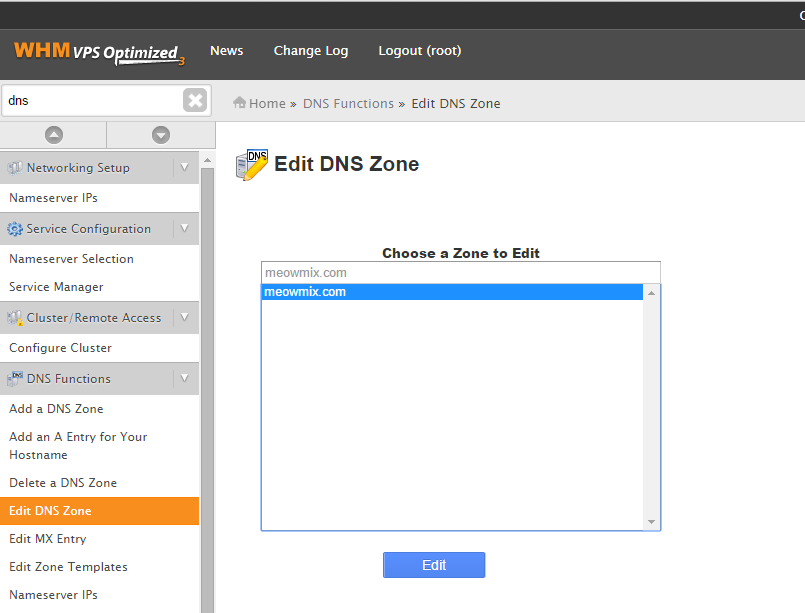 Click edit DNS zone
In the edit you will be presented by a page similar to the below image. You will want to scroll down to the “Add New Entries Below this Line” section and insert your values for ns1 and ns2 as A records using your reserved IPs. If you did not reserve 2 IPs, you can use the server’s IP for one of the nameservers and the additional IP you reserved as the second. Once done, click “Save.”
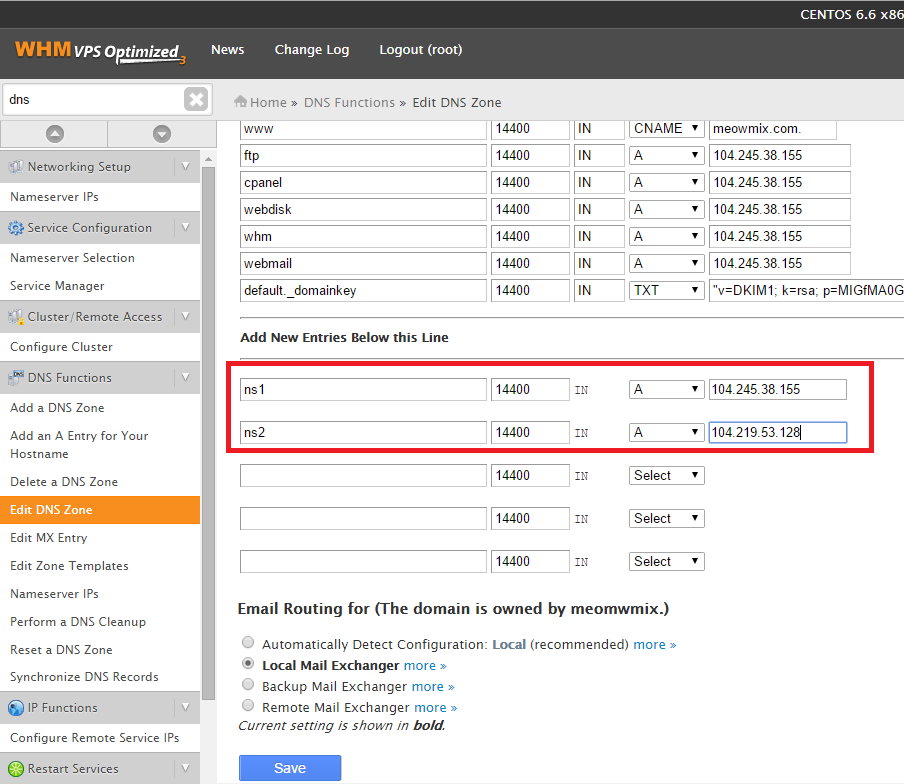 Insert values for ns1 and ns2
If you will be using your own nameservers to host the website they are named after, go back to edit the DNS Zone and edit where it has listed the NS records for your domain to be your new nameservers. Hit “Save” to make the changes.
The last thing to do is if you will be using these nameservers for all websites you will create on this server, go to “Basic cPanel & WHM Setup” and scroll down to the bottom. You will find the Nameservers section and here you will want to put in your new nameservers.
Once done, click on Assign IP address and it should correctly assign the IPs that you have assigned the nameservers. Then click “Save” to save the new changes.
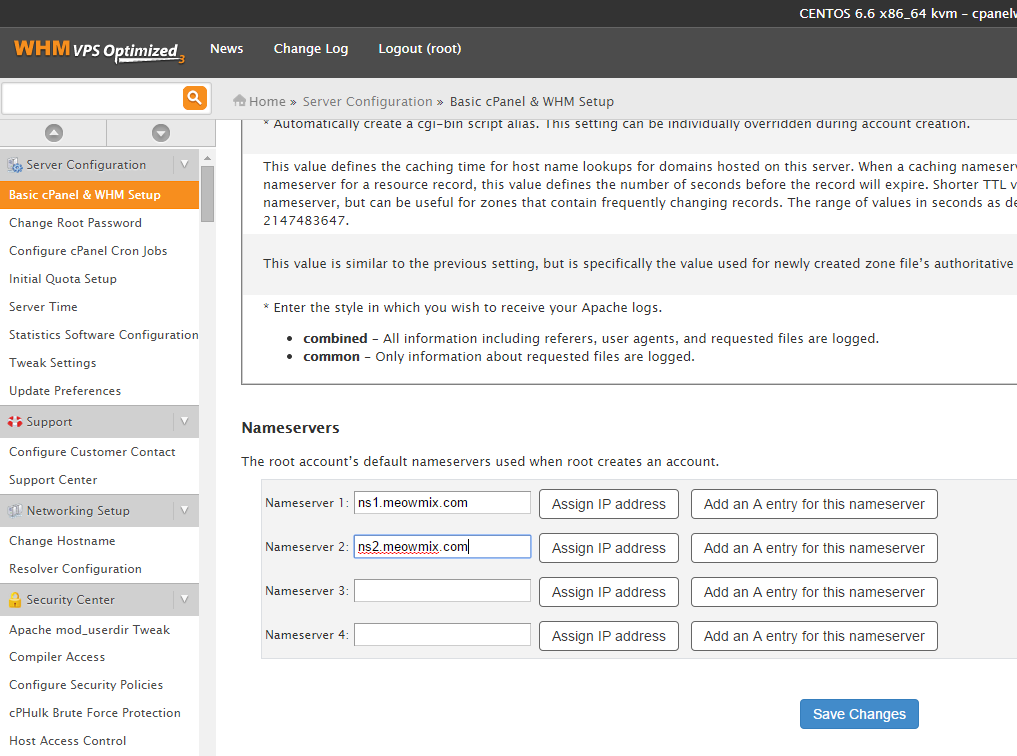 Click Assign IP address on each nameserver
And that is it. You have created your own nameservers and can make websites that can utilize them. Please note that after making your own nameservers, propagation throughout the Internet can take up to 48 hours so do expect some downtime while the nameservers propagate.
Do not forget, in order to use the nameservers, you need to set your domains’ nameservers at the Registrar level to point to the nameservers you have created. This includes the nameservers for the domain the nameservers are made from.
And as a last mention of note. If you would like to have proper nameservers that will not go down, it is recommended to have 2 servers with each server acting as one of the nameservers (you simply make a nameserver the IP of each server or additional IP for each server.) You would just need to replicate your DNS zones between the two servers. This is mainly useful if you will be using your nameservers to host websites that are not contained on the same server as your nameservers.
* This post is for informational purposes only and does not constitute professional, legal, financial, or technical advice. Each situation is unique and may require guidance from a qualified professional.
Readers should conduct their own due diligence before making any decisions.