Table of Contents
Verified and Tested 03/25/2015
Introduction
This tutorial will show you how to create a DNS zone in cPanel & WHM. This is mainly useful for when you have your own nameservers and will be using the server to host the DNS for an off-server website. If you are using our Cloud DNS or not using DNS on your server at all, you do not need to use the DNS zone editor.
Prerequisites
A server with cPanel and WHM installed. If you do not have a server already, spin up a cPanel WHM server in under 30 seconds.
Create a DNS Zone in cPanel & WHM
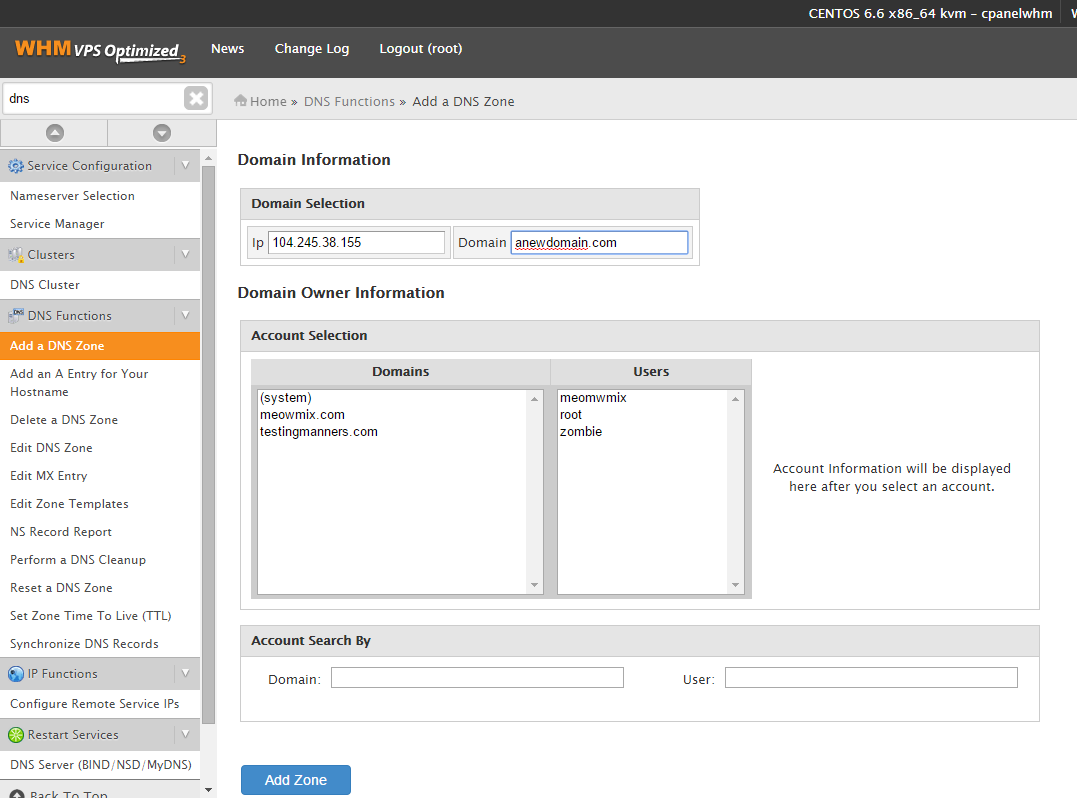
First, you will need to log into WHM for your server. Once you have logged in, go to the search bar and type “DNS.” Proceed to the “Add DNS Zone” section. Here, you will see at the top “Domain Selection.” You’d want to put in the IP of the server or the IP you want the domain to be on and then the domain itself. Once done, you go to “Domain Owner Information” and select the owner for the domain. If this is to be a stand-alone account, you can put it under system ownership. Once done, click “Add Zone.”
 Add a DNS Zone
And that’s it. You can edit the DNS Zone and add more records to it by going to “Edit DNS Zone” and selecting the new zone you made.
* This post is for informational purposes only and does not constitute professional, legal, financial, or technical advice. Each situation is unique and may require guidance from a qualified professional.
Readers should conduct their own due diligence before making any decisions.